Author: Sean C

  • Understand HVAC Systems: Boost Home Comfort and Efficiency

    Understand HVAC Systems: Boost Home Comfort and Efficiency

    Your home’s HVAC system quietly does more than just keep you warm in winter and cool in summer. For many homeowners, HVAC energy use represents a surprisingly large slice of the monthly utility bill, and it directly shapes the air your family breathes every single day. Yet most people never think about their HVAC until something breaks. This guide walks you through what these systems actually do, why they matter for your comfort, your health, and your wallet, and what simple steps can help you get far more from the system you already own.


    Table of Contents

    Key Takeaways

    Point Details
    HVAC is central to comfort Your HVAC system directly determines both temperature balance and air quality inside your home.
    Energy impact is big Heating and cooling systems can drive up to 39% of household energy use, making their efficiency crucial.
    Maintenance saves money Neglecting filter and airflow upkeep cuts efficiency and increases utility costs, even with modern units.
    Upgrades need smart setup New HVAC units only deliver savings if tuned and maintained, since real-world efficiency can vary widely.
    Proper care boosts health Ventilation and filtration support clean, healthy indoor air, reducing exposure to pollutants and allergens.

    What does an HVAC system do in a home?

    Now that we’ve seen the big-picture impact HVAC systems have, let’s get specific about their core functions.

    HVAC stands for heating, ventilation, and air conditioning. Each of those three words represents a distinct function, yet they are deeply connected in practice. Together, they work as one system to maintain a livable, healthy indoor environment all year long.

    HVAC systems provide heating, cooling, and ventilation to maintain thermal comfort and manage indoor air quality in homes. That three-part responsibility is bigger than most homeowners realize. When any one part lags, all three suffer.

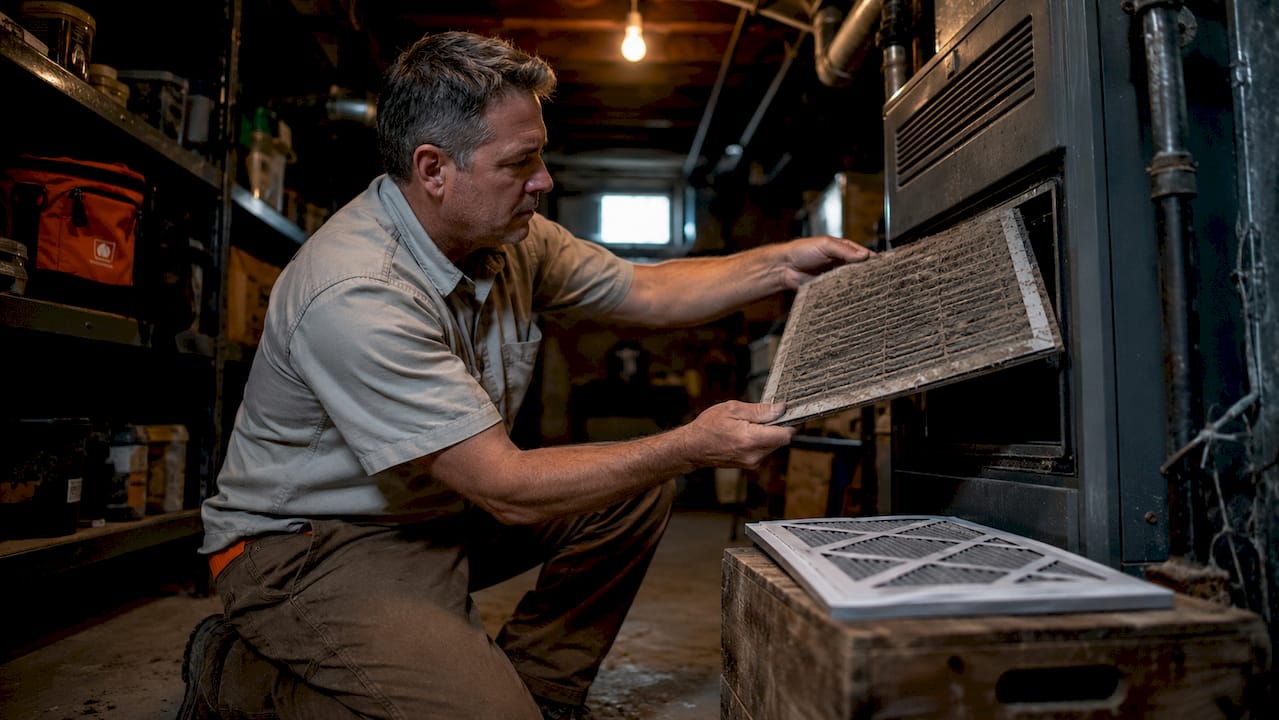
    Hand replacing air filter beside HVAC vent

    Here is a quick breakdown of what each component actually handles:

    Component Primary job Affects
    Heating Warms air during cold months Temperature, humidity
    Ventilation Moves air in, out, and around Air freshness, moisture, pollutants
    Air conditioning Cools and dehumidifies air Temperature, comfort, mold risk

    The ventilation piece is often the most overlooked. Fresh air has to get in, stale air has to get out, and the exchange rate matters. A home that is sealed too tight traps pollutants. A home that leaks too much wastes energy. Balanced airflow sits in the middle.

    Key roles your HVAC system plays every day:

    • Temperature regulation: Keeps indoor temps within a comfortable range regardless of outdoor weather
    • Humidity control: Prevents both dry air in winter and sticky humidity in summer
    • Air circulation: Moves conditioned air evenly so rooms feel consistent
    • Filtration: Captures dust, pollen, pet dander, and other particles on every pass

    To stay on top of all these functions, a solid HVAC maintenance guide makes it easy to track what needs attention and when. Scheduling annual HVAC service keeps every component working in sync so the whole system performs as designed.

    “An HVAC system is not just a comfort tool. It is a building health system. When it works well, you barely notice it. When it doesn’t, you feel it in every room.”


    With these roles in mind, it’s crucial to understand how HVAC doesn’t just heat or cool. It is central to both how your home feels and the quality of the air you breathe in it.

    Ventilation and filtration strategies can meaningfully improve indoor air quality. Your HVAC supports this through increased airflow and higher-efficiency filtration. The EPA identifies three pillars of good indoor air quality: source control, ventilation, and air cleaners. Your HVAC system touches all three.

    Most homeowners set a thermostat and forget it. That approach handles temperature, but it does almost nothing for air quality. Pollutant sources inside a typical home include cooking fumes, cleaning products, off-gassing from furniture, pet allergens, and mold spores. Without active ventilation and proper filtration, those particles cycle through your air again and again.

    Here is how different HVAC setups compare for indoor air quality outcomes:

    Setup Ventilation quality Filtration level IAQ result
    Basic thermostat, stock filter Low Minimal (MERV 4) Poor to fair
    Programmable thermostat, upgraded filter Moderate Better (MERV 8-11) Good
    Smart thermostat, ERV/HRV system High Excellent (MERV 13+) Very good
    Smart system plus air purifier Very high Premium Excellent

    A few things that make a real difference for air quality:

    • Filter ratings matter: MERV ratings (Minimum Efficiency Reporting Value) tell you how well a filter captures small particles. Higher is generally better, but check your system’s specs before going too high since very dense filters can restrict airflow.
    • Run times affect quality: Longer fan run cycles move more air through the filter, which means cleaner results even without a fancy system.
    • Humidity is non-negotiable: Indoor humidity between 30% and 50% discourages mold growth and makes dust mites less active. Your AC already dehumidifies in summer. In winter, a whole-home humidifier can help.
    • Fresh air intake matters: Many homes rely on natural infiltration for fresh air, but adding a controlled fresh air intake gives you predictable ventilation without random drafts.

    Pro Tip: If you notice more dust on surfaces right after changing air handler settings, your filter may be the wrong MERV rating for your system. A local HVAC tech can confirm the right match in about five minutes.


    Efficiency and energy use: How HVAC impacts your bills

    A system that manages both comfort and air quality also quietly shapes your utility costs, and the difference between a well-run and a neglected system can be dramatic.

    HVAC systems can represent a large energy share in buildings, and smart improvements yield substantial energy and cost savings when they match actual building needs and controls. For most American homes, heating and cooling account for roughly 39% of total energy consumption. That is more than any other household system.

    Infographic highlights hvac savings and efficiency stats

    HVAC condition Estimated energy efficiency Monthly bill impact
    Neglected system, dirty filter 60-70% of rated capacity 20-30% higher bills
    Average maintained system 85-90% of rated capacity Near-baseline costs
    Well-tuned, upgraded system 95-100%+ (heat pumps) Up to 30% savings

    Steps that move you from average to well-tuned:

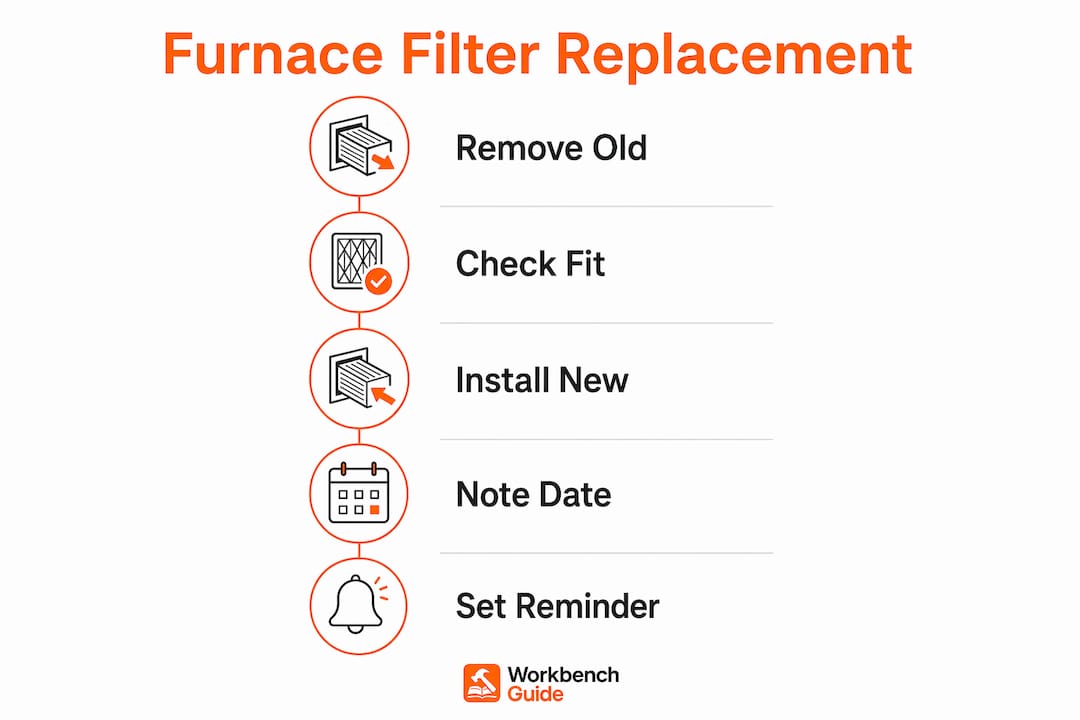
    1. Replace filters on schedule: A clogged filter forces the blower to work harder, consuming more electricity for the same airflow.
    2. Seal ducts: Leaky ductwork can waste 20 to 30% of conditioned air before it ever reaches the room.
    3. Program setbacks: Setting temps back 7 to 10 degrees during sleep hours can trim heating costs by roughly 10% annually.
    4. Check refrigerant levels: Low refrigerant in your AC reduces cooling output and forces the compressor to run longer, burning more electricity.
    5. Size matters on upgrades: An oversized unit short-cycles (turns on and off too fast), which wastes energy and wears out parts faster.

    Stat callout: Smart improvements to HVAC systems can cut energy costs by up to 30%, with an economic payback period typically landing between three and five years depending on your system and climate.

    Prioritizing preventative maintenance tips is one of the easiest ways to keep that efficiency edge. It’s also worth understanding appliance maintenance benefits more broadly, since an efficient home usually has several well-maintained systems working together.

    Pro Tip: Before investing in a brand-new system, ask an HVAC technician to perform a full load calculation (called a Manual J calculation). It confirms what size equipment your home actually needs. Many homeowners discover their existing system was never sized correctly in the first place.


    Why maintenance matters: Common mistakes and easy wins

    To truly benefit from your HVAC investment, you need more than a “set and forget” mindset. Maintenance habits are the hidden driver of system success.

    HVAC energy efficiency depends strongly on cleanliness and airflow. Neglecting routine maintenance measurably increases energy use and reduces performance, even in high-efficiency, brand-new units. That is not a warning to ignore.

    The most common maintenance mistakes homeowners make:

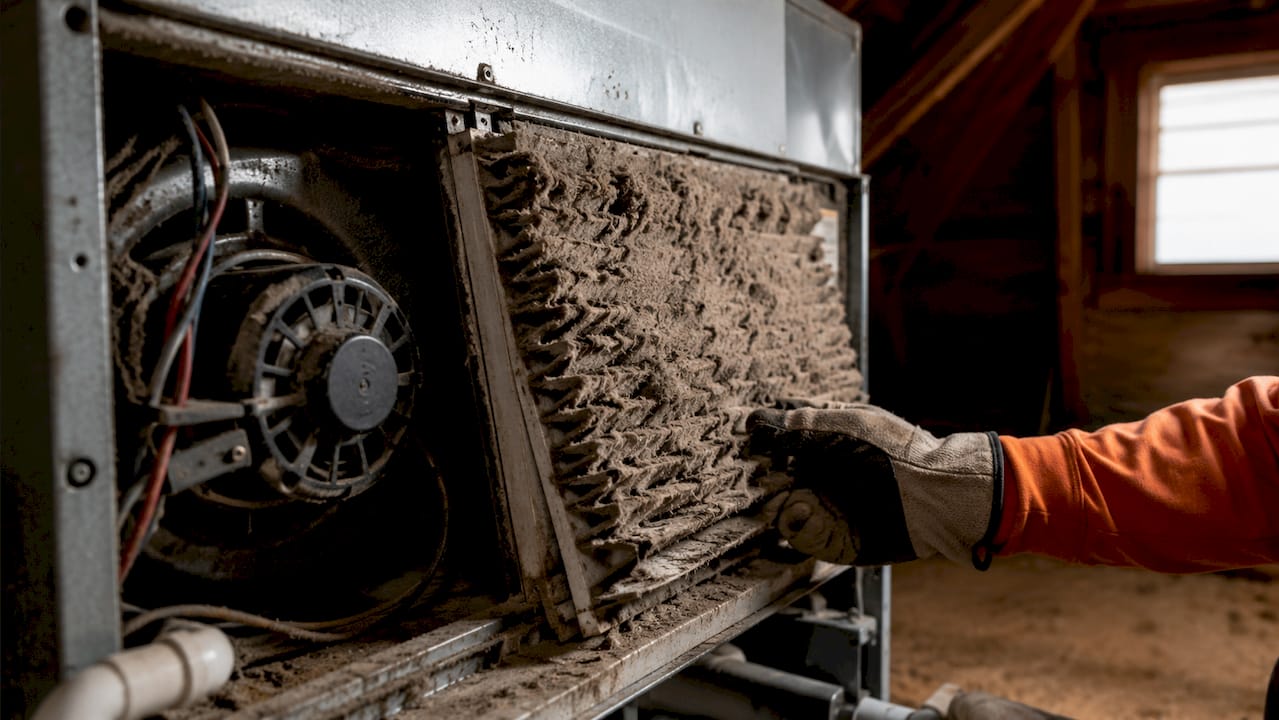
    • Skipping filter changes: Filters clog faster than most people expect. In homes with pets or dusty conditions, monthly replacement is often needed.
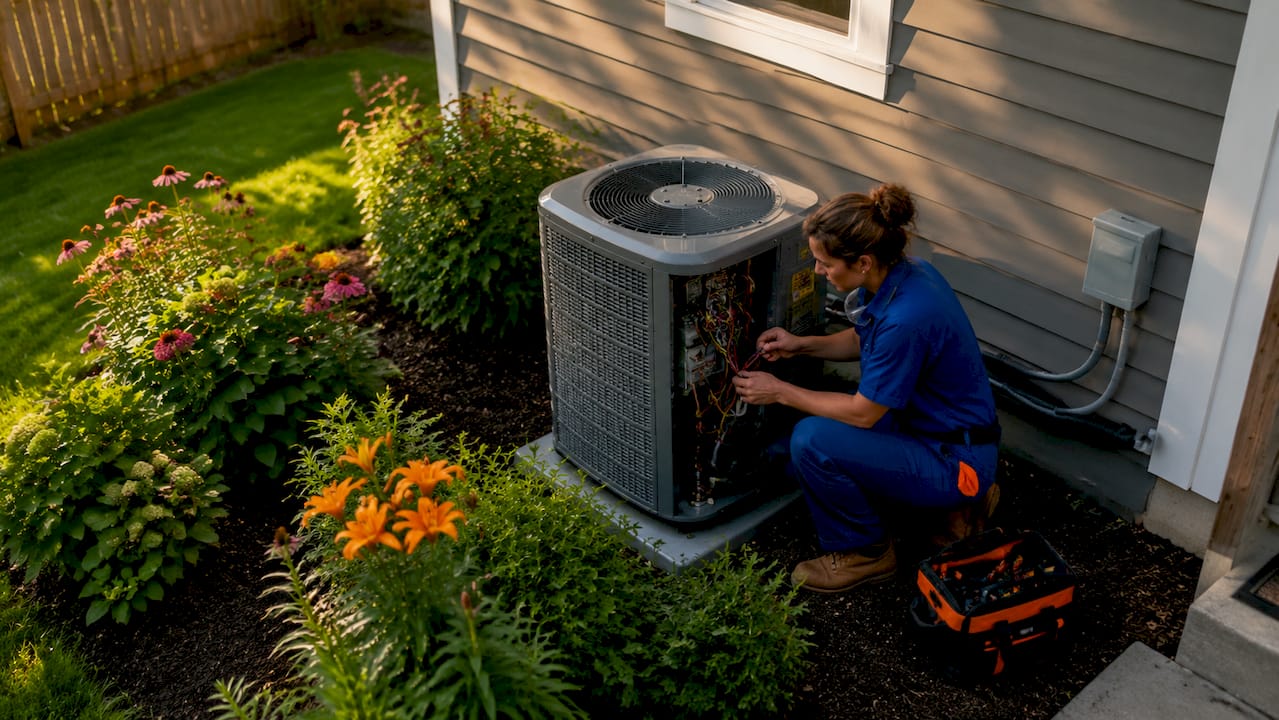
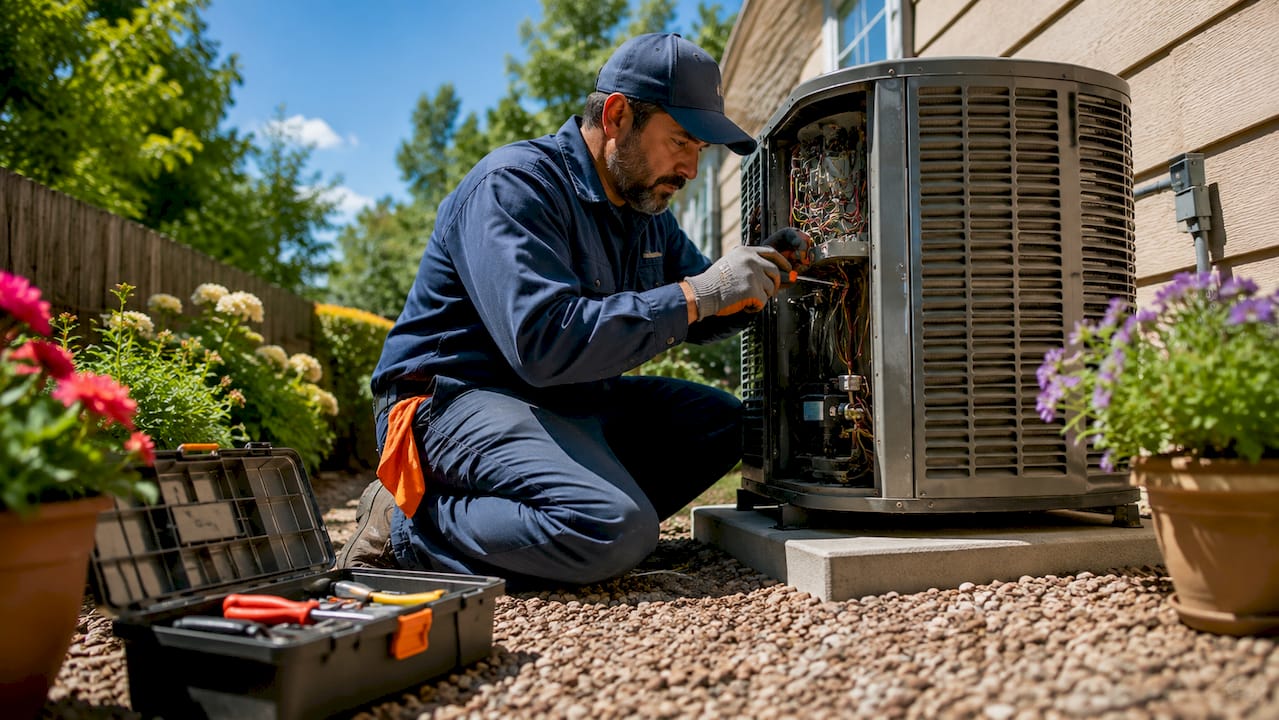
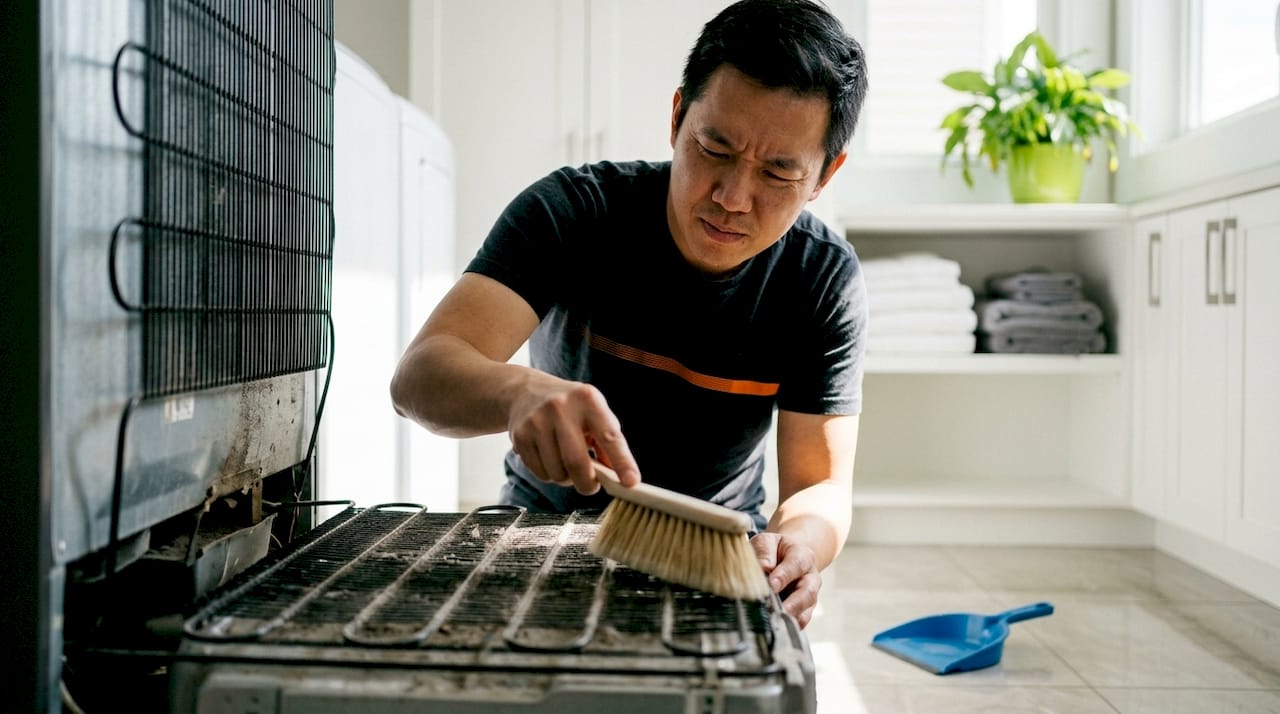
    • Ignoring the outdoor unit: The condenser coil on your outdoor AC unit gets coated with dirt, cottonwood, and debris. A dirty coil can’t reject heat effectively, so the system runs longer.
    • Blocking vents: Furniture pushed against supply or return vents disrupts airflow and forces the system to compensate by running more cycles.
    • Neglecting the drain line: A clogged condensate drain causes water backup, which can damage your system and encourage mold growth in the air handler.
    • Skipping annual inspections: A technician can spot refrigerant leaks, failing capacitors, or worn belts before they become emergency breakdowns.

    What you can realistically do yourself:

    • Replace air filters every one to three months (check monthly and change when visibly dirty)
    • Clear at least two feet of space around the outdoor condenser unit
    • Gently rinse the outdoor coil fins with a garden hose each spring
    • Check that all vents in the home are open and unobstructed
    • Pour a cup of diluted bleach down the condensate drain line twice a year to prevent clogs

    Using a solid home maintenance checklist turns these tasks from forgotten afterthoughts into scheduled habits. Small steps done consistently have a bigger payoff than big repairs done reactively.


    Going beyond the basics: How system settings and upgrades shift real-world results

    Once the maintenance basics are covered, you can maximize comfort and savings by fine-tuning your system and, when the time is right, upgrading with real-world evidence in mind.

    One of the most important insights coming from recent research is this: a better label does not automatically mean better results. Heat pump performance in real-world operation can deviate significantly from label expectations. Occupant behavior and system settings both affect measured energy efficiency in the field. That means the homework you do after installation matters just as much as what you buy.

    Upgrade or setting change Realistic efficiency gain Cost impact
    Smart/programmable thermostat 10-15% reduction in heating/cooling use Low cost, fast payback
    Air sealing and insulation Up to 20% total energy reduction Moderate cost
    Variable-speed air handler 10-20% electricity savings vs. single speed Higher cost, long payback
    Heat pump (replacing gas furnace) 30-50% less energy for heating High cost, significant savings
    Zoning system 15-25% reduction with multiple zones Moderate to high cost

    Stat callout: Optimizing controls and usage patterns can deliver 15% or more in efficiency gains without replacing any hardware at all.

    Practical ways to fine-tune your current system:

    • Adjust fan mode: Setting the fan to “on” (continuous) rather than “auto” improves air circulation and filtration but uses more electricity. For most homes, “auto” is more efficient unless you have air quality concerns.
    • Use setback schedules: Smart thermostats learn your patterns. Even a basic programmable model with a simple weekday/weekend schedule beats a manual thermostat.
    • Check refrigerant charge: A system that is even slightly low on refrigerant loses efficiency fast. This is a pro-only check, but it’s worth including in your annual service call.
    • Consider zoning: If certain rooms are always too hot or too cold, a zoning system lets you direct conditioned air where it’s actually needed rather than trying to average out the whole house.

    Preparing your system for seasonal shifts is also key. A solid winter HVAC prep routine before temperatures drop can prevent mid-winter breakdowns and keep your heating costs in check from day one of the cold season.


    The surprising truth: Why most homeowners leave HVAC savings on the table

    All the evidence points to one common mistake. Let’s dig into why so many homeowners miss the biggest returns from their HVAC system.

    Here’s the reality: the biggest source of wasted HVAC money is not bad technology. It is simple, preventable neglect. Most homeowners treat their HVAC like background plumbing. It runs, it does something, and they ignore it until it stops. That mindset costs real money every single month.

    A few myths drive this pattern. The first is “newer is always better.” A brand-new high-efficiency unit run on a clogged filter with leaky ducts and no schedule programming will underperform a well-maintained older unit every single time. Efficiency drops even in high-efficiency units when airflow-restricting components like clogged filters and dirty coils are left unmaintained, because comfort and efficiency are both tied to basic upkeep, not just equipment ratings.

    The second myth is “IAQ takes care of itself.” It does not. Ventilation requires intention. Filtration requires regular replacement. Humidity requires monitoring. None of those things happen automatically in a standard home without some level of homeowner engagement.

    The third myth is “only pros can help.” Plenty of the highest-impact HVAC actions are DIY-friendly. Changing a filter, clearing debris from the condenser, checking vents, and programming a thermostat require no special tools or training.

    What we’ve seen consistently is that homeowners who treat their HVAC as a living system, one that needs seasonal attention and informed settings, spend less on repairs, pay lower utility bills, and live in more comfortable homes. The gap between a passive owner and an engaged one is not expensive equipment. It is habits.

    Explore preventing costly home repairs to see how the same principle applies across every major system in your home. Small, consistent checks prevent big, expensive surprises.


    Take control: Bring comfort and savings to your home

    Ready to shift from passive to proactive? Workbench Guide makes it simple to stay on top of HVAC care without feeling overwhelmed. The preventative maintenance guide walks you through everything from seasonal checkups to filter schedules, with practical steps written for real homeowners rather than technicians. Use the home maintenance checklist to build a full-year plan that keeps your HVAC, along with every other major system, running efficiently. At WorkbenchGuide, you get smart reminders, step-by-step DIY guidance, and contractor recommendations when a job calls for professional hands. Better air, lower bills, and fewer surprises start with knowing what to do and when to do it.


    Frequently asked questions

    What is the most important function of an HVAC system at home?

    An HVAC system maintains home comfort by controlling temperature, ventilation, and indoor air quality, making it one of the most essential systems in any home.

    How often should I perform maintenance on my HVAC system?

    Replace filters every one to three months, and schedule a professional inspection at least once a year to catch issues before they become costly failures, since routine maintenance directly affects both efficiency and performance.

    Can better HVAC maintenance really lower my energy bills?

    Yes, proper upkeep combined with smart improvements can cut HVAC energy costs by up to 30%, with savings starting as soon as you address filter changes and basic system care.

    Will upgrading to a new HVAC ensure lower bills automatically?

    Not necessarily, because real-world heat pump efficiency often deviates from label ratings, and proper setup, maintenance, and usage habits are required to actually reach peak savings.

    How does my HVAC system help improve indoor air quality?

    Your HVAC improves air quality by cycling stale indoor air out and filtering incoming air through ventilation and filtration strategies that capture pollutants, allergens, and particles on every pass through the system.

  • Master the home safety inspection process: a step-by-step guide

    Master the home safety inspection process: a step-by-step guide

    Most homeowners are sitting on hidden problems they don’t even know exist. 86% of inspections uncover at least one issue, and the average repair cost after a home inspection tops $11,200. That’s a serious hit to your wallet, and most of it is preventable. This guide walks you through the full home safety inspection process, from understanding what inspections actually cover to building your own room-by-room checklist, gathering the right tools, and knowing exactly when to call in a professional.

    Table of Contents

    Key Takeaways

    Point Details
    High defect rate Over 85% of homes inspected reveal at least one safety issue.
    Prep and tools matter The right tools and preparation make inspections more effective and efficient.
    DIY with limits DIY inspections are great for routine checks but should be supplemented with professional evaluations, especially for older homes.
    Common issues Roof, electrical, plumbing, and water damage are the most frequent findings.
    Maintenance saves money Proactive safety inspections prevent expensive repairs and boost property value.

    Understanding the home safety inspection process

    A home safety inspection is a structured evaluation of your home’s visible and accessible systems and components. The goal is simple: find problems before they become emergencies. But not all inspections are the same, and knowing which type fits your situation is your first step.

    General vs. targeted inspections serve different purposes. A general home inspection covers the whole house, including the roof, foundation, electrical system, plumbing, HVAC, and more. A targeted safety inspection focuses on one specific area, like electrical-only checks, fire hazard reviews, or moisture assessments. If you just bought a new furnace, a targeted HVAC check makes sense. If you’re buying or selling, a full general inspection is the right move.

    Two major organizations set the professional standards: ASHI (American Society of Home Inspectors) and InterNACHI (International Association of Certified Home Inspectors). Both require inspectors to evaluate observable conditions only. They don’t predict future failures, cosmetic defects, or anything hidden behind walls. That distinction matters because homeowners sometimes expect inspectors to catch everything. The inspector’s job is to report what they can see and access, not what might be lurking inside a sealed wall cavity.

    Here’s what a standard safety inspection typically covers versus what it doesn’t:

    Covered Not covered
    Roof condition (visible surfaces) Hidden structural defects inside walls
    Electrical panels and outlets Pest infestations (unless add-on)
    Plumbing fixtures and visible pipes Cosmetic issues (paint, carpet wear)
    HVAC systems (operational check) Future predictions or code compliance
    Foundation and basement conditions Underground drainage or sewer lines*
    Windows, doors, and weatherproofing Appliance warranties or remaining lifespan

    Infographic comparing general and targeted home inspections

    *Sewer scope is an optional add-on available from most inspection companies.

    Key areas every safety inspection should address:

    • Smoke and carbon monoxide (CO) detector placement and function
    • Electrical panel capacity and visible wiring condition
    • Plumbing leaks, water pressure, and drain function
    • Roof and attic for water intrusion or structural damage
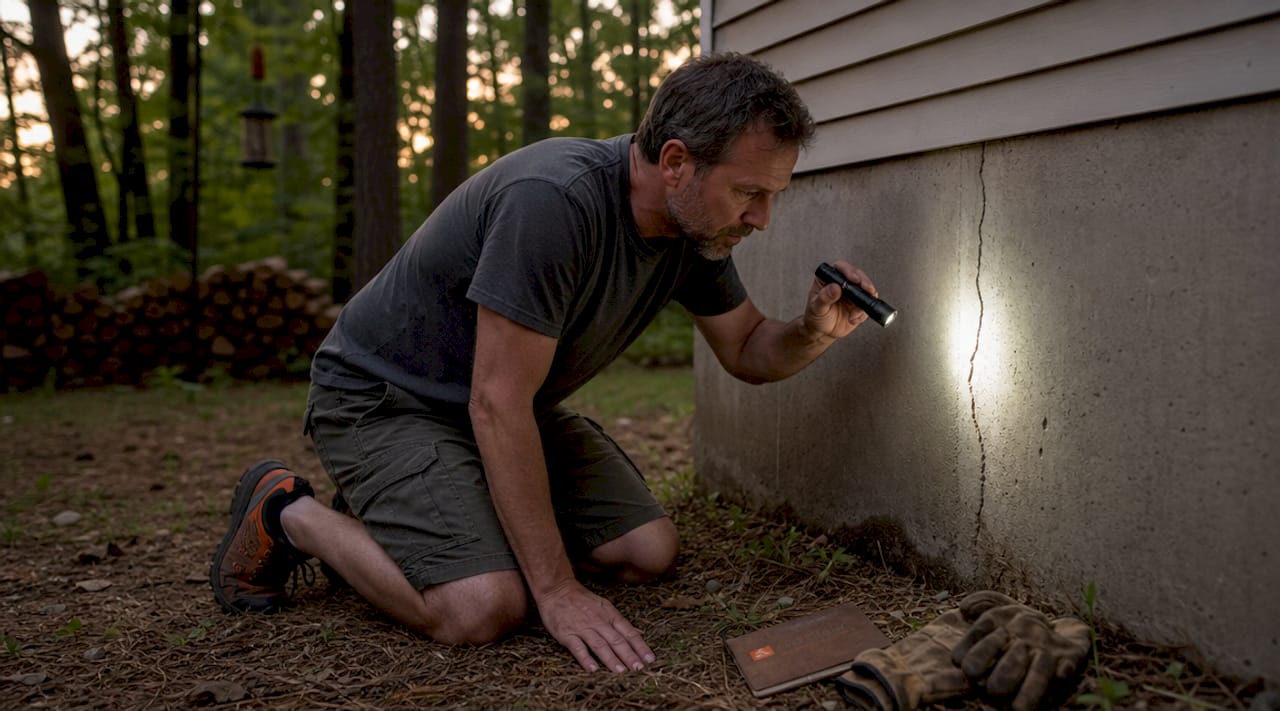
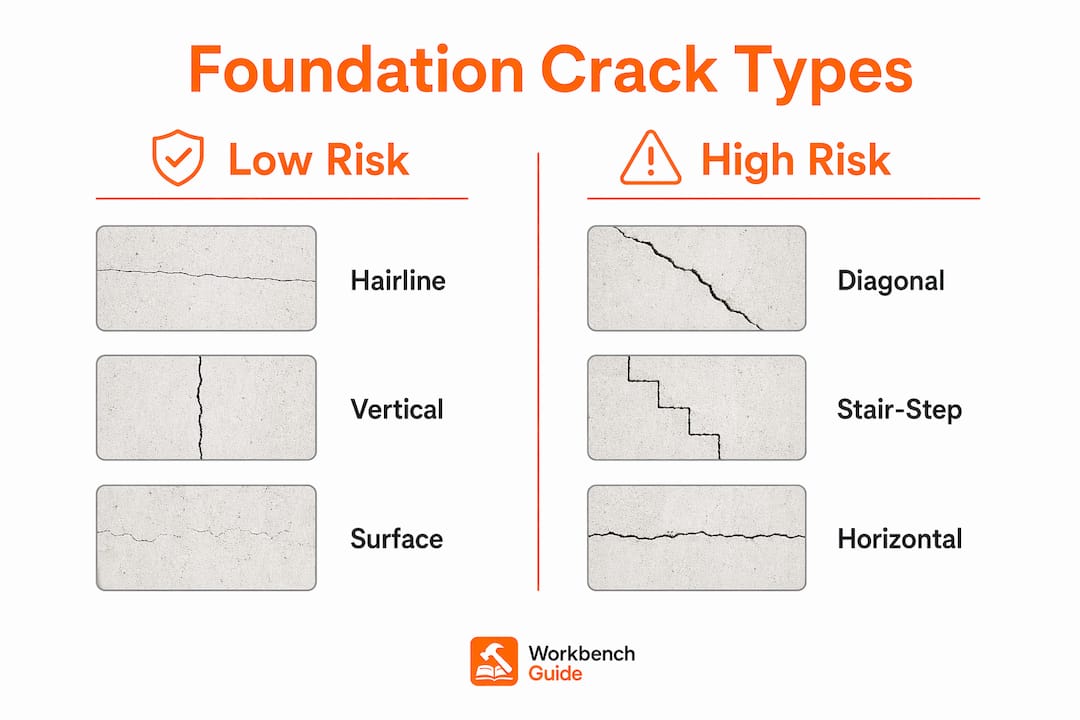
    • Foundation for cracks or settling patterns

    If you want to start with your roof before a full inspection, our roof inspection checklist walks you through exactly what to look for from the ground and up top. And if a major issue surfaces during your inspection, keep our emergency home repairs guide handy for immediate next steps.

    Gathering tools and preparing for inspection

    Once you understand what inspections cover, it’s time to get the right tools and prepare properly. You don’t need to outfit yourself like a professional, but a few key tools make a real difference between a surface-level walkthrough and a genuinely useful assessment.

    Professional inspectors rely on tools like thermal imaging cameras, moisture meters, gas leak detectors, and outlet testers. These tools reveal problems invisible to the naked eye, like hidden moisture in drywall, weak GFCI outlets, or heat signatures from overloaded circuits. Homeowners doing routine checks can accomplish a lot with a smaller, affordable toolkit.

    Inspector using outlet tester in lived-in kitchen

    Homeowner vs. professional tool comparison:

    Tool Homeowner use Professional use
    Flashlight (bright LED) Crawlspaces, attics, under sinks Standard inspection equipment
    Outlet tester ($10-20) GFCI test, polarity check Same, plus advanced testers
    Moisture meter ($25-60) Checking drywall and wood for dampness Multi-mode models for in-depth readings
    Thermal camera Not typical (rentable) Required for hidden heat/moisture issues
    Screwdriver set Panel cover removal, outlet checks Yes, plus specialty tools
    Ladder (6-foot minimum) Attic hatch, roof edges Extension ladders for full roof access

    Before you start the inspection itself, preparation can dramatically improve your results:

    • Clear access to your electrical panel, attic hatch, crawlspace, and water shutoff valve
    • Replace batteries in smoke and CO detectors the week before, then test them during the inspection
    • Pull out appliance manuals or service records so you can cross-check system ages
    • Create a dedicated notes log (paper or phone) to record every finding with a photo attached
    • Review your home maintenance checklist to understand which tasks are overdue before you inspect

    Pro Tip: Do your inspection on a dry day after a recent rainstorm. Fresh rain reveals active leaks in the roof, windows, and foundation that would stay hidden during dry conditions. This single timing trick catches more problems than any single tool.

    Our full library of inspection checklists can help you organize findings room by room and system by system, so nothing slips through the cracks.

    Step-by-step safety inspection checklist

    Armed with your checklists and tools, here’s how to approach a thorough safety inspection step by step. Work through your home systematically, starting outside and moving inward, then top to bottom.

    Exterior and structure (start here every time):

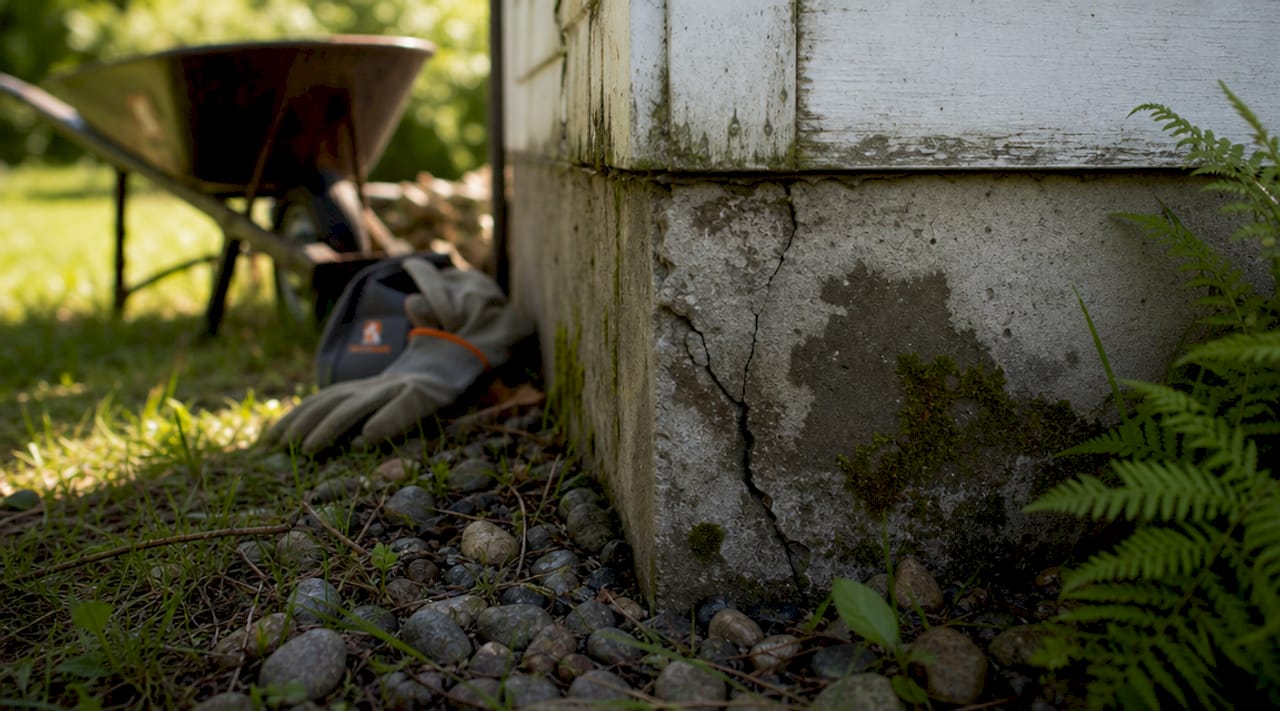
    1. Walk the entire perimeter. Look for foundation cracks wider than 1/8 inch, especially diagonal cracks near corners, which signal settling or structural stress.
    2. Check the roof from the ground using binoculars or zoom on your phone. Look for missing shingles, lifted flashing around chimneys or vents, and sagging ridgelines.
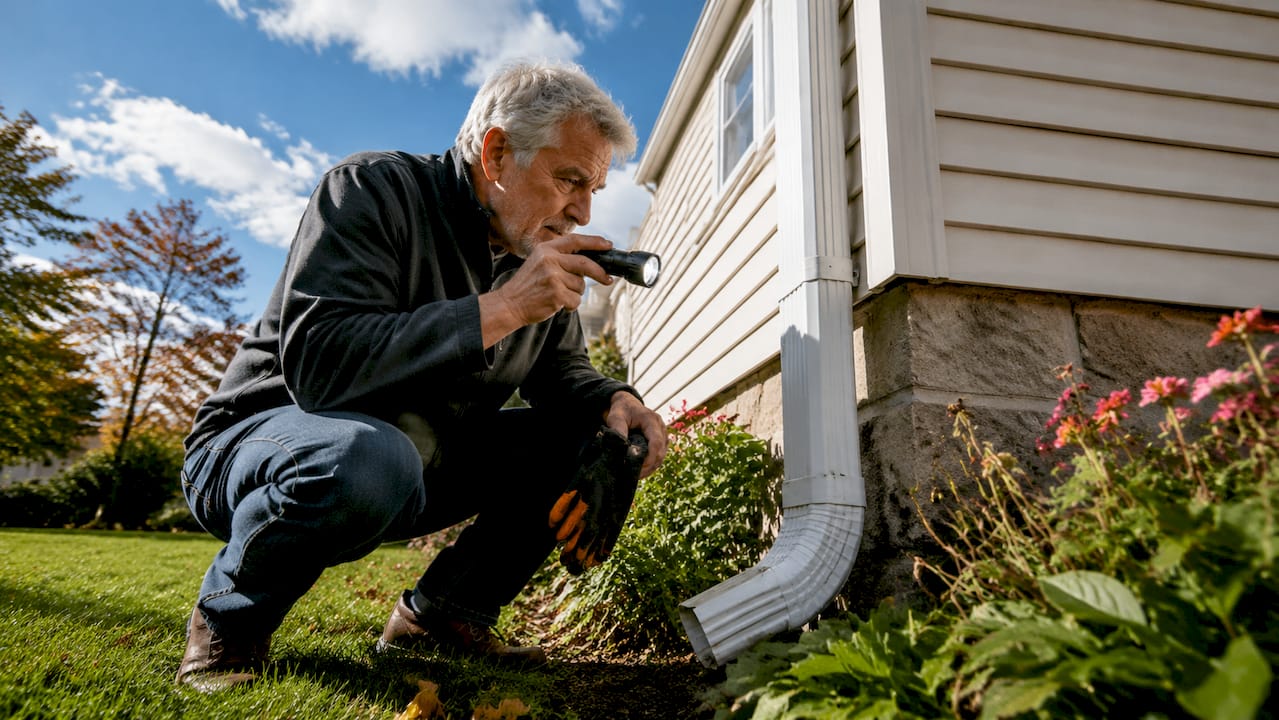
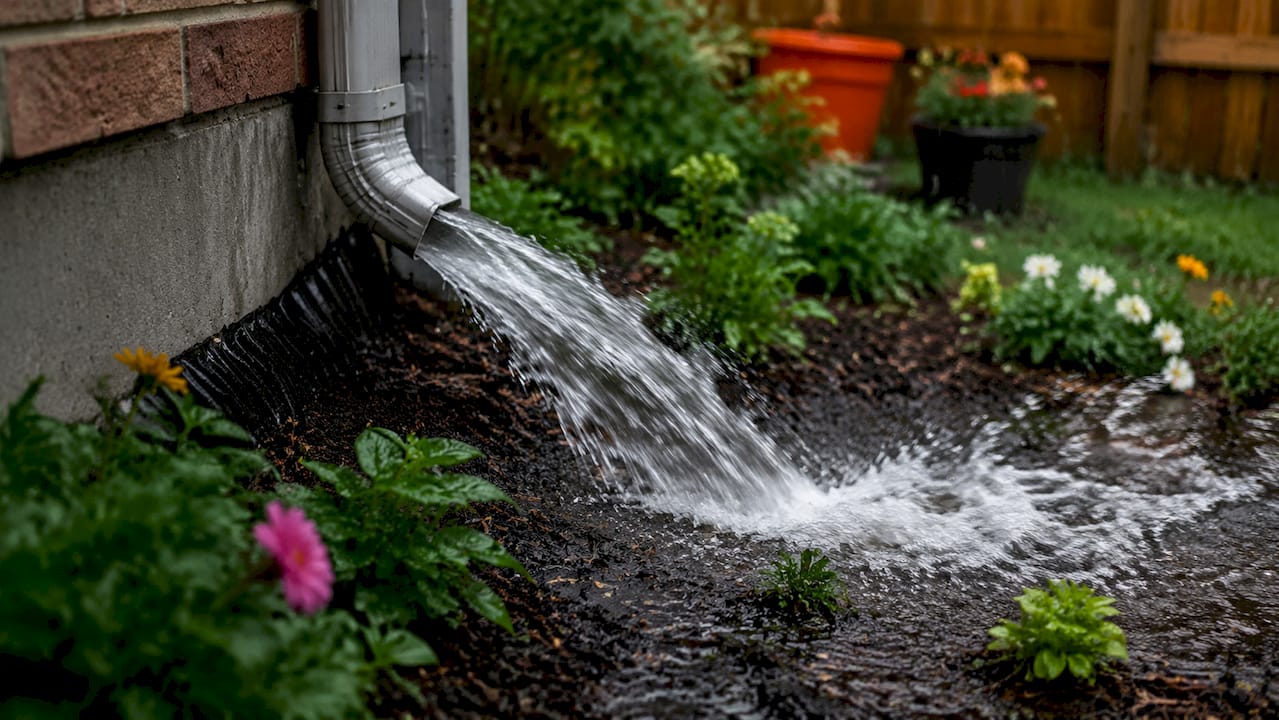
    3. Inspect gutters for separation, rust, or blockages. Gutters overflowing toward the foundation are one of the most common causes of basement water intrusion.
    4. Look at grading. The ground should slope away from your home’s foundation on all sides, at least 6 inches of drop over the first 10 feet.
    5. Check all handrails on exterior steps. Grab and pull firmly. Any wobble is a fall hazard, and it’s an easy fix.

    Interior, room by room:

    1. Test every smoke detector and CO detector by pressing the test button. Replace units older than 10 years (smoke) or 7 years (CO), regardless of whether they still beep.
    2. Check every electrical outlet in the kitchen and bathrooms with your outlet tester. These should be GFCI outlets. If the tester shows a fault, stop using that circuit until it’s repaired.
    3. Run all faucets and check under every sink cabinet for moisture, discoloration, or warped wood. These are the telltale signs of slow leaks.
    4. Flush every toilet and watch for any rocking at the base or slow drainage. A rocking toilet can indicate a failed wax ring, which leads to water damage in the subfloor.
    5. Test your HVAC by running both heating and cooling, regardless of the season. Listen for unusual sounds and check that all registers are delivering air. Replace filters if you’re past the 90-day mark.
    6. Check the water heater for rust around connections, corrosion at the base, or signs of sediment buildup (rumbling sound when heating is a classic tell). Most water heaters last 10 to 15 years.
    7. In the attic, look for daylight coming through the roof deck, dark staining on rafters (mold), or compressed/disturbed insulation that might signal pest activity or moisture.

    While DIY homeowners can handle simplified checks like smoke detector tests and visual crack inspections, professionals are recommended for a comprehensive safety assessment, especially in attics, crawlspaces, and electrical panels.

    Pro Tip: Use your phone to photograph every finding as you go, and name photos by room and issue type. When you sit down to prioritize repairs, this visual record saves you significant time and makes contractor conversations much more precise.

    Frequency recommendations by task:

    • Monthly: Test smoke/CO detectors, check GFCI outlets, look under kitchen and bathroom sinks
    • Quarterly: HVAC filter swap, inspect water heater, check exterior drainage
    • Annually: Full roof and attic walkthrough, foundation perimeter check, full electrical visual review

    Our home audit guide goes deeper on building a recurring inspection habit that fits your schedule. And if you want proof that small checks pay off, the data in our prevent costly repairs guide makes a compelling case.

    Troubleshooting, edge cases, and professional help

    As you follow your inspection checklist, some situations will call for deeper expertise or special care. Older homes, unusual construction types, and add-ons like detached garages or finished basements all introduce complications that standard checklists don’t always capture.

    Older home risks that need specialist attention:

    Homes built before 1980 carry specific hazards that require targeted expertise. Outdated wiring types like knob-and-tube and aluminum branch circuit wiring are fire risks and often disqualify homes from standard homeowner’s insurance. Polybutylene pipes (common in 1970s to 1990s homes) are prone to sudden failure and are no longer accepted by most building codes. Older electrical panels from brands like Federal Pacific or Zinsco are known to fail silently without tripping, creating serious fire hazards.

    These issues require a licensed electrician or plumber to assess properly. A home inspector may flag them, but the actual risk evaluation and repair quote needs a certified specialist.

    Optional specialty inspections worth considering:

    • Sewer scope inspection (detects root intrusion or pipe collapse)
    • Radon testing (particularly important in the Midwest and Mid-Atlantic regions)
    • Mold assessment after any water event or in chronically damp areas
    • Chimney inspection before the first fire of the season
    • Lead paint testing in homes built before 1978

    Common defect frequency and average repair costs:

    According to 2025 inspection data, the most frequently detected problems break down like this: roof problems appear in 19 to 41% of inspections, electrical defects in 15 to 42%, window and door issues in 18 to 55%, plumbing in 18 to 33%, HVAC in 20 to 31%, foundation issues in 12 to 15%, and water damage in 22 to 45% of homes inspected.

    The average homeowner spends $11,200 on repairs identified during a professional inspection. But that number can spike dramatically if foundation, roofing, and electrical issues are all found together. Getting ahead of these problems through routine inspection costs far less than emergency repairs after failure.

    For practical guides on addressing what you find, the household repairs guide covers the most common fixes with clear, step-by-step instructions.

    Why most homeowners underestimate safety inspections

    Here’s an uncomfortable truth: most homeowners only inspect their home when something breaks or when they’re buying or selling. The rest of the time, the house just runs in the background. That approach feels efficient, but it’s actually expensive.

    The 86% issue rate in professional inspections isn’t because homes are poorly built. It’s because maintenance is gradual, problems are invisible, and most people don’t look unless something forces them to. Slow water intrusion behind a shower wall doesn’t announce itself. Corroded wiring in an attic doesn’t smell or make noise. A cracked footing in the crawlspace just sits there until it doesn’t.

    What changes when you inspect routinely? You shift from reacting to problems to catching them in their early, cheap stage. A roof flashing repair caught early costs a few hundred dollars. The same issue ignored for two years costs several thousand in interior water damage repairs plus the flashing replacement.

    We’d also push back on the idea that a self-taught homeowner inspection is “good enough” for everything. For cosmetic checks and basic system testing, yes, your own walkthrough adds real value. But for electrical panels, crawlspaces, attics, and anything involving structural components, a professional brings tools and pattern recognition that genuinely catches things you’ll miss. The cost of a professional inspection, typically $300 to $500, is a fraction of what a single missed major defect will cost you.

    The smartest approach is to combine both. Use our prevent costly repairs tips to stay active between inspections, and bring in a licensed inspector every two to three years, or anytime you’re making a major purchase or renovation decision.

    Next steps: Maintain a safer, more valuable home

    Knowing the inspection process is only the beginning. The real payoff comes from building it into a consistent routine. Workbench Guide gives you the structure to make that easy, with a full maintenance checklist that tells you what to check and when, so nothing slips through the cracks across the seasons. For homeowners who want to go further, our preventative maintenance guide shows you how consistent small actions protect your home’s value year over year. And if your inspection turns up improvement opportunities, our DIY project ideas connect you to projects that save money while adding real, measurable value to your property.

    Frequently asked questions

    How often should I perform a home safety inspection?

    Most experts recommend a full safety inspection at least once a year, with high-risk items like smoke detectors tested monthly, and a professional inspection every two to three years for older homes or before major transactions.

    What safety issues are most common during inspections?

    Roof damage, electrical faults, plumbing leaks, and window or door failures top the list, with water damage appearing in 22 to 45% of inspected homes and electrical issues in 15 to 42% of cases.

    What tools do I need for a basic home safety inspection?

    Start with a bright flashlight, an outlet tester, a moisture meter, and a screwdriver set. For deeper findings, thermal cameras and moisture meters used by professionals can be rented for a day at most tool rental shops.

    Should I hire a professional for home safety inspections?

    If you’re buying or selling a home, dealing with an older property, or finding repeated issues in your DIY checks, a licensed inspector is worth every dollar. The high issue-detection rate and the potential cost of missed hazards make professional assessment the smarter financial choice in those scenarios.

  • Home Maintenance Checklist: Prevent Costly Repairs Year-Round

    Home Maintenance Checklist: Prevent Costly Repairs Year-Round

    Skipping a single clogged gutter cleaning can send water pouring into your foundation, leading to thousands of dollars in structural repairs. That one oversight, which takes less than an hour to fix, can snowball into a nightmare that disrupts your home and your budget for months. A structured, season-by-season maintenance checklist changes everything. It keeps every task visible, organized, and timed correctly so nothing slips through the cracks. When you follow a consistent routine, you protect your property’s value, extend the life of your systems, and avoid the kind of costly emergency repairs that catch most homeowners completely off guard.

    Table of Contents

    Key Takeaways

    Point Details
    Routine saves money Regular maintenance prevents costly repairs and extends your home’s lifespan.
    Smart tracking matters Using apps or reminders helps you stay consistent with seasonal tasks.
    DIY or pro? Know the difference Choose carefully between DIY and professional maintenance to avoid safety issues and voided warranties.
    Seasonal checks are crucial Divide maintenance by season for maximum impact and efficiency.

    How to build a practical home maintenance checklist

    With the value of a checklist clear, let’s break down the smartest way to build and manage yours.

    The first thing most homeowners get wrong is treating their checklist like a one-time document. They write it out, tackle a few tasks, then forget about it for six months. An effective checklist is a living system, not a static list. It needs regular reviews, updated priorities, and reliable reminders to keep you on schedule throughout the year.

    Start by taking stock of every major system and surface in your home. That means your HVAC system, plumbing, roof, gutters, windows, insulation, foundation, electrical panel, and any appliances. Group them by how often they need attention: monthly, quarterly, semi-annually, or annually. This structure turns an overwhelming list of random tasks into a manageable calendar.

    Homeowner inspecting HVAC system with checklist

    Prioritizing risk is the key move most homeowners skip. Not all tasks carry the same consequences if ignored. A dirty dryer vent is a fire hazard. A cracked caulk line around a window is cosmetic. Rank your tasks by the potential damage they cause when neglected, and tackle the highest-risk items first. From there, you decide who does what. Source control for indoor air quality is a great example of this principle in action. The EPA emphasizes using apps and calendar reminders for tracking, handling low-risk tasks yourself, and calling in pros for high-risk work.

    Here is what a prioritized checklist framework should include:

    • High-risk, pro-required tasks: HVAC inspections, electrical panel checks, roof assessments, and chimney sweeps
    • High-risk, DIY-capable tasks: Dryer vent cleaning, smoke and carbon monoxide detector tests, water heater inspection
    • Moderate-risk, DIY tasks: Gutter cleaning, air filter replacement, caulking around windows and doors
    • Low-risk, regular upkeep: Cleaning range hood filters, checking outdoor hose bibs, lubricating door hinges

    Pro Tip: Use a free app like Todoist or Google Calendar to set recurring reminders for each task category. Assign deadlines, attach photos of completed work, and track costs over time. This turns your checklist into a home maintenance record that’s invaluable when selling your property.

    For budgeting, anchor yourself to the 1% rule. This means setting aside 1% of your home’s purchase price each year for maintenance. Our preventative maintenance guide breaks this down in more detail, and pairing it with our essential repair guides gives you a complete planning toolkit.

    Seasonal home maintenance tasks: What to do and when

    Once your checklist criteria are set, here’s exactly what to schedule throughout the year.

    Breaking tasks down by season gives you clarity on timing and prevents you from cramming too many projects into one weekend. Each season comes with its own priorities based on weather exposure, system strain, and energy efficiency needs.

    Spring tasks focus on reversing winter damage and preparing for warmer months:

    1. Inspect your roof for missing or cracked shingles after winter weather
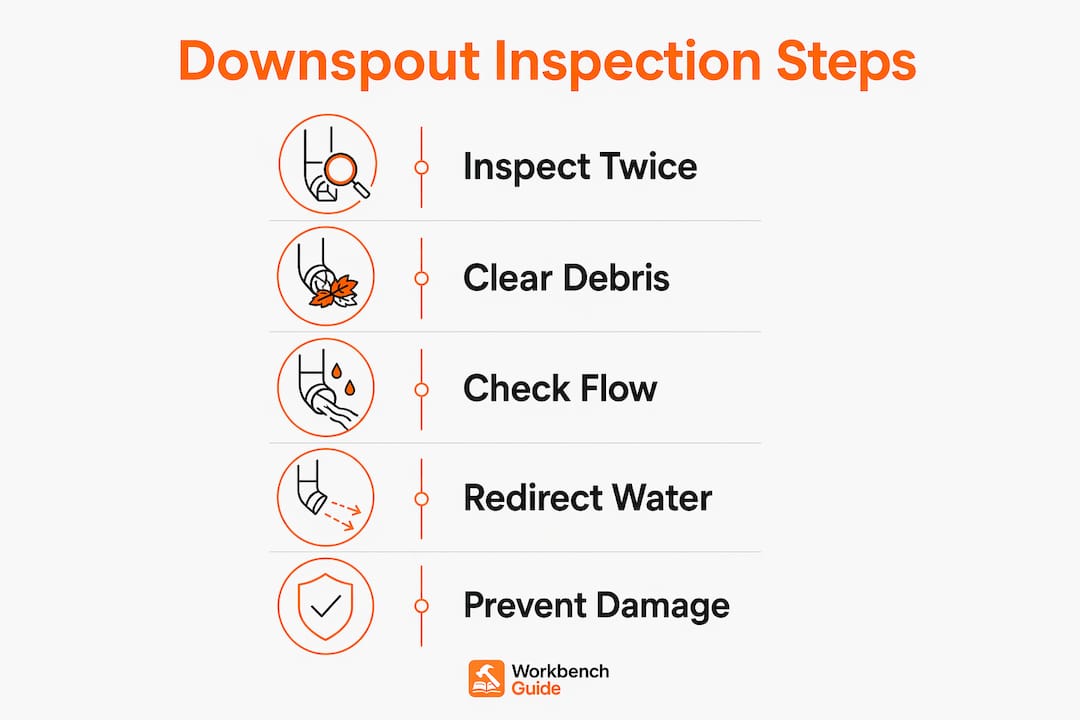
    2. Clean out gutters and downspouts clogged with leaves and winter debris
    3. Check your foundation for cracks caused by freeze and thaw cycles
    4. Service your air conditioning unit before it’s needed on the first hot day
    5. Inspect window and door seals, replacing any weatherstripping that shrank or cracked
    6. Test all GFCI outlets in bathrooms, kitchens, and garages
    7. Flush your water heater to remove sediment buildup that reduces efficiency

    Summer tasks are about upkeep and preparing systems for heavy use:

    1. Trim trees and shrubs away from the house to prevent pest entry and storm damage
    2. Inspect and clean your deck or patio, treating wood surfaces as needed
    3. Check attic ventilation to prevent heat buildup, which strains the roof and HVAC
    4. Inspect your irrigation or sprinkler system for leaks or misaligned heads
    5. Clean window screens and check for torn sections before mosquito season peaks

    Fall tasks are arguably the most critical of the year because winter prep tasks require careful timing. Schedule a furnace and HVAC tune-up, clean gutters again after leaves drop, check attic insulation levels, clear your dryer vents, and test every smoke and carbon monoxide detector before you start relying on heating systems.

    1. Schedule a furnace tune-up and replace filters
    2. Clean gutters and flush downspouts after leaves have finished falling
    3. Inspect attic insulation and add more if levels are below recommended depth
    4. Clear the dryer vent from lint and blockage to prevent fire hazards
    5. Drain and store garden hoses, shut off outdoor water lines
    6. Test smoke detectors and carbon monoxide detectors, replacing batteries

    Winter tasks focus on monitoring and minor upkeep:

    1. Check for ice dams forming on the roof edge during and after snowfall
    2. Inspect pipes in unheated spaces like garages or crawl spaces for freezing risk
    3. Monitor your heating bill for unusual spikes that signal system inefficiency
    4. Keep a path clear to your electrical panel, water shutoff, and HVAC unit

    For your seasonal home prep to be truly effective, keep this schedule in a shared location where everyone in the household can see it. Our detailed checklist gives you a ready-to-use format, and for cold-climate homeowners, winterizing your home walks through the most important cold-weather steps.

    Task Season DIY or Pro Frequency
    HVAC tune-up Spring & Fall Pro Twice yearly
    Gutter cleaning Spring & Fall DIY Twice yearly
    Roof inspection Spring Pro Annually
    Dryer vent cleaning Fall DIY Annually
    Smoke detector test Fall DIY Twice yearly
    Attic insulation check Fall DIY/Pro Annually
    Water heater flush Spring DIY Annually
    Exterior caulking Spring DIY Annually

    Pro Tip: Never schedule major fall tasks after the first frost. Caulk and sealants need above-freezing temperatures to bond properly, and HVAC technicians get booked solid once cold weather hits. Book your fall tune-up in September, not November.

    DIY vs. professional maintenance: Making smart choices

    Knowing what to do is step one, but deciding who should do it can make all the difference.

    This is where a lot of homeowners make costly mistakes in both directions. Some try to DIY high-risk tasks they are not qualified for, which creates safety hazards and voids warranties. Others pay professionals for tasks they could handle themselves in 30 minutes. Getting this balance right saves real money.

    Tasks you can safely DIY:

    • Replacing HVAC filters every 1 to 3 months
    • Cleaning dryer vents and range hood filters
    • Inspecting weatherstripping and replacing caulk
    • Testing and replacing smoke and carbon monoxide detector batteries
    • Cleaning gutters and flushing downspouts
    • Checking for visible plumbing leaks under sinks

    Tasks that require a licensed professional:

    • Electrical panel inspections and any wiring work
    • HVAC system tune-ups involving refrigerant or internal components
    • Roof repairs involving structural decking or flashing
    • Gas line work of any kind
    • Chimney cleaning and structural inspection
    • Radon testing and mitigation system installation

    Proactive home maintenance is more cost-effective than repairs when you follow the 1% rule as a baseline budget, scaling up to 4% for older homes where systems are aging and more prone to failure. The same research reinforces that DIY saves money on routine tasks, but calling in professionals for high-risk work protects both warranties and safety.

    Moisture control is one area where the line between DIY and pro gets blurry. You can check for visible mold and manage minor humidity with a dehumidifier, but controlling indoor air quality for your home also means using MERV 13 or higher rated filters, testing radon levels in basements, and monitoring carbon monoxide, all tasks the EPA links directly to long-term health outcomes. A basic radon test kit costs under $30 and is a clear DIY win. Mitigation installation is not.

    “Homeowners who invest consistently in routine maintenance spend significantly less over a home’s lifetime than those who wait for systems to fail. Prevention is almost always cheaper than emergency repair.” This reflects the consensus among home services professionals and is backed by data showing that deferred maintenance costs multiply over time.

    Task DIY Cost Pro Cost Risk if Skipped
    HVAC filter replacement $10 to $30 $80 to $150 High: system failure
    Dryer vent cleaning $0 to $20 $100 to $175 High: fire hazard
    Gutter cleaning $0 to $50 $100 to $250 Medium: water damage
    Electrical inspection Not recommended $150 to $300 Very high: fire/shock risk
    Roof inspection Limited DIY $150 to $350 Very high: structural damage
    Radon test $15 to $30 $400+ (mitigation) High: health risk

    For detailed guidance on HVAC upkeep, our HVAC maintenance guide covers exactly what to check and when. And if you want a broader look at how small checks save serious money, see our guide on preventing costly repairs.

    Why smart tracking and preventive care always pays off

    With the line between DIY and pro clearer, here’s what real-world insight tells us about maintenance success.

    Here is the uncomfortable truth most home maintenance articles skip over: the checklist itself is not what saves your home. Consistency is. We have seen homeowners build beautiful, detailed checklists, then ignore them for 18 months because life gets busy. When they finally open it again, there is a $6,000 HVAC replacement waiting for them that a $90 tune-up would have prevented.

    The homeowners who consistently protect their properties are not necessarily more skilled. They are better organized. They use apps, set recurring calendar events, and treat home maintenance like a subscription they pay into monthly rather than a crisis they manage annually. This mindset shift is the real differentiator.

    There is also a trap in focusing only on big seasonal tasks. The highest-impact maintenance habits are often the smallest ones: replacing filters on time, checking under sinks once a month, and walking your exterior after every major storm. These micro-tasks cost almost nothing and catch problems when they are still cheap to fix.

    Another underappreciated reality is that your home’s age dramatically changes your maintenance equation. A 10-year-old home with original systems runs on a different budget and schedule than a 30-year-old home with an aging roof and a furnace approaching end-of-life. Adjusting your checklist and budget upward as your home ages is not optional. It is the difference between being proactive and being reactive.

    Tracking tools available through our smart tracking tools page give you a structured starting point so you are not building from scratch. The hardest part of maintenance is not knowing what to do. It is remembering to do it, on schedule, every time.

    Next steps: Confident home care with WorkbenchGuide

    If you’re ready to move from theory to action, here’s how WorkbenchGuide can help you confidently manage every maintenance task.

    WorkbenchGuide was built specifically for homeowners who want to stay ahead of their home, not constantly behind it. Start with our complete checklist to get a ready-made, season-by-season task plan you can use immediately. From there, our full library of maintenance guides covers everything from HVAC to plumbing to exterior upkeep with simple, step-by-step instructions. When you run into something that needs a professional, our repair tutorials help you understand what is involved so you can hire smarter and avoid being overcharged. Your home deserves a system, not guesswork.

    Frequently asked questions

    How often should I clean gutters and check my HVAC system?

    Clean gutters twice a year, ideally in spring and fall, and schedule HVAC tune-ups in both seasons to catch issues before peak heating and cooling demand.

    What maintenance tasks should always be handled by a professional?

    Electrical systems, significant HVAC work, and roof repairs all require licensed professionals to ensure safety and protect warranties, since DIY attempts on these systems can void coverage and create liability.

    Does tracking tasks in an app really make a difference?

    Using apps and reminders for home maintenance tracking significantly improves consistency and helps homeowners catch small problems before they turn into expensive, time-sensitive repairs.

    How does the 1% rule help with maintenance budgeting?

    The 1% rule means setting aside 1% of your home’s value per year for upkeep, but older homes may need up to 4% annually as aging systems require more frequent attention and replacement.

  • Why Annual Safety Checks Protect Your Home and Save Money

    Why Annual Safety Checks Protect Your Home and Save Money

    Skipping your annual home safety checks feels harmless until the moment it isn’t. A slow gas leak, a smoke detector with a dead battery, a dryer vent clogged with lint: these aren’t dramatic disasters waiting to happen. They’re quiet failures that build for months before they become emergencies. The evidence is sobering. Deferred maintenance costs up to $4 for every $1 you skip, meaning that one overlooked inspection can easily snowball into a five-figure repair bill. This article breaks down exactly why annual safety checks matter and how to make them stick.

    Table of Contents

    Key Takeaways

    Point Details
    Save lives, prevent disasters Annual checks catch deadly risks like fires, carbon monoxide, and falls before they become tragedies.
    Prevent major repair bills Catching small issues early can save you thousands on water, fire, or structural repairs.
    Unlock insurance discounts Regular maintenance can lower your premiums by up to 35% and simplify insurance claims.
    Peace of mind all year A yearly home safety routine means confident, stress-free ownership and better property value.
    Consistency is key Building a habit with checklists and reminders is the best way to maintain safety and save money long-term.

    The real risks annual safety checks prevent

    Now that you’re aware of the stakes, let’s break down the most serious risks that annual safety checks are designed to prevent.

    Most homeowners think of home safety in terms of dramatic events: a house fire, a major flood, a roof collapse. But the data tells a different story. The majority of preventable home disasters start as small, detectable problems that went unchecked for too long. Annual safety checks are your early warning system, and skipping them is like driving without checking your mirrors.

    Consider fire risk. The NFPA reports an average of 328,590 home structure fires per year between 2019 and 2023, resulting in 2,600 deaths, 10,770 injuries, and $8.9 billion in property damage annually. That last number is staggering. And the preventable part?

    57% of home fire deaths occurred in properties without working smoke alarms. A functioning detector that costs $15 to replace could be the difference between escaping safely and not escaping at all.

    Annual checks that include testing smoke and CO detectors catch these silent failures before they become fatal. A detector can look perfectly normal on your wall while its sensor has degraded to the point of uselessness. You won’t know until the moment you need it most.

    Falls and poisonings are the other leading killers. The National Safety Council data shows 125,700 home injury deaths in 2023, driven primarily by poisoning (77,000 deaths) and falls (32,000 deaths). Annual checks that identify loose rugs, poor stairway lighting, and improper chemical storage can directly reduce these numbers in your own home.

    Here are the most important hazards that annual checks are built to catch, along with their real costs:

    Hazard Annual deaths/cost Caught by annual check?
    House fires (no smoke alarm) 2,600 deaths, $8.9B damage Yes: detector testing
    Falls (poor lighting, loose rugs) 32,000 deaths Yes: hazard walkthroughs
    Poisonings (CO, chemicals) 77,000 deaths Yes: CO detector, storage check
    Water damage (leaks, burst pipes) $13,000 avg. claim Yes: plumbing inspection
    HVAC failures Thousands of breakdowns Yes: annual tune-up

    Beyond these headline risks, there are spots most homeowners forget entirely. You should avoid costly home repairs by paying special attention to:

    • Attic spaces: Moisture buildup, pest intrusion, and insulation damage often go unnoticed for years
    • Garage areas: Flammable storage, CO buildup from vehicles, and faulty door sensors
    • Foundation perimeter: After major storms, cracks or shifting can appear that worsen through winter freeze-thaw cycles
    • Crawl spaces: Mold, rodent nesting, and vapor barrier damage are nearly invisible until they cause structural or air quality problems

    These overlooked zones are where deferred inspections cause the most expensive damage. A crack in your foundation that costs $500 to seal becomes a $15,000 waterproofing project if ignored for two or three winters.

    Homeowner inspecting basement for cracks and damage

    Annual safety checks save you money: How prevention beats repairs

    Understanding that annual checks don’t just protect your family but are also critical for your wallet, let’s look at how prevention directly adds up to huge savings.

    The math here is blunt. Deferred maintenance costs homeowners up to $4 in future repairs for every $1 they skip today. That ratio gets worse for water and structural damage, where a leaky pipe that costs $150 to fix can cause tens of thousands in drywall, flooring, and mold remediation if it bursts or seeps unchecked for a season.

    Infographic with home safety and cost statistics

    Look at how the costs compare across some of the most common deferred issues:

    Problem Cost to fix early Cost after emergency
    Minor roof leak (1-2 shingles) $150 to $400 $3,000 to $12,000 (rot, interior damage)
    Dryer vent cleaning $75 to $150 $5,000+ (fire damage)
    HVAC tune-up $75 to $150 $3,000 to $10,000 (full replacement)
    Minor plumbing leak $100 to $200 $10,000+ (water damage, mold)
    Caulking gaps in foundation $50 to $100 $5,000 to $30,000 (waterproofing, structural)

    The pattern is consistent. Early action costs hundreds. Emergency action costs thousands. Annual checks are how you stay on the early side of that line.

    Here is a simple process you can follow every year to make your check cost-effective and organized:

    1. Walk every room and zone with a notepad. Look for cracks, stains, moisture, rust, fraying wires, and anything that looks different from last year. Don’t just glance, actually open cabinet doors and look under sinks.
    2. Document everything with photos. Take timestamped photos of any issue you find, even minor ones. This creates a paper trail that proves maintenance for insurance purposes and helps you track whether a problem is growing.
    3. Assign a priority and a timeline. Not every issue needs to be fixed this week. Rank problems by safety risk and cost escalation potential, and schedule repairs accordingly.
    4. Follow up and confirm completion. Whether you fix it yourself or hire a contractor, note the date and method of repair. Update your checklist and store it somewhere you’ll find it next year.

    Pro Tip: Start a dedicated folder on your phone for home maintenance photos. Label each photo with the date and location. When you file an insurance claim or apply for a home equity loan, this documentation proves you’ve been a responsible homeowner. It takes 30 seconds per photo and can save you thousands in disputes.

    Building a habit around preventative maintenance tips like these is how homeowners avoid the dreaded “surprise” repair bill. You can also protect yourself heading into cold weather by winterizing your home, which pairs perfectly with your annual fall check.

    Less obvious benefits: Insurance breaks and peace of mind

    Financial savings are just the beginning. Annual checks offer hidden rewards that make your homeownership experience smoother and less stressful.

    Most homeowners don’t realize that their insurance company is paying close attention to how well they maintain their property. Proactive upkeep doesn’t just prevent claims. It actively lowers your premiums. Regular maintenance can qualify you for meaningful insurance discounts, including:

    • New or well-maintained roof: 10% to 35% discount depending on the carrier
    • Updated electrical wiring: Reduces fire risk premiums by 5% to 10%
    • Security system installation: 5% to 15% discount for monitored systems
    • Updated plumbing: Reduces water damage liability and associated premiums
    • Smoke and CO detectors documented as functional: Can qualify for additional safety discounts

    These discounts add up to real money. If your annual premium is $1,500, a 15% reduction saves you $225 per year. That more than covers the cost of your annual check. Over 10 years, the savings compound dramatically.

    There’s also the less talked about benefit of fewer denied claims. Insurance companies can and do deny claims when they determine that a loss resulted from neglected maintenance rather than a sudden, unforeseen event. If your roof leaks and an adjuster finds evidence of years of unaddressed damage, your claim may be reduced or rejected entirely. Documented annual checks protect you from that outcome.

    Pro Tip: After each annual check, send a brief summary email to your insurance agent noting what you inspected, what you repaired, and when. Even if they don’t respond, this creates a dated record that can be invaluable if a claim is ever disputed. Ask your agent directly whether your current maintenance activities qualify for any discounts you aren’t already receiving.

    Staying on top of appliance maintenance is another area where annual checks protect your insurance standing, since appliance failures from neglect are a common reason claims get complicated.

    Beyond the financial side, there’s a quality-of-life benefit that’s hard to quantify but very real. Homeowners who do annual checks consistently report feeling more confident and less anxious about their property. You know what’s been checked, what’s been fixed, and what’s on the list for next season. That certainty is worth something. It means fewer 2 a.m. moments of wondering whether that noise in the basement is something serious.

    What should your annual safety check include?

    Now that you understand the why, here’s exactly what to include in your home’s annual safety review.

    Annual HVAC tune-ups prevent 70% to 80% of system breakdowns and save 10% to 30% on energy bills. That alone makes the $75 to $150 service call one of the highest-return items on your annual list. Dryer vents clogged with lint are responsible for thousands of house fires every year, making vent cleaning another non-negotiable task.

    Here’s a practical checklist of systems and areas to cover every year:

    • Smoke alarms: Test each unit. Replace batteries. Check the manufacture date and replace any unit older than 10 years
    • Carbon monoxide detectors: Test function. CO detectors expire after 5 to 7 years, and old sensors fail without warning
    • HVAC system: Schedule a professional tune-up, replace filters, check refrigerant levels and ductwork
    • Dryer vent: Remove and clean the full duct run from the dryer to the exterior wall
    • Electrical panel: Look for tripped breakers, corrosion, or signs of overheating. Call a licensed electrician for anything unusual
    • Roof and gutters: Check for missing shingles, cracked flashing, and blocked gutters that cause ice dams or fascia rot
    • Foundation: Inspect the exterior perimeter for new cracks, especially after a winter season
    • Water heater: Flush sediment, check the anode rod, and test the pressure relief valve
    • Attic and crawl space: Look for moisture staining, animal intrusion, and insulation displacement
    • Chemical and flammable storage: Ensure gasoline, paint, and cleaning products are stored safely away from ignition sources

    For comprehensive HVAC maintenance, it helps to understand what a technician is actually checking so you can ask the right questions and know when something sounds wrong.

    Pro Tip: On January 1st or your birthday, set a recurring annual calendar event titled “Home Safety Check.” Break it into three 30-minute sessions over the same weekend, one for interior systems, one for exterior, and one for documentation and scheduling any repairs. It feels far less overwhelming than one big inspection day.

    Why most homeowners skip checks and how to finally make it habit

    Once you know what to check, the final challenge is consistency. Here’s a perspective that challenges the standard advice and explains what really works.

    The standard advice is “just set a reminder and stick to it.” That advice fails most people. It fails because the real obstacle isn’t laziness. It’s overwhelm. When a homeowner looks at a complete 40-item home safety checklist, the instinctive response is to close the tab and tell themselves they’ll do it next month. Next month becomes next season, then next year.

    Generic lists don’t work because they ignore context. A checklist built for a 1950s ranch house in Minnesota doesn’t apply the same way to a 2005 townhome in Georgia. When a list includes tasks you don’t recognize or that don’t apply to your home, the whole thing starts to feel like a burden rather than a habit.

    “Most costly disasters happen because a simple, routine task was put off by a week, then a month, then a year.”

    What actually builds the habit? Three things work reliably. First, break the check into smaller tasks spread across the year rather than one massive annual event. Checking detectors in spring, gutters in fall, and HVAC in early summer feels manageable. Second, share the job. Households where safety checks are a shared responsibility between partners or family members are far more consistent than those where one person carries the entire burden. Third, reward small wins. Mark completed tasks on a visible checklist, share the results with someone, or tie the check to something you enjoy, like a good cup of coffee or a weekend project you look forward to.

    Digital tools beat paper lists and memory. Practical maintenance checklists that are tailored to your home type, climate, and age keep the process relevant and remove the friction of figuring out what to do next. The goal isn’t perfection. It’s consistency.

    Take control of your home safety: Get expert checklists and tools

    With the right tools, building your yearly safety routine is easier than ever. Here’s how to get started with trusted resources.

    At WorkbenchGuide, we’ve built everything you need to make annual safety checks a genuine habit rather than a yearly scramble. Start with our detailed home maintenance checklist to get a clear, season-by-season view of every task your home needs. When you want to go deeper on keeping costs down year-round, our preventative maintenance guide walks you through smart strategies that pay for themselves. Our step-by-step guides and smart reminders mean you’ll never forget a critical check again, and you’ll always know exactly what to do next.

    Frequently asked questions

    Which home safety checks are absolutely critical every year?

    You should check smoke and CO detectors, HVAC systems, dryer vents, roof, electrical panel, and foundation every year because these systems are responsible for the most common and most costly home disasters. Annual detector checks and HVAC tune-ups alone prevent the majority of fires and mechanical failures.

    How do annual safety checks lower home insurance costs?

    Insurance companies reward documented preventative upkeep with direct premium discounts, and regular maintenance on your roof, wiring, plumbing, and security systems can reduce premiums by 10% to 35% depending on the upgrade.

    How much can skipping annual maintenance cost me?

    Every dollar you skip in maintenance can cost up to four dollars in future repairs, and deferred upkeep on water-related or structural issues often results in repair bills that exceed $10,000.

    Do expired smoke alarms still work?

    No, expired detectors are unreliable and potentially useless. Smoke alarms must be replaced every 10 years and CO detectors every 5 to 7 years, because old sensors fail silently without giving you any warning that they’ve stopped working.

  • Step-by-step home renovation guide: Plan, execute, succeed

    Step-by-step home renovation guide: Plan, execute, succeed

    Starting a home renovation without a clear plan is one of the most expensive mistakes a homeowner can make. You buy materials before measuring twice, skip the permit process, or gut a bathroom before realizing the plumbing underneath needs a full replacement. The excitement of a fresh space clouds the judgment that keeps projects on budget and on schedule. This guide walks you through every phase of the renovation process, from defining your vision and setting a realistic budget to pulling permits, swinging a sledgehammer safely, and finishing strong with a punch list that catches what others miss. Follow this roadmap and you will avoid the most common pitfalls that derail DIY projects.

    Table of Contents

    Key Takeaways

    Point Details
    Have a clear plan Start your renovation with a vision and step-by-step roadmap so you don’t get lost or overwhelmed.
    Budget with buffer Always include a 10-20% contingency in your budget for unexpected costs, even if your estimates seem solid.
    Inspect before you demo Thoroughly check for structural issues and hidden surprises before starting demolition to avoid costly mistakes.
    Get permits for major work Obtain all necessary permits and professional help for structural, electrical, or plumbing projects.
    Follow step sequence Stick to the proven order—rough-ins, insulation, drywall, finishing, fixtures, walkthrough—to achieve quality results.

    Define your vision and build your renovation roadmap

    Before you buy a single nail or watch a single tutorial, you need to get clear on what you actually want and why. Renovations fail when homeowners start with a vague idea like “update the kitchen” without knowing whether that means new cabinet hardware or a full gut renovation. The outcome looks very different, and so does the price tag.

    Start by writing down your renovation objectives. Are you modernizing an outdated space? Expanding square footage? Fixing a persistent problem like water damage or poor insulation? Trying to increase resale value before listing? Each goal shapes every decision that follows. A homeowner remodeling to sell will prioritize neutral finishes and broad appeal. A homeowner staying for 20 years can invest in personal preferences and high-durability materials.

    Once your goals are clear, prioritize your projects by three factors: impact, necessity, and budget fit. A leaking roof beats a cosmetic kitchen upgrade every time. Use design blogs, manufacturer showrooms, and how the system works on organized planning platforms to gather inspiration before committing to any direction. The standard renovation process always starts with this kind of structured planning and vision definition, and skipping it is what separates frustrating projects from successful ones.

    Draft a rough project roadmap that lists each task, estimated duration, and who is responsible for completing it. This does not need to be a formal document. A spreadsheet or even a printed checklist works fine as long as it exists and you actually refer to it.

    Full renovation vs. partial renovation: Which approach fits your project?

    Infographic comparing full and partial renovation

    Factor Full renovation Partial renovation
    Scope Entire home or floor One or two rooms
    Cost Higher upfront investment More manageable budget
    Disruption Major, often requires temporary relocation Minimal, one area at a time
    Best for Older homes needing full updates Targeted upgrades or resale prep
    Timeline Months to a year or more Weeks to a few months

    Pro Tip: Use free tools like SketchUp or even room-layout apps on your phone to visualize your space before committing to a layout. Seeing a new kitchen island on screen before buying materials saves both money and regret.

    With your goals in mind, the next step is nailing down your budget and anticipating expenses.

    Establish your budget and build in a contingency

    Nothing derails a renovation faster than running out of money halfway through. And it happens more often than you’d expect, not because homeowners are careless, but because renovation costs have layers that are easy to underestimate.

    The visible costs are easy to spot: tile, paint, appliances, labor quotes. The hidden costs are where budgets collapse. Think permit fees, dumpster rentals, subfloor replacement after you pull up old flooring, or outdated wiring that must be updated before any wall can close. Budgeting with a 10-20% contingency is not optional padding; it is essential protection for the unexpected.

    Break your project down by room or task, then estimate each line item individually. Vague totals like “kitchen: $15,000” are harder to track and easier to blow through. Specific line items like “cabinet installation labor: $1,800” give you checkpoints to measure against. Use the DIY budget guidelines available through organized planning tools to benchmark your estimates against real project costs.

    Sample renovation cost ranges with contingency

    Project area Estimated cost range Suggested contingency
    Kitchen remodel $10,000 to $50,000 15-20%
    Bathroom remodel $5,000 to $20,000 15-20%
    Flooring (per room) $1,500 to $6,000 10-15%
    Roof replacement $7,000 to $15,000 10%
    Electrical panel upgrade $1,500 to $4,000 15%

    Steps to build your renovation budget:

    1. List every task in your project scope, down to small items like outlet covers and caulk.
    2. Research material costs online and at local suppliers. Get at least two quotes.
    3. Contact two to three contractors for labor estimates on any work you will not do yourself.
    4. Add up all line items and apply your contingency percentage on top of the total.
    5. Compare your total to your actual available funds. Adjust scope if needed before starting.
    6. Set a monthly or weekly spending ceiling and track all expenses against it.

    Pro Tip: Track every single expenditure in a spreadsheet from day one, not after the fact. Weekly reviews catch overruns early, when you still have room to adjust, rather than at the end when the damage is done.

    Once your finances are mapped out, it is time to check your home’s condition before any demolition begins.

    Inspect your home for structural issues and potential surprises

    Opening a wall and finding mold, outdated knob-and-tube wiring, or a cracked floor joist is not just stressful. It is expensive, and it can stop your project cold for weeks. A thorough inspection before any demo work is one of the most protective things you can do for your budget and timeline.

    A structured home inspection before renovation is a crucial step that many DIY guides gloss over because it is not as exciting as picking tile. But catching a problem before you open walls costs far less than discovering it mid-project.

    Common issues to check before renovation begins:

    • Foundation cracks or settling, especially in basements and crawl spaces
    • Roof condition: missing shingles, sagging areas, deteriorated flashing
    • Windows and exterior doors: drafts, failed seals, rotting frames
    • Plumbing: slow drains, discoloration in water, visible corrosion on pipes
    • Electrical: double-tapped breakers, ungrounded outlets, aluminum wiring
    • HVAC: age of system, filter condition, ductwork leaks
    • Mold or moisture: staining on ceilings, musty odors, soft drywall

    Use the roof inspection checklist before any exterior or attic work. For a broader view of preventing costly repairs before they become renovation budget busters, small checks now save thousands later. If you are a newer homeowner, the new homeowner inspection tips for the first 90 days offer a solid baseline for understanding your home’s condition.

    Warning: Never assume electrical and plumbing are “probably fine” just because the home looks solid. Outdated systems hidden behind walls are among the most common and costly surprises in home renovation. Skipping electrical or plumbing inspection before starting work can result in failed inspections, required demolition, and thousands in unplanned expenses.

    If anything on your inspection list raises a red flag, call a licensed professional before proceeding. A $300 inspection fee is cheap compared to discovering structural damage after you have already ordered $8,000 worth of cabinetry.

    After inspection and addressing any issues, you can move on to the permit process and professional help.

    Secure permits and schedule professional help, then start demolition

    Skipping permits is tempting. They take time, cost money, and feel like bureaucratic friction standing between you and your renovation. But unpermitted work creates real problems: failed home sales, voided insurance claims, and potentially having to tear out completed work to satisfy inspectors. The risk is simply not worth it.

    Hiring professionals, obtaining permits, and then beginning demolition follow a deliberate sequence that protects both your safety and your investment. Electrical, plumbing, HVAC, and structural modifications almost always require permits and licensed contractors in most jurisdictions. Cosmetic work like painting or replacing flooring typically does not, but always verify with your local building department.

    Steps to secure permits and schedule contractors:

    1. Contact your local building and planning department to identify which tasks require permits.
    2. Submit permit applications with your project plans, including dimensions and material specs where required.
    3. Get contractor quotes while permits are pending so work can begin as soon as approval arrives.
    4. Confirm contractor availability and lock in a schedule before permits expire.
    5. Post your permit visibly on site as required, and keep a copy of your project plans accessible for inspectors.
    6. Schedule required inspections at the right intervals: rough-in, framing, insulation, and final.

    Once permits are secured and contractors are scheduled, demolition can begin. Organize your demo work before you swing anything. Wear safety glasses, gloves, and a dust mask rated for fine particles. Shut off power and water to the affected areas. Work in a logical sequence: remove fixtures and cabinetry first, then surface materials like flooring and drywall, and structural elements last. Use the step-by-step repair guides to understand what lies behind walls in common renovation areas before cutting into them.

    Pro Tip: Photograph and document every wall cavity, junction box, and pipe layout before closing anything up. Inspectors appreciate clear documentation, and you will be glad you have it when a future repair requires knowing what is behind a wall.

    With the site prepared, the next phase is rebuilding and finishing your new spaces.

    Rebuild: Rough-ins, insulation, drywall, paint, flooring, and fixtures

    This is the phase most homeowners picture when they imagine a renovation. But it only goes smoothly when everything before it was done right. Rebuilding follows a strict sequence that you cannot shortcut without creating problems downstream.

    Contractor sanding drywall in mid-renovation living room

    The standard home renovation rebuild sequence runs from rough-ins through final walkthrough, and each step depends on the one before it being inspected and approved.

    Rebuilding phase in order:

    1. Rough-in electrical: run new circuits, place outlet and switch boxes, pull wire to panel
    2. Rough-in plumbing: set drains, supply lines, and vent stacks before walls close
    3. Rough-in HVAC: ductwork, vents, and any new equipment from your HVAC maintenance guide plan
    4. Schedule rough-in inspections and get sign-off before proceeding
    5. Install insulation in exterior walls, ceilings, and any soundproofing areas
    6. Hang drywall, tape, mud, and sand to a smooth finish
    7. Prime and paint walls and ceilings before cabinetry and flooring go in
    8. Install flooring: hardwood, tile, or luxury vinyl plank depending on the room
    9. Set cabinets, countertops, and appliances
    10. Install fixtures: lights, outlets, switches, faucets, hardware
    11. Conduct a thorough punch list walkthrough and address every incomplete or defective item

    Tools and supplies to have ready before rebuilding starts:

    • Drywall screws, joint compound, and corner bead
    • Paint rollers, brushes, and painter’s tape
    • Level, tape measure, and chalk line
    • Flooring installation tools specific to your material (tapping block, pull bar, spacers)
    • Drill, circular saw, and jigsaw for cuts and installations
    • Caulk and grout for tile and fixture sealing

    Keep an emergency repairs guide nearby during this phase, especially for plumbing connections where leaks can appear hours after installation.

    Pro Tip: Walk your project site every evening before leaving and update your punch list with anything incomplete, damaged, or misaligned. Small issues caught daily take five minutes to fix. The same issues caught on final walkthrough can take five days.

    With your renovation complete, it is time to review what makes a truly effective DIY project.

    Our take: What most DIY guides get wrong about home renovation

    Most renovation guides are written as if every project goes according to plan, in exactly the right order, with zero surprises. That version of renovation exists in magazines. Real projects are messier.

    The biggest gap in standard renovation advice is the assumption that a rigid checklist is enough. In practice, the homeowners who finish projects successfully are not the ones who followed a list perfectly. They are the ones who built flexibility into their plan from the start and were willing to reassess constantly. When a contractor runs two weeks late, when a material is back-ordered, or when an inspection reveals an issue that requires rerouting a drain, your plan needs to bend without breaking.

    Another overlooked ingredient is the daily check-in habit. Most guides tell you to plan before you start and inspect when you finish. What they skip is the middle: consistent, brief daily reviews of what was completed, what is next, and whether anything has changed. This habit catches sequencing errors before they become expensive. It also keeps you sane in a project that can otherwise feel like it is spiraling.

    Here are some counterintuitive lessons that separate successful DIY renovations from stressful ones:

    • Slower planning always means faster execution. Every hour spent on the roadmap saves three hours of backtracking mid-project.
    • The most dangerous phrase in renovation is “we’ll figure it out as we go.” Improvising on the fly usually means paying someone to undo what you just did.
    • Budget friction is healthy. If setting a budget feels painfully restrictive, that friction is protecting you from a worse feeling later.
    • Inspections are not obstacles. They are checkpoints that confirm your work is sound before you hide it behind drywall permanently.

    Follow the home renovation insights from homeowners who have navigated real projects to build a more realistic picture of what the process actually looks like in practice.

    Pro Tip: Build a deliberate “adjust week” into any project longer than one month. This is a buffer window with no scheduled tasks, just time to handle the surprises that have accumulated and recalibrate your plan for the next phase.

    Next steps: Organize your renovation with expert tools and guidance

    Knowing the steps is one thing. Staying organized through a live renovation while managing contractors, tracking expenses, and keeping your household running is another challenge entirely. That is where having the right system behind you makes a real difference.

    Workbench Guide gives homeowners the DIY guides and checklists to plan and execute projects without guessing what comes next. Every phase of your renovation has a corresponding checklist to keep you on track. You will also find preventative maintenance tips that protect your newly renovated spaces long after the final walkthrough is done. Start with the home maintenance checklist to understand what ongoing care your home needs by season. Your renovation is an investment. The right tools help you protect it.

    Frequently asked questions

    What is the first step in home renovation?

    Always start by defining your renovation goals and creating a clear project roadmap before you spend money or begin any work. The renovation process consistently begins with planning and vision definition for good reason.

    How much contingency should I include in my renovation budget?

    Include a 10-20% contingency on top of your total estimated costs to cover unexpected issues, price changes, or hidden problems discovered mid-project.

    Do I need permits for DIY home renovation?

    You need permits for structural, electrical, or plumbing changes, so always check with your local authority before starting. Permits and professional help are standard requirements for any renovation that affects your home’s core systems.

    How should I sequence renovation tasks for best results?

    Follow a methodical order from rough-ins through final walkthrough: electrical, plumbing, and HVAC rough-ins first, then insulation, drywall, paint, flooring, fixtures, and a final punch list review.

  • DIY project ideas that save money and boost your home

    DIY project ideas that save money and boost your home

    Choosing the wrong DIY project is surprisingly easy. You buy materials, watch a few tutorials, and end up with a half-finished shelf or a cracked driveway that looks worse than before. The real challenge isn’t finding project ideas — it’s knowing which ones fit your skill level, budget, and space. This article cuts through the noise by presenting researched, proven projects with step-by-step guidance, cost breakdowns, and honest advice on what actually delivers results. Whether you’re brand new to DIY or looking for your next worthwhile challenge, you’ll leave here with a clear plan and real examples you can start this weekend.

    Table of Contents

    Key Takeaways

    Point Details
    Start with quick wins Low-skill projects like decluttering and simple repairs build confidence and save money.
    Budget-friendly builds Most storage and garden projects cost under $200 and use basic tools and affordable materials.
    Repair for lasting impact Fixing driveway cracks, squeaky floors, and polishing hardwoods improves home value and comfort.
    Skill-building shortcuts Pocket holes, self-tapping screws, and freestanding designs simplify construction and let you customize for your space.
    Use expert guides Step-by-step plans and checklists make DIY success easier and safer for all skill levels.

    How to choose the right DIY project for your home

    Before you buy a single board or rent a single tool, you need a simple framework for picking the right project. Most homeowners skip this step, and that’s exactly why so many DIY projects stall halfway through.

    Start by asking three honest questions:

    • How much time do I actually have? A hall tree takes a full weekend. Fixing a squeaky floor takes one afternoon.
    • What’s my skill level? Be realistic. Using a pocket hole jig (a device that drills angled holes for clean wood joins) for the first time is different from doing it on your fifth project.
    • What’s my real budget? Include tools, not just materials. A $20 project can turn into a $120 project when you add the drill bits and clamps you don’t own yet.

    The smartest place to start is with quick wins. Quick wins under one hour include decluttering counters, shining sinks, and tightening loose hinges. These tasks cost almost nothing and give immediate visual payoff. On bigger projects, DIY typically takes 3 to 10 times longer than a professional, but you’ll see 40 to 80% savings on labor-heavy tasks like painting or patching. That math adds up fast over a year of consistent project work.

    Understanding basic mechanics and safety saves you expensive mistakes. Terms like backer rod (a foam cylinder pressed into wide cracks before applying filler), self-tapping screws (fasteners that drill their own threads into metal or wood), and pocket holes (angled pilot holes that create hidden, strong joints) will appear throughout this article. Knowing what these mean before you reach the hardware store saves real time.

    Pro Tip: If you’re new to home projects, check out first-time homeowner tips and use your home maintenance checklist to prioritize tasks before starting anything new.

    With criteria in mind, let’s dive into specific project examples you can tackle yourself.

    DIY plans for modern planters and raised beds

    Building your own raised bed is one of the best entry points into DIY woodworking. You get a functional product, visible results, and a strong foundation of skills you’ll use on every future project.

    The most accessible materials are cedar fence pickets and 2×4 lumber. Cedar is naturally rot-resistant, which makes it perfect for outdoor use. A typical build uses cedar pickets for the outer walls and 2x4s for the inner frame that holds everything together under soil pressure. Mitered corners (angled cuts that meet cleanly at 45 degrees) give the finished planter a polished, modern look. Stacking boards in alternating layers adds structural strength without requiring any advanced joinery.

    Here’s a simple step-by-step process based on free DIY plans for sizes up to 72×36 inches and 18 to 23 inches tall:

    1. Cut your lumber to length. Use the cut list from your plans. A 72×36 inch bed needs long side boards, short end boards, and corner posts.
    2. Build the inner frame. Assemble your 2x4s into a rectangular frame using deck screws. This frame gives the walls something solid to attach to.
    3. Attach the outer pickets. Secure cedar pickets to the inner frame with 2.5 inch deck screws, keeping spacing even. Mitered corners go on last.
    4. Square the frame. Measure diagonally from corner to corner. Both measurements should match. Adjust before the screws set.
    5. Treat or finish the wood. A coat of outdoor wood sealant extends the life of your planter significantly, especially in wet climates.
    6. Fill and plant. A good soil mix for raised beds is 60% topsoil, 30% compost, and 10% perlite for drainage.

    Stat callout: You can build a 72×36 inch raised bed for less than one-third the cost of a comparable store-bought version.

    Pro Tip: Use pressure-treated lumber for ground-contact parts or any sections that will sit directly on wet soil. For growing edibles, choose lumber rated for contact with food-growing environments. Explore more DIY woodworking project alternatives and find detailed build guides on the DIY blog.

    Planters are just one way DIY projects enhance your landscape; let’s look at practical indoor solutions.

    Hall tree and closet shelving: Practical indoor storage projects

    Indoor storage projects pay off every single day. A well-built hall tree turns a chaotic entryway into a functional landing zone. Custom closet shelving eliminates wasted vertical space that stock systems never quite solve.

    Man assembling wooden hall tree indoor

    A simple lumber hall tree uses standard 2x lumber and costs around $40 in materials. The build relies on pocket hole joinery to connect legs and aprons (the horizontal support pieces) cleanly and without visible hardware. Self-tapping screws secure the seat and top panel. The freestanding design means no wall anchoring, so you can reposition it as your needs change.

    Freestanding closet shelving uses 2×4 legs with 1×4 sides and shelf boards. The key detail is screwing shelves to legs every 3 feet to prevent sag under heavy loads. A running cost of $15 to $20 per foot makes this dramatically cheaper than store systems and far more customizable. You choose the height, depth, and number of shelves.

    Key benefits of both builds:

    • Fully customizable to fit your exact space and storage needs
    • No wall attachment required, which simplifies installation and avoids drywall patching later
    • Beginner-friendly joinery that requires only a drill and pocket hole jig
    • Reusable design you can disassemble and move to a new home

    “Freestanding designs simplify installation and let you rearrange with ease.”

    Feature Hall tree Closet shelving
    Approximate cost ~$40 $15 to $20 per foot
    Skill level Beginner Beginner
    Space needed Small entryway Closet or open room
    Versatility Entryway, mudroom Any room, fully scalable
    Wall attachment Not required Not required
    Primary tools Drill, pocket hole jig Drill, saw, level

    Storage isn’t the only area DIY can help; home repairs and maintenance are equally rewarding and practical for homeowners. Visit our guide on essential household repairs and browse household repair checklists to stay organized across all your upcoming projects.

    Easy home repairs: Driveway cracks, squeaky floors, and kitchen upgrades

    Maintenance-driven DIY projects are where homeowners find the biggest hidden savings. A cracked driveway ignored for two winters can turn into a resurfacing job that costs thousands. A squeaky floor left untreated loosens over time and damages subfloor edges. The effort to fix these early is small. The cost to fix them late is not.

    Driveway crack repair follows five clear steps based on proven repair methods:

    1. Clean out all debris and loose material from the crack using a wire brush and compressed air.
    2. For cracks deeper than half an inch, press in a backer rod to reduce the volume you need to fill and improve adhesion.
    3. Apply self-leveling filler for horizontal cracks or non-sag filler for vertical or angled surfaces.
    4. Sprinkle dry sand lightly over the wet filler to improve traction and blend the appearance.
    5. Allow full cure time (usually 24 to 48 hours) before driving over the repaired area.

    Squeaky floor repair is one of those fixes that feels almost magical. You locate the joist (the structural beam under the floor) using a finder bit, then drive special snapping screws through the flooring into the joist using a repair kit jig. The screw head snaps off below the surface, leaving a tiny hole. Fill it with a matching color crayon or wood filler for a nearly invisible repair.

    Kitchen upgrades don’t need to be expensive. Annual floor polishing prevents hardwood from going dull and protects the finish between full refinishing jobs. Installing open kitchen shelves on unused wall or corner space adds both function and a clean visual upgrade for under $50 in most cases.

    Pro Tip: Always predrill holes before driving screws near wood edges to prevent splitting, and check level every few steps on any shelf or storage build. A crooked shelf looks amateur and stresses the fasteners unevenly.

    Overlooked repairs and upgrades with big impact:

    • Tighten all door hinges and cabinet hardware throughout the house (takes 20 minutes, costs nothing)
    • Recaulk around tubs, sinks, and windows to prevent moisture damage
    • Replace worn weatherstripping on exterior doors to cut heating and cooling costs
    • Touch up baseboards and trim with leftover paint for a fresh, polished look

    You can significantly cut long-term expenses by preventing home repair costs before they compound into major problems.

    Project Key tools needed Estimated cost Time required
    Driveway crack repair Wire brush, caulk gun $20 to $50 1 to 2 hours
    Squeaky floor fix Repair jig, drill $20 to $30 1 to 3 hours
    Floor polishing Applicator pad, polish $30 to $50 2 to 4 hours
    Open kitchen shelves Drill, level, stud finder $30 to $80 2 to 4 hours

    Now that you’ve seen repairs and storage upgrades, here’s a summarizing comparison to help you select the best project based on your specific needs.

    DIY project comparison: Which project suits your home best?

    Choosing between projects gets easier when you see them side by side. Beginner woodworking projects like planters, hall trees, and shelving rely on the same core skills: pocket holes, self-tapping screws, and cedar or pressure-treated lumber for outdoor durability. Once you learn these fundamentals on one project, the next one takes half the time.

    Project Cost Skill level Impact Best for
    Raised bed or planter $40 to $80 Beginner High Outdoor space, curb appeal
    Hall tree ~$40 Beginner High Entryway, mudroom
    Closet shelving $15 to $20/ft Beginner High Any room, storage
    Driveway crack repair $20 to $50 Easy Medium Driveways, walkways
    Squeaky floor fix $20 to $30 Easy Medium Any room with hardwood
    Kitchen shelf install $30 to $80 Beginner Medium Kitchens, small spaces

    Pro tips summary for each project:

    • Planters and raised beds: Use cedar or pressure-treated lumber, predrill all screws, and square the frame before it dries.
    • Hall tree: A pocket hole jig makes the difference between a wobbly build and a solid one.
    • Closet shelving: Attach shelves to legs every 3 feet. More supports mean more weight capacity.
    • Driveway cracks: Backer rod is the detail most DIYers skip, and it’s the one that makes the repair last.
    • Squeaky floors: Snap-off screws are the cleanest fix available without pulling up the floor.

    Explore how DIY guides work on Workbench Guide to see how step-by-step instructions and maintenance tracking help you move from project to project with confidence.

    Having compared major options, it’s time to hear the expert perspective on what often gets overlooked in DIY project selection.

    The overlooked value of practical DIY projects

    Here’s a contrarian take that most DIY content won’t tell you: the most photogenic projects are rarely the most valuable ones.

    Social media rewards showpiece builds, elaborate pergolas, custom kitchen islands, and statement furniture pieces that look stunning in a photo. But in real life, those projects deliver diminishing returns. They take months, cost far more than expected, and often sit unfinished while the practical problems in your home continue to compound.

    The most valuable projects are almost always the boring-looking ones. Tightening a hinge before a door frame splits. Sealing a driveway crack before freeze-thaw cycles turn it into a trench. Building a simple hall tree that stops your entryway from being chaos every morning.

    Quick wins under one hour deliver something showpiece builds almost never do: immediate, lasting, daily improvement. And the labor savings are real. At 40 to 80% savings over professional costs on common tasks, a consistent habit of small DIY fixes can save thousands per year.

    “A simple repair or storage build can save you thousands and boost your skills overnight.”

    There’s also a skill compounding effect that most homeowners miss. Each small project teaches you something. Your first time using a drill teaches you about torque settings. Your first shelf build teaches you about level and stud placement. By the time you’re ready for a bigger project, you’re not starting from zero. You’re building on a real foundation of experience.

    Pro Tip: Focus on skill-building projects first, not aesthetic ones. A project that teaches you pocket hole joinery, how to square a frame, or how to use a level pays dividends on every project that follows. Your emergency home repairs guide will be a lot less stressful when you’ve already practiced the core techniques on low-stakes builds.

    Transform your home with proven DIY guides and checklists

    Ready to put this into action? Workbench Guide makes it easy to move from inspiration to a completed project with a clear system behind you. Use the home maintenance checklist to identify which repairs and upgrades deserve your attention first, then follow step-by-step guides to tackle each one safely and within budget. Build a habit of preventative home maintenance so small issues never become expensive emergencies. Browse the full library of DIY guides and checklists to find the exact project resources you need, from first-time builds to experienced repairs. Your home deserves consistent care, and the right tools and guidance make all the difference.

    Frequently asked questions

    Which DIY projects are best for beginners?

    Quick wins like decluttering, polishing floors, tightening hinges, and building simple planters or freestanding shelves are ideal starting points because they require minimal tools and produce visible, satisfying results quickly.

    How much money can I save doing DIY home repairs?

    DIY projects typically save 40 to 80 percent over professional labor costs, especially on painting, patching, and minor structural repairs where labor is the biggest line item.

    What tools are needed for basic woodworking DIY projects?

    A drill, circular saw, screwdrivers, and pocket hole jig with screws cover the vast majority of beginner builds including planters, hall trees, and closet shelving systems.

    Are permits needed for DIY projects?

    Most minor repairs, storage builds, and cosmetic upgrades don’t require permits; only structural changes, electrical work, or plumbing modifications typically require a permit from your local authority.

    What are overlooked maintenance projects that make a big impact?

    Polishing hardwood floors annually, tightening cabinet hinges, recaulking wet areas, and repairing driveway cracks each produce lasting home improvements for well under $150 and take only a few hours.

  • Why Annual HVAC Service Prevents Repairs and Saves Money

    Why Annual HVAC Service Prevents Repairs and Saves Money

    Skipping your annual HVAC service feels harmless until your system dies on the hottest day of August and you’re staring down a $4,000 emergency repair bill. Most homeowners treat their heating and cooling system like a smoke detector: ignore it until something goes wrong. But HVAC maintenance reduces breakdowns by up to 95% and delivers a 545% return on investment, according to industry studies. This guide explains exactly why annual servicing matters, what it involves, and how it saves you serious money over the life of your system.

    Table of Contents

    Key Takeaways

    Point Details
    Annual service prevents breakdowns Routine HVAC maintenance reduces the risk of system failures by up to 95%.
    Huge financial returns Investing in annual HVAC care delivers up to 545% ROI compared to reactive repairs.
    DIY tasks save money Simple steps like filter changes and coil cleaning boost efficiency and avoid costly emergencies.
    Deferred maintenance is expensive Putting off HVAC care multiplies repair costs and increases homeowner stress.
    Work smarter, not harder Checklists and schedules make annual maintenance easy, keeping your home comfortable year-round.

    What happens when you skip annual HVAC servicing

    The biggest misconception in home maintenance is that “if it’s still running, it’s fine.” Your HVAC system can keep pumping air while quietly developing problems that compound month after month. A dirty filter forces the blower motor to work harder. A refrigerant leak causes the compressor to run longer cycles. Small inefficiencies stack up until one day the whole system gives out.

    The financial consequences of that neglect are steep. Deferred maintenance costs multiply every dollar of ignored upkeep into roughly four dollars of capital repair or replacement cost. That’s not a rounding error. That’s the difference between a $150 tune-up and a $600 compressor repair. Or between a $200 seasonal check and a $8,000 system replacement you weren’t budgeting for.

    Beyond the repair bills, skipping annual service hits you in three other ways:

    • Higher energy bills every month. A neglected system runs longer to reach your thermostat setting, burning more electricity or gas. You pay the penalty every billing cycle without realizing the cause.
    • More frequent breakdowns. Systems without regular check-ups fail at dramatically higher rates. Emergency service calls are expensive, often require waiting days for a technician, and always seem to happen during extreme weather when demand is highest.
    • Shorter system lifespan. A well-maintained HVAC unit can last 15 to 20 years. A neglected one might give out in 10 years or less, forcing a replacement that costs anywhere from $5,000 to $12,000.

    The stress factor is real too. There’s nothing like a broken furnace in January to turn a weekend into a family emergency. Consistent annual care, as covered in our guide to preventing costly repairs, is the simplest way to protect yourself from those situations entirely.

    “Deferred maintenance doesn’t save money. It just moves the cost forward while adding interest.”

    The proven ROI of regular HVAC maintenance

    Let’s talk numbers, because this is where the case for annual servicing becomes undeniable.

    Industry research consistently shows that regular maintenance reduces HVAC breakdowns by up to 95% and generates a 545% return on investment. That ROI figure accounts for avoided repairs, extended system life, and energy savings all combined. In practical terms, a homeowner who spends $150 to $250 per year on a maintenance contract can realistically save $1,000 or more over a five-year period compared to a neighbor who skips it entirely.

    Here’s a breakdown of the core financial benefits:

    Benefit Without maintenance With annual service
    Breakdown frequency High, unpredictable Reduced by up to 95%
    Energy costs Up to 30% higher Optimized for efficiency
    System lifespan 10 to 12 years average 15 to 20 years
    Emergency repair risk Very likely over 5 years Minimal
    5-year cost estimate $3,000 to $6,000+ $750 to $1,250

    Energy savings alone justify the annual investment. A well-tuned system runs more efficiently, which translates to real reductions in your monthly utility bills. Tune-ups deliver measurable energy savings of 10 to 30%, depending on how long service has been deferred. If your current energy bill is $200 a month during peak season, that’s $20 to $60 back in your pocket every month after a proper tune-up. Over a full summer or winter season, those savings can easily cover the cost of the maintenance appointment itself.

    Pro Tip: Schedule your annual HVAC service in spring (for cooling season) or fall (for heating season), before peak demand hits. You’ll get faster appointment times, often better pricing, and your system will be ready when you need it most.

    For more detail on the full financial picture of keeping up with home systems, our HVAC maintenance guide and our breakdown of appliance maintenance savings are both worth bookmarking.

    What annual HVAC service includes: homeowner checklist

    Knowing why maintenance matters is one thing. Knowing what to actually do is what makes the difference. Annual HVAC service is a combination of DIY tasks you can handle yourself and professional checks that require a licensed technician. Here’s how a complete annual service breaks down:

    1. Replace or clean air filters. This is the single most impactful DIY task. A clogged filter restricts airflow, forces your system to work harder, and can damage internal components. Replace 1-inch filters every 1 to 3 months. Thicker media filters may last 6 to 12 months. Check the label.

    2. Clean the outdoor condenser unit. Turn off power to the unit, then gently rinse the fins with a garden hose to remove dirt, grass clippings, and debris. Keep at least two feet of clearance around the unit at all times. Restricted airflow around the condenser is one of the most common causes of summertime system failure.

    3. Inspect and clean evaporator coils (pro task). The evaporator coil sits inside your air handler and absorbs heat from the air. Dirty coils reduce cooling capacity and efficiency. A technician will clean these coils as part of a standard tune-up. Post-cleaning airflow increases by 10 to 46%, which is a massive boost in performance from one service visit.

    4. Check refrigerant levels (pro task). Low refrigerant means your system can’t cool effectively and the compressor runs hot, leading to premature failure. Only a licensed technician can legally handle refrigerant, so this is one to leave to the pros.

    5. Test and calibrate the thermostat. Make sure the thermostat is reading temperatures accurately and cycling the system on and off correctly. Smart thermostats should be checked for software updates. An inaccurate thermostat can cause your system to run longer than necessary, wasting energy.

    6. Inspect electrical connections and capacitors (pro task). Loose wiring and failing capacitors are leading causes of sudden breakdowns. A technician will tighten connections and test capacitors during a tune-up, catching problems before they become failures.

    7. Clear the condensate drain line. The drain line removes moisture pulled from the air during cooling. A clogged line can cause water damage, mold growth, and system shutdowns. Flush it with a cup of diluted vinegar once a year.

    8. Lubricate moving parts. Blower motors and fan bearings need periodic lubrication to reduce friction and extend component life. This is often part of a professional tune-up but some systems have serviceable ports you can access yourself.

    Pro Tip: Keep a simple maintenance log with dates, filter brands, and any issues noticed. When a technician visits, this history helps them spot trends and catch problems earlier. You can use the home maintenance checklists on Workbench Guide to track this automatically.

    A full professional HVAC tune-up typically costs between $75 and $200, depending on your region and what’s included. That’s a bargain compared to what comes next if you skip it.

    Annual service vs. emergency repairs: cost, time, and stress compared

    To really understand the value of annual servicing, it helps to see it measured directly against the alternative: waiting for something to break.

    Factor Annual service Emergency repair
    Average cost $75 to $200 $300 to $2,500+
    Wait time Scheduled at your convenience 1 to 5 days during peak season
    Disruption to home Minimal, planned Significant, unplanned
    Risk of full system failure Very low Moderate to high
    Energy bills between visits Optimized Increasing unnoticed
    Peace of mind High Reactive and stressful

    Infographic comparing annual HVAC service and emergency repairs

    The cost difference alone is stark. But the time and stress columns matter just as much for most families. An emergency repair during a heat wave means days without air conditioning, sometimes with children or elderly family members in the home. It means canceling plans, scrambling for portable fans, and dealing with contractors who are overbooked and charging premium rates.

    Family considering HVAC repair costs at home

    Annual service, by contrast, fits into your schedule on your terms. You pick the appointment time during a slower season, the tech is in and out in 60 to 90 minutes, and you move on with your day knowing your system is ready for the months ahead.

    Here’s what the data says about the efficiency payoff from consistent maintenance:

    • Energy savings of 10 to 30% from regular tune-ups compared to neglected systems
    • Airflow improvements of 10 to 46% after professional cleaning, meaning better comfort in every room
    • Reduction in carbon output as an efficient system burns less fuel to do the same job

    Proactive care is also a major factor in home resale value. Buyers and inspectors look at HVAC maintenance records. A well-documented service history signals that the home has been cared for. See our yearly maintenance schedule for a practical way to document and track every task, or check out our maintenance vs repair costs breakdown for a deeper look at what different service levels actually cost homeowners.

    The real reason annual HVAC service matters most

    Here’s something most guides won’t tell you: the numbers are compelling, but they’re not actually why annual HVAC service matters most to homeowners.

    The real reason is control. Your home is probably your largest financial asset. Most of what threatens that asset is invisible until it’s expensive. Roof leaks, foundation cracks, electrical problems, and HVAC failures rarely announce themselves in advance. They just show up as crises.

    Annual HVAC service is one of the few maintenance habits that gives you a window into your system while you still have time to act cheaply. That deferred maintenance multiplier, the one that turns every $1 into $4, works in reverse when you stay ahead of it. You’re not just saving money. You’re choosing not to be blindsided.

    There’s also something underrated about the confidence that comes from knowing your home is handled. Homeowners who stay current on maintenance sleep better. They don’t worry about weird noises from the air handler. They don’t dread the first hot day of summer because they already know the system passed its spring inspection. That peace of mind has real value even if it doesn’t show up in a spreadsheet.

    We believe the goal of home maintenance isn’t just to avoid repairs. It’s to feel like you’re in charge of your home instead of the other way around. Explore more on that mindset with our guide to preventative maintenance strategies.

    The homeowners who get the most out of annual servicing aren’t the ones who are most worried about their systems. They’re the ones who have built a simple, repeatable routine and stuck to it. That habit, more than any single repair or tune-up, is what protects a home over decades.

    Take the next step: Make annual maintenance easy

    Ready to protect your investment and save on repairs? Workbench Guide makes it straightforward to stay on top of every annual task, including your HVAC service. Our maintenance checklist walks you through what to do and when, so nothing slips through the cracks. If you want a broader strategy for protecting your home systems over time, our preventative maintenance guide covers the full picture. And when you’re ready to organize your entire home care routine in one place, the Workbench Guide platform gives you the reminders, guides, and checklists to make confident home ownership feel manageable, not overwhelming.

    Frequently asked questions

    How often should I service my HVAC system?

    Industry experts recommend servicing your HVAC annually to reduce breakdowns by up to 95% and keep the system running at peak efficiency. Most homeowners schedule one visit in spring for cooling season and one in fall for heating season.

    Can I do HVAC maintenance myself or do I need a pro?

    You can handle filter changes, condenser cleaning, and drain line flushing yourself, but tasks like refrigerant checks and electrical inspections need a licensed technician. A professional tune-up also restores post-cleaning airflow by 10 to 46%, which DIY cleaning alone typically won’t achieve.

    How much does annual HVAC maintenance save over emergency repairs?

    Skipping maintenance can quadruple your costs over time, while consistent servicing delivers a 545% return on investment when you account for avoided repairs, energy savings, and extended system life. A $150 annual tune-up can easily prevent a $600 to $2,500 emergency repair.

    What tasks should every homeowner do annually on their HVAC?

    Replace or inspect air filters, clean the outdoor condenser unit, flush the condensate drain line, and schedule a professional tune-up that covers coils, refrigerant, and electrical components. These steps preserve airflow efficiency and can cut energy bills by up to 30% compared to a neglected system.

  • Winterizing Your Home: Simple Steps to Prevent Costly Repairs

    Winterizing Your Home: Simple Steps to Prevent Costly Repairs

    One missed step in fall can turn into a $10,000 repair bill by February. A frozen pipe that bursts, a clogged gutter that collapses under ice, or a furnace that quits on the coldest night of the year are not freak accidents. They are the predictable results of skipped seasonal maintenance. Burst pipes alone cause billions in insurance claims every year, and most of those losses are entirely preventable. This guide gives you a clear, practical winterizing checklist built around the tasks that actually protect your home, your budget, and your peace of mind.

    Table of Contents

    Key Takeaways

    Point Details
    Service your heating system Annual inspections and filter changes improve efficiency and safety for winter.
    Seal drafts and leaks Stopping drafts around windows, doors, and pipes keeps more heat in and reduces bills.
    Protect from water damage Clearing gutters and insulating attics helps prevent costly leaks, ice dams, and roof problems.
    Insulate pipes to prevent bursts Pipe insulation in vulnerable areas is one of the easiest ways to prevent flooding and repairs.
    Prepare for emergencies Have a winter kit and emergency plan to keep your family safe and your home protected.

    Heating system: Inspection, service, and efficiency

    With the high costs of winter mishaps in view, let’s start with your home’s heating. It is the engine that keeps everything safe and comfortable when temperatures plunge.

    Your furnace or boiler works harder in winter than any other season. If it has not been serviced recently, it may be running inefficiently or on the verge of a breakdown. Inspect and service your furnace or heating system each fall, including changing the filter, to make sure it operates safely and efficiently. A dirty filter forces the system to work harder, raises your utility bills, and degrades indoor air quality for your whole family.

    Here is how to work through your heating system prep:

    1. Schedule a professional furnace tune-up in September or October before demand picks up and HVAC companies get booked solid.
    2. Replace furnace filters with a fresh one rated for your system. Check the filter again in January if anyone in your home has allergies or if you run the heat constantly.
    3. Set your programmable thermostat to 68°F when people are home and awake. Drop it a few degrees overnight or during work hours to save on heating costs without sacrificing comfort.
    4. Reverse your ceiling fans to run clockwise at low speed. This pushes warm air trapped near the ceiling back down into the living space.
    5. Check vents and registers in every room to make sure furniture or rugs are not blocking airflow.

    “A well-maintained furnace can last 15 to 20 years. Skipping one annual service can shave years off its life and spike your monthly energy bill by up to 15 percent.”

    If you notice unusual sounds, short cycling, or uneven heat, get a diagnosis before the first cold snap. You can find repair guidance for furnaces to understand what common problems look like and when to call a professional.

    Pro Tip: Slide a white piece of paper over your return air vent. If it sticks, you have good suction and the system is drawing air properly. If it falls, the filter may be blocked or there may be a duct issue worth investigating.

    Stopping heat loss: Sealing drafts, windows, and doors

    Once your heating system is ready, it is time to make sure all that warm air stays inside where it belongs. Air leaks are silent money drains that work against every dollar you spend on heating.

    Seal drafts around windows, doors, outlets, and pipes using caulk, weatherstripping, or plastic film window kits to prevent heat loss. These are inexpensive fixes that pay for themselves quickly. In fact, the energy checklist savings from sealing drafts can cut your heating costs by up to 20 percent over a winter season.

    Common spots where drafts hide include:

    • Window frames and sills, especially in older homes where caulk has cracked or shrunk
    • Door frames and thresholds, which often develop gaps as houses settle over time
    • Electrical outlets and switch plates on exterior walls, which can feel noticeably cold to the touch
    • Pipe penetrations where plumbing or gas lines enter the house through exterior walls
    • Attic hatch covers, which are frequently overlooked but can leak a significant amount of heat

    The fix for each location varies slightly. Use silicone or latex caulk for gaps around window and door frames. Apply weatherstripping tape or door sweeps to the edges of doors that show daylight around them. For outlets on exterior walls, pick up foam outlet gaskets at any hardware store. They cost less than a dollar each and take about two minutes to install.

    For windows that are especially drafty or single-pane, a shrink-film window insulation kit adds a temporary second layer of air space that noticeably reduces heat loss. It is not a permanent solution, but it gets you through the season without replacing windows.

    Pro Tip: On a windy day, hold a lit incense stick near suspected draft areas. Watch the smoke. If it bends or wavers, you have found a leak worth sealing. This simple test costs nothing and takes minutes.

    Consistent preventative home maintenance like this is how experienced homeowners keep utility bills manageable year after year without major renovations.

    Preventing water damage: Gutters, roofs, and insulation

    Now that your home is snug and sealed, let’s focus on simple steps to protect it from costly water damage coming from above.

    Check and clean gutters and downspouts before the first freeze to prevent ice dams and the water damage they cause. Clogged gutters trap standing water that freezes into ice, which can force its way under shingles, damage fascia boards, and overflow to damage your foundation.

    Follow this roof and gutter checklist:

    1. Scoop out leaves, twigs, and debris from gutters using a gutter scoop or your gloved hands, then flush with a garden hose to verify water flows freely.
    2. Check downspouts to make sure they direct water at least three to four feet away from your foundation. Extension pieces are inexpensive and easy to snap on.
    3. Inspect your roof for missing, cracked, or curling shingles that could let water in during winter storms. Also inspect the roof for damage and trim any overhanging branches that could snap under snow and ice.
    4. Check attic insulation and ventilation to make sure heat is not escaping through the roof deck, which creates the warm spots that form ice dams.
    Problem Cause Prevention
    Ice dams Warm roof deck melting snow unevenly Add attic insulation, improve ventilation
    Gutter overflow Blocked gutters trapping water Clean gutters every fall
    Water in basement Downspouts directing water toward foundation Extend downspouts away from house
    Roof leaks Damaged or missing shingles Annual roof inspection before winter

    “Ice dams are almost always an insulation problem, not a roofing problem. Adding R-value to your attic often costs less than one water damage claim.”

    You can review the full list of seasonal maintenance steps to stay ahead of similar issues throughout the year.

    Pipe and plumbing safeguards

    Water damage prevention does not stop at the roof. Your pipes need special attention as temperatures drop because even a small freeze can cause a catastrophic failure.

    Insulate exposed pipes, especially in unheated areas like attics, crawl spaces, garages, and along exterior walls, before cold weather arrives. Also disconnect and drain outdoor hoses and shut off the supply valves to exterior faucets. Water left in an outdoor hose or faucet line can freeze and crack the pipe inside the wall.

    Homeowner insulating pipes in crawlspace

    During extreme cold snaps, let faucets drip slowly and open cabinet doors under sinks on exterior walls to allow warm room air to circulate around the pipes. Even a trickle of moving water dramatically reduces the risk of freezing.

    Here is a quick comparison of common pipe insulation options:

    Insulation type Best for Cost DIY friendly
    Foam pipe sleeves Straight pipe runs in basements Low Yes
    Fiberglass wrap Irregular shapes and angles Low to medium Yes
    Heat tape (electric) High-risk pipes in unheated spaces Medium Yes, with care
    Spray foam Gaps and penetrations near pipes Low Yes

    Key plumbing tasks before winter hits:

    • Locate your main water shutoff valve now, before an emergency makes you search for it in a panic
    • Drain and store outdoor hoses in a garage or shed
    • Shut off the interior supply valves for outdoor spigots if your home has them
    • Insulate hot water pipes near exterior walls to reduce heat loss and keep hot water arriving faster at your faucets

    Pro Tip: Take a photo of where your main shutoff valve is located and save it in your phone. When a pipe bursts, every second counts and you will not have time to search.

    Taking these steps now is how you prevent costly repairs that catch unprepared homeowners completely off guard every January.

    Fireplace, detectors, and emergency readiness

    Your home may already feel protected, but emergencies can strike at any time. Here is how to make sure safety is built into your winter prep from the start.

    Have your chimney inspected and cleaned if you use a fireplace or wood stove, and test your smoke and carbon monoxide detectors while replacing batteries. Creosote, a flammable byproduct of burning wood, builds up in chimneys over time and is one of the leading causes of house fires in winter. An annual inspection by a certified chimney sweep is not optional if you plan to burn.

    Follow these safety steps:

    1. Schedule chimney cleaning before your first fire of the season. Look for a certified chimney sweep through the Chimney Safety Institute of America.
    2. Test every smoke detector in your home. Press the test button and listen for a loud beep. Replace any unit that does not respond or is more than 10 years old.
    3. Test carbon monoxide detectors the same way. CO (carbon monoxide) is an odorless, colorless gas produced by gas appliances and fireplaces. You cannot detect it without a working CO alarm.
    4. Stock your emergency kit with supplies to last at least 72 hours without power or heat.

    Prepare an emergency kit that includes non-perishable food, bottled water, extra batteries, flashlights, warm blankets, a battery-powered or hand-crank radio, and any prescription medications. Know exactly where your water shutoff valve is located in case a pipe bursts and you need to cut the water quickly.

    Your emergency winter kit should include:

    • Three days of non-perishable food per person in your household
    • One gallon of water per person per day
    • Extra batteries in sizes that match your flashlights, radios, and remote controls
    • Warm blankets or sleeping bags rated for cold temperatures
    • First-aid kit with bandages, pain relievers, and a thermometer
    • Copies of important documents in a waterproof bag

    Pro Tip: Walk every adult in your household to the main water shutoff valve. Practice turning it off together. This 60-second exercise can prevent thousands of dollars in damage if a pipe fails overnight.

    If something goes wrong despite your best prep work, bookmark emergency repair steps so you know exactly what to do first.

    Why most winterizing checklists fail: Overlooked details that cost you

    Having covered all the essential tasks, it is still entirely possible to follow a generic checklist and leave your home vulnerable. Here is what truly experienced homeowners do differently.

    Generic checklists are written for an average house that does not exist. Your home has its own quirks. A 1950s ranch with original single-pane windows needs a completely different approach than a 2005 colonial with updated insulation. An older home in a mild climate needs different prioritization than a newer home in a region that sees regular below-zero temperatures. Applying a one-size-fits-all list without adapting it to your actual house means you will spend time on low-priority tasks while higher-risk areas go unaddressed.

    One group that checklists rarely address adequately is older adults living alone. Older adults are less sensitive to cold, which means they may not notice when indoor temperatures have dropped to dangerous levels. If you have a parent or elderly neighbor, keep a visible indoor thermometer in the main living area and check on them frequently during cold snaps. Set the thermostat no lower than 68°F regardless of the energy savings logic, because hypothermia can develop indoors.

    Another overlooked detail is the sequence of tasks. Most checklists treat all items as equal, but experienced homeowners know to prioritize tasks in order of potential damage cost. Pipe insulation and furnace service come before weatherstripping because a burst pipe or a furnace failure in January causes far more destruction than a drafty door. Thinking through your checklist from a risk-and-consequence angle changes how you spend your time and money.

    Finally, there is the follow-through problem. Most homeowners do a great job in November and then forget to recheck filters, test detectors again in January, or monitor gutters after a heavy rain. The best approach is to build your checklist into a recurring calendar reminder rather than treating it as a one-time event. A year-round maintenance checklist helps you stay on track across all seasons, not just winter.

    Winter home prep made easy with expert checklists

    If you are ready to get proactive with home care, Workbench Guide is built exactly for this. You get access to printable checklists organized by season and task type, so nothing gets missed and you always know what to tackle next. Whether you prefer a printed sheet on the fridge or a digital checklist on your phone, having it organized in one place removes the guesswork entirely. Pair the checklists with step-by-step repair guides and you will have everything you need to handle most winterizing tasks yourself or make smarter decisions when you bring in a contractor. Workbench Guide makes seasonal home care straightforward, repeatable, and far less stressful.

    Frequently asked questions

    What temperature should I keep my thermostat at in winter?

    Keep your thermostat at 68°F when you are home and awake, and lower it slightly when you are away or sleeping to save on heating costs without risking frozen pipes.

    How do I stop pipes from freezing during extreme cold?

    Let faucets drip slightly and open cabinet doors under sinks to allow warm room air to circulate around pipes near exterior walls during severe cold snaps.

    What should I include in a winter emergency kit for my home?

    Pack non-perishables, bottled water, batteries, blankets, flashlights, and a first-aid kit; also know your water shutoff valve location before an emergency strikes.

    How often should I clean my gutters to prepare for winter?

    Clean your gutters and downspouts at least once in late fall before the first freeze to prevent ice dam formation and the water damage that follows.

    Why is attic insulation and ventilation important in winter?

    Proper insulation and ventilation stop warm air from escaping through the roof deck, which reduces ice dam formation and helps maintain a consistent, energy-efficient indoor temperature all winter long.

  • What is a home audit? A homeowner’s guide to proactive care

    What is a home audit? A homeowner’s guide to proactive care

    Most homeowners treat their house like a car they only take to the shop after the engine warning light comes on. You wait for the leak, the crack, or the sudden spike in your utility bill before you do anything about it. But the truth is, by the time you notice a problem, it has usually been growing for months or even years. A home audit flips that script entirely. It is a proactive look at your property before things go wrong, and it can save you thousands of dollars, protect your family’s comfort, and keep your home’s value strong.

    Table of Contents

    Key Takeaways

    Point Details
    Early issue detection Home audits reveal small problems before they become major repairs.
    DIY or professional You can conduct basic audits yourself or hire a certified pro for deeper analysis.
    Regular audits save money Annual or seasonal home audits cut long-term costs and protect property value.
    Checklists are essential Using structured checklists makes sure you don’t overlook hidden problems.

    What is a home audit?

    A home audit is a structured assessment of your property’s overall condition. Instead of waiting for something to break, you go room by room and system by system to check everything while it still looks fine on the surface. Think of it as a physical for your house.

    The core elements of a home audit include:

    • Checking for water leaks at visible pipes, under sinks, and around appliances
    • Inspecting insulation in the attic and around windows and doors
    • Reviewing HVAC filters and ductwork for buildup or damage
    • Looking for early signs of wear on the roof, siding, foundation, and flooring
    • Testing smoke and carbon monoxide detectors for proper function

    The difference between a home audit and your usual cleaning or weekend repairs is intent. Repairs are reactive. Cleaning is routine. A home audit is deliberate investigation. You are actively hunting for issues that have not caused a problem yet but will.

    “DIY home audits use visual checks and checklists for leaks, insulation, and filters, while professional audits provide quantified data with specialized equipment.”

    The financial case for doing this regularly is hard to ignore. A minor roof flashing issue caught during an audit might cost $200 to fix. Left alone for two years, the same problem can create water damage, mold, and structural rot that runs $8,000 or more. Using a solid home maintenance checklist alongside your audit keeps every check organized and nothing falls through the cracks.

    Benefit DIY Audit Professional Audit
    Cost Free to low cost $300 to $600 average
    Time required 2 to 4 hours 3 to 5 hours
    Tools needed Flashlight, checklist, camera Blower door, infrared camera
    Issues found Visible problems Visible and hidden problems
    Report provided Your own notes Detailed written report

    Home audits are not just for older homes either. New construction can have insulation gaps, improper grading, and poorly sealed windows from day one. Every home benefits from a regular, honest look.

    DIY vs. professional home audits: What’s the difference?

    Now that you know what a home audit is, it is important to understand your options for doing one. Both approaches have real value, and many homeowners use a combination of both.

    A DIY audit relies on your own eyes and simple, affordable tools. You walk through your home with a flashlight and a checklist, looking for anything that seems off. You check for drafts near windows, look for water stains on ceilings, feel for soft spots in flooring, and press your hand against exterior walls to feel for temperature inconsistencies. The DOE confirms that DIY visual checks on insulation and filters are effective starting points for identifying energy inefficiencies and maintenance needs.

    A professional audit goes several layers deeper. Certified auditors use tools like blower door tests, which depressurize your home to find air leaks that are invisible to the naked eye. Infrared cameras detect heat loss through walls and attic floors. Combustion analyzers check your furnace and water heater for safety. Professionals certified through BPI or RESNET provide a full written report with priority rankings and estimated costs for each issue found.

    When DIY is enough:

    • Annual check on a newer home with no history of major issues
    • Post-storm inspection for visible damage
    • Seasonal checks before winter or summer

    When you need a professional:

    • Persistent high energy bills with no obvious cause
    • Suspected hidden moisture or mold problems
    • Before a home sale or major renovation
    • Older homes with unknown insulation or ductwork history

    You can explore structured guides and checklists to make your DIY audits more thorough, even if you still bring in a pro every few years for the deeper assessment.

    Pro Tip: Even if you are confident in your DIY skills, schedule a professional energy audit at least every three to five years. The blower door test alone can reveal air leaks responsible for 20 to 30 percent of heating and cooling costs in the average home.

    What does a home audit check? Key systems and areas reviewed

    To know what you will actually examine, let’s break down each part of your home that a thorough audit reviews. A good audit does not skip any system, because issues in one area often affect others.

    1. Roof and attic. Look for missing or curled shingles, soft spots from the attic side, proper ventilation, and insulation depth. Dark stains on attic wood indicate moisture intrusion.
    2. Foundation and basement. Check for cracks wider than a quarter inch, water staining, efflorescence (white mineral deposits), and any signs of settling or shifting.
    3. Plumbing. Run every faucet and check for slow drains. Inspect under sinks for moisture, soft cabinet floors, or discoloration. Look at water heater condition and age.
    4. HVAC system. Check filter condition, inspect visible ductwork for tape failures, listen for unusual sounds, and check that all vents are open and unobstructed.
    5. Insulation. Feel for drafts near outlets on exterior walls. Check attic insulation depth. Look at weatherstripping on all exterior doors and windows.
    6. Windows and doors. Hold a lit candle or incense stick near frames on a windy day to detect drafts. Check glazing compound and caulk for cracks or shrinkage.
    7. Electrical. Look for tripping breakers, warm outlet covers, flickering lights, or any smell of burning plastic near panels. Do not open the electrical panel yourself unless you are qualified.
    8. Appliances. Check dryer vent for lint buildup. Confirm refrigerator door seals are tight. Inspect the range hood filter and dishwasher door gasket.
    9. Moisture and mold. Check bathrooms, laundry rooms, and basements. Look for dark spotting, musty odors, or peeling paint that indicates chronic moisture behind walls.

    A professional auditor can use thermal imaging to spot exactly where your insulation and air sealing are failing, even inside walls you cannot see. That is the key difference. A DIY audit tells you what to see. A professional audit tells you what is there even when you cannot see it.

    Auditor scanning wall with thermal camera

    You can dig into specific problems with household repair guides for issues you find, and build a longer term approach using preventative maintenance tips that connect your audit findings to a real action plan.

    Pro Tip: Photograph every issue you find during an audit, even small ones. Create a folder on your phone labeled with the date. When you do your next audit, you can compare photos side by side to see if a crack has grown or a stain has spread. This documentation also matters when selling your home or filing an insurance claim.

    When and how often should you conduct a home audit?

    Understanding what a home audit covers, the next step is knowing when to schedule these checks for the best results.

    Most homes should have a full audit at least once per year. Older homes, homes in harsh climates, and properties with known issues deserve more frequent attention, such as a light check each season. The goal is not to find something wrong every time. The goal is to make sure nothing is wrong.

    Best times to schedule a home audit:

    • Before winter: Check your heating system, insulation, weatherstripping, and roof before cold weather stresses every one of those systems at once
    • After major storms: Wind and hail can crack shingles, shift flashing, and force water into small gaps that did not exist before
    • Before a home sale: A seller’s audit catches problems before a buyer’s inspector does, giving you time to fix items on your terms instead of under pressure
    • After renovations: New construction work can disturb insulation, plumbing, and air sealing in adjacent areas that were not part of the project scope
    • When bills spike unexpectedly: A sudden jump in your gas or electric bill without a clear cause is a strong signal that something in your envelope or mechanical systems has changed

    Key stat: The average emergency home repair costs between $1,000 and $5,000, while most issues caught during regular home audits and inspections cost a fraction of that to address proactively.

    Staying consistent is the hardest part. Most homeowners start with good intentions but skip audits when life gets busy. Setting a recurring calendar reminder for the same weekend every fall takes about 30 seconds and makes the habit stick. A yearly maintenance checklist paired with your audit ensures you never forget the smaller seasonal tasks that keep big repairs away.

    How to get started: Tools, checklists, and practical tips

    Once you know when to audit, it is time to get started with the right tools and a method that actually works.

    Infographic listing home audit steps checklist

    The most common mistake is trying to audit everything at once and getting overwhelmed. Instead, start with one system or one area of the house. Pick the roof and attic on one Saturday, then tackle plumbing the next. Breaking it down makes the process feel manageable and keeps your attention sharp.

    Basic tools for a DIY audit:

    • Flashlight or headlamp for attics, crawl spaces, and under sinks where visibility is poor
    • Notepad and pen or a phone for recording findings and taking photos
    • Screwdriver for checking loose outlet covers, hinges, or vent grilles
    • Work gloves to protect your hands in dusty or rough spaces
    • Moisture meter (optional but useful) for testing wood around windows and plumbing for hidden dampness

    Step-by-step approach for your first audit:

    1. Download or print a structured checklist before you begin
    2. Walk the exterior first and work your way inside
    3. Check the attic and basement, because those two areas reveal the most
    4. Move room by room through the living areas
    5. Test all mechanical systems: HVAC, water heater, appliances
    6. Review your notes, prioritize findings, and schedule fixes

    DIY audits rely on visual checks and structured checklists that guide you through every major system without missing anything. You can find ready-to-use free home audit checklists as well as deeper reference material on the home maintenance blog to support your work.

    Pro Tip: Schedule your next audit the moment you finish your current one. Put a specific date in your phone calendar with a reminder two weeks out. Homeowners who lock in the date immediately are far more likely to actually complete the next audit than those who plan to do it “sometime next fall.”

    One important note on safety: never attempt major electrical, structural, or gas repairs on your own unless you are trained. The purpose of a DIY audit is to identify and document, not to fix everything yourself. Know when a contractor is the right call, and make it.

    A homeowner’s perspective: Why home audits pay off—what most people miss

    Here is something most articles about home maintenance never say directly: the biggest threat to your home is not one catastrophic event. It is the slow, quiet accumulation of small things you were too busy to notice.

    We have seen it over and over. A homeowner spends years maintaining their property and then faces a $12,000 repair because a small attic vent was blocked, moisture built up in the insulation, and rot worked its way into the rafters without a single obvious warning sign. The vent itself would have cost nothing to clear. The audit that would have caught it takes less time than a Saturday afternoon movie.

    What strikes us most is how much homeowners learn about their own house once they start auditing regularly. You start to understand which rooms run cold, which pipes are oldest, and which corner of the basement always gets a little damp after heavy rain. That knowledge is genuinely valuable. It makes you a better homeowner, a smarter buyer if you ever upgrade, and a more informed seller when the time comes.

    The other thing most people miss is the compounding effect of saving money with prevention. Fixing a $50 caulk failure prevents a $3,000 window replacement. Replacing a $15 HVAC filter on schedule keeps a $4,000 compressor running for years longer. These are not dramatic savings. They are consistent, reliable ones that add up to tens of thousands of dollars over the life of homeownership.

    The habit of auditing also shifts your mindset. You stop feeling like things just happen to your home and start feeling like you are actually in charge of it. That confidence is not just psychological. It shows in how you maintain the property, how quickly you respond to small issues, and how well you are prepared when you do need a contractor.

    Get organized: Take the next step with home audits and maintenance

    If you are ready to make home audits part of your maintenance routine, here is an easy way to get started. Workbench Guide was built specifically to help homeowners stay ahead of their home instead of always chasing it.

    Start with the complete home maintenance checklist to map out your yearly schedule and make sure every system gets attention at the right time. When your audit turns up something that needs fixing, the household repair guides walk you through common repairs step by step, so you know exactly what to do and when to call a professional. You can also grab downloadable guides and checklists to keep your audit organized and your records complete. Your home is one of your biggest investments. Workbench Guide helps you protect it.

    Frequently asked questions

    What is the main purpose of a home audit?

    A home audit helps you spot small issues early before they grow into expensive problems, using visual checks and checklists across every key system in your home.

    Is a professional home audit worth it if I do my own inspections?

    Yes. Professional audits offer deeper insights with tools like infrared cameras and blower door tests that can find hidden issues missed in standard DIY checks.

    How often should I do a home audit?

    Most homes benefit from a yearly full audit, with more frequent checks recommended for older homes or after significant weather events.

    What tools do I need for a DIY home audit?

    You only need basic items like a flashlight, notepad, camera, and a good checklist to complete a thorough visual inspection of your home’s key systems.

  • Roof inspection guide: Step-by-step checklist for homeowners

    Roof inspection guide: Step-by-step checklist for homeowners

    A neglected roof can quietly turn a $300 shingle repair into a $10,000 water damage nightmare. Most homeowners never think about their roof until water is dripping through the ceiling, and by then, the damage has already spread into the framing, insulation, and drywall. The good news is that a careful, well-timed inspection catches most serious problems while they’re still cheap and manageable. This guide walks you through exactly how to inspect your roof safely and thoroughly, including when to do it, what to look for, and when to call in a professional roofer before small issues spiral out of control.

    Table of Contents

    Key Takeaways

    Point Details
    Inspection frequency matters Checking your roof at recommended intervals prevents costly surprises and prolongs its lifespan.
    Safety first Proper preparation and an attic check keep homeowners safe and catch hidden issues early.
    Use checklists and document Following a step-by-step guide and saving photos empowers you to spot problems and handle insurance or repairs confidently.
    Act on warning signs Granule loss or missing shingles over 10% mean it’s time to plan for replacement before leaks develop.
    Routine saves money Making roof inspections part of your regular maintenance keeps property values high and avoids expensive repairs.

    When and how often to inspect your roof

    With the importance of inspections clear, let’s define how often and when you should conduct them.

    How often you inspect depends on your roof type, your home’s age, and the weather patterns in your area. Not every roof needs the same attention on the same schedule. Understanding the right frequency for your specific situation is the first step toward smart, cost-saving maintenance.

    Inspection frequencies by roof type

    Roof type Recommended frequency Notes
    Asphalt shingles Annually after age 15 More frequent after storms
    Metal or tile Every 2 to 3 years Focus on fasteners and flashing
    Flat roofs Twice per year Watch for ponding water
    Older roofs (20+ years) Twice per year minimum Any roof type

    According to inspection frequency benchmarks, asphalt shingles typically last 20 to 30 years, but you should begin annual inspections once the roof hits the 15-year mark. Metal and tile roofs can last 40 to 70 years or more, but their fasteners and flashing need attention every 2 to 3 years. Flat roofs are especially vulnerable to water pooling, so they require checks twice per year to catch ponding before it damages the membrane.

    Weather events are often the most urgent triggers. After winds exceeding 50 mph or hail larger than one inch in diameter, inspect your roof immediately. These aren’t optional checkups. Even if the roof looks fine from the street, wind and hail can crack shingles, loosen flashing, and dislodge fasteners in ways that aren’t visible from the ground. Granule loss and more than 10% of shingles missing are the clearest signals that replacement is approaching.

    Experts don’t fully agree on a single universal schedule. The National Roofing Contractors Association recommends inspecting twice a year for all homeowners. Other professionals argue that once a year is enough for newer roofs in mild climates, with storm-driven inspections added as needed. A third camp, increasingly supported by roofing specialists, suggests starting every inspection in the attic rather than on the roof itself, since interior water stains often appear before exterior damage becomes obvious.

    • Inspect in spring to assess winter storm damage
    • Inspect in fall before the cold season begins
    • Inspect immediately after any major storm, hail, or high wind event
    • Add an extra check after any nearby tree falls or branches make contact with the roof

    Pairing your roof inspections with a broader home maintenance schedule makes it easier to stay consistent. Seasonal inspections as part of your seasonal home prep routine prevent any single task from slipping through the cracks.

    Pro Tip: Mark your inspection dates on your calendar the same way you schedule HVAC filter changes. Roof checks that feel routine are far less stressful than emergency calls after a leak appears.

    Safety and preparation: What you need before you start

    Now that you know when to inspect, it’s crucial to prepare properly before beginning.

    No inspection is worth an injury. Falls from ladders and rooftops are among the leading causes of home accident injuries every year in the United States. Before you take a single step toward the roof, your safety setup needs to be complete.

    DIY vs. professional inspection comparison

    Situation DIY inspection Hire a professional
    Single-story home, dry conditions Suitable Optional
    Steep pitch (above 4:12 slope) Use caution, consider pro Recommended
    Post-storm damage assessment Proceed carefully with safety gear Strongly recommended
    Older roof with visible rot or sagging Do not climb Required
    Two-story or higher structure Use caution Recommended

    A 4:12 slope means the roof rises 4 inches for every 12 inches of horizontal distance. Anything steeper than that significantly increases fall risk, and a professional may be the safer, smarter choice.

    Essential safety equipment:

    • Non-slip rubber soled shoes or work boots
    • Safety harness rated for fall arrest, anchored to a roof anchor point
    • A sturdy extension ladder rated for your weight plus the weight of your tools
    • Work gloves to protect against sharp shingle edges
    • Safety glasses, especially when checking in the attic

    Tools to bring:

    • Flashlight or headlamp for the attic
    • Digital camera or smartphone for photos
    • Binoculars for a ground-level visual check before climbing
    • Chalk or painter’s tape to mark damaged areas
    • Notepad or a printed checklist

    Always inspect the attic before climbing onto the roof. Storms and hail require immediate but careful checks. Interior clues like water stains, mold, and daylight coming through the decking often tell the story before you ever set foot on the surface.

    Only inspect on dry days with no expected rain. Morning inspections are preferable because dew evaporates and the roof surface is less slippery than in humid afternoon conditions. Avoid inspecting during high winds, even moderate ones, because gusts can destabilize a ladder or push you off balance on a slope.

    If you’re uncomfortable with heights, or if the roof pitch is steep, that’s completely valid. A professional roofing inspection typically costs $150 to $400, which is a fraction of what a missed leak will cost you later. Review essential household repairs to understand which checks you can confidently handle yourself and which ones call for expert eyes.

    Pro Tip: Before climbing, do a full visual sweep from the ground using binoculars. You can spot missing shingles, sagging areas, and obvious flashing gaps without ever leaving the ground. This gives you a starting point and helps you focus your attention once you’re on the roof.

    Step-by-step roof inspection checklist

    Once you’ve prepped, it’s time to follow the inspection checklist step by step.

    A thorough inspection moves from the inside out. Starting in the attic gives you crucial clues about where water may already be entering, so you’re not going in blind when you step onto the surface. Use a printed roof inspection checklist to track every item as you go.

    Step 1: Inspect the attic first

    Go into the attic with your flashlight and look for water stains on the decking or rafters, dark spots or mold growth, soft or spongy wood, and any visible daylight coming through the roof boards. Any of these signals mean water is already getting in somewhere.

    Woman checks attic for roof leaks

    Step 2: Check for granule loss in gutters

    Before climbing up, examine your gutters and downspouts. A significant accumulation of dark, sand-like granules is a strong indicator of shingle wear. Granule loss and missing shingles exceeding 10% signal that replacement is approaching.

    Step 3: Inspect the roof surface from the ladder

    Once on the roof or using a ladder to get a close view, check each area methodically, moving from the eaves toward the ridge:

    1. Look for cracked, curled, or missing shingles in each section
    2. Check flashing around chimneys, vents, skylights, and valleys for gaps or rust
    3. Look for raised or missing fasteners on metal roofs
    4. Check for soft spots or depression in the decking when walking (flat roofs)
    5. Inspect the ridge cap shingles for lifting or cracking
    6. Look for moss or algae growth, which traps moisture and accelerates shingle decay

    Step 4: Document everything with photos

    Photograph every problem area from multiple angles. Include a reference object like a coin or your hand in the photo to show scale. These images become critical evidence when filing insurance claims or getting contractor quotes.

    Step 5: Check roof penetrations and edges

    Pipes, vents, and skylights are the most common entry points for water. Check the rubber boots around pipe penetrations for cracking and confirm that flashing is seated tightly. Walk the edges and inspect the drip edge for rust or separation.

    Step 6: Check the gutters and fascia

    Clogged gutters cause water to back up under the roof edge, which rots the fascia board and can push water under shingles. Look for sagging gutters, rust spots, or gaps between the gutter and the fascia.

    Infographic showing roof inspection steps checklist

    Pro Tip: Use a garden hose to simulate rainfall at specific problem spots you noticed in the attic. Have someone inside watching the spot while you run water over the suspected area. This simple test often confirms exactly where a slow leak is entering.

    Common issues and what to do next

    Having completed the checklist, here’s what to look for and how to act on what you find.

    Finding problems during an inspection doesn’t automatically mean you need a full roof replacement. Most issues fall into three categories: things you can temporarily fix yourself, things that need professional attention soon, and things that need immediate professional intervention.

    Most frequent issues homeowners find:

    • Cracked or curled shingles caused by age and UV exposure
    • Missing shingles from wind or storm impact
    • Deteriorating flashing around chimneys or skylights
    • Clogged or overflowing gutters pulling away from the fascia
    • Soft spots or ponding on flat roofs
    • Mold, mildew, or moss growth on the surface
    • Rust on metal flashing or drip edges

    “Missing shingles exceeding 10% and granule loss are immediate concerns for replacement.” Acting quickly limits interior damage and keeps repair costs from multiplying.

    How to respond to what you find

    Minor issues (DIY options available):

    A few cracked or missing shingles in an otherwise healthy roof can often be replaced by a confident homeowner. Roofing cement and replacement shingles are available at hardware stores for under $50. Clear gutters of debris and reattach them if they’re pulling away. Apply moss-killing product if growth is minor.

    Moderate issues (monitor closely and budget for repairs):

    Flashing that’s lifting but not yet leaking can be temporarily sealed with roofing caulk, but a roofer should inspect and reseal it properly before the next rainy season. Soft spots on flat roofs need attention within a few weeks to prevent membrane failure.

    Serious issues (call a professional now):

    If you find widespread shingle damage, large gaps in flashing, water stains spanning multiple rafters in the attic, or any visible sagging in the roof structure, stop and call a licensed roofer. Do not attempt repairs on a structurally compromised roof. For situations involving active leaks during a storm, review emergency roof repairs to handle the immediate situation safely while you wait for professional help.

    Documentation for insurance:

    Keep a dated log of every inspection, including photos, notes on what you found, and any repairs made. Insurance adjusters look for evidence of regular maintenance when evaluating storm damage claims. A homeowner with documented inspection records is in a far stronger negotiating position than one who has no history of maintenance activity.

    Pro Tip: Create a simple folder on your phone labeled “Roof Inspections” and drop all your dated photos in there. When your insurance company asks how old the damage is, you’ll have proof ready in seconds.

    A fresh perspective: Why roof inspection routines really matter

    Most homeowners treat their roof like a smoke detector: they know it matters, but they only think about it when something goes wrong. Here’s the honest truth. The roof is the single most expensive exterior component of your home, and it fails gradually and silently. You won’t get a warning bell.

    What separates homeowners who avoid massive repair bills from those who don’t is discipline, not luck. Consistent home maintenance routines that include roof checks twice a year cost you an hour of time. Skipping those checks for five years can cost you a full roof replacement plus interior remediation.

    The attic check is the most skipped step in nearly every self-inspection guide. Most people go straight to the roof and miss water damage that’s been creeping through the decking for months. Start inside. Always.

    Storms change everything. A roof that passed inspection in April can develop three vulnerable spots after a June hailstorm. Don’t wait until fall to check it. The sooner you find storm damage, the more likely your insurance claim will be approved, and the less time water has to work its way deeper into your home’s structure.

    Documentation is your quiet superpower. Homeowners who photograph their inspections and keep clear records rarely lose insurance disputes. Those who don’t often find themselves absorbing costs that should have been covered.

    Take your home maintenance to the next level

    Feeling empowered? Roof inspections are just one piece of a well-organized home maintenance system. At Workbench Guide, we’ve built a full set of tools to help you stay on top of every major task before it becomes an emergency.

    Start with our complete home maintenance checklist to build a seasonal routine that covers your roof, HVAC, plumbing, and more. When you find an issue during an inspection, our repair guides walk you through the fix with clear, step-by-step instructions written specifically for homeowners, not contractors. And if you want to go deeper, our preventative maintenance tips show you how a little consistent attention now saves thousands of dollars over the life of your home.

    Frequently asked questions

    How often should I inspect my roof if it’s new?

    New roofs in mild climates can be checked annually in mild climates, but any significant storm, high winds, or hail should trigger an immediate additional check regardless of the roof’s age.

    What should I do if more than 10% of shingles are missing?

    If over 10% of shingles are missing, schedule a professional assessment soon because your roof’s protective coverage is compromised and further damage can spread quickly.

    Is inspecting the attic necessary during a roof check?

    Yes, always check the attic before climbing onto the roof, since water stains, mold, and soft decking often reveal leaks and hidden damage before any exterior signs appear.

    What are the signs I should call a professional roofer?

    Call a professional if you find widespread shingle damage, large active leaks, sagging roof sections, significant flashing failures, or if you cannot safely access the roof yourself.

    Do roof inspections help with insurance claims?

    Yes, dated inspection records with clear photos and written notes give insurance adjusters concrete evidence of regular maintenance and help support claims for storm or accidental damage with far less dispute.