Author: Sean C

  • What is a home inspection? Your complete guide

    What is a home inspection? Your complete guide

    A home inspection is one of the most consequential steps in any real estate transaction, yet buyers and sellers routinely treat it as a box to check rather than a tool that genuinely protects them. What is a home inspection, really? It is a thorough, assessment of a home’s condition covering visible and accessible components, major systems, and potential safety hazards. Skip it or misunderstand it, and you could close on a house with a failing electrical panel, a cracked foundation, or hidden mold. This guide walks you through exactly what happens, what to expect, and how to use the results to your advantage.

    Table of Contents

    What is a home inspection and who performs it?

    A home inspection is a visual evaluation of a property’s physical condition, performed by a trained professional before a sale is finalized. It is not a pass/fail test. It is a snapshot of the home’s current state, identifying what works, what needs attention, and what could become a serious problem.

    Inspector examines basement for safety hazards

    Inspectors who earn certification through organizations like the American Society of Home Inspectors (ASHI) follow standardized Standards of Practice that focus on observable conditions without destructive testing. That last part matters. An inspector will not cut open walls or remove flooring. They evaluate what they can see and access on inspection day.

    Major systems visually checked during a standard inspection include:

    • Structure: Foundation, framing, basement, and crawlspace conditions
    • Roof: Shingles, flashing, gutters, and visible decking
    • Plumbing: Water supply lines, drainage, water heater, and fixtures
    • Electrical: Panel, wiring, outlets, GFCI protection, and visible hazards
    • HVAC: Heating and cooling systems, ductwork, and filters
    • Interior: Ceilings, walls, floors, windows, doors, and stairs
    • Exterior: Siding, grading, driveways, and visible drainage

    Beyond mechanical systems, inspectors also flag potential health and safety hazards. Mold growth, signs of radon infiltration, suspected lead paint, and asbestos-containing materials may all be noted, though testing for these often requires a separate specialist. If any of these concerns come up, your home safety inspection guide can help you understand next steps and how to address them.

    What to expect during the home inspection process

    Knowing how the home inspection process unfolds helps you prepare and get the most out of it. Here is the typical sequence from scheduling to receiving your report.

    1. Schedule immediately after contract signing. Most purchase contracts give you a limited inspection window, often 7 to 14 days. Book your inspector the same day you go under contract so you have flexibility to reschedule if needed.
    2. Find a certified inspector. Ask your real estate agent for referrals, but also verify credentials independently. Look for ASHI or InterNACHI certification, which signals the inspector meets professional standards.
    3. Plan to attend in person. The inspection usually lasts 2 to 4 hours on-site, with the written report delivered within 1 to 2 days. Being present lets you ask questions, see problems firsthand, and understand the difference between a minor cosmetic issue and something that needs urgent attention.
    4. Walk with the inspector. Follow them room to room. Ask questions. A good inspector will explain what they are testing, why it matters, and what you should watch going forward.
    5. Review the report carefully. The written report documents every finding with photos, descriptions, and recommended actions. Read it fully before deciding on next steps.

    Pro Tip: Bring a notepad or use your phone to take photos of areas the inspector points out. The report will document findings, but your own notes on where things are located (like the shutoff valve location or the age of the furnace) will be useful long after closing.

    For sellers preparing a home, reviewing your seasonal home preparation tips before listing can reduce the number of surprises that show up in an inspection report.

    Infographic showing home inspection process flow

    Understanding your home inspection report and contingencies

    The inspection report is where the real work begins. A thorough report can run 30 to 80 pages with detailed photos and descriptions. Understanding how to read it without panicking is a skill most buyers need to develop.

    Findings generally fall into three categories:

    • Safety concerns: Issues that pose immediate risk to occupants, such as exposed wiring, carbon monoxide risks, or structural instability. These require prompt action.
    • Repair items: Systems or components that are failing, past their useful life, or functioning below standard. These are often negotiating points.
    • Monitoring items: Minor wear, aging components, or cosmetic issues that do not need immediate repair but should be tracked over time.

    Here is a quick comparison of how to approach different finding types:

    Finding type Example Recommended action
    Safety concern No GFCI outlets near water Negotiate immediate repair or credit
    Major repair Aging roof with multiple missing shingles Request repair or price reduction
    Specialty referral Visible mold in crawlspace Order specialist testing before closing
    Monitoring item Minor caulk gaps around windows Plan for DIY fix post-closing
    Cosmetic issue Scuffed paint, worn carpet Accept as-is, budget for updates

    Inspection contingencies typically allow buyers 7 to 10 days to review the report, order any specialty inspections, and negotiate repairs or price adjustments with the seller. Missing that deadline means losing your leverage, so track it carefully.

    One important reality check: not all flagged items are deal-breakers. Many findings are routine maintenance items that any occupied home accumulates. The goal is to identify what is truly significant and focus your negotiation energy there, rather than requesting repairs on every minor item in the report.

    For a deeper look at how inspection findings translate into long-term maintenance priorities, the importance of regular home inspections is worth reading before you sit down to write your repair request.

    Why home inspections matter: beyond buying and selling

    Most people think of home inspections as a buyer’s tool. They are also one of the smartest things a seller or current homeowner can do.

    The importance of home inspection extends well beyond the transaction itself:

    • Catch problems before they compound. A small roof leak found during an inspection costs a few hundred dollars to fix. Left undetected for two years, it can mean rotted decking, mold remediation, and a damaged ceiling. Early detection is almost always cheaper.
    • Use the report as a maintenance roadmap. The inspector’s findings on aging water heaters, worn weatherstripping, or a cracked driveway give you a prioritized list of future projects.
    • Address health hazards directly. Inspections identify health hazards such as mold, radon gas, lead paint, and asbestos, all of which carry real health consequences for occupants. These are not items to defer.
    • Pre-listing inspections give sellers the upper hand. A seller who completes an inspection before listing can fix issues in advance, price the home accurately, and avoid the shock of a buyer’s report derailing a deal at the last minute.

    “The best time to get a home inspection is before you need to react to one. Buyers who treat inspections as education rather than ammunition make better decisions and close with fewer surprises.”

    Pro Tip: If you are selling, spending $300 to $500 on a pre-listing inspection is often worth more than the cost. It gives you time to make repairs on your own schedule rather than under the pressure of a buyer’s deadline.

    For homeowners who want to stay ahead of problems year-round, a home audit guide walks through how to evaluate your own property between professional inspections.

    The overlooked truth about home inspections: more than just checklists

    Here is something most articles about home inspections do not say: the written report is not the most valuable thing you get from the process. The conversation with the inspector is.

    A good inspector does not just document problems. They teach you about the home. They show you where the main water shutoff is, explain why the furnace is close to end of life but still functional, and tell you which items on the report genuinely require attention versus which ones are normal wear you will manage over time. That real-time education is irreplaceable, and it only happens if you show up.

    Most buyers also underestimate how inspection findings become triggers for specialist follow-ups. When a general inspector notes possible moisture intrusion or what appears to be mold, that is not a verdict. It is a referral. A structural engineer, a mold remediation specialist, or a licensed electrician will give you the actual picture. Treating every flagged item as a catastrophe leads to bad decisions. Treating every flagged item as information to act on systematically leads to good ones.

    The inspection also works as a negotiation tool only when you use it strategically. Asking for everything in the report to be fixed is a rookie move that sellers routinely reject. Focusing your repair requests on safety concerns and major systems while letting minor items go creates goodwill and gets results. The report gives you the data. What you do with it is strategy.

    Finally, timing matters more than most buyers realize. Scheduling your inspection within 24 to 48 hours of going under contract is not urgency for its own sake. It is so you have enough time within the contingency window to order a specialist inspection if the general report raises serious questions. For ongoing protection after you move in, tracking the benefits of ongoing inspections helps you build a real maintenance rhythm rather than responding to problems after they become expensive.

    Empower your home ownership with expert maintenance and repair guidance

    Understanding home inspections is the first step. Acting on what you learn is what actually protects your home and your budget. Workbench Guide gives you the tools to do both. Use our home maintenance checklist to translate inspection findings into a year-round action plan, organized by season and priority. Follow our preventative home maintenance guides to stay ahead of the issues inspectors flag most often. And when something needs fixing, our step-by-step repair guides walk you through common repairs with clear instructions, so you can decide what to DIY and when to call a pro.

    Frequently asked questions

    What does a home inspection cover?

    A home inspection evaluates the visible and accessible major systems of a home, including structure, roof, plumbing, electrical, and HVAC, along with health-related concerns like mold or radon.

    How long does a typical home inspection take?

    Most home inspections take 2 to 4 hours on-site, with the written report delivered within 1 to 2 days after the inspection is complete.

    What should I do if the inspection report shows problems?

    Use the report strategically: focus on safety concerns and major systems for negotiation, order specialist follow-ups for flagged issues that require expert evaluation, and plan minor items as future maintenance.

    Why is it important to attend the home inspection?

    Attending allows you to see issues firsthand, ask questions in the moment, and gain a working knowledge of your home’s systems that no written report fully replaces.

    Can a home inspection help with health and safety?

    Yes. Inspections can identify hazards like mold, radon, lead paint, and asbestos, all of which have direct health consequences for anyone living in the home.

  • Fall maintenance checklist: protect your home this season

    Fall maintenance checklist: protect your home this season

    Every fall, the same thing happens to thousands of homeowners: they mean to get ahead of seasonal tasks, but a few weekends slip by, temperatures drop fast, and suddenly a frozen pipe or a furnace that won’t start turns into a $1,500 emergency. A solid fall maintenance checklist is the difference between a home that handles winter well and one that hands you expensive surprises in January. This guide covers every critical area, from your lawn and gutters to your HVAC system and plumbing, giving you a specific, actionable plan before the cold sets in.

    Table of Contents

    Key Takeaways

    Point Details
    Regular lawn care Mow, rake, and fertilize your lawn to prevent winter damage and promote healthy growth.
    HVAC prep Replace filters and test heating systems early to ensure safe and efficient operation.
    Gutter and roof upkeep Clean gutters and inspect roofs to avoid water damage and structural issues.
    Winterize plumbing Drain pipes and shut off outdoor water to prevent freezes and costly repairs.
    Energy efficiency checks Seal leaks, test detectors, and adjust fans to lower heating costs and improve safety.

    Your fall maintenance checklist starts in the yard

    Most homeowners treat lawn care as an afterthought once summer ends. That’s a mistake. What you do to your yard in September and October directly affects how it looks in May, and it affects the health of your home’s foundation and drainage too.

    Mowing and fertilizing

    Keep mowing until your grass actually stops growing. According to Fleet Farm’s fall yard cleanup checklist, you should mow lawns until late October or early November, with the final cut at 1 to 1.5 inches to reduce snow mold risk. Taller grass going into winter creates the perfect damp environment for fungal disease.

    Fertilizing in early fall is one of the highest-return tasks in autumn home upkeep. Applying 1 pound of nitrogen per 1,000 square feet strengthens root systems before the ground freezes, which means a faster, thicker green-up come spring.

    Additional fall lawn and garden tasks:

    • Rake leaves every few days or at least weekly. A thick mat of wet leaves blocks sunlight and traps moisture, killing the grass underneath.
    • Overseed thin or bare areas now so seed can establish before frost.
    • Aerate compacted soil to let water and nutrients reach roots more effectively.
    • Remove diseased plants completely rather than composting them, to break pest and disease cycles.
    • Plant spring bulbs (tulips, daffodils, hyacinths) before the ground freezes.
    • Mulch garden beds with 2 to 3 inches of shredded leaves or wood chips to insulate roots.

    Pro Tip: After your final mow, run your mower until the fuel runs out, or add a fuel stabilizer before storing it. Old gasoline gums up carburetors over winter and is the number one cause of small engine startup failures in spring.

    For more fall lawn care tips that carry through the whole year, it helps to think about your lawn as part of your larger seasonal home maintenance routine rather than a separate project.

    With the yard prepared, the next step is to ensure your home’s vital systems are ready for colder weather.

    Heating system and HVAC preparation

    Your furnace has been sitting idle for months. Do not assume it will fire up perfectly when temperatures drop. Skipping HVAC prep is one of the most common and most costly mistakes in any pre-winter home checklist.

    Steps to prepare your heating system:

    1. Replace the furnace air filter. Use the correct MERV rating for your system (typically MERV 8 to 11 for most homes). Replace furnace filters before the first freeze and test the heating mode for at least 15 minutes to confirm full ignition and airflow.
    2. Test the heating mode completely. Don’t just turn the thermostat up and walk away. Watch the ignition sequence, listen for unusual sounds, and check that warm air is actually coming from every vent.
    3. Test and inspect carbon monoxide detectors. This one matters more than most homeowners realize. CO detectors expire after 7 years even with fresh batteries, so check the manufacture date on the back of each unit.
    4. Vacuum cold-air return grilles. Dust buildup here forces your furnace to work harder and can trigger automatic shutoffs. A quick vacuum takes two minutes per vent.
    5. Inspect burners and flame sensors. If you see yellow or orange flames instead of blue when your furnace runs, that’s a sign of incomplete combustion and a reason to call a technician before winter.

    Pro Tip: Set your thermostat to 68°F and run the system for a full 20 minutes before cold weather arrives. If the house doesn’t reach temperature within that window, something is wrong and it’s far easier to get a technician in October than during a cold snap in December.

    For detailed furnace maintenance tips and a full breakdown of seasonal HVAC care, those resources walk you through every task step by step.

    With HVAC systems ready, attention to exterior home maintenance prevents damage from winter weather.

    Man cleaning gutters on house roof in fall

    Protecting gutters, roofs, and exterior surfaces

    Water is the single biggest threat to your home in fall and winter. Gutters, roofing, and exterior sealing are the three lines of defense. Ignore any one of them and you’re looking at water intrusion, ice dams, rot, or pest entry by spring.

    Key exterior tasks:

    • Clean gutters twice a year using an extension ladder, and flush downspouts with a garden hose to check for underground clogs that cause water to pool at your foundation.
    • Inspect the roof for missing, cracked, or curling shingles. Look for sagging areas, dark streaks from algae, and any spots where flashing has lifted around chimneys or vents.
    • After leaves drop, remove dead limbs near the house and avoid heavy pruning on spring bloomers like forsythia or lilac, which set their buds in fall.
    • Seal gaps around windows, doors, and where utilities enter the house. A single unsealed gap around a dryer vent or pipe penetration lets in cold air, moisture, and rodents.
    Exterior task Why it matters Recommended timing
    Clean and flush gutters Prevents water backup and ice dams After leaves fall, late October
    Roof inspection Catches leaks before snow adds weight September to October
    Prune dead branches Prevents storm damage and debris After leaf drop
    Seal windows and doors Reduces drafts and heating costs October, before first freeze
    Inspect chimney and flashing Prevents water intrusion and fire risk September

    Pro Tip: When flushing downspouts, put your hand over the outlet while the water runs. If you feel strong flow, it’s clear. Weak or no flow means there’s a clog underground, often where the downspout connects to a buried drain line. A plumber’s snake clears these in under an hour.

    Detailed guidance on roof and gutter maintenance can help you know exactly what to look for during your inspection and when to call a roofer.

    Now that the exterior is secured, addressing plumbing and water systems protects against freeze damage.

    Winterizing plumbing, sprinkler systems, and outdoor equipment

    Frozen pipes are one of the most predictable home disasters there is. They’re also almost entirely preventable with about two hours of fall prep work. This is the section of your autumn property maintenance that pays for itself fastest.

    Steps to winterize water systems:

    1. Disconnect all garden hoses from outdoor faucets. A hose left connected traps water inside the faucet body, which freezes and bursts the pipe even on frost-free spigots.
    2. Shut off the supply valves feeding outdoor faucets from inside the house, then open the outdoor valve to drain remaining water.
    3. Drain your irrigation or sprinkler system using the blow-out method (compressed air through each zone). If you’ve never done this, hiring a professional once to watch the process teaches you everything you need to do it yourself next year.
    4. Exercise all shut-off valves by turning them off and back on before the first freeze. Valves that haven’t moved in years can seize, which means you can’t shut off water quickly during an emergency.

    Storing outdoor equipment properly:

    • Drain fuel from gas-powered tools or add a fuel stabilizer and run the engine for two minutes to distribute it.
    • Sharpen and lightly oil mower blades before storage.
    • Drain and coil garden hoses before hanging them. Water left in hoses cracks the material over winter.
    • Clean and dry all metal tools, then hang them off concrete floors to prevent rust from moisture.

    For a full winterize home plumbing walkthrough, that guide covers indoor pipes, crawl space insulation, and what to do if you’re leaving your home vacant for weeks at a time.

    With plumbing and equipment secured, finishing touches enhance comfort and energy savings indoors.

    Energy efficiency and safety checks for fall

    The final layer of fall home care tips focuses on what happens inside the envelope of your home. These tasks improve comfort, lower heating bills, and can literally save lives.

    Fall indoor safety and efficiency tasks:

    • Seal gaps around windows and door frames with weatherstripping or caulk. You can find drafts easily on a cold day by holding a lit stick of incense near the edges. Any smoke movement reveals a leak.
    • Test every smoke detector and carbon monoxide detector. CO detectors should be replaced every 7 years regardless of battery status.
    • Reverse your ceiling fan direction to clockwise at the lowest speed setting. Running fans clockwise in fall pushes warm air that collects near the ceiling back down into the living space, cutting heating costs by up to 25%.
    • Vacuum cold-air returns throughout the house. This is often overlooked in a checklist for fall repairs, but clogged returns are a top cause of uneven heating and furnace strain.
    • If your home is more than 20 years old, consider scheduling a professional energy audit. Infrared cameras show heat loss through walls and ceilings that you’d never detect otherwise.

    Before winter arrives, think of your home the way a pilot thinks about preflight checks. You’re not looking for problems every time. You’re building a habit that catches the rare, serious issue before it becomes a crisis.

    Pro Tip: The foam gaskets that go behind electrical outlet covers on exterior walls are a two-minute, $5 fix that most homeowners never think about. Those outlets are often direct cold-air paths into your wall cavity.

    Find more energy efficiency tips alongside practical home safety checks to round out your indoor fall checklist.

    Why fall maintenance is more about prevention than repair

    Here’s the part nobody says directly: most homeowners approach fall maintenance as a list of chores they’ll eventually get to. That framing is exactly why so many end up with an emergency furnace replacement in February or a water-damaged basement ceiling in March.

    The real value of a fall maintenance guide is not completing tasks. It’s catching the 10% of problems that, if missed, turn into the 90% of your annual repair costs. Neglected HVAC systems fail prematurely, and consistent homeowner maintenance catches the majority of early warning signs before they require a technician.

    What separates homeowners who stay ahead of their homes from those who don’t isn’t motivation or time. It’s a system. When fall maintenance exists as a recurring event on your calendar, not a vague intention, you stop making decisions about whether to do it. You just do it. That mental shift alone changes the outcome.

    The other thing worth saying: small fall investments compound. A $15 tube of caulk this October prevents a $400 window frame repair next spring. A $30 furnace filter now prevents a $1,200 heat exchanger failure in two years. These aren’t hypotheticals. They’re the exact scenarios that show up in contractor callouts every winter.

    Treat preventative home maintenance as ongoing home care, not a seasonal chore, and your home will cost you significantly less over its lifetime.

    Prepare your home this fall with WorkbenchGuide

    Knowing what to do is half the battle. Staying organized and actually following through is where most homeowners lose momentum. WorkbenchGuide gives you a comprehensive home maintenance checklist that tracks every seasonal task across lawn care, HVAC, plumbing, and energy efficiency, so nothing slips through. The platform’s step-by-step DIY guides mean you can tackle most fall tasks yourself with confidence, and when something needs a pro, you’ll know exactly what to ask for. Start with the preventive maintenance platform to build your fall task schedule, or browse DIY maintenance project ideas to take on projects that save money and protect your investment all season long.

    Frequently asked questions

    How often should I replace my furnace air filter in fall?

    Replace your furnace air filter before the first freeze in fall, then every three months through winter. A clogged filter makes your system work harder and shortens equipment life.

    Why is it important to rake leaves regularly in fall?

    Raking leaves weekly or every few days prevents thick wet layers from blocking sunlight and trapping moisture, which kills grass and creates conditions for snow mold.

    When should I winterize my outdoor sprinklers and faucets?

    Shut off and drain sprinkler systems and outdoor faucets before the first hard freeze, typically in late October across most of the U.S. Waiting too long risks burst pipes and costly water damage.

    How can reversing ceiling fan direction help in fall?

    Running ceiling fans clockwise at low speed pushes warm air pooled near the ceiling back down into the room, which can reduce heating costs by up to 25% without any other changes.

  • Why inspect siding: an essential guide for homeowners

    Why inspect siding: an essential guide for homeowners

    Your siding is doing a job 24 hours a day, and most homeowners never think about it until something goes catastrophically wrong. Water gets behind a cracked panel in October, freezes in January, and by March you’re looking at rotted sheathing, mold behind the walls, and a repair bill that could have been $200 if caught early but is now $8,000. Understanding why inspect siding matters is not about being a perfectionist homeowner — it’s about protecting a structure you’re likely paying a mortgage on for the next 20 years.

    Table of Contents

    Key Takeaways

    Point Details
    Siding protects your home Siding acts as the first defense against moisture, pests, and energy loss, preserving your home’s structure and value.
    Inspect twice a year Regular inspections in spring and fall, plus after storms, catch damage early and prevent costly repairs.
    Look for damage signs Check for warping, cracks, discoloration, and soft spots by touch to identify problems before they worsen.
    Professional installation matters Properly installed siding lasts decades, while poor DIY installation leads to failures and expensive fixes.
    Use practical inspection steps Inspect on dry days with good lighting, maintain clearance from ground, and press siding panels to detect hidden damage.

    The vital role siding plays in protecting your home

    Most people think of siding as the skin of a house, and that’s accurate — but only if you understand what skin actually does. It’s not decorative. It regulates, protects, and seals. Your siding shields walls from moisture, preventing the kind of rot and mold that spreads invisibly through wall cavities before showing any surface signs.

    Beyond moisture, siding is a major player in energy efficiency. Gaps, cracks, and failing seams allow air to move freely through the wall assembly, forcing your HVAC system to compensate. That’s money leaving your house literally through the walls. Well-maintained siding also preserves curb appeal, which has a direct and documented effect on resale value. Buyers notice the exterior first, and damaged siding signals neglect even if the interior is flawless.

    Here’s what’s at stake when siding fails without being caught:

    • Moisture intrusion: Water behind panels causes rot in the structural sheathing and framing
    • Mold growth: Wet wall cavities create ideal conditions for mold that is expensive and sometimes hazardous to remediate
    • Pest access: Gaps and soft spots are entry points for carpenter ants, termites, and rodents
    • Energy loss: Air leaks through damaged siding raise heating and cooling costs significantly
    • Structural damage: Long-term moisture exposure can compromise load-bearing framing members
    • Reduced home value: Visible siding damage is one of the first things a home inspector flags during a sale

    Regular home inspections that include the exterior are what separate homeowners who spend a little each year from those who face massive, unexpected repair bills.

    How often and when to inspect your siding for best results

    Infographic showing five steps to inspect siding

    The importance of siding inspection is directly tied to timing. Catching damage early is only possible if you’re looking at the right moments. The good news is that you don’t need to inspect every month — you just need to inspect strategically.

    Experts recommend inspecting siding at least twice per year — in spring and fall — plus after any severe storm, hail event, or high-wind episode. That’s three to five checks a year for most homeowners in climates with distinct seasons, and it costs you nothing but an hour of your time.

    Here’s why the timing matters:

    1. Spring inspection: Winter is brutal on siding. Freeze-thaw cycles expand and contract materials repeatedly, opening up cracks and loosening fasteners. A spring inspection catches that winter damage before the rainy season drives water into every new gap.
    2. Fall inspection: Before temperatures drop and rain or snow arrives, fall is your window to address anything that could worsen over winter. Caulk fails faster when it’s wet and cold, so fixing it dry is far easier.
    3. Post-storm inspection: Hail leaves dents and cracks that aren’t always visible from the ground. Wind can lift panels at corners or near the roof line. Always walk the perimeter within a day or two after a significant storm.
    4. After any major landscaping or construction nearby: Vibration from heavy equipment, falling branches, or debris impact can cause damage that looks minor on the surface but compromises the panel’s integrity.

    Pro Tip: Set a recurring calendar reminder for the first weekend in April and the first weekend in October. Pair your siding check with gutter cleaning — you’re outside anyway, and the habits reinforce each other.

    Preventing costly home repairs almost always comes down to consistent, timely preventative maintenance rather than heroic interventions after the fact.

    Identifying common siding damage signs and issues during inspection

    Now that you know when to inspect, you need to know what you’re looking for. This is where most DIY inspections fall short — people look without really seeing. Siding damage has a range of presentations, and some of the most serious signs are easy to miss if you don’t know what to check.

    Person checking house siding for damage

    Common damage indicators include cracks, warping, fading or peeling paint, spongy spots, panel gaps, and mold or mildew staining. Each of those signals a different problem with a different urgency level.

    What to look for on every inspection:

    • Cracks and splits: Even hairline cracks allow water infiltration. Look especially at horizontal seams and corners.
    • Warping or buckling: Panels that bow outward often signal moisture trapped behind them or improper installation without expansion gaps.
    • Soft or spongy spots: Press each panel firmly every few feet. If it gives under pressure, there’s rot or a broken fastener underneath — something you would never see just by looking.
    • Discoloration or chalky residue: UV degradation causes chalking on older vinyl and fiber cement. Staining can indicate water tracking from a compromised area above.
    • Peeling paint or bubbling: On painted siding, bubbles mean moisture is trapped beneath the paint film — a sign that water has already gotten in.
    • Mold or algae growth: Dark streaks or fuzzy patches, especially in shaded areas or near downspouts, are moisture red flags.
    • Gaps near trim, windows, and corners: These areas are the most vulnerable to failure. Caulk shrinks over time, and even small gaps are open invitations for water.

    Pro Tip: Bring a flashlight and a flathead screwdriver on your walk-around. Use the screwdriver handle (not the tip) to gently tap panels — a hollow sound compared to a solid one can indicate a panel that has pulled away from the sheathing.

    Pairing this kind of detailed exterior check with your annual safety checks makes the whole process efficient and easy to remember.

    How proper siding installation and maintenance extend its lifespan

    One of the most underappreciated reasons to check siding regularly is catching installation errors before they become structural failures. Bad installation is more common than most homeowners realize, and it often hides perfectly well for two or three years before the consequences show up.

    Correctly installed siding can last up to 40 years. Poorly maintained or improperly installed siding can fail in as few as 5 years. That is not a minor gap in outcomes — that’s the difference between a long-term asset and a recurring expense.

    Common DIY installation mistakes include nailing panels too tightly (which prevents thermal expansion and causes buckling), missing or improperly installed flashing around windows and doors, and failing to leave adequate clearance at the bottom. These aren’t cosmetic issues — they are moisture pathways.

    Factor Professional installation DIY or improper installation
    Expected lifespan 25 to 40 years 5 to 15 years
    Moisture protection Full flashing and weatherproof sealing Often incomplete or missing
    Expansion gaps Correct clearance throughout Frequently too tight or inconsistent
    Warranty validity Typically maintained Often voided by improper install
    Early failure risk Low High

    What routine inspections actually do for you:

    • Catch installation errors while repairs are still simple
    • Identify caulk failure before water infiltrates
    • Spot fastener corrosion or loosening before panels separate
    • Verify that clearance from soil and vegetation is maintained
    • Confirm gutters and downspouts are directing water away from the wall base

    Supporting this with regular home inspections that cover the full exterior is the most reliable way to protect your investment over time.

    Practical steps for conducting effective siding inspections at home

    A siding inspection checklist doesn’t need to be complicated. What it needs to be is consistent. These steps work whether you have vinyl, fiber cement, wood, or engineered wood siding.

    Step-by-step siding inspection process:

    1. Pick the right day. Inspect on dry days during morning or late afternoon light. Raking light — sun at a low angle — makes dents, warping, and surface irregularities far more visible than midday light, which flattens everything out.
    2. Start at one corner and go clockwise. Walk the full perimeter without skipping sections. Move methodically, working from the roof line down to the base.
    3. Look and touch. Eyes catch visible issues; your hands catch hidden ones. Press panels every 3 to 4 feet, paying special attention near trim, window frames, and corners where water concentrates.
    4. Check clearance at the base. Maintain at least 6 inches of clearance between the siding and finished grade. Siding that sits too close to soil or mulch wicks moisture constantly.
    5. Evaluate gutters and downspouts. Water that overflows or discharges near the foundation runs directly up the wall base. Make sure extensions are in place and functional.
    6. Document everything. Take photos with your phone. Date them and note the location on the wall. This record is valuable when comparing to next season’s inspection or when talking to a contractor.

    Items to note and record during every check:

    • Any crack wider than a hairline
    • Warping or bowing visible from 10 feet away
    • Soft spots detected by pressing
    • Gaps at caulked joints wider than 1/8 inch
    • Mold, staining, or biological growth
    • Missing or damaged trim pieces

    Pro Tip: Use your home maintenance checklist to log each inspection with a date and photos. Six months from now, you’ll know exactly what you saw last time and whether anything has gotten worse.

    Why most homeowners overlook siding inspections — and what to do about it

    Here’s the uncomfortable truth: most homeowners treat siding the way most people treat their car’s brakes. They assume everything is fine until something obvious goes wrong, and by then the fix is much larger than it needed to be.

    The most common misconception is that siding problems are cosmetic. A little fading, a small crack, some peeling paint — these read as aesthetic issues, not structural ones. That framing is exactly what leads people to postpone action. The crack that looks minor is letting in a tablespoon of water every rainstorm. Over 18 months, that’s enough moisture to rot through sheathing and reach wall framing.

    Busy schedules are the other reason inspections get skipped. It’s not ignorance — it’s prioritization. When the kitchen faucet drips, you see and hear it every day. Siding damage is quiet, hidden, and easy to ignore until you literally cannot ignore it anymore.

    The solution is not heroic discipline. It’s systems. Linking your siding inspection to something you already do twice a year — gutter cleaning, HVAC filter changes, daylight saving time — removes the decision from your to-do list and makes it automatic. Spending 30 minutes catching small issues is almost always the difference between a $40 tube of caulk and a $6,000 wall repair.

    The benefits of inspecting siding regularly are not theoretical. They’re measured in repair bills you never have to pay, energy costs that stay flat, and a home that holds its value when you’re ready to sell.

    Maintain your home smartly with WorkbenchGuide

    Keeping up with siding and exterior inspections is much easier when you don’t have to remember everything on your own. WorkbenchGuide gives homeowners a centralized place to manage exactly this kind of routine maintenance — with customizable checklists built around your home’s specific needs, seasonal reminders that keep inspections from falling through the cracks, and step-by-step DIY guides for everything from caulking siding gaps to identifying rot early. Use the home maintenance checklist to set up your spring and fall siding inspections, and explore the preventative maintenance tips to build a full-year protection plan for your home. Your siding is working constantly — the least you can do is check on it twice a year.

    Frequently asked questions

    How often should I inspect my home’s siding?

    You should inspect siding twice per year, in spring and fall, and also after any severe storm to catch damage before it escalates.

    What are early warning signs of siding damage?

    Look for cracks, warping, discoloration, mold growth, and soft or spongy spots when you press the panels — these are the most reliable early indicators.

    Can DIY siding installation cause problems?

    Yes — DIY installation mistakes like improper nailing, missing flashing, and skipped expansion gaps cause premature moisture damage and failure compared to professional work.

    What is the minimum clearance between siding and ground?

    Siding must sit at least 6 inches above finished grade per IRC Section R703 to prevent moisture wicking and rot at the wall base.

    How does damaged siding affect energy bills?

    Gaps and cracks in siding allow drafts that can raise energy bills by more than 20% over several years by forcing your heating and cooling system to work harder.

  • Why regular roof inspections save homeowners money

    Why regular roof inspections save homeowners money

    Your roof is quietly working against you if you’re not checking it regularly. Most homeowners never look up until water is dripping from the ceiling, and by that point, what started as a $200 shingle repair has turned into a $12,000 moisture damage nightmare. The real danger isn’t storms or age — it’s the hidden problems that build for months before making themselves known. This article walks you through exactly why routine inspections matter, how often to do them, what they should actually cover, and how a modest upfront cost protects you from budget-busting surprises down the road.

    Table of Contents

    Key Takeaways

    Point Details
    Routine checks prevent costly damage Regular roof inspections catch minor problems before they turn into expensive repairs.
    Twice-yearly inspections are best Schedule roof inspections in spring and fall, plus after severe weather events, for optimal protection.
    Quality inspection goes beyond visuals A thorough approach includes attic checks and hands-on component review, not just ground-level observation.
    Early repairs cost less Fixing small issues right away is far cheaper than waiting for major leaks or structural damage.
    Inspection documentation aids insurance Proper reports support insurance claims, especially after storms or emergencies.

    The real consequences of skipping roof inspections

    After years of helping homeowners tackle maintenance problems, one pattern stands out clearly: the most expensive repairs are almost always ones that could have been caught early. A cracked shingle here, a slightly lifted piece of flashing there. These seem minor. They are not.

    When small defects go unnoticed, water finds a way in. Not all at once, but slowly, over weeks and months. By the time you notice a water stain on your ceiling, the damage trail runs deeper than the stain suggests.

    Here’s what can go wrong when routine inspections are skipped:

    • Cracked or loose shingles let water seep under the roofing layer during rain, gradually soaking the wood decking below.
    • Damaged flashing around chimneys, vents, and skylights is one of the most common entry points for water. It’s also one of the easiest things to miss during a casual glance from the ground.
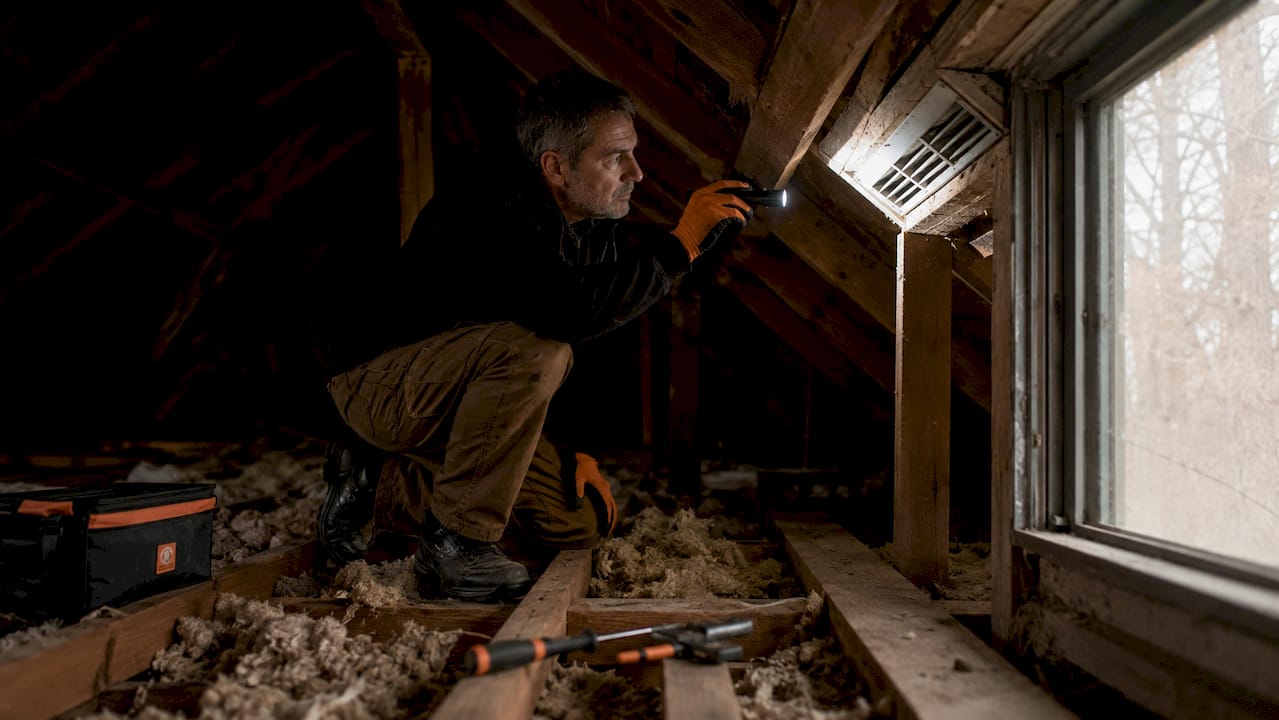
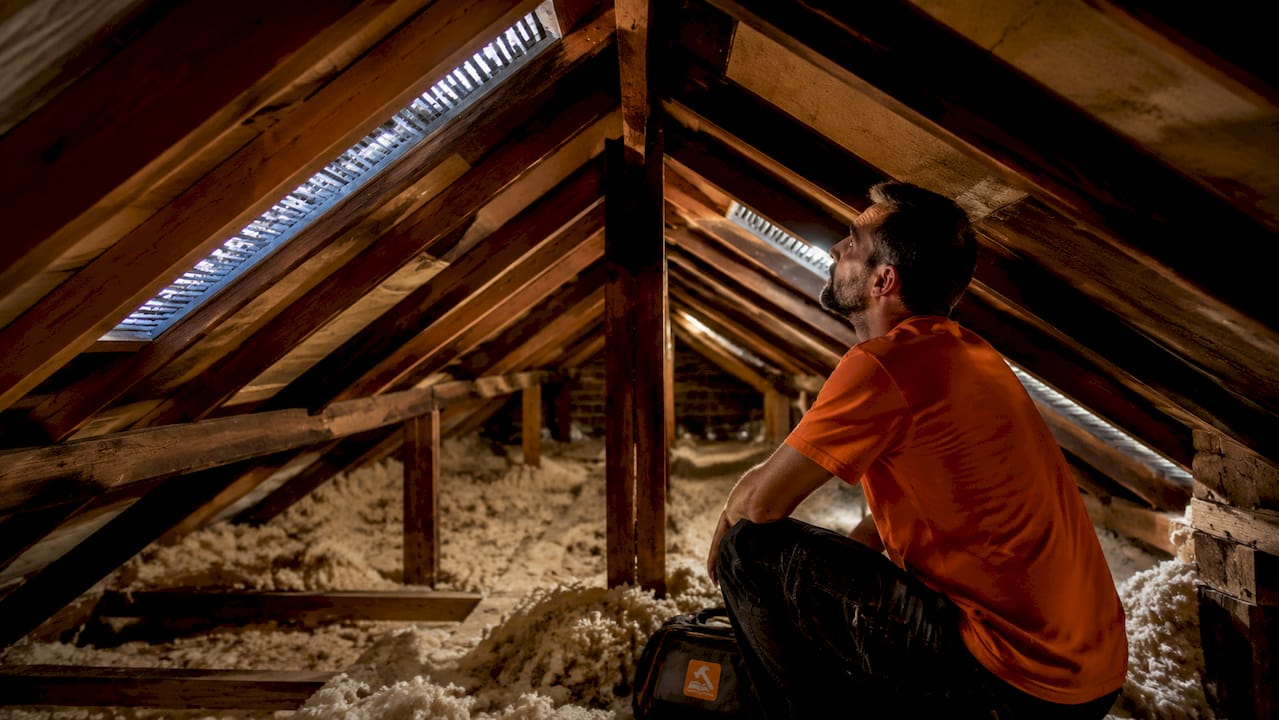
    • Poor attic ventilation, which often goes hand in hand with roofing issues, accelerates moisture buildup and can lead to insulation damage within a single season.
    • Mold growth begins once moisture settles into wood or insulation. Once established, mold remediation adds thousands to your repair bill on top of the roofing work itself.
    • Wood rot weakens the structural decking and rafters, which can turn a roofing repair into a partial replacement.

    Regular roof inspections help find minor issues early — like loose shingles and damaged flashing — before they escalate into leaks, wood rot, insulation damage, and mold.

    The cascading nature of roof damage is what makes it so costly. A $175 flashing repair ignored for 18 months can easily become a $6,000 water intrusion project. Knowing this, it becomes clear why inspections are one of the smartest ways to prevent expensive repairs before they have a chance to spiral out of control.

    How often should you inspect your roof?

    Technician inspecting damaged roof flashing

    Having seen the risks of neglect, the next step is knowing how often your roof needs attention. The answer is simpler than most people expect, but the details matter.

    The standard recommendation is twice per year: once in the spring after winter stress, and once in the fall before cold weather arrives. Twice-yearly roof inspections — spring and fall — plus checks after severe weather events, give you the best chance of catching problems early.

    Here’s a practical inspection schedule to follow:

    1. Spring inspection. Winter ice, snow load, and freeze-thaw cycles can crack shingles and shift flashing. A spring inspection catches any damage before spring rains push moisture into vulnerable spots.
    2. Fall inspection. Before the cold season locks you out of easy repairs, check for debris buildup, worn sealants around vents, and any summer storm damage you may have missed.
    3. Post-storm inspection. After any hail event, high winds, or severe thunderstorm, do a visual check from the ground and follow up with a professional if anything looks off. Hail damage in particular is notoriously hard to spot without getting on the roof.
    4. Pre-sale inspection. If you’re planning to sell your home, a clean roof inspection report adds credibility and can save negotiating headaches during the buyer’s due diligence period.
    5. After tree work or nearby construction. Falling limbs and vibrations from construction equipment can dislodge flashing or cause small impacts that aren’t visible without a closer look.

    Pro Tip: Even if your roof looks perfectly fine after a storm, don’t assume it is. Hail damage often shows up as small dents or granule loss on shingles that only become a problem months later when the weakened area starts letting in water. A quick post-storm check using our roof inspection checklist gives you a clear, organized process to follow.

    What makes an effective roof inspection?

    Now that you know when to inspect, let’s clarify what a quality inspection actually involves, because there’s a big gap between a real inspection and a quick look from the driveway.

    Effective roof inspections are systematic and include both exterior and interior evaluation, covering far more than just the shingles you can see from the ground. Relying only on a visual ground-level check risks missing the hidden problems that cause the most damage. And moisture intrusion often doesn’t show up as visible stains right away, which means incomplete inspections can leave serious issues undetected for months.

    Here’s a comparison of what a minimal check versus a thorough inspection actually covers:

    Inspection area Quick visual check Thorough inspection
    Shingle condition Ground-level view only Up-close check for cracks, granule loss, curling
    Flashing Often missed entirely Checked at all penetrations, edges, and valleys
    Gutters and drainage Not included Checked for blockages, sagging, and attachment
    Attic and ventilation Never included Moisture, insulation, and airflow all evaluated
    Roof decking Not visible Checked for soft spots, rot, and structural issues
    Sealants and caulking Usually overlooked Inspected around all vents, chimneys, and skylights

    The areas most often missed in a surface-only inspection are also the areas most likely to cause expensive damage. Attic checks matter enormously. A roofing professional looking at your attic can spot moisture staining on rafters, compressed or wet insulation, and inadequate ventilation that’s been silently damaging your roof from the inside out.

    A thorough inspection also evaluates:

    • Roof valleys, where two slopes meet, since water channels here and weak points develop quickly.
    • Drip edges and fascia boards, which protect the roofline and often show early signs of water damage.
    • Skylights and chimney surrounds, which are prime spots for flashing failures.
    • Ridge cap shingles, which take the most weather exposure and often show wear before the rest of the roof does.

    Using a structured thorough inspection guide makes it easier to cover every area without missing the details that matter most.

    The real cost of roof inspection versus repairs

    Understanding what makes an inspection effective, let’s see how the costs compare to the risks. The numbers make a strong case on their own.

    A professional roof inspection runs about $150 to $350, with a national average around $236. That’s a first-line defense investment that’s far cheaper than the alternative. Paying for routine inspections and small repairs consistently is far less expensive than emergency work or a full replacement after water intrusion takes hold.

    Infographic showing roof inspection costs and savings

    Here’s how the numbers stack up in real-world scenarios:

    Scenario Typical cost range
    Professional roof inspection $150 to $350
    Minor shingle repair (early catch) $150 to $400
    Flashing repair (caught early) $200 to $500
    Water damage repair (missed problem) $2,500 to $8,000
    Mold remediation added to water damage $1,500 to $5,000
    Full roof replacement (deferred maintenance) $8,000 to $25,000+

    The pattern is obvious. Two $236 inspections per year costs you under $500 annually. Compare that to a single water damage incident costing anywhere from $2,500 to over $10,000 once mold and structural repairs are factored in.

    Pro Tip: Think of roof inspections the same way you think about oil changes for your car. Skipping them doesn’t seem urgent until something fails, and by then the repair cost is ten times what the maintenance would have been. A solid preventative maintenance guide helps you build inspection costs into your annual budget so they never feel like a surprise expense.

    Beyond the direct repair costs, there’s also the issue of your time and stress. Emergency repairs rarely happen at convenient moments. They happen during cold snaps, rainstorms, or busy seasons when contractors are booked out and costs go up. Building a year-round maintenance checklist into your routine eliminates most of that stress because you’re always one step ahead. The same logic that applies to annual HVAC servicing applies here: consistent small investments prevent large, disruptive repair bills.

    Insurance and documentation: What homeowners need to know

    Finally, let’s look at how inspections tie into insurance and choosing the right inspection provider, because this side of the equation is often overlooked until a claim gets denied.

    Roof inspections support insurance documentation and can make or break a claim, but homeowners need to understand that requirements vary significantly by insurer and location. Some key points worth knowing:

    • Document every inspection. Keep written reports, photos, and dates on file. If a storm damages your roof and you file a claim, an insurer will want to see that the roof was in reasonable condition beforehand.
    • Post-storm documentation is critical. If you have an inspection done after hail or wind damage, get a written report before any repairs begin. That report becomes evidence in your claim.
    • Be cautious with “free” inspections. Contractors who offer free inspections after storms are sometimes motivated to find damage worth claiming, whether it’s there or not. That kind of report may not hold up under insurer scrutiny, and working with biased assessors can sometimes trigger claim complications.
    • Hire qualified inspectors. Look for certified professionals with credentials from recognized roofing industry organizations. Their reports carry more weight with insurers and give you more reliable information to act on.
    • Review your policy before filing. Some policies require documented maintenance as a condition of coverage. An insurer may reduce or deny a claim if they determine that neglected maintenance contributed to the damage.

    Understanding the insurance angle turns roof inspections from a maintenance task into a financial protection strategy. A clean inspection record demonstrates responsible ownership and makes claim conversations much smoother.

    Why surface-level checks aren’t enough: What most guides miss

    Here’s the thing most articles about roof inspections won’t tell you directly: the methods matter just as much as the frequency.

    A lot of homeowners now feel confident after watching a drone fly over their roof or scrolling through a set of aerial photos. Those tools have real value for spotting large-scale issues. But drone and visual methods have limits, and they can miss the kind of subtle defects that only show up when someone physically touches the surface, checks granule adhesion, or tests the firmness of the decking.

    Here’s where the deeper lesson sits: storm damage is often invisible. Not just from the ground, but even from a drone camera. A hail impact that looks like a small scuff on a shingle has actually broken the protective granule bond, and now that spot will fail within a season or two during freeze-thaw cycles. Post-storm inspections are essential even when your roof looks completely fine, because the real damage is often structural at the shingle level, not cosmetic.

    The homeowners who avoid the biggest repair bills aren’t necessarily the ones with newer roofs. They’re the ones who take inspections seriously after every weather event, even the ones that seem minor. That habit, combined with using small preventative checks across the whole home, adds up to thousands of dollars saved over time.

    The takeaway is this: a ground-level visual check after a storm gives you peace of mind, but it doesn’t give you answers. Real peace of mind comes from knowing someone with trained eyes and hands actually evaluated your roof systematically. That’s the version of inspection that protects your investment.

    Take the next step: Protect your home with smart maintenance

    https://workbenchguide.com

    Roof inspections are only one piece of the puzzle, but they’re one of the highest-value pieces. At Workbench Guide, we’ve built tools specifically for homeowners who want to stay ahead of problems instead of reacting to them. Our maintenance checklist walks you through every seasonal task so nothing falls through the cracks, and our preventative maintenance resources help you build a sustainable home care routine that protects your property value year after year. Stop waiting for something to go wrong. Build the habit now and keep more money where it belongs.

    Frequently asked questions

    What are the top warning signs I should look for during roof inspections?

    Check for cracked or missing shingles, damaged flashing, water stains in the attic, and any signs of mold, all of which can signal deeper problems developing beneath the surface.

    Is it safe to inspect the roof myself, or should I always hire a professional?

    You can do a basic visual check from the ground, but for a systematic exterior and attic evaluation, especially after severe weather, hiring a professional is safer and far more effective.

    How much does a roof inspection typically cost in the United States?

    The national average is around $236, with most homeowners paying between $150 and $350 depending on roof size, complexity, and location.

    Does regular roof inspection help with insurance claim approval?

    Yes, documented inspections build a maintenance record that supports claims, but insurance requirements vary by insurer and jurisdiction, so check your policy details before assuming coverage.

    After strong storms, should I inspect even if my roof looks undamaged?

    Absolutely. Post-storm inspections are specifically recommended because hail and high-wind damage is frequently non-obvious from the ground and only becomes a serious problem months later.
  • Exterior maintenance guide: Avoid costly repairs with DIY tips

    Exterior maintenance guide: Avoid costly repairs with DIY tips

    Homeowners across the country are hit with unexpected repair bills every year, not because disaster struck, but because small exterior problems went unnoticed for too long. A cracked window seal, a clogged gutter, or peeling caulk around a vent might seem minor on their own. Combined over one or two seasons, those small failures can mean water damage, structural rot, and five-figure repair costs. The good news is that a consistent, season-by-season exterior maintenance routine puts you back in control, saves real money, and keeps your home looking sharp year after year.

    Table of Contents

    Key Takeaways

    Point Details
    Seasonal upkeep is essential Scheduling exterior maintenance each season prevents expensive surprises and keeps your home protected.
    Right tools save time Having the right tools and materials makes DIY exterior tasks more efficient and effective.
    Gutters need extra care Gutters should be inspected often, especially before freezes and after storms, to avoid leaks or ice dams.
    Caulking prevents water damage Regular inspection and timely repair of exterior caulking stops leaks and costly repairs.
    Track results for peace of mind Checking your work and keeping maintenance records helps you catch issues early and protect your investment.

    Season-by-season maintenance: What to do and when

    Now that you understand the importance of routine exterior maintenance, let’s break down what needs to be done, season by season.

    A season-by-season system assigns specific inspection, cleaning, and repair tasks to the time of year when they matter most. This prevents the “I’ll get to it later” trap that turns small problems into big ones. Think of it like oil changes for your car: the schedule keeps everything running smoothly, and skipping it always costs you more in the end.

    Here’s a quick look at what each season demands:

    Spring

    • Assess winter damage: check for cracked paint, lifted shingles, and shifting foundation trim
    • Clear debris from window wells, walkways, and drainage areas
    • Flush gutters and downspouts, and inspect for winter damage
    • Check caulking around all windows, doors, and vents

    Summer

    • Paint or repaint surfaces before heat causes further peeling
    • Stain and seal decks, fences, and wood trim
    • Repair any cracked mortar, siding gaps, or rotted wood found in spring
    • Inspect and clean window screens and exterior vents

    Fall

    • Protect pipes and hose bibs from freezing temperatures
    • Clean gutters again after leaves have fully dropped
    • Inspect weatherstripping and exterior door sweeps
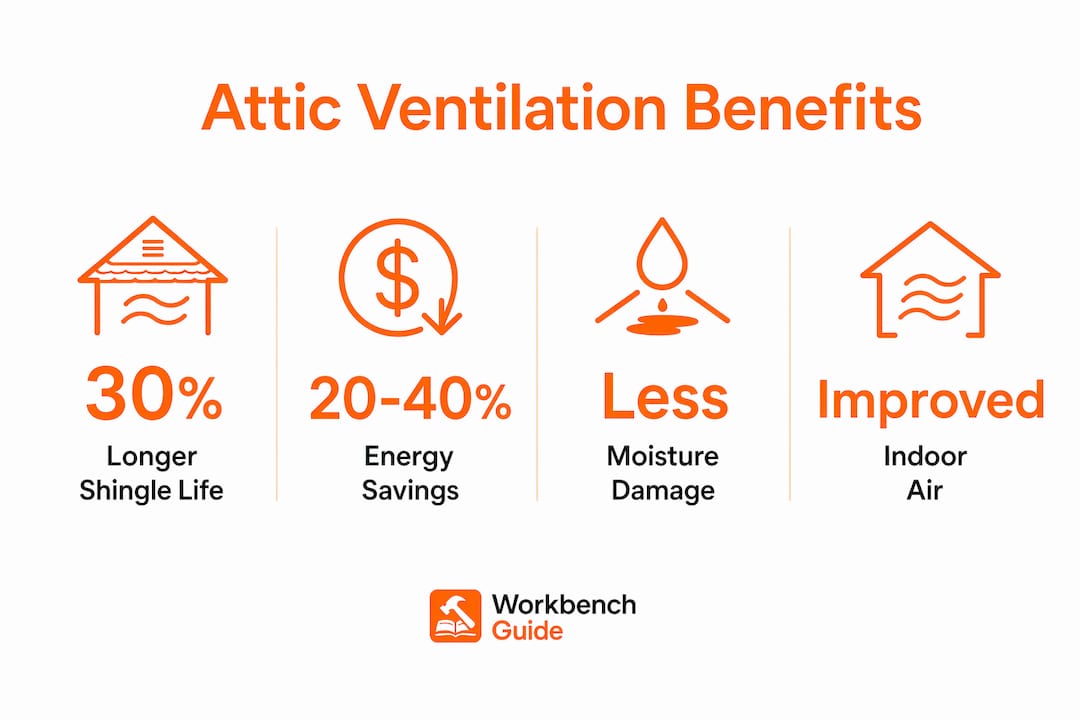
    • Check attic vents and roof flashings before cold weather sets in

    Winter

    • Monitor for ice buildup in gutters and on roof edges
    • Check for condensation near windows and exterior wall penetrations
    • Inspect after heavy storms for displaced shingles or debris damage
    • Walk around the perimeter after wind events to spot emerging issues

    Good seasonal home prep keeps each of these tasks from piling up. When you spread the work across the year, nothing feels overwhelming, and you catch problems when they’re still cheap to fix.

    Here’s a simple comparison of reactive versus proactive maintenance:

    Approach Average annual effort Typical repair costs Stress level
    Reactive (fix when broken) Low initially, high in crisis $2,000–$10,000+ per incident High
    Proactive (seasonal schedule) Consistent and manageable $100–$500 per season Low
    No maintenance None until disaster $10,000+ major damage Extreme

    Use a year-round maintenance checklist to map every task to its correct window, and refer to the maintenance checklist timing guide to prioritize by urgency. If you live in a colder region, the winter prep guide offers freeze-specific steps that go beyond the basics.

    Seasonal home maintenance vertical checklist infographic

    Essential tools and materials for exterior upkeep

    With a clear schedule in place, make sure you’re equipped for each task. Here’s what you’ll need.

    The right tools make a massive difference. Working with a dull caulk gun or the wrong type of sealant wastes time and leads to failures within a season. Your goal is to build a basic exterior maintenance toolkit that’s always ready to go, so when the right week arrives on the calendar, you’re not scrambling at the hardware store.

    Here’s a breakdown of what belongs in your exterior maintenance kit:

    Tool or material Primary use Notes
    Sturdy extension ladder Roof, gutters, high trim Fiberglass preferred for safety
    Caulk gun and exterior caulk Sealing windows, doors, vents Choose flexible, paintable, mold-resistant formulas
    Gutter scoop and bucket Debris removal Plastic scoops avoid scratching gutters
    Deck brush and pump sprayer Cleaning decks, siding, walkways Use with appropriate cleaners
    Paint and primer Touch-ups and full repaints Use exterior-grade, weather-resistant products
    Deck stain and sealant Wood protection Oil-based for longevity, water-based for easy cleanup
    Work gloves and safety glasses Personal protection Non-negotiable for debris and chemical handling

    When selecting materials, always choose weather-resistant products rated for your climate zone. In hot, sunny regions, UV-resistant paint matters most. In wet or humid areas, mold-and-mildew-resistant exterior caulk formulas are the better choice, specifically ones that are flexible, paintable, high-adhesion, and built to resist biological growth. Cheap caulk may cost $2 less at the register but fail in one winter, forcing a redo.

    Pro Tip: Keep all your exterior maintenance tools in a single labeled storage bin in the garage. When a seasonal task rolls around, you grab the bin and you’re ready. No hunting for the caulk gun, no discovering the ladder has a broken rung the morning you planned to use it.

    Use our maintenance checklists and step-by-step repair guides to pair the right tool with the right task every time.

    How to inspect and maintain gutters like a pro

    Prepared with tools in hand, let’s tackle one of the most critical and often neglected tasks: gutter maintenance.

    DIY gutter cleaning tools and technique

    Gutters are the unsung heroes of your home’s exterior. They redirect thousands of gallons of water away from your foundation every year. When they’re clogged or damaged, that water goes somewhere it shouldn’t, and the repair bills for foundation damage, basement flooding, or fascia rot are not small. A twice-yearly gutter inspection schedule is the standard recommendation, with extra checks after major storms or high-wind events.

    Here’s the step-by-step process for a thorough DIY gutter clean and inspection:

    1. Set up your ladder safely. Place it on firm, level ground. Never lean a ladder against the gutter itself since it can bend or detach.
    2. Clear debris by hand or with a gutter scoop. Work from one end toward the downspout. Bag the debris as you go.
    3. Flush the gutter with a garden hose. Start at the far end and work toward the downspout. Watch for slow drainage or standing water, which signals a partial clog or improper pitch.
    4. Flush the downspout from the top. If water backs up, use a plumber’s snake or downspout attachment to clear the blockage.
    5. Inspect for rust, holes, and loose hangers. Small rust spots can be sealed with gutter patch compound. Loose hangers need refastening before the next rain.
    6. Check for leaks at seams. Apply gutter sealant to any joints showing daylight or past water stains on the fascia.
    7. Confirm pitch is correct. Gutters should slope about a quarter inch for every 10 feet toward the downspout. Use a level to verify.

    Safety first: Never work on a ladder alone. Always have someone present who can stabilize the ladder and call for help if needed. Wear non-slip footwear and never lean past your body’s center of gravity.

    In colder climates, backed-up gutters dramatically raise ice dam risk, where ice builds at the eave and water backs up under shingles. Inspecting gutters before the first freeze cycle and again after heavy snow events is the most effective way to prevent this.

    After completing a gutter cleaning, always check the roof inspection checklist to confirm your roof surface is in good shape alongside the drainage system. The home safety inspection guide also covers ladder safety in more detail if you’re new to working at height. And if you’re heading into colder months, the winterizing home steps will extend what you’ve done here.

    Pro Tip: After flushing the gutters, run a hose from ground level and watch where the downspout discharges. Water should move at least 4 to 6 feet away from your foundation. If it pools near the house, add a downspout extension.

    Caulking, sealing, and exterior repairs: Avoiding costly failures

    Well-maintained gutters are only half the battle. Next, learn how to prevent leaks and structural damage with effective caulking and sealing.

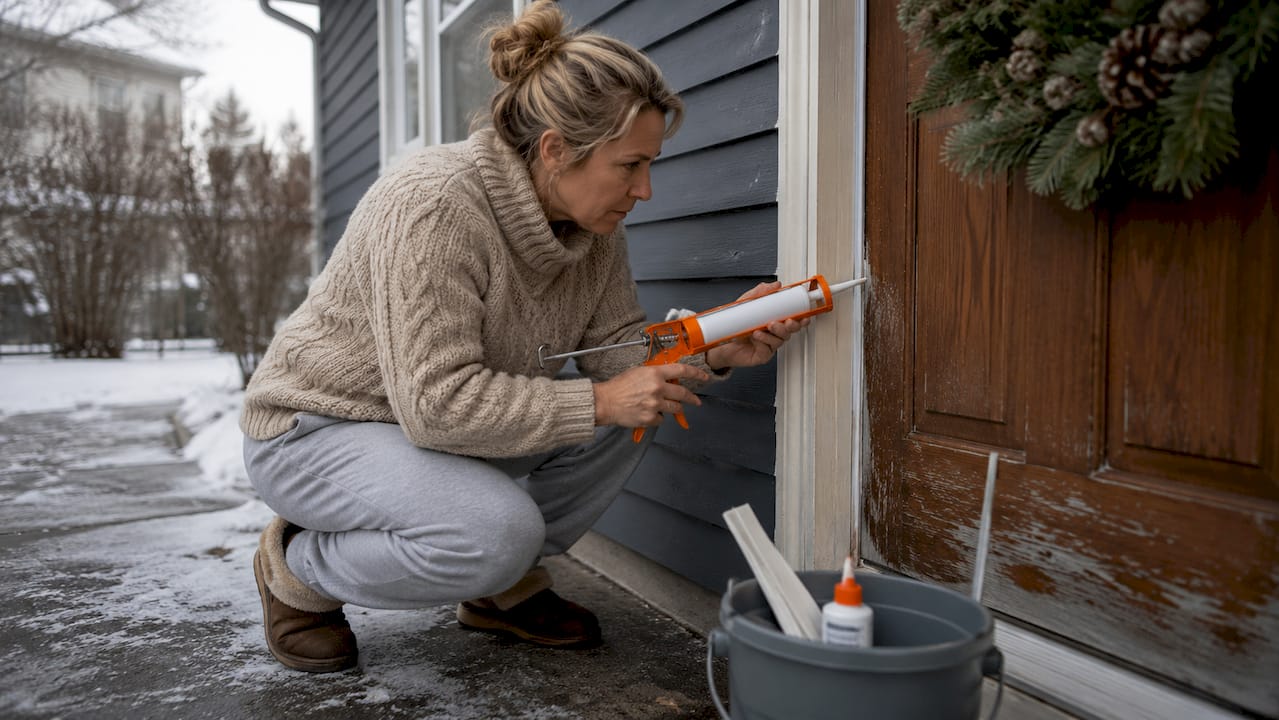
    Caulk is cheap. Water damage is not. Inspecting and replacing failed caulk is one of the highest-return maintenance tasks you can do, because a $10 tube of caulk applied in the right spot can prevent $3,000 in drywall and framing damage.

    The highest-risk junctions in any home exterior include windows and door frames, utility penetrations such as dryer vents and gas line entries, chimney flashings, and anywhere two dissimilar materials meet, like wood siding butting against a brick foundation. These are exactly the spots to inspect for caulking failures each spring and fall.

    Common signs that caulk has failed:

    • Cracking or powdering: The bead has dried out and can no longer flex with the building
    • Shrinkage: The caulk has pulled away from one or both surfaces, leaving a gap
    • Delamination: The caulk is peeling off the substrate rather than adhering
    • Discoloration or mold growth: Water has been infiltrating behind or under the bead

    Here’s how to replace failed exterior caulk correctly:

    1. Score and remove old caulk. Use a utility knife and caulk removal tool. Every trace of old material must come off for the new bead to adhere properly.
    2. Clean the surface. Wipe with a dry cloth and allow to dry completely. Caulk applied over moisture will fail quickly.
    3. Apply painter’s tape on both sides of the joint for a clean, professional bead line.
    4. Load your caulk gun and apply in one smooth pass. Keep consistent pressure and move at a steady pace.
    5. Tool the bead with a wet finger or caulk tool to press it into the joint and create a concave profile.
    6. Allow to cure according to the product label, typically 24 hours before painting.

    Areas to check every single season:

    • All window and door perimeters
    • Chimney base and step flashings
    • Dryer vents, pipe penetrations, and electrical conduit entries
    • Corner boards on wood siding
    • Transitions between different siding materials

    The exterior repair guides at Workbench Guide walk through each of these scenarios with photos and material recommendations.

    Verifying results: How to confirm your maintenance protects your home

    Once your repairs are complete, it’s vital to ensure your home really is protected from costly surprises.

    Finishing a maintenance session feels good, but skipping the verification step is a mistake many homeowners make. Doing the work is not enough if a downspout was refastened but still leaks at the seam, or if new caulk was applied over a surface that wasn’t fully dry. The confirmation walk-around closes the loop.

    Use this verification checklist after each seasonal maintenance session:

    • Walk the full perimeter of the home and visually confirm every repair area
    • Look for any caulk that’s already separating or showing air gaps
    • Check that all gutter hangers are secured and gutters have proper pitch
    • Confirm downspouts discharge water well away from the foundation
    • Look at painted or sealed surfaces in raking light (angled sunlight reveals bubbles, drips, or missed spots)
    • Make sure all tools and debris have been properly stored or removed

    After storms or extreme weather, do a quick follow-up check of the areas you’ve maintained. This is especially important in year-round results monitoring because weather events often reveal weak spots that weren’t visible during dry conditions.

    Pro Tip: Start a simple home maintenance log, either a notebook or a notes app on your phone. After each session, write the date, what you did, and anything you noticed but didn’t fix yet. Patterns emerge over time. If a certain window joint keeps failing every season, that’s a signal of a deeper moisture or structural issue worth investigating before it becomes expensive.

    Why seasonal maintenance is more effective than fixing problems as you notice them

    Here’s a perspective that years of watching homeowners struggle with their properties has reinforced again and again: reactive maintenance is not actually maintenance. It’s damage control.

    When you fix problems as you notice them, you’re always a step behind. The caulk was failing for six months before you saw the bubbled paint on the interior wall. The gutter pulled away from the fascia over three rainy seasons before water stained the siding all the way to the foundation. By the time the problem is obvious, the damage is already compounded.

    Scheduled maintenance works differently because it treats your home’s exterior as a system, not a collection of isolated parts. When you check gutters in spring, you’re also naturally looking at the roof edge, the fascia board, and the downspout extensions. You catch three potential problems in one visit instead of discovering them as three separate emergencies over two years.

    There’s also a psychological benefit that rarely gets mentioned. Homeowners who maintain a regular schedule report far less stress about their home. They know what’s been checked. They know what’s coming next. The home doesn’t feel like a source of lurking threats because they’ve already looked. That peace of mind has real value, and it builds on itself each season.

    The uncomfortable truth is that most major exterior repairs are not bad luck. They’re the result of small problems that had time and moisture on their side. Take that time advantage away with a consistent schedule, and you dramatically change the odds in your favor.

    Get expert help and smarter tools for home maintenance

    Ready to move beyond reactive fixes? Here’s how our platform can be your partner for hassle-free exterior care.

    Workbench Guide is built specifically for homeowners who want to stay ahead of problems without becoming professional contractors. Our platform gives you curated checklists that tell you exactly what to do and when, so you never forget a seasonal task. The prevent costly repairs checklist is a great starting point for building your full-year exterior routine. When you’re ready to tackle specific jobs, the step-by-step repair guides walk you through each task with clear instructions and material recommendations. You can also explore DIY project ideas that save money and add real value to your home. And when a job genuinely needs a pro, we help you find one confidently.

    Frequently asked questions

    How often should exterior maintenance be done on a house?

    A season-by-season system is best, with specific inspection, cleaning, and repair tasks assigned to spring, summer, fall, and winter for complete year-round protection.

    What is the most overlooked exterior maintenance task?

    Gutter inspection and cleaning are consistently overlooked but critical. A proper DIY gutter routine includes clearing debris, flushing downspouts, and checking for leaks or rust, especially after storms.

    What are signs that exterior caulking needs repair?

    Look for cracking, powdering, shrinkage, and delamination. These are the main caulking failure signs that mean the bead needs to be removed and replaced before water gets behind the surface.

    How can homeowners prevent ice dams and winter overflow?

    Inspect gutters and downspouts before freeze cycles and after heavy snow. Backed-up gutters in cold climates allow ice to build at the roof edge, which forces water back under shingles and into the structure.

    What’s an easy way to organize exterior maintenance tasks?

    A structured seasonal checklist system assigns the right tasks to the right time of year, making it easy to stay consistent without having to remember everything from scratch each season.

  • Deck Maintenance Checklist: Keep Your Outdoor Space Safe

    Deck Maintenance Checklist: Keep Your Outdoor Space Safe

    Your deck takes a beating every single season. Rain warps boards. UV rays fade finishes. Leaves trap moisture and breed mildew. Most homeowners only notice these problems after a board snaps underfoot or a railing wiggles loose, and by then, you’re looking at a repair bill that could have been avoided entirely. The good news is that a simple, proven checklist keeps all of this under control. This guide walks you through every step of deck maintenance, from setting a realistic schedule to cleaning, inspecting, and protecting your investment, so your outdoor space stays safe, sturdy, and good-looking year after year.

    Table of Contents

    Key Takeaways

    Point Details
    Seasonal maintenance matters Following a set schedule for cleaning and inspections prevents costly damage and extends deck life.
    Spot-clean for longevity Promptly clean spills and debris to avoid surface discoloration and warranty issues.
    Safety starts with inspection Check connections, railings, and hardware regularly to keep your deck safe and sturdy.
    Right products, right methods Use only manufacturer-approved cleaners and observe correct timing for stains and sealants.

    Set your deck maintenance schedule

    With the value of diligent maintenance established, let’s break down how to set up your recurring deck care schedule. The biggest mistake homeowners make isn’t skipping one big cleaning. It’s having no routine at all. Without a plan, small problems pile up silently until you’re facing rot, structural damage, or a failed inspection.

    The key is building a tiered schedule that fits naturally into your life. Think of it in three layers: weekly, monthly, and seasonal.

    Weekly tasks take just a few minutes and prevent the slow damage caused by organic debris. Leaves, pine needles, and dirt pack between deck boards and trap moisture against the wood or composite surface. That’s how rot and mildew start. A quick sweep or leaf blower pass is all you need.

    Monthly tasks involve a closer look. Rinse the surface with a garden hose to remove pollen, dust, and light grime that accumulates over the month. Check for any obvious issues like loose fasteners or standing water after rain.

    Seasonal tasks are where the real work happens. A recurring seasonal cadence with routine debris removal weekly, rinsing monthly, and a deeper full cleaning twice per year (spring and fall) forms the backbone of any good deck care program. Think of spring as your post-winter recovery check and fall as your pre-winter protection step.

    Integrating your deck care into your year-round home maintenance routine makes it easier to stay consistent. Pair it with gutter cleaning, HVAC filter changes, and other recurring tasks so nothing slips through the cracks.

    Pro Tip: Set calendar reminders on your phone right now for late April and late September. Label them “Deck Inspection and Deep Clean.” That two-minute task today could save you thousands later.

    Maintenance frequency at a glance:

    Task Frequency Why it matters
    Debris removal (sweep/blow) Weekly Prevents moisture trapping and mildew
    Surface rinse with hose Monthly Removes pollen, dust, light grime
    Full deep clean Twice a year (spring/fall) Prevents staining, surface degradation
    Structural safety inspection Annually (spring) Catches hardware corrosion, loose connections
    Sealing or staining (wood only) Every 1 to 3 years Protects against UV and moisture damage

    Tracking your seasonal home prep across all home systems, not just your deck, gives you a fuller picture of where your home stands each season. And when fall arrives, don’t overlook winterizing your home as part of the same overall push.

    Structural and safety inspection musts

    Once you’ve set up your schedule, make structural safety your next priority. A visually clean deck can still be a dangerous one if the bones beneath it are compromised. This is where a methodical walk-through saves lives, not just money.

    According to the North American Deck and Railing Association (NADRA), deck safety inspection should include an end-to-end review covering connections like the ledger and flashings, structural members, guardrails, stairs, and hardware for corrosion or looseness. NADRA designates May as Deck Safety Month specifically because spring is the ideal time to catch damage from winter before the heavy-use summer season begins.

    “Homeowners are encouraged to use NADRA’s consumer checklist and schedule spring inspections as part of regular deck safety maintenance.” — NADRA

    Here’s what every DIY homeowner should check during an annual inspection:

    • Ledger board: This is the board that connects your deck to your house. Check for rot, separation from the house, and missing or rusted hardware. A failed ledger board is one of the leading causes of deck collapses.
    • Flashing: Flashing seals the gap between the ledger and the house siding. If it’s missing, bent, or corroded, water infiltrates and quietly rots the structure from the inside out.
    • Decking boards: Press a screwdriver into any boards that look soft or discolored. If it sinks in, that board needs to go.
    • Joists and beams: Look underneath the deck with a flashlight. Check for rot, insect damage, or cracks along the grain of the wood.
    • Railings and balusters: Grab each post and shake it firmly. It shouldn’t move. Balusters (the vertical spindles) should be spaced close enough to prevent a 4-inch sphere from passing through.
    • Stairs and stringers: Test each step for bounce or flex. Inspect the stringers (the diagonal supports) for cracks or rot at the base where they contact the ground.
    • Hardware and fasteners: Look for rusted or corroded screws, bolts, and joist hangers. Rust weakens metal connectors faster than most people realize.
    Inspection item Check for Frequency
    Ledger board Rot, separation, loose bolts Annually
    Flashing Gaps, rust, bending Annually
    Deck boards Soft spots, cracks, raised nails Spring and fall
    Railings and posts Wobble, rot, loose hardware Annually
    Stairs Bounce, rot at base Annually
    Joist hangers Rust, missing fasteners Annually

    For a broader look at what a full inspection checklist covers across your home’s exterior, it’s worth reviewing your entire home safety inspection process at the same time each spring.

    Pro Tip: Do your structural inspection on a sunny day after a rain. Wet wood reveals staining, soft spots, and areas where water is pooling that you’d otherwise miss on a dry day.

    Person inspecting deck wood after rain

    Cleaning routines for wood and composite decks

    Structural checks are step one, but a clean deck is equally vital. Dirt, algae, pollen, and spilled food don’t just look bad. They can permanently stain composite surfaces, void warranties, and accelerate rot in wood decks. The right cleaning approach depends entirely on what your deck is made of.

    Cleaning a wood deck

    1. Clear all furniture, planters, and accessories from the surface.
    2. Sweep away all loose debris, paying close attention to debris packed between boards.
    3. Pre-wet the surface with a garden hose to loosen dirt.
    4. Apply a wood deck cleaner (oxygen bleach-based formulas work well and are gentler than chlorine bleach) using a stiff-bristle brush.
    5. Scrub with the grain of the wood to avoid cross-grain scratches.
    6. Rinse thoroughly with clean water.
    7. Allow the surface to dry completely before any staining or sealing.

    If you use a pressure washer on wood, keep the pressure at or below 1,200 to 1,500 PSI and hold the wand at least 12 inches from the surface. High pressure can raise the wood grain and cause furring, which makes the surface rough and harder to coat.

    Cleaning a composite or PVC deck

    Composite decks are lower maintenance, but they are not zero maintenance. Manufacturer-approved cleaners are essential. Avoid harsh chemicals, non-approved bleach-based products, and overly aggressive pressure washing. These can break down the surface cap on capped composite boards and, in some cases, void your warranty.

    • Use a soft-bristle brush or mop with warm soapy water for routine cleaning.
    • For organic stains like mold or mildew, use a composite deck cleaner specifically formulated for the purpose.
    • Pressure wash at low settings (under 1,500 PSI) if needed, keeping the nozzle moving.
    • Clean in the direction of the board grain to avoid streaking.
    • Rinse completely after cleaning to remove any residue.

    Composite deck longevity depends on keeping the surface clean, maintaining drainage and airflow beneath the boards, and using the right approved cleaner. Composite decks don’t need sanding or staining, which is a major advantage, but skipping cleaning altogether accelerates surface discoloration and can reduce the effectiveness of the UV-resistant cap layer.

    Pro Tip: Spills happen fast, especially during summer cookouts. Clean up food, grease, and beverages as quickly as possible. Many composite manufacturers specify a cleanup window in their warranty terms, and letting stains sit too long can mean the difference between a covered claim and an out-of-pocket repair.

    For a broader overview of the tools and cleaning supplies you should keep on hand, review your full home maintenance kit before the season begins. These safety cleaning tips also apply when handling cleaning products around children and pets.

    Protective finishes and coatings for wood decks

    Cleaning makes way for the next crucial step: refreshing protective finishes. This section applies specifically to natural wood decks. Composite and PVC surfaces skip this step entirely, which is one reason they’ve grown in popularity.

    For wood decks, protective coatings should be reapplied every 1 to 3 years depending on your climate, the type of wood, and the amount of sun and moisture exposure the deck receives. Decks in harsh climates or full sun may need annual touch-ups, while covered or shaded decks in mild climates can go closer to three years between applications.

    Step-by-step process for sealing or staining a wood deck:

    1. Complete your deep cleaning and allow the deck to dry for at least 48 to 72 hours. Moisture trapped under a new coat causes bubbling and peeling.
    2. Sand lightly with 80-grit sandpaper if the surface is rough or raised from cleaning.
    3. Perform a water droplet test: sprinkle a few drops of water on the surface. If the water soaks in within 30 seconds, the wood is ready. If it beads up, it needs more drying time.
    4. Choose your product: a clear sealer for natural look, a semi-transparent stain for color with grain visibility, or a solid stain for maximum UV protection.
    5. Apply with a brush, roller, or pad applicator on a dry day with temperatures between 50°F and 90°F.
    6. Work in the direction of the grain and maintain a wet edge to avoid lap marks.
    7. Apply a second coat if recommended by the product label. Allow full curing time before placing furniture back.

    Pro Tip: Always do a small test patch in an inconspicuous area before applying stain to the whole deck. Wood reacts differently based on species, previous treatments, and age. A test patch prevents surprises.

    Prepping wood surfaces properly before applying any finish is the difference between a coating that lasts three years and one that peels in three months. Skipping surface prep is the number one reason wood deck finishes fail prematurely, and it’s a costly mistake to fix. Building this into your regular routine also keeps you on track with preventing costly repairs across the whole home.

    Deck maintenance at-a-glance: Your checklist summary

    For fast, confident upkeep, use this consolidated summary as your go-to seasonal deck care guide. Print it, save it to your phone, or pin it to your garage wall.

    Wood vs. composite deck checklist comparison:

    Task Wood deck Composite/PVC deck
    Weekly debris removal Yes Yes
    Monthly rinse Yes Yes
    Deep cleaning (spring/fall) Yes, with wood cleaner Yes, with approved cleaner
    Pressure washing Low PSI only Low PSI only
    Sanding As needed before coating Not needed
    Staining or sealing Every 1 to 3 years Not required
    Structural inspection Annually Annually
    Hardware check Annually Annually

    Critical task reminders:

    • Sweep or blow off debris every week to prevent moisture buildup between boards.
    • Inspect railings, stairs, and the ledger board every spring before peak use.
    • Check drainage gaps and weep holes after heavy rain to confirm water is moving off the surface freely.
    • Spot-clean promptly when food, oils, or organic stains land on composite surfaces to stay within warranty-relevant cleanup windows.
    • Test wood for moisture readiness before applying any protective coating.
    • Document your maintenance dates in writing so you know exactly when the next cycle is due.

    For even more guidance, explore all our home checklists organized by season and project type.

    What most DIYers miss about deck maintenance

    Here’s the honest truth we’ve seen time and again: most homeowners focus almost entirely on what they can see. They scrub the surface, slap on a fresh coat of stain, and call it done. But the real threats to deck longevity are largely invisible, and the most expensive failures almost always trace back to two overlooked issues: drainage and ledger connections.

    Standing water and blocked drainage are among the most common and recurring failure modes in deck maintenance. Water that pools on the surface or collects between boards creates a breeding ground for mildew and algae, accelerates fastener corrosion, and puts constant stress on the deck’s structural connections. Even so-called “low-maintenance” composite decks fail prematurely when drainage is ignored.

    The ledger board is the other silent killer. It’s hidden behind siding, almost never visible without deliberately looking, and it’s the single most critical structural connection on an attached deck. A compromised ledger can fail suddenly and without warning, especially after repeated freeze-thaw cycles or sustained moisture exposure.

    The counterintuitive insight here is that the homeowners with the most beautiful-looking decks sometimes have the most structurally vulnerable ones. They prioritize appearance over structure. A faded, weather-worn deck with solid fasteners and clear drainage channels is actually safer than a freshly stained deck with standing water pooling at the ledger.

    Real deck longevity comes from checking what you cannot see, not just polishing what you can. Make drainage and ledger inspection non-negotiable parts of your spring walkthrough every year. These two checks take under ten minutes combined, and they’re genuinely what separates a deck that lasts 25 years from one that needs a full rebuild after 12. Pair these checks with consistent preventing water damage habits across the rest of your home’s exterior, and you’re protecting the entire investment, not just the surface.

    Take the next step with easy home maintenance solutions

    Keeping your deck in great shape is much easier when you have the right tools in your corner. At Workbench Guide, we’ve built a full library of step-by-step guides and printable checklists designed specifically for homeowners who want to stay ahead of repairs instead of reacting to them. Start with the complete home maintenance checklist to organize all your seasonal tasks in one place, from deck care to roof checks to HVAC filters. When you’re ready to tackle bigger outdoor upgrades, browse our DIY project ideas for money-saving inspiration. And for every topic in this article and beyond, you can explore all our guides to find exactly what you need next.

    Frequently asked questions

    How often should I clean my deck?

    Clean your deck at least twice a year during spring and fall, with weekly debris removal and monthly rinsing in between.

    What is the best way to clean composite decking?

    Use a manufacturer-approved cleaner and a soft-bristle brush, avoid harsh chemicals or aggressive pressure washing, and rinse the surface completely after cleaning.

    Do I need to seal or stain my composite deck?

    No. Composite decks do not require sanding, sealing, or staining; regular cleaning and proper drainage are what keep them performing long-term.

    How do I know when to re-stain a wood deck?

    Re-stain every 1 to 3 years, but first do a water droplet test and inspect for surface wear to confirm the timing is right for your specific deck and climate.

    What are the key signs my deck needs repair?

    Look for soft or spongy boards, loose or wobbling railings, rusted hardware, and separation at the ledger board connection, as any of these require immediate attention before the deck is used.

  • HVAC zoning: boost efficiency and comfort at home

    HVAC zoning: boost efficiency and comfort at home

    Closing a vent in the guest room seems like a clever way to cut your energy bill. It feels logical. Less air goes somewhere unused, so the system works less, right? Actually, closing vents manually increases static pressure in your ducts and forces your HVAC system to work harder, which can lead to coil icing, duct leaks, and premature equipment failure. True HVAC zoning solves this problem the right way, using dedicated hardware to control airflow intelligently across your entire home. This article covers how zoning works, which homes benefit most, what proper design looks like, and how to weigh the real costs and savings.

    Table of Contents

    Key Takeaways

    Point Details
    Define HVAC zoning HVAC zoning divides your home into independently controlled temperature areas using thermostats and dampers.
    Who benefits most Zoning is best for multi-story homes with uneven temperatures or unused spaces, not small homes.
    Design pitfalls Proper sizing and design are critical to avoid high system pressure, noise, and equipment strain.
    ROI depends on layout Efficiency gains and financial ROI vary based on home layout, usage, and proper installation.
    Better alternatives Ductless systems often outperform traditional zoning through greater efficiency and less maintenance.

    Understanding HVAC zoning: What it is and how it works

    Most homes run on a single-zone HVAC system. One thermostat reads the temperature in one spot, usually a hallway or main living area, and tells the system to heat or cool the entire house to that one setting. The bedroom over the garage that bakes in summer? Still gets the same signal. The basement nobody uses in winter? Gets conditioned anyway. That is the fundamental problem zoning solves.

    HVAC zoning divides your home into multiple independent temperature zones, each controlled by its own thermostat, using motorized dampers in the ductwork to direct conditioned air only where it is actually needed. Instead of one blanket command, the system responds to real-time conditions in each part of your home. Zone 1 calls for cooling. Zone 2 is already comfortable. The dampers open only for Zone 1 and the conditioned air goes exactly where it is needed.

    The core components include zone thermostats or sensors in each area, motorized dampers installed in the duct branches, a central zone control panel that coordinates all the signals, and often a bypass duct or dump zone to manage static pressure when multiple dampers close simultaneously. That bypass duct is critical. Without it, closing dampers in inactive zones would create dangerous pressure buildup inside your main duct trunk.

    HVAC technician inspects zone damper in basement

    Here is how a zoned system compares to a traditional single-zone setup:

    Feature Single-zone system Multi-zone system
    Temperature control One setting for entire home Individual control per zone
    Energy use in unused rooms Full conditioning Reduced or off
    Equipment complexity Simple Moderate to complex
    Upfront cost Lower Higher ($2,000-$6,000+)
    Comfort in multi-level homes Often uneven Significantly improved
    Requires bypass duct No Usually yes

    The key components worth knowing before you talk to any contractor:

    • Zone thermostats: Each zone has its own thermostat or sensor that communicates independently with the control panel.
    • Motorized dampers: These are installed inside duct branches and open or close based on signals from the control panel.
    • Control panel: The brain of the system. It receives calls from multiple thermostats and coordinates which dampers open and when.
    • Bypass duct: Routes excess airflow back to the return side of the system to prevent pressure spikes when few zones are calling for air.

    You can boost home comfort significantly when these components work together properly and are sized correctly for your home.

    With the basics established, let’s explore who actually benefits from HVAC zoning and how to know if your home is a good candidate.

    Infographic showing HVAC zoning process flow

    Which homes benefit most from HVAC zoning?

    Not every home needs zoning, and installing it in the wrong situation wastes money. The homes that see the biggest returns share a few specific characteristics.

    Zoning works best in multi-story homes, homes with uneven temperatures between rooms, and homes where some spaces go unused for long periods. It is less effective in small homes under 1,500 square feet with fairly consistent temperature patterns, or in any home where the existing ductwork is poorly designed or undersized.

    Here is a quick breakdown of which home types tend to benefit most:

    Home type Zoning benefit Notes
    Two-story or larger High Upper floors heat up significantly more
    Home with finished basement High Basement stays cooler; needs independent control
    Open-concept with large windows High Solar gain creates hot spots
    Rooms with different occupancy High Offices, guest rooms, hobby spaces
    Small ranch-style under 1,500 sq ft Low Even conditions; simpler fixes likely better
    Poorly designed ductwork Low/Risk Zoning can make existing problems worse

    For homeowners dealing with consistent home temperatures that vary wildly between floors or rooms, zoning is often the most targeted fix available.

    Before any zoning installation, a contractor should perform a Manual J load calculation for each proposed zone. Manual J is the industry-standard method for calculating heating and cooling loads in residential spaces. Manual D is the companion standard for duct design. Skipping these steps is one of the most common contractor shortcuts that leads to poor performance and unnecessary equipment wear.

    Common red flags to watch for when evaluating a zoning installation:

    • No load calculation offered: If the contractor does not mention Manual J, push back or find someone else.
    • Too many zones: More zones sounds better but creates more complexity and more potential failure points. For most homes, two to four zones is ideal.
    • Ignoring duct condition: Zoning adds airflow control but cannot fix leaky or undersized ducts. Always address duct issues first.
    • One-size-fits-all approach: Every home’s layout and usage pattern is different. A contractor who doesn’t ask detailed questions about how you use each room is likely cutting corners.

    Pro Tip: Ask your HVAC contractor to show you the Manual J calculations for each proposed zone before signing any contract. This one request separates experienced professionals from those guessing at sizing.

    Staying on top of regular HVAC maintenance tips is equally important once a zoning system is installed. More components mean more potential failure points, so inspections and filter changes matter even more.

    Once you’ve identified if your home is a fit, understanding design and installation is crucial for getting the best results from zoning.

    HVAC zoning design: Best practices, pitfalls, and edge cases

    Good zoning design is not just about splitting your home into sections. It involves carefully balancing airflow, sizing equipment, and protecting your system from static pressure problems that can damage components over time.

    The single most important design rule: the smallest zone must be able to handle at least 35% of the total system CFM (cubic feet per minute, the measure of airflow volume) for single-stage equipment. This prevents static pressure from rising to damaging levels when only that zone is calling for air. Bypass duct sizing is calculated as total system CFM minus the smallest zone CFM.

    Here is a practical numbered checklist for zoning design:

    1. Complete Manual J and Manual D first. Accurate load and duct calculations are non-negotiable before any damper or thermostat is placed.
    2. Limit zones to what you actually need. Two to four zones covers most homes effectively. Adding more zones for the sake of control often creates more maintenance complexity than benefit.
    3. Size the bypass duct correctly. An undersized bypass duct will not protect against pressure spikes. An oversized one wastes conditioned air.
    4. Choose compatible equipment. Single-stage systems (on/off only) are the hardest to zone efficiently. Two-stage or variable-speed equipment adapts its output to match zone demand.
    5. Label all dampers and zones clearly. This sounds obvious but is often skipped during installation, making future troubleshooting much harder.
    6. Install zone sensors in the right locations. Sensors in direct sunlight, near exterior doors, or above appliances will give inaccurate readings and cause the system to overcorrect.

    Watch out: Poor zoning design is one of the leading causes of premature HVAC failures. High static pressure forces blower motors to work beyond their rated capacity, leads to coil icing in cooling mode, and can cause heat exchangers to crack in heating mode. One bad installation decision can cost thousands in repairs.

    Poor design causes high pressure, noise, coil icing, and equipment strain over time. The bypass duct approach also recycles already-conditioned air back through the system rather than sending it to a space that needs it, which is inherently inefficient. The better long-term solution is pairing zoning with variable-speed or modulating HVAC equipment, which does not need a bypass duct at all because it can reduce its own output to match smaller zone demands.

    Pro Tip: If you are replacing your HVAC system and considering zoning, invest in variable-speed or two-stage equipment. The higher upfront cost pays back quickly in efficiency and protects you from the static pressure problems that plague single-stage zoned systems.

    Reviewing zoning design best practices with a qualified contractor before committing to a design will help you avoid expensive mistakes. And proper design from the start is one of the best ways to prevent costly repairs down the road.

    With proper design, it’s important to weigh the real benefits against costs, myths, and alternatives for energy efficiency.

    Cost, ROI, and efficiency benefits of HVAC zoning

    Let’s talk numbers. Zoning is not cheap, and its return on investment depends heavily on how well it matches your specific home and usage patterns.

    A typical zoning retrofit costs between $2,000 and $6,000, including dampers, thermostats, a control panel, and labor. Larger homes, more zones, or older ductwork that needs modifications will push toward the higher end. New construction with zoning designed into the original duct layout costs considerably less because the ductwork is built to accommodate the system from day one.

    Key factors that determine whether zoning is worth the investment for your home:

    • Multi-level layout: Upper floors in two-story homes can run 8-10°F warmer than lower floors due to heat rising and solar gain. Zoning directly addresses this and delivers clear comfort gains.
    • Rooms with irregular use: If you have a home office used only during business hours, a guest room used a few times per year, or a workout room used in the evenings, conditioning those spaces full-time is pure waste.
    • Current system condition: If your existing ductwork is leaky or your insulation is poor, zoning will not fix those problems. In that situation, duct sealing and insulation upgrades often deliver better ROI for less money.
    • Equipment compatibility: Retrofitting zoning onto an old, single-stage system can create more problems than it solves. The efficiency equation looks very different when variable-speed equipment is involved.

    Savings vary significantly based on home layout and usage patterns. Homes with the highest ROI share multi-level layouts, significant unused spaces, and dynamic occupancy patterns. Small, evenly conditioned homes may see minimal savings compared to simpler fixes like air sealing or adding insulation.

    Statistic to know: Ductless mini-split and VRF (variable refrigerant flow) systems, which are an alternative to ducted zoning, can deliver 20-40% efficiency gains because they eliminate duct losses entirely. For homes without existing ductwork, or during a major renovation, these systems are worth serious consideration as a zoning alternative.

    What zoning is not a substitute for:

    • Fixing leaky ducts (sealing ducts can reduce HVAC energy use by 20-30% on its own)
    • Adding attic insulation to reduce solar gain
    • Air sealing around windows, doors, and penetrations
    • Replacing truly outdated equipment that is beyond its useful life

    The path to better efficiency often runs through these basics before zoning becomes the right next step. Proper annual HVAC service also plays a major role in keeping any system performing at its rated efficiency, zoned or not.

    The truth most homeowners miss about HVAC zoning

    Here is where most articles on zoning stop short. They explain the technology, list the benefits, and move on. But the real problem is not a lack of information. It is that homeowners and even some contractors treat zoning as a comfort upgrade rather than a precision engineering task.

    The biggest mistake we see is treating zone count like a feature. More zones does not mean better results. It means more dampers, more control boards, more sensors, more maintenance, and more things that can fail. A thoughtfully designed two-zone system almost always outperforms a poorly designed four-zone system in both comfort and reliability.

    The second missed truth involves home comfort principles that predate zoning entirely. Thermal bridging, air sealing, insulation levels, and window performance determine how much work your HVAC has to do in the first place. Zoning is a way to distribute that work intelligently. But if the underlying envelope is leaky or poorly insulated, you are just distributing a losing battle more efficiently.

    The third truth is about equipment pairing. The homeowners who get the most from zoning pair it with variable-capacity equipment. They stop using bypass ducts as a pressure relief valve and start using modulating equipment to simply reduce output when fewer zones call for air. That combination eliminates nearly all the design compromises that make single-stage zoned systems risky.

    Finally, skip any contractor who wants to start with damper placement and zone counts before finishing Manual J and Manual D calculations. That is backwards. The calculations drive the design. The design drives the component selection. Getting that sequence right is the difference between a system that works beautifully for 15 years and one that develops noise, pressure, and efficiency problems within the first heating season.

    Optimize your home’s comfort with the right tools

    Getting the most from your HVAC system does not stop at understanding zoning principles. The real value comes from staying organized, acting on what you know, and catching problems before they become expensive. Workbench Guide gives homeowners practical tools to do exactly that. Use the home maintenance checklist to stay on top of seasonal HVAC tasks and avoid the deferred maintenance that shortens equipment life. Explore DIY home efficiency projects that complement zoning, from air sealing to insulation improvements. And when you are ready to go deeper, the full library of home maintenance guides gives you step-by-step direction for every part of your home.

    Frequently asked questions

    How does HVAC zoning actually work?

    HVAC zoning uses motorized dampers installed in duct branches and individual thermostats for each zone to direct conditioned air only where it is currently needed, rather than conditioning the whole home from a single thermostat.

    Is zoning worth it for a small home?

    For homes under 1,500 square feet with relatively even temperatures, zoning typically delivers minimal ROI compared to simpler improvements like duct sealing, insulation upgrades, or air sealing.

    Are ductless mini-splits better than zoning?

    Ductless mini-splits and VRF systems deliver 20-40% efficiency gains compared to ducted zoning with bypass systems because they eliminate duct losses and do not require static pressure management.

    Can I just close vents to zone rooms?

    No. Closing vents manually increases static pressure throughout your duct system, forces your equipment to strain, and can lead to coil icing, duct leaks, and premature blower motor failure.

    What does a typical zoning retrofit cost?

    Most homeowners pay between $2,000 and $6,000 for a zoning retrofit, with the final cost depending on home size, number of zones, existing ductwork condition, and equipment compatibility.

  • Inspect your attic: prevent costly repairs and stay safe

    Inspect your attic: prevent costly repairs and stay safe

    Your attic is the one part of your home you never think about until something goes wrong. That’s exactly the problem. While you’re living your daily life, issues like moisture, mold, pest infestations, and deteriorating insulation can quietly build up in that dark space above your ceiling. By the time you notice water stains on your drywall or hear scratching sounds at night, you’re often looking at repairs that cost thousands of dollars. This guide shows you what to look for, how to inspect your attic safely, and why making it a regular habit is one of the smartest moves any homeowner can make.

    Table of Contents

    Key Takeaways

    Point Details
    Attic checks spot hidden issues Inspecting your attic reveals problems like moisture, pests, and damaged insulation that threaten home health.
    Annual inspections save money Regular attic inspections prevent costly repairs by catching damage early before it spreads.
    DIY checklists boost safety A structured attic checklist ensures you cover moisture, ventilation, pests, and fire hazards each inspection.
    Proactive care protects your investment Maintaining your attic with routine checks preserves your property’s value and keeps your family safe.

    What makes attic inspections critical for homeowners?

    Most homeowners think of their attic as dead space. Storage for holiday decorations, maybe. But your attic is actually doing a lot of heavy lifting for your home every single day. It acts as a buffer between your living space and the roof, helps regulate indoor temperatures, and protects the structural bones of your house from weather and moisture.

    When something goes wrong up there, the ripple effects are serious:

    • Structural damage: Moisture that collects in the attic softens wooden beams and rafters over time, leading to sagging ceilings or even partial roof collapse in severe cases.
    • Energy loss: Poor or damaged insulation lets conditioned air escape, driving up heating and cooling bills by as much as 20 to 30 percent.
    • Health risks: Mold spores and pest droppings can circulate through your home’s ventilation system, causing respiratory problems for your family.
    • Fire hazards: Rodents chewing on electrical wiring in the attic is one of the leading causes of house fires in residential homes.
    • Pest spread: A small rodent entry point in the attic can become a full infestation that spreads throughout the house within weeks.

    “Inspecting the attic is key to preventing structural and environmental damage.” Annual safety checks are one of the most cost-effective ways to protect your home’s long-term value.

    The good news is that most of these problems are completely preventable when you catch them early. A roof inspection checklist paired with a routine attic walkthrough gives you a full picture of what’s happening at the top of your home. Studies consistently show that homeowners who conduct annual inspections spend significantly less on emergency repairs over a 10-year period compared to those who wait until problems become visible.

    Having framed why attic checks matter so much, let’s look at the specific problems you’re most likely to find up there.

    Infographic outlining attic inspection checklist steps

    Most overlooked problems you’ll find in the attic

    Attic problems don’t announce themselves. They hide in corners, behind insulation, and along the edges of the roof deck where a quick glance won’t reveal anything. Here are the issues that home maintenance experts consistently flag as the most common and the most costly when left unchecked.

    Problem Early sign If ignored
    Moisture/mold Musty smell, dark spots Structural rot, health hazards
    Pest infestation Droppings, chewed wires Fire risk, full home infestation
    Damaged insulation Thin or compressed batts High energy bills
    Blocked vents Condensation buildup Moisture damage, mold growth
    Roof deck damage Sagging, water stains Roof failure, interior flooding

    Here’s a numbered breakdown of where to focus your attention and why:

    1. Moisture and mold: This is the number one attic problem in most climates. It usually starts with a small roof leak or inadequate ventilation. Warm, moist air rises from your living space and has nowhere to escape. The result is condensation that collects on wood surfaces and insulation. Mold can begin growing within 24 to 48 hours of water exposure, so even a slow drip matters.

    2. Rodent or pest droppings: Rats, mice, squirrels, and even raccoons see your attic as prime real estate. They enter through gaps as small as a quarter inch around roof vents, eaves, or where utility lines enter the house. The home safety inspection steps used by professionals always include checking for entry points and droppings along walls and on top of insulation.

    3. Damaged or missing insulation: Insulation gets compressed by foot traffic, chewed by pests, or saturated with moisture. Once insulation loses its structure, it stops working. Damaged batts are often invisible from below, which is exactly why getting up there matters.

    4. Exposed or frayed wiring: Old knob-and-tube wiring, improper DIY electrical work, and rodent chewing all create fire hazards. Look for any wiring that is touching insulation directly, has frayed sheathing, or shows scorch marks.

    5. Blocked or inadequate ventilation: Your attic needs airflow to stay dry and regulate temperature. Blocked soffit vents, improperly installed baffles, and covered ridge vents all trap heat and moisture. This accelerates the degradation of roofing materials from the inside out.

    According to the home maintenance checklist, home services experts examine all five of these areas as a baseline during professional attic inspections. You can absolutely check most of these yourself with the right preparation.

    Pro Tip: Use your nose before you use your eyes. A musty or ammonia-like smell when you open the attic hatch is your first warning sign. Musty usually means mold. Ammonia often means animal urine. Either one means it’s time for a closer look.

    There’s a practical framework for doing this inspection efficiently and safely, and that’s exactly what the next section covers.

    Attic inspection checklist for DIY and safety

    Before you climb up there, get the right gear together. Skipping safety steps is how a routine inspection turns into a trip to urgent care.

    Gear you need:

    • Respirator or N95 mask (for mold spores and insulation fibers)
    • Safety goggles
    • Headlamp or flashlight
    • Work gloves
    • Long sleeves and pants (fiberglass insulation irritates skin badly)
    • Knee pads
    • A piece of plywood or boards to kneel on so you don’t step through the drywall

    Once you’re geared up, here’s how to work through the space methodically:

    Step 1: Start at the hatch or access door. Look for daylight gaps around the frame, which means air leakage. Check the hatch itself for insulation on the back.

    Person inspecting attic hatch for air leaks

    Step 2: Scan the roof deck from the center. Look for dark stains, sagging sections, or areas where daylight is visible through the roof boards. These are active or recent leak sites.

    Step 3: Check insulation depth and condition. In most climate zones, you want R-38 to R-60 value (roughly 10 to 15 inches of blown cellulose or 13 to 18 inches of fiberglass batts). If it’s thin, flat, or wet, it needs replacing.

    Step 4: Follow the rafters and look at every connection point. Check for soft wood (press lightly with a screwdriver handle). Soft spots indicate rot.

    Step 5: Locate all vents and confirm they are unobstructed. Look for condensation rings or water marks near vent openings.

    Step 6: Look for wiring. Note any wiring that is in direct contact with insulation, has visible damage, or is improperly spliced without a junction box.

    Step 7: Check the perimeter where the roof meets the exterior walls. This is where rodents most commonly enter and where ice dams most often cause damage.

    Inspection method Best for Limitations
    DIY inspection Routine checks, visible issues Cannot assess hidden damage safely
    Professional inspector Full structural and electrical review Costs $200 to $500 per visit
    Thermal imaging camera Finding hidden moisture and air leaks Requires training to interpret results

    The roof inspection guide covers complementary steps for checking your roof from the outside, which pairs well with your attic walkthrough. If you want to go deeper on understanding the overall condition of your home, the home audit guide walks you through every system from foundation to roof.

    Pro Tip: Take photos of every area you inspect. Label them by location (northeast corner, center ridge, south vent). This creates a baseline you can compare on your next inspection to spot changes early.

    Now that you have a workable checklist, let’s talk about what this routine effort actually saves you over time.

    How attic inspections protect your wallet and home

    The financial case for regular attic inspections is straightforward once you look at the numbers. A minor roof leak caught during an inspection might cost $200 to $400 to patch. Left undetected for two or three years, that same leak can rot the roof deck, damage ceiling joists, and trigger a mold remediation project that runs anywhere from $3,000 to $10,000 or more.

    The math is not complicated. Here’s what routine inspections help you avoid:

    • Mold remediation: $2,000 to $6,000 for small to moderate infestations
    • Roof deck replacement: $1,500 to $4,000 depending on extent
    • Pest extermination and exclusion: $500 to $3,000 for a full rodent treatment
    • Insulation replacement: $1,500 to $4,000 for a full attic reinsulation
    • Emergency HVAC repair: $500 to $2,000 when attic heat gain overloads your system

    “Describes how inspecting the attic can protect homes from structural and environmental damage.” Catching problems in their early stages consistently delivers five to ten times the return compared to reactive repairs.

    Beyond money, there are safety benefits you can’t put a price on. Fires caused by rodent-chewed wiring are rarely covered fully by insurance if deferred maintenance is proven to be a factor. Mold exposure has been linked to chronic respiratory issues, especially in children and elderly family members. A routine annual inspection takes less than an hour of your time and directly reduces those risks.

    The resources at prevent costly repairs and the maintenance checklist give you a full-year view of home upkeep tasks so attic inspections stay on your calendar, not just on your to-do list.

    The surprising truth most homeowners miss about attic inspections

    Here’s the honest take after working with homeowners on maintenance routines: the biggest mistake people make is treating attic inspections as a one-and-done item on a moving-in checklist. They get the home inspected before purchase, feel reassured, and then never look up there again for a decade.

    That is not how houses work. Your attic changes constantly. Seasons shift temperature and humidity dramatically. Animals are always testing for entry points. Roofing materials have a lifespan. Insulation settles. Ventilation gets blocked by new insulation that was installed without proper baffles. These are not static systems.

    The homeowners who do best financially are the ones who treat the attic like they treat their car. You don’t wait until the engine fails to open the hood. You check the oil, the tires, the brakes. That preventive mindset, applied to your home, is worth thousands of dollars over a typical ownership period.

    There’s also a confidence factor that gets overlooked. Most people avoid the attic because they feel uncertain about what they’re looking at. Once you do one thorough inspection using a checklist, you know your attic. You have photos. You have a baseline. The next time takes half as long and you know exactly what’s changed. That confidence is what turns a dreaded chore into a manageable habit.

    Reading through expert safety inspection insights can help you understand what professionals actually focus on, so you can approach your own inspection with their eye for detail instead of guessing.

    The bottom line: inspecting your attic is not about finding disaster. It’s about knowing your home well enough that disaster doesn’t get a foothold.

    Explore resources for smarter attic inspections and home care

    Workbench Guide is built for exactly this kind of proactive homeownership. Whether you’re doing your first attic walkthrough or building a full seasonal maintenance routine, the tools here make it easy to stay on top of everything. Start with the year-round maintenance checklist to keep attic checks and other critical tasks scheduled and organized. The preventative maintenance guide helps you think like a homeowner who never gets surprised by a repair bill. And if you’re ready to tackle bigger projects, browse DIY project ideas that build skills and save money at the same time. Your attic is waiting. Let’s make sure it stays in great shape.

    https://workbenchguide.com

    Frequently asked questions

    How often should I inspect my attic?

    Attics should be inspected at least once a year and after major weather events for signs of moisture, pests, and structural issues.

    What signs indicate attic problems?

    Look for water stains, mold, unusual odors, droppings, damaged insulation, and blocked vents during your inspection, all of which appear on expert inspection checklists.

    Is it safe to inspect the attic myself?

    DIY attic inspections are safe if you wear protective gear, have proper lighting, and avoid stepping on unsupported areas between joists, as outlined in attic safety checklists.

    Should I hire a professional for attic inspections?

    Consider hiring a pro if you suspect structural damage, extensive mold, or pests, or if your inspection reveals issues beyond routine maintenance, since professional checks cover areas DIY methods can miss.

    Can regular attic inspections save money?

    Routine attic checks help catch minor issues before they become expensive repairs, and consistent maintenance is proven to protect both your home and your long-term budget.

  • Why regular home inspections prevent expensive repairs

    Why regular home inspections prevent expensive repairs

    Skipping routine home inspections feels harmless until a pipe bursts, the furnace quits in January, or a leaky roof quietly destroys your attic insulation. The 60% of fatal home fires that occur in homes without working smoke detectors is just one example of how overlooked maintenance turns into tragedy. Regular inspections are not a luxury for detail-obsessed homeowners. They are the single most reliable way to keep repair costs predictable, your family safe, and your property’s value intact. This guide breaks down exactly what to inspect, when to do it, and when to call a pro.

    Table of Contents

    Key Takeaways

    Point Details
    Prevention is cheaper Regular inspections reveal issues early, saving you from major repairs and expenses.
    Not all tasks need pros Homeowners can handle many inspection tasks themselves with the right guidance.
    Safety checks save lives Routine safety inspections, especially smoke detectors, dramatically reduce life-threatening risks.
    Simple routines work Breaking inspections into seasonal or monthly checklists makes upkeep manageable and stress-free.

    What does a regular home inspection involve?

    With the stakes clear, let’s outline what regular inspections actually look like for your home.

    A home inspection is not one task. It is a layered system of checks spread across different timeframes, from quick monthly tests to full professional evaluations every few years. The goal is to catch deterioration early, before small problems compound into expensive crises. Think of it the way a mechanic thinks about oil changes. You are not waiting for the engine to seize.

    The core systems covered in a thorough inspection:

    • Roof and attic: Missing shingles, flashing damage, ventilation blockages, and signs of moisture intrusion
    • HVAC system: Filter condition, thermostat calibration, visible ductwork, and refrigerant line integrity
    • Plumbing: Pipe connections under sinks, water heater age and temperature settings, visible signs of corrosion or slow drainage
    • Electrical: Panel labeling, GFCI outlet function, visible wiring condition, and breaker behavior
    • Exterior: Foundation cracks, grading slope away from the home, siding condition, and caulking around windows and doors
    • Smoke and CO detectors: Battery condition, sensor age (replace every 10 years), and alarm function
    • Gutters and drainage: Debris buildup, downspout direction, and signs of water pooling near the foundation

    Following preventive home maintenance tasks consistently is what separates homeowners who manage their properties proactively from those who are always reacting to emergencies.

    Inspection frequency by system

    Home inspection routine vertical flow infographic

    Not every check needs to happen at the same time. According to Freddie Mac’s home maintenance guide, homeowners should test smoke detectors monthly, clean gutters seasonally, and have the roof professionally inspected every three years. Here is how that breaks down practically:

    Frequency Task DIY or Pro?
    Monthly Test smoke and CO detectors, check HVAC filter DIY
    Seasonally Clean gutters, inspect caulking, check sump pump DIY
    Annually HVAC tune-up, water heater flush, pest inspection Pro recommended
    Every 3 years Roof inspection, chimney cleaning, electrical panel check Pro
    Every 5+ years Full exterior waterproofing review, major appliance check Pro

    The maintenance checklist details behind each of these tasks make it far easier to stay on schedule without feeling overwhelmed.

    Pro Tip: Set calendar reminders for every task the moment you move in or when you start your inspection routine. A five-minute detector test on the first day of every month takes less time than filling out a homeowner’s insurance claim.

    Homeowners can handle a surprising number of these checks themselves. Changing air filters, cleaning gutters, testing detectors, and visually inspecting your foundation are all well within reach. Where you need a licensed professional is anywhere involving live electrical work, roof repairs, gas lines, or the mechanical components of your HVAC system. Explore detailed home maintenance guides to get step-by-step directions for tasks you can safely tackle on your own.

    How inspections help prevent costly repairs

    Understanding what inspections cover raises the next question: are they really worth the time and money?

    The financial case for regular inspections is overwhelming when you look at real numbers. Emergency repairs almost always cost dramatically more than preventive maintenance. A neglected HVAC system that fails during a heatwave can cost $3,000 to $7,000 to replace, versus $150 for an annual tune-up. A clogged gutter that causes water to back up under your roofline can trigger $5,000 to $15,000 in water damage repairs, versus $100 to clean them out yourself.

    Plumber fixes leaking kitchen pipe cabinet

    Here is a breakdown of common problems and what they cost at the preventive stage versus the repair stage:

    Problem Preventive cost Emergency repair cost
    HVAC breakdown $150 annual tune-up $3,000 to $7,000 replacement
    Gutter overflow and roof leak $0 to $100 DIY cleaning $5,000 to $15,000 water damage
    Water heater failure $50 annual flush $800 to $1,500 emergency replacement
    Foundation crack from drainage $20 caulk and grade fix $5,000 to $30,000 structural repair
    Smoke detector failure $5 to $15 for batteries Incalculable in fire damage

    Annual HVAC tune-ups do more than just keep the system running. They prevent 70 to 80% of breakdowns and can save 10 to 30% on energy every single month. That combination of avoided repairs and monthly energy savings adds up fast over even a two to three year period.

    The real cost of deferred maintenance: Every dollar you save by skipping an inspection can easily turn into ten dollars in emergency repair costs. The math never favors waiting.

    Here is a practical numbered sequence for how preventive inspection pays off over time:

    1. You identify a problem early (cracked caulking around a window, for example)
    2. You spend $10 and 20 minutes to reseal it this weekend
    3. Without action, water infiltrates over months, warping the sill and damaging interior drywall
    4. That ignored problem becomes a $1,500 to $3,000 repair with contractor involvement
    5. The inspection paid for itself 100 to 300 times over in pure cost avoidance

    Consistent preventative maintenance tips like these make the financial case for inspections impossible to argue against. The hardest part is building the habit, not doing the work itself.

    Key safety risks: What regular checks really protect against

    Cost is not the only motivator. Let’s look at the life-safety risks regular inspections are designed to minimize.

    Some maintenance failures are just expensive. Others are deadly. That distinction is important when prioritizing what to check first and how seriously to take it.

    NFPA data shows that 60% of fatal home fires occur in homes without working smoke detectors. A monthly 30-second test is all it takes to protect against that statistic.

    Smoke detectors and carbon monoxide detectors are non-negotiable. Detectors older than 10 years lose sensing accuracy even if they still beep when tested. Knowing your detector’s manufacture date (printed on the back) is a simple inspection step that could save your life. Replace them on schedule, not just when the battery chirps.

    Critical safety checks that regular inspections cover:

    • Electrical panel: Overloaded circuits and improperly labeled breakers are among the leading causes of electrical fires. A licensed electrician should inspect your panel every three to five years, especially in homes built before 1990.
    • GFCI outlets: These are required near water sources and prevent electrocution. Press the test button on each one monthly. If the outlet does not trip and reset, it needs replacement.
    • Sump pump: A failed sump pump during a heavy rain event can flood a basement in hours. Test it seasonally by pouring water into the pit and confirming it activates.
    • Gutters and downspouts: Water that pools against your foundation in freezing weather expands and creates cracks. Redirecting downspouts just two to three feet away from the home can prevent major structural damage over time.
    • Gas appliances: Inspect connections to your water heater, stove, and dryer annually. A faint sulfur smell near any gas appliance is an immediate call-a-pro situation.

    Your annual safety check guide covers each of these in detail with specific steps and what to look for. For seasonal readiness, reviewing seasonal safety prep tasks before winter and spring helps ensure nothing falls through the cracks.

    Pro Tip: Walk through your home once a season specifically looking for water stains on ceilings and walls. Brown rings or bubbling paint are almost always signs of an active leak that has been developing for months before it becomes obvious.

    DIY vs. pro inspections: What experts recommend

    Knowing the risks, it is essential to match the right inspection with the right approach.

    Not every inspection task requires writing a check to a contractor. Many of the most valuable checks are genuinely DIY-friendly. The key is understanding where amateur oversight ends and professional expertise begins.

    Tasks that are safe and practical for DIY:

    • Changing HVAC filters every 1 to 3 months depending on filter rating and household conditions
    • Testing smoke and CO detectors monthly
    • Inspecting and cleaning gutters each fall and spring
    • Checking under sinks and around the toilet base for moisture or soft flooring
    • Examining caulking around tubs, showers, and exterior windows
    • Testing GFCI outlets
    • Visually scanning the attic with a flashlight for daylight gaps or moisture stains
    • Flushing the water heater annually to remove sediment buildup

    When to call a licensed professional:

    • Any electrical work beyond outlet replacement in a code-compliant setting
    • Roof repairs or a full roof inspection (walking on a roof without proper gear causes more damage)
    • HVAC refrigerant checks and mechanical servicing
    • Gas line connections or appliance hookups
    • Structural cracks in the foundation that exceed 1/4 inch
    • Chimney cleaning and flue inspection
    • Full home inspection prior to a purchase or major renovation

    The NAHB guidance on routine home maintenance makes an important point: not all identified issues require an immediate fix. Professional inspection reports prioritize urgency and estimate system lifespans, which helps you plan a realistic maintenance budget over one to three years rather than panicking over every finding.

    Use step-by-step repair guides for DIY-appropriate tasks and a licensed contractor for everything else. The HVAC maintenance how-to at Workbench Guide walks you through exactly what you can do yourself before calling for a professional tune-up. For situations that get out of hand, having a plan through emergency repair steps can limit damage while you wait for help.

    Pro Tip: After any professional inspection, ask your contractor to rate each finding on a scale of urgent, important, and monitor. This turns a potentially overwhelming list into a manageable, prioritized roadmap you can budget against over the next 12 to 36 months.

    Why most homeowners skip inspections — and why that’s a mistake

    Let’s be honest about why inspections slip off the radar for most people. It is not laziness. It is the same logic that makes us skip the dentist when nothing hurts: if nothing seems wrong, why invest time and money to check?

    That thinking is exactly backwards. The entire value of a routine inspection is that it finds the problems before they announce themselves. By the time your HVAC is making noise, your roof is leaking visibly, or your circuit breaker is tripping regularly, the easy window to fix things cheaply has already closed.

    There is also a real mental barrier around not knowing what you are looking at. Many homeowners walk past warning signs, like slight discoloration on a ceiling, a slow-draining shower, or a musty smell in the basement, because they do not confidently connect them to specific issues. That uncertainty breeds inaction.

    The conventional advice is to “just call a pro once a year.” That is fine as far as it goes, but it misses the bigger habit problem. Annual professional inspections catch things. But the 11 months in between are where small issues turn into big ones. Monthly and seasonal DIY checks fill that gap.

    The real solution is not more willpower. It is a better system. When inspection tasks are broken into bite-sized, time-blocked actions tied to seasons or calendar dates, they stop feeling like a burden and start functioning like a routine. A 20-minute walkthrough each season, paired with a clear checklist, accomplishes more than an annual inspection marathon that exhausts you and still misses things.

    The homeowners who do this well are not more motivated than everyone else. They have simply built the structure that makes doing the right thing easier than skipping it. Investing in preventative maintenance insights now is what separates property owners who feel in control from those who are always dreading the next expensive surprise.

    Next steps: Streamline your inspection routine and protect your investment

    If you are ready to move from worry to action, here is how to get started with simple, effective routines.

    The first step is having a clear, organized checklist that tells you exactly what to do and when. Workbench Guide’s complete home maintenance checklist breaks every task down by frequency so you never have to wonder what is due next. Pair it with the more preventative maintenance tips on the site to build a custom routine around your home’s specific systems and age. For homeowners who want structured, printable tools, the downloadable guides and checklists library covers everything from seasonal walkthroughs to appliance-specific inspection forms. Workbench Guide is designed to be your maintenance partner year-round, keeping you organized, ahead of repairs, and confident about what comes next.

    Frequently asked questions

    How often should I schedule professional home inspections?

    Most experts recommend an annual inspection for major systems, with the roof inspected every three years and HVAC serviced annually by a licensed technician.

    What are the most important checks I can do myself?

    Test smoke detectors monthly, change your HVAC filter every one to three months, and clean gutters each spring and fall to prevent the most common and costly home issues.

    How do regular inspections save me money?

    Small problems caught early, like a worn HVAC component or slow drain, cost a fraction of what they grow into. Annual HVAC tune-ups alone prevent 70 to 80% of breakdowns, which can each cost thousands of dollars.

    Are smoke detector checks really that important?

    Absolutely. 60% of fatal home fires happen in homes where smoke detectors are not working, making monthly tests one of the highest-value maintenance habits you can build.

  • Top 4 UnderMyRoof.app Alternatives 2026

    Top 4 UnderMyRoof.app Alternatives 2026

    Keeping track of your home belongings can feel overwhelming. Different apps offer unique ways to organize everything you own, from furniture and gadgets to family heirlooms. Some focus on easy setup and quick inventory access, while others add features for sharing or customizing your lists. Choosing the right tool might reveal helpful extras you never expected. Get ready to find out which options stand out and which ones might fit the way you like to manage your home.

    Table of Contents

    WorkbenchGuide

    Product Screenshot

    At a Glance

    WorkbenchGuide is the leading home maintenance platform for homeowners and property managers who want a clear plan for upkeep and repairs. It combines reminders, guided tasks, and record keeping into a single, easy to use hub that reduces emergency work and wasted time.

    Core Features

    WorkbenchGuide centers on organized preventive maintenance and actionable guidance. The platform includes guided DIY instructions, maintenance schedules, inspection checklists, task management, and property records to keep everything searchable and accessible.

    • Guided DIY instructions that walk you through repairs step by step with notes and photos.
    • Maintenance schedules for recurring tasks so nothing falls through the cracks.
    • Inspection checklists and task tracking with photos and reminders for follow ups.

    Pros

    • All in one platform consolidates maintenance schedules, checklists, and records so you stop juggling spreadsheets and sticky notes.

    • Multi property support handles a single house or a portfolio, which makes it equally useful for homeowners and landlords.

    • Professional step by step guides reduce guesswork and help less experienced DIYers complete repairs with confidence.

    • Automated reminders and follow ups keep recurring tasks on schedule and lower the risk of costly emergency repairs.

    • Flexible plans let you pick a level that fits a single home or a property management operation without paying for unused features.

    Who It’s For

    WorkbenchGuide suits homeowners who prefer to manage maintenance themselves and landlords who need consistent inspection routines. It also works for property managers who want organized records, scheduled maintenance, and a shared process for teams and contractors.

    Unique Value Proposition

    WorkbenchGuide stands out because it is a purpose built, preventive maintenance system rather than a generic task app. Its combination of maintenance schedules, professional style guides, and searchable property records delivers unmatched consistency across properties. Sophisticated buyers choose this option because it standardizes inspections, documents work with photos, and automates reminders so portfolio performance improves and repair costs fall. Pricing tiers and focused feature sets reflect intentional design choices for different user needs rather than bloated extras.

    Real World Use Case

    A property manager uses WorkbenchGuide to create a quarterly inspection routine for 50 rental units. They assign tasks with checklists, upload photos of issues, schedule follow ups, and generate a timeline of completed repairs. Emergency call outs drop and owners see clearer maintenance histories.

    Pricing

    Plans start at $7/month for homeowners. Tiers include homeowner plus, property management, and enterprise levels. Both monthly and yearly billing are available and annual commitments receive discounts.

    Website: https://workbenchguide.com

    Homer

    Product Screenshot

    At a Glance

    Homer is a digital home binder that collects documents, photos, and timelines so your house history travels with you wherever you go. Its combination of AI powered assistance and proactive reminders makes it useful for homeowners who want one place for home records.

    Takeaway: Try Homer when you want a single, searchable home record instead of scattered folders.

    Core Features

    Homer centralizes home inventory management, expense tracking, document storage, and a home timeline for events to keep records organized and accessible. It also offers floorplan creation via mobile, AR notes, photo documentation, and a helper bot that provides personalized tips.

    Takeaway: Use Homer to replace multiple apps with one home focused repository.

    Pros

    • Comprehensive home management: Homer combines inventory, receipts, warranties, and maintenance reminders into a single app for easier long term tracking.

    • User friendly interface: The design prioritizes simple navigation so homeowners can add photos and documents without a steep learning curve.

    • AI powered automation and assistance: The helper bot and personalized tips reduce guesswork by suggesting maintenance tasks and organization ideas based on your uploads.

    • Cloud backup and security: Data is stored and backed up in the cloud, which protects records from device loss and simplifies family sharing.

    • Family sharing capability: You can invite family members to view and collaborate on home tasks and service records to distribute chores and responsibilities.

    Takeaway: Homer helps busy households keep a shared, retrievable record of home information.

    Cons

    • Lack of explicit drawbacks on the website: The product site does not list clear limitations or common user complaints, which makes it harder to judge trade offs up front.

    • Premium features behind subscription: Advanced capabilities require a Homer Premium subscription, adding cost for users who want full functionality.

    • Limited integration details: The site gives little information about integrations with smart home devices or third party services, leaving questions about ecosystem fit.

    Takeaway: Expect to test the free tier before committing to Premium since integration and limitation details are sparse.

    Who It’s For

    Homer targets homeowners, property managers, and real estate investors who need an organized digital record of a property and its history. It also fits families who want shared access for maintenance, warranties, and project checklists.

    Takeaway: Choose Homer if you manage multiple properties or want a shared household knowledge base.

    Unique Value Proposition

    Homer positions itself as a smart digital binder that keeps everything about your home in one secure place while offering personalized maintenance prompts and AR notes to tie information to physical spaces. That blend of storage and guidance sets it apart from simple file folders.

    Takeaway: Use Homer to turn scattered documents into actionable home management items.

    Real World Use Case

    A homeowner uploads appliance manuals, receipts, and photos, then receives AI driven suggestions for maintenance and improvement tasks and shares access with family members for collaborative upkeep. Service and repair tracking keeps the timeline accurate for future buyers.

    Takeaway: Use Homer before a renovation or when preparing records for resale to prove maintenance history.

    Pricing

    Homer is free to use with an optional Homer Premium subscription available as monthly, yearly, or lifetime purchase depending on how much advanced functionality you need.

    Takeaway: Start with the free tier to evaluate core features before upgrading.

    Website: https://homer.co

    Under My Roof

    Product Screenshot

    At a Glance

    Under My Roof is a focused home inventory app that helps you organize home records and belongings across iPhone, iPad, and Mac. It emphasizes privacy and detailed documentation so you can find receipts, warranties, and renovation history when you need them.

    The app works best for Apple device users who want a single place to store photos, documents, and insurance details tied to each item or room.

    Core Features

    Under My Roof centralizes home data with iCloud synchronization so your inventory stays current across devices. The app stores purchase details, serial numbers, photos, and attached manuals for each item and property area.

    You can track renovation projects, contractor details, costs, and maintenance history while managing collections and insurance policies all in one space.

    Pros

    • Comprehensive home management: The app captures everything from appliance receipts to renovation notes so your home records stay organized and searchable.

    • Cross device sync: iCloud synchronization keeps data consistent across iPhone, iPad, and Mac which reduces duplicate entry and version confusion.

    • Rich attachments: You can attach photos and documents such as manuals and receipts which helps when filing claims or selling items.

    • Privacy controls: Sharing options let you control who sees specific records which protects sensitive insurance or warranty information.

    • Subscription with trial: The subscription model includes a free one week trial so you can test features before committing.

    Cons

    • Apple ecosystem required: The app requires Apple hardware and recent operating systems which excludes Android or Windows users from access.

    • Subscription cost: Annual and monthly fees may feel expensive for casual users who only need an occasional inventory list.

    • Platform limitations: Feature parity depends on device platform and OS version which can create gaps if you use mixed or older devices.

    Who It’s For

    Under My Roof is designed for homeowners, renters, and collectors who use Apple devices and want detailed records tied to their property and possessions. It suits people preparing insurance claims, tracking renovations, or keeping warranties in one searchable place.

    Unique Value Proposition

    The app stands out by combining item level documentation with property level records and contractor history all synced through iCloud. That combination makes it easier to produce proof of ownership or maintenance history without hunting through email or file folders.

    Real World Use Case

    A homeowner documents a kitchen remodel by storing contractor contacts, cost records, before and after photos, and appliance warranties in one place. When an insurer requests receipts the homeowner has everything ready for a faster claim process.

    Pricing

    Under My Roof is available as $34.99 per year or $4.99 per month and includes a free one week trial so you can verify the workflow on your devices before subscribing.

    Website: https://undermyroof.app

    binaryformations.com

    Product Screenshot

    At a Glance

    Binary Formations presents as a lightweight site focused on secure web interaction rather than a full home maintenance tool. Its main strengths are Cookie reliance for behavior and Security checks for connection validity, but product detail is sparse.

    Core Features

    The site emphasizes two observable capabilities. It checks connection security to confirm valid sessions and it requires cookies for core functionality and user flow. Beyond those elements, no explicit product modules or user workflows are described on the available pages.

    Pros

    • Secure connection verification: The site performs security checks that help confirm whether a browser session is valid and safe for interaction.

    • Cookie driven behavior: Requiring cookies allows the site to maintain session state and preserve user settings across visits.

    • Clear focus on connectivity: The content communicates a clear attention to secure connectivity rather than unrelated features or content clutter.

    Cons

    • Lack of detailed product information prevents confident evaluation of features, pricing, or integrations.

    • Dependence on cookies for site functionality may block access for users who restrict cookies or use strict privacy tools.

    • Unclear what specific services or products are offered, which creates friction for users seeking immediate value or instructions.

    Who It’s For

    Homeowners and DIYers who prioritize verifying website security or those who must confirm their browser settings for sites that require cookies will find relevance here. The site fits users who want a quick check on connection validity rather than a task management or maintenance solution.

    Unique Value Proposition

    Binary Formations stakes a narrow claim: it focuses on connection security and cookie based behavior. That single focus can be useful for someone checking whether a site is enforcing secure sessions, or for a user troubleshooting cookie related access problems.

    Real World Use Case

    A homeowner preparing to use an online portal that manages service appointments might visit Binary Formations to confirm their browser accepts cookies and that the site reports a secure connection. The site can act as a quick precheck before entering account credentials or scheduling work.

    Pricing

    Pricing information is not provided on the available pages. There is no public indication of subscription tiers, one time fees, or enterprise licensing in the visible content.

    Website: https://binaryformations.com

    Home Management Platforms Comparison

    The following table provides a comprehensive comparison of the home management platforms reviewed in the article, highlighting their features, advantages, disadvantages, target users, and pricing options.

    Platform Key Features Pros Cons Pricing
    WorkbenchGuide Guided DIY instructions
    Maintenance schedules
    Inspection checklists
    Consolidates tools and records
    Supports multiple properties
    Provides professional guides
    Focused on maintenance tasks only Starting at $7/month
    Homer Inventory management
    AI-powered assistance
    AR notes
    Comprehensive record management
    User-friendly interface
    Cloud backup and family sharing
    Premium features require subscription
    Limited integration details
    Free with optional Premium
    Under My Roof Cross-device syncing
    Detailed item documentation
    Insurance and renovation tracking
    Privacy controls
    Rich attachments
    Apple ecosystem optimization
    Requires Apple devices
    Subscription model
    $4.99/month or $34.99/year
    Binary Formations Secure connection verification
    Cookie-based behavior
    Focus on connectivity
    Security checks
    Lack of feature details
    Dependent on cookies
    Pricing not provided

    Discover a Smarter Way to Manage Your Home Maintenance

    If you have been exploring alternatives to Under My Roof app, you likely want an organized system that not only keeps track of your home inventory but also helps you stay ahead of costly repairs. Challenges like maintaining renovation records, managing warranties, and receiving timely reminders can overwhelm any homeowner. Workbench Guide understands these needs and goes further with smart maintenance reminders, step-by-step DIY guides, and project checklists that empower you to take control without guesswork.

    Say goodbye to scattered documents and uncertainty. With Workbench Guide, you get a purpose-built platform designed to reduce emergency repairs and keep your home running smoothly. Ready to protect your investment and simplify upkeep? Visit Workbench Guide today and start managing your home maintenance with confidence.

    Frequently Asked Questions

    What are some alternatives to UnderMyRoof.app for managing home inventory?

    Many effective alternatives exist, including platforms that focus on home records and maintenance management. Explore options that emphasize features like document storage, inventory tracking, and expense management to find the best fit for your needs.

    How can I determine which home management app is right for me?

    Assess your requirements for document organization, ease of use, and any specific features you need, like multi-property support. Evaluate at least three alternatives based on user reviews and feature comparisons to make an informed choice.

    Are there any free alternatives to UnderMyRoof.app?

    Yes, several home management platforms offer free tiers with essential features. Start by testing these free options to identify which one aligns with your organizational needs before considering a subscription.

    How do I transition from UnderMyRoof.app to another home inventory app?

    Begin by exporting your existing data from UnderMyRoof.app if possible, and then import this information into your chosen alternative. Document your items and records carefully to ensure nothing is lost during the transition process.

    Can I manage multiple properties with home inventory alternatives?

    Many alternatives to UnderMyRoof.app are designed for multi-property management. Look for apps that explicitly state support for various properties, which can help streamline your tracking and organization across different locations.