

One missed step in fall can turn into a $10,000 repair bill by February. A frozen pipe that bursts, a clogged gutter that collapses under ice, or a furnace that quits on the coldest night of the year are not freak accidents. They are the predictable results of skipped seasonal maintenance. Burst pipes alone cause billions in insurance claims every year, and most of those losses are entirely preventable. This guide gives you a clear, practical winterizing checklist built around the tasks that actually protect your home, your budget, and your peace of mind.
Table of Contents
- Heating system: Inspection, service, and efficiency
- Stopping heat loss: Sealing drafts, windows, and doors
- Preventing water damage: Gutters, roofs, and insulation
- Pipe and plumbing safeguards
- Fireplace, detectors, and emergency readiness
- Why most winterizing checklists fail: Overlooked details that cost you
- Winter home prep made easy with expert checklists
- Frequently asked questions
Key Takeaways
| Point | Details |
|---|---|
| Service your heating system | Annual inspections and filter changes improve efficiency and safety for winter. |
| Seal drafts and leaks | Stopping drafts around windows, doors, and pipes keeps more heat in and reduces bills. |
| Protect from water damage | Clearing gutters and insulating attics helps prevent costly leaks, ice dams, and roof problems. |
| Insulate pipes to prevent bursts | Pipe insulation in vulnerable areas is one of the easiest ways to prevent flooding and repairs. |
| Prepare for emergencies | Have a winter kit and emergency plan to keep your family safe and your home protected. |
Heating system: Inspection, service, and efficiency
With the high costs of winter mishaps in view, let’s start with your home’s heating. It is the engine that keeps everything safe and comfortable when temperatures plunge.
Your furnace or boiler works harder in winter than any other season. If it has not been serviced recently, it may be running inefficiently or on the verge of a breakdown. Inspect and service your furnace or heating system each fall, including changing the filter, to make sure it operates safely and efficiently. A dirty filter forces the system to work harder, raises your utility bills, and degrades indoor air quality for your whole family.
Here is how to work through your heating system prep:
- Schedule a professional furnace tune-up in September or October before demand picks up and HVAC companies get booked solid.
- Replace furnace filters with a fresh one rated for your system. Check the filter again in January if anyone in your home has allergies or if you run the heat constantly.
- Set your programmable thermostat to 68°F when people are home and awake. Drop it a few degrees overnight or during work hours to save on heating costs without sacrificing comfort.
- Reverse your ceiling fans to run clockwise at low speed. This pushes warm air trapped near the ceiling back down into the living space.
- Check vents and registers in every room to make sure furniture or rugs are not blocking airflow.
“A well-maintained furnace can last 15 to 20 years. Skipping one annual service can shave years off its life and spike your monthly energy bill by up to 15 percent.”
If you notice unusual sounds, short cycling, or uneven heat, get a diagnosis before the first cold snap. You can find repair guidance for furnaces to understand what common problems look like and when to call a professional.
Pro Tip: Slide a white piece of paper over your return air vent. If it sticks, you have good suction and the system is drawing air properly. If it falls, the filter may be blocked or there may be a duct issue worth investigating.
Stopping heat loss: Sealing drafts, windows, and doors
Once your heating system is ready, it is time to make sure all that warm air stays inside where it belongs. Air leaks are silent money drains that work against every dollar you spend on heating.
Seal drafts around windows, doors, outlets, and pipes using caulk, weatherstripping, or plastic film window kits to prevent heat loss. These are inexpensive fixes that pay for themselves quickly. In fact, the energy checklist savings from sealing drafts can cut your heating costs by up to 20 percent over a winter season.
Common spots where drafts hide include:
- Window frames and sills, especially in older homes where caulk has cracked or shrunk
- Door frames and thresholds, which often develop gaps as houses settle over time
- Electrical outlets and switch plates on exterior walls, which can feel noticeably cold to the touch
- Pipe penetrations where plumbing or gas lines enter the house through exterior walls
- Attic hatch covers, which are frequently overlooked but can leak a significant amount of heat
The fix for each location varies slightly. Use silicone or latex caulk for gaps around window and door frames. Apply weatherstripping tape or door sweeps to the edges of doors that show daylight around them. For outlets on exterior walls, pick up foam outlet gaskets at any hardware store. They cost less than a dollar each and take about two minutes to install.
For windows that are especially drafty or single-pane, a shrink-film window insulation kit adds a temporary second layer of air space that noticeably reduces heat loss. It is not a permanent solution, but it gets you through the season without replacing windows.
Pro Tip: On a windy day, hold a lit incense stick near suspected draft areas. Watch the smoke. If it bends or wavers, you have found a leak worth sealing. This simple test costs nothing and takes minutes.
Consistent preventative home maintenance like this is how experienced homeowners keep utility bills manageable year after year without major renovations.
Preventing water damage: Gutters, roofs, and insulation
Now that your home is snug and sealed, let’s focus on simple steps to protect it from costly water damage coming from above.
Check and clean gutters and downspouts before the first freeze to prevent ice dams and the water damage they cause. Clogged gutters trap standing water that freezes into ice, which can force its way under shingles, damage fascia boards, and overflow to damage your foundation.
Follow this roof and gutter checklist:
- Scoop out leaves, twigs, and debris from gutters using a gutter scoop or your gloved hands, then flush with a garden hose to verify water flows freely.
- Check downspouts to make sure they direct water at least three to four feet away from your foundation. Extension pieces are inexpensive and easy to snap on.
- Inspect your roof for missing, cracked, or curling shingles that could let water in during winter storms. Also inspect the roof for damage and trim any overhanging branches that could snap under snow and ice.
- Check attic insulation and ventilation to make sure heat is not escaping through the roof deck, which creates the warm spots that form ice dams.
| Problem | Cause | Prevention |
|---|---|---|
| Ice dams | Warm roof deck melting snow unevenly | Add attic insulation, improve ventilation |
| Gutter overflow | Blocked gutters trapping water | Clean gutters every fall |
| Water in basement | Downspouts directing water toward foundation | Extend downspouts away from house |
| Roof leaks | Damaged or missing shingles | Annual roof inspection before winter |
“Ice dams are almost always an insulation problem, not a roofing problem. Adding R-value to your attic often costs less than one water damage claim.”
You can review the full list of seasonal maintenance steps to stay ahead of similar issues throughout the year.
Pipe and plumbing safeguards
Water damage prevention does not stop at the roof. Your pipes need special attention as temperatures drop because even a small freeze can cause a catastrophic failure.
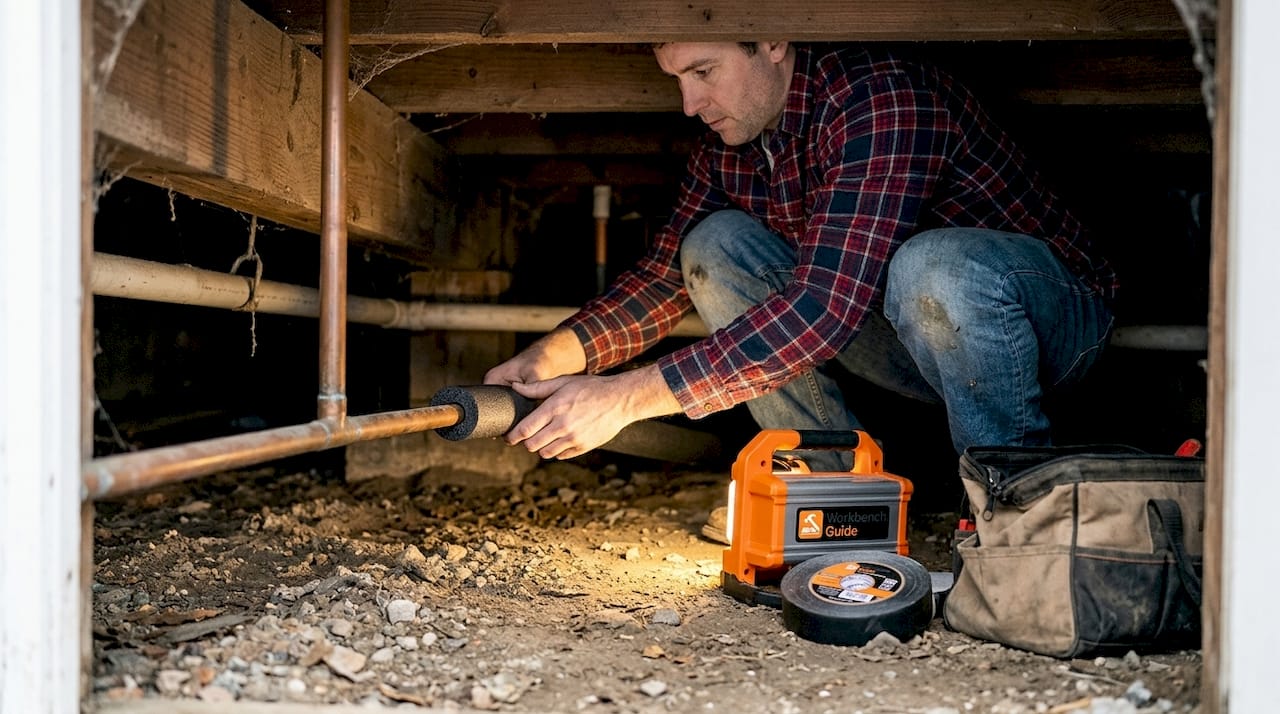
Insulate exposed pipes, especially in unheated areas like attics, crawl spaces, garages, and along exterior walls, before cold weather arrives. Also disconnect and drain outdoor hoses and shut off the supply valves to exterior faucets. Water left in an outdoor hose or faucet line can freeze and crack the pipe inside the wall.
During extreme cold snaps, let faucets drip slowly and open cabinet doors under sinks on exterior walls to allow warm room air to circulate around the pipes. Even a trickle of moving water dramatically reduces the risk of freezing.
Here is a quick comparison of common pipe insulation options:
| Insulation type | Best for | Cost | DIY friendly |
|---|---|---|---|
| Foam pipe sleeves | Straight pipe runs in basements | Low | Yes |
| Fiberglass wrap | Irregular shapes and angles | Low to medium | Yes |
| Heat tape (electric) | High-risk pipes in unheated spaces | Medium | Yes, with care |
| Spray foam | Gaps and penetrations near pipes | Low | Yes |
Key plumbing tasks before winter hits:
- Locate your main water shutoff valve now, before an emergency makes you search for it in a panic
- Drain and store outdoor hoses in a garage or shed
- Shut off the interior supply valves for outdoor spigots if your home has them
- Insulate hot water pipes near exterior walls to reduce heat loss and keep hot water arriving faster at your faucets
Pro Tip: Take a photo of where your main shutoff valve is located and save it in your phone. When a pipe bursts, every second counts and you will not have time to search.
Taking these steps now is how you prevent costly repairs that catch unprepared homeowners completely off guard every January.
Fireplace, detectors, and emergency readiness
Your home may already feel protected, but emergencies can strike at any time. Here is how to make sure safety is built into your winter prep from the start.
Have your chimney inspected and cleaned if you use a fireplace or wood stove, and test your smoke and carbon monoxide detectors while replacing batteries. Creosote, a flammable byproduct of burning wood, builds up in chimneys over time and is one of the leading causes of house fires in winter. An annual inspection by a certified chimney sweep is not optional if you plan to burn.
Follow these safety steps:
- Schedule chimney cleaning before your first fire of the season. Look for a certified chimney sweep through the Chimney Safety Institute of America.
- Test every smoke detector in your home. Press the test button and listen for a loud beep. Replace any unit that does not respond or is more than 10 years old.
- Test carbon monoxide detectors the same way. CO (carbon monoxide) is an odorless, colorless gas produced by gas appliances and fireplaces. You cannot detect it without a working CO alarm.
- Stock your emergency kit with supplies to last at least 72 hours without power or heat.
Prepare an emergency kit that includes non-perishable food, bottled water, extra batteries, flashlights, warm blankets, a battery-powered or hand-crank radio, and any prescription medications. Know exactly where your water shutoff valve is located in case a pipe bursts and you need to cut the water quickly.
Your emergency winter kit should include:
- Three days of non-perishable food per person in your household
- One gallon of water per person per day
- Extra batteries in sizes that match your flashlights, radios, and remote controls
- Warm blankets or sleeping bags rated for cold temperatures
- First-aid kit with bandages, pain relievers, and a thermometer
- Copies of important documents in a waterproof bag
Pro Tip: Walk every adult in your household to the main water shutoff valve. Practice turning it off together. This 60-second exercise can prevent thousands of dollars in damage if a pipe fails overnight.
If something goes wrong despite your best prep work, bookmark emergency repair steps so you know exactly what to do first.
Why most winterizing checklists fail: Overlooked details that cost you
Having covered all the essential tasks, it is still entirely possible to follow a generic checklist and leave your home vulnerable. Here is what truly experienced homeowners do differently.
Generic checklists are written for an average house that does not exist. Your home has its own quirks. A 1950s ranch with original single-pane windows needs a completely different approach than a 2005 colonial with updated insulation. An older home in a mild climate needs different prioritization than a newer home in a region that sees regular below-zero temperatures. Applying a one-size-fits-all list without adapting it to your actual house means you will spend time on low-priority tasks while higher-risk areas go unaddressed.
One group that checklists rarely address adequately is older adults living alone. Older adults are less sensitive to cold, which means they may not notice when indoor temperatures have dropped to dangerous levels. If you have a parent or elderly neighbor, keep a visible indoor thermometer in the main living area and check on them frequently during cold snaps. Set the thermostat no lower than 68°F regardless of the energy savings logic, because hypothermia can develop indoors.
Another overlooked detail is the sequence of tasks. Most checklists treat all items as equal, but experienced homeowners know to prioritize tasks in order of potential damage cost. Pipe insulation and furnace service come before weatherstripping because a burst pipe or a furnace failure in January causes far more destruction than a drafty door. Thinking through your checklist from a risk-and-consequence angle changes how you spend your time and money.
Finally, there is the follow-through problem. Most homeowners do a great job in November and then forget to recheck filters, test detectors again in January, or monitor gutters after a heavy rain. The best approach is to build your checklist into a recurring calendar reminder rather than treating it as a one-time event. A year-round maintenance checklist helps you stay on track across all seasons, not just winter.
Winter home prep made easy with expert checklists
If you are ready to get proactive with home care, Workbench Guide is built exactly for this. You get access to printable checklists organized by season and task type, so nothing gets missed and you always know what to tackle next. Whether you prefer a printed sheet on the fridge or a digital checklist on your phone, having it organized in one place removes the guesswork entirely. Pair the checklists with step-by-step repair guides and you will have everything you need to handle most winterizing tasks yourself or make smarter decisions when you bring in a contractor. Workbench Guide makes seasonal home care straightforward, repeatable, and far less stressful.
Frequently asked questions
What temperature should I keep my thermostat at in winter?
Keep your thermostat at 68°F when you are home and awake, and lower it slightly when you are away or sleeping to save on heating costs without risking frozen pipes.
How do I stop pipes from freezing during extreme cold?
Let faucets drip slightly and open cabinet doors under sinks to allow warm room air to circulate around pipes near exterior walls during severe cold snaps.
What should I include in a winter emergency kit for my home?
Pack non-perishables, bottled water, batteries, blankets, flashlights, and a first-aid kit; also know your water shutoff valve location before an emergency strikes.
How often should I clean my gutters to prepare for winter?
Clean your gutters and downspouts at least once in late fall before the first freeze to prevent ice dam formation and the water damage that follows.
Why is attic insulation and ventilation important in winter?
Proper insulation and ventilation stop warm air from escaping through the roof deck, which reduces ice dam formation and helps maintain a consistent, energy-efficient indoor temperature all winter long.