Author: Sean C

  • Appliance Maintenance Workflow: Your DIY Home Guide

    Appliance Maintenance Workflow: Your DIY Home Guide

    An appliance maintenance workflow is a systematic sequence of preventive and routine tasks designed to keep home appliances efficient, safe, and long-lasting. Most homeowners treat appliance care as reactive fixes instead of planned upkeep, which leads to costly emergency calls and shortened appliance life. A structured approach covers everything from refrigerators and dryers to dishwashers and washing machines. The right workflow combines a maintenance schedule for appliances, the correct tools, and clear step-by-step tasks. Follow it consistently and you can extend appliance life by 3–5 years, saving thousands in replacement costs.

    What tools and components does an appliance maintenance workflow require?

    The right tools make the difference between a 15-minute task and a frustrating afternoon. Before you start any home appliance upkeep, gather the basics so nothing stops you mid-task.

    Core maintenance tools

    Every homeowner should keep these tools on hand:

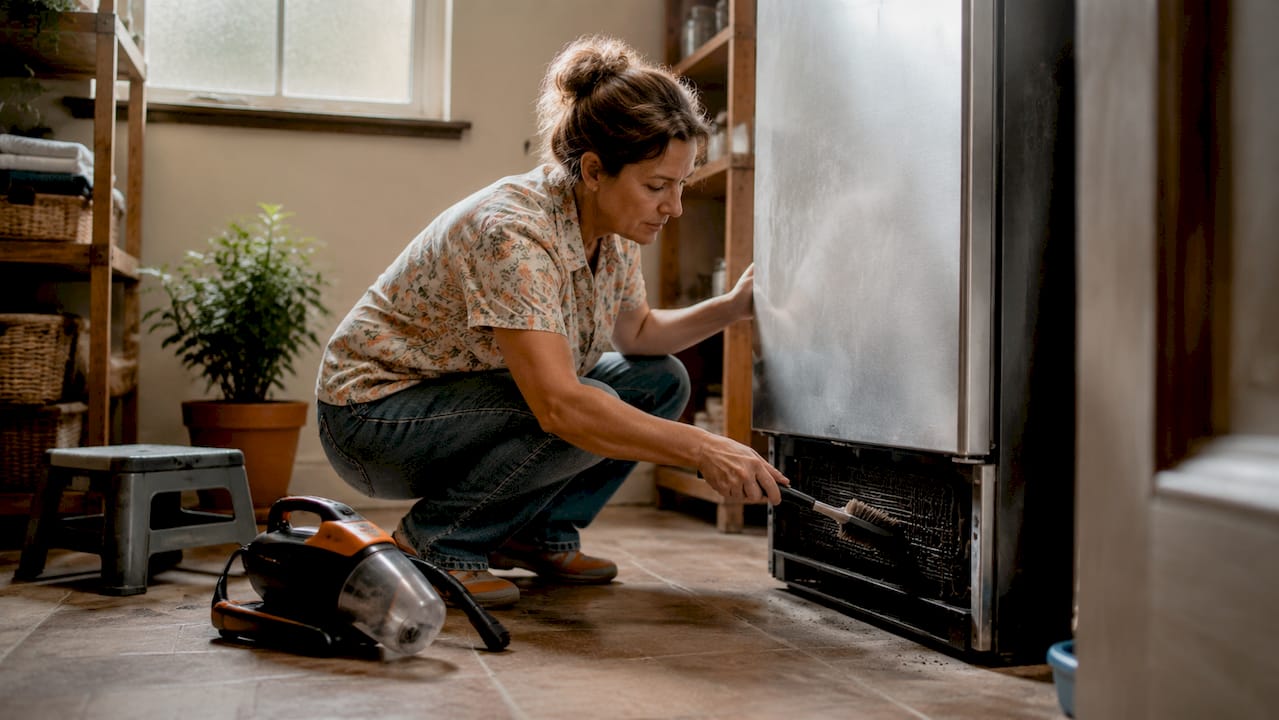
    • Refrigerator coil brush: A long, flexible brush designed to reach condenser coils behind or beneath the fridge.
    • Vacuum with brush attachment: Pulls dust and debris from coils, dryer vents, and tight spaces.
    • Lint trap brush: A narrow, flexible brush that clears lint buildup deep inside the dryer trap slot.
    • Flathead and Phillips screwdrivers: Used to remove access panels on dryers, dishwashers, and washing machines.
    • Gasket cleaner or mild bleach solution: Cleans door seals on refrigerators and washing machines to prevent mold.
    • Adjustable wrench: Tightens or loosens water supply hose connections on washers and dishwashers.
    Tool Appliance Task
    Coil brush Refrigerator Clean condenser coils
    Lint trap brush Dryer Clear deep lint buildup
    Vacuum with brush Dryer, refrigerator Remove dust from vents and coils
    Gasket cleaner Washer, refrigerator Wipe door seals and prevent mold
    Adjustable wrench Washer, dishwasher Check and tighten water hose connections
    Screwdriver Dryer, dishwasher Remove access panels for filter cleaning

    Safety and documentation

    Always unplug an appliance before cleaning internal components. Keep your appliance manuals in one folder or a digital file. Manuals contain manufacturer-specific maintenance intervals that override generic advice. Wear rubber gloves when handling gasket cleaners or bleach solutions.
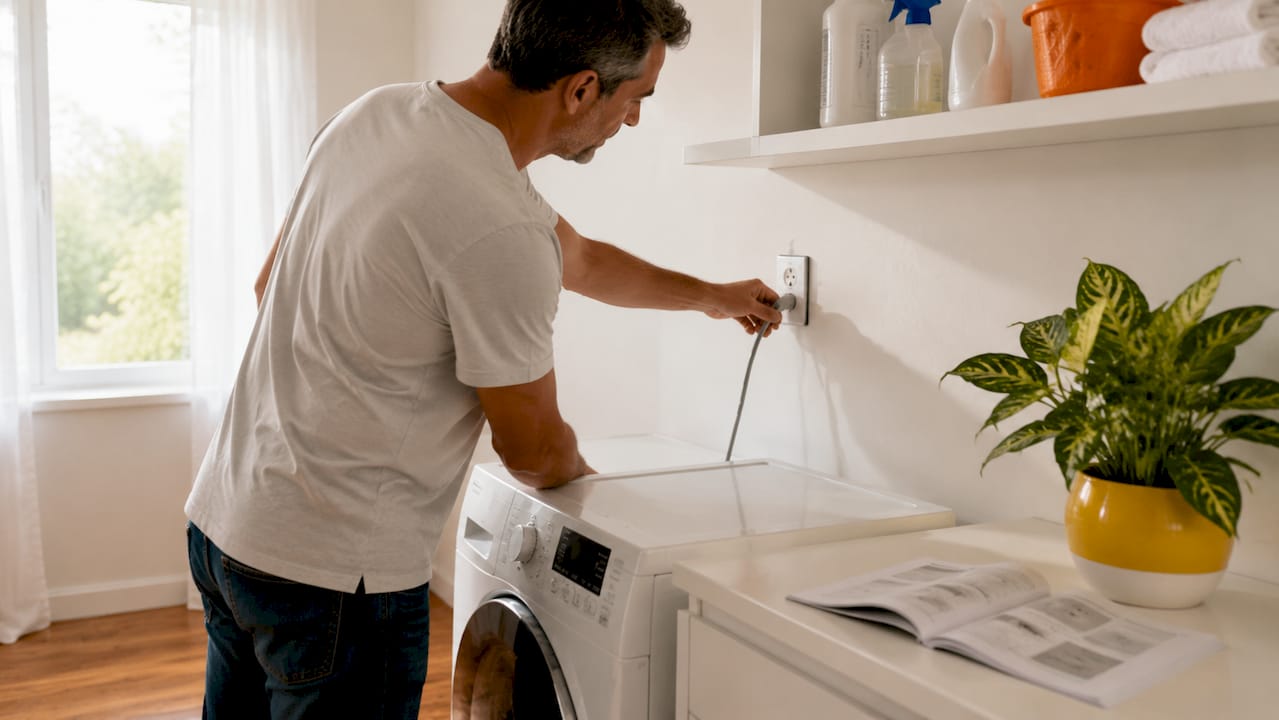
    Hands unplugging washing machine in laundry room

    Pro Tip: Photograph the back of each appliance with your phone. You will always have the model number and serial number ready when ordering parts or scheduling a service call.

    Scheduling tools matter just as much as physical tools. A shared Google Calendar, Apple Reminders, or a dedicated app like Workbenchguide keeps tasks from slipping through the cracks. Digital reminders beat handwritten notes because they repeat automatically on the interval you set.
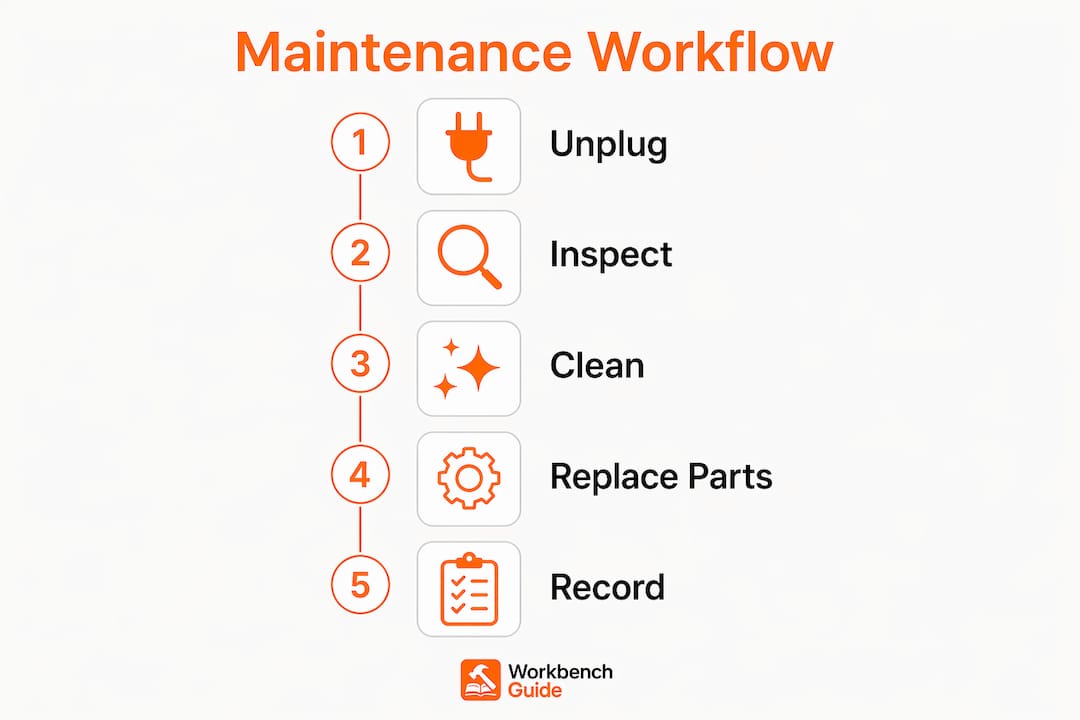
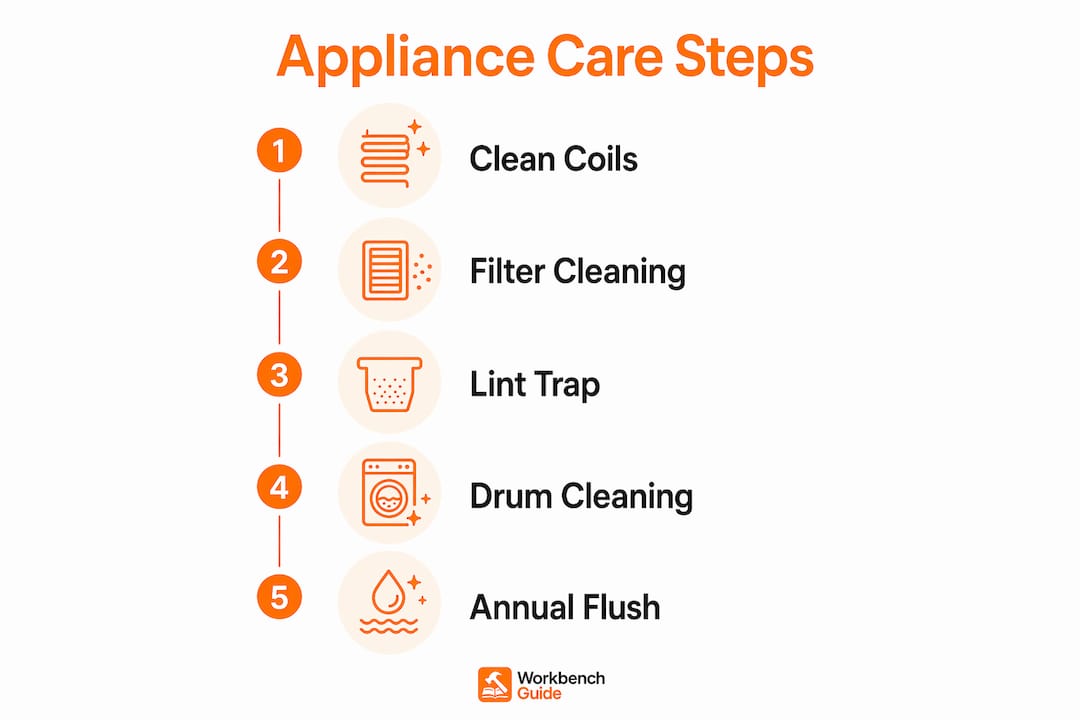
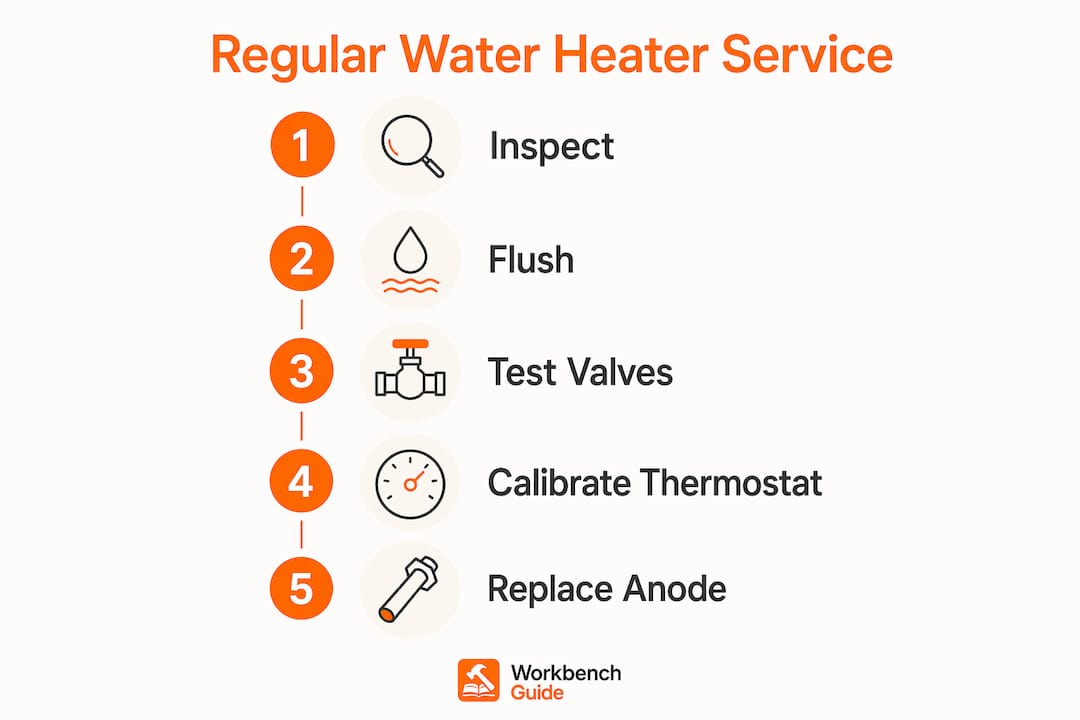
    Infographic showing step-by-step appliance maintenance workflow

    How do you build a maintenance schedule for home appliances?

    A maintenance schedule for appliances works best when it matches your household’s actual usage, not a generic calendar. A family with two large dogs and a dryer running daily needs a different schedule than a single homeowner with light laundry loads.

    Frequency recommendations by task

    Use these intervals as your baseline:

    1. Monthly: Clean the dishwasher filter, wipe washing machine door gaskets, check refrigerator door seals for cracks, and run a tub-clean cycle on the washer.
    2. Every 3 months: Vacuum refrigerator condenser coils, inspect dryer lint trap and vent opening, and check dishwasher spray arms for clogs.
    3. Every 6 months: Clean the dryer vent duct fully, inspect water supply hoses for cracks or bulging, and run a dishwasher cleaning cycle with a commercial cleaner like Affresh.
    4. Annually: Replace water supply hoses if they are 3–5 years old, have an HVAC technician inspect any appliance with a gas connection, and review all appliance manuals for updated manufacturer guidance.
    5. As needed: Address unusual noises, error codes, or odors immediately rather than waiting for the next scheduled interval.

    Tailoring your schedule

    Households with pets should clean dryer vents every 6 months rather than annually, since pet hair accelerates lint buildup significantly. Homes in humid climates need more frequent gasket cleaning because mold grows faster in moisture-rich air. If your dryer vent duct runs longer than 15 feet, treat it as a high-risk duct and clean it twice a year.

    Pro Tip: Build your maintenance calendar around seasons. Spring and fall are natural checkpoints. Spring covers post-winter appliance stress; fall prepares appliances for heavier holiday use.

    Track every completed task in a simple log, whether a notebook, a spreadsheet, or Workbenchguide’s built-in history tracker. A maintenance history helps you spot patterns, such as a filter that clogs faster than expected, and gives a technician useful context if a repair is ever needed. Seasonal checklists also help you spot early warning signs like unusual sounds or odors before they become failures.

    Step-by-step workflow for routine appliance maintenance

    Five key maintenance tasks prevent most emergency service calls. Each takes under 20 minutes and requires no specialized skills. Here is how to execute each one correctly.

    Refrigerator condenser coils

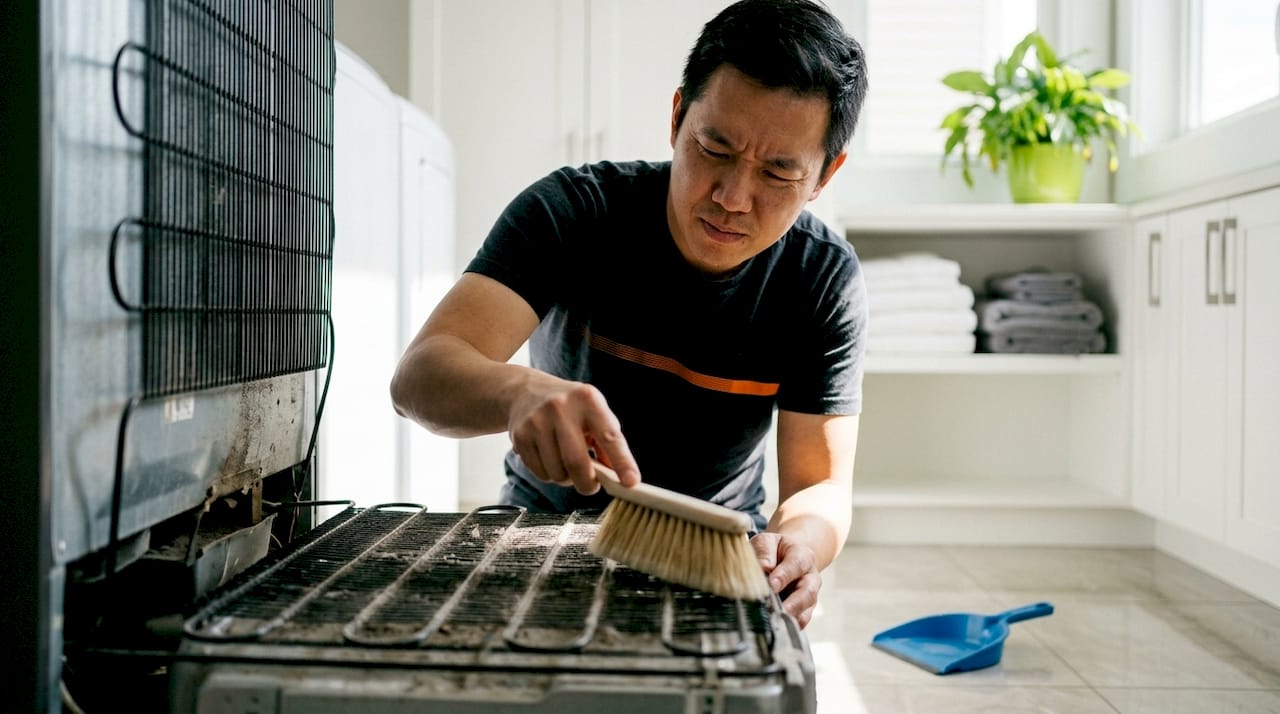
    Pull the fridge away from the wall or remove the front grille at the base. Use a coil brush to loosen dust, then vacuum the debris. Cleaning condenser coils can improve energy efficiency by 25–35%, which shows up directly on your utility bill. Do this every 3 months if you have pets, or every 6 months otherwise.

    Dryer vent and lint trap

    Dryer vent blockage is the leading cause of dryer fires and thermal fuse failures. A $25 vent brush kit clears the duct in about 20 minutes. Pull the dryer from the wall, disconnect the duct, and push the brush through from both ends. Clean the lint trap slot with a narrow lint brush after every few loads.

    Dishwasher filter and spray arms

    Remove the bottom rack and twist out the filter assembly. Rinse it under warm water and scrub with a soft brush. Check the spray arm holes for food debris and clear them with a toothpick. Run a cleaning cycle monthly with a tablet cleaner like Affresh or a cup of white vinegar placed in the bottom rack.

    Washing machine door gasket and drum

    Wipe the rubber door gasket on front-load washers with a diluted bleach solution after every few washes. Mold in the gasket fold is the most common source of musty odors. Run a tub-clean cycle monthly on both front-load and top-load machines using a washer cleaner tablet.

    Water supply hoses

    Inspect hoses behind the washer and dishwasher every 6 months. Look for cracks, bulging, or corrosion at the fittings. Replace water supply hoses every 3–5 years to prevent bursts that cause serious water damage. Braided stainless steel hoses last longer than standard rubber hoses and cost only a few dollars more.

    Appliance Task Frequency Time Required
    Refrigerator Clean condenser coils Every 3–6 months 15 minutes
    Dryer Clean vent duct and lint trap Every 6–12 months 20 minutes
    Dishwasher Clean filter and run cycle Monthly 10 minutes
    Washing machine Wipe gasket, run tub-clean Monthly 15 minutes
    Washer/dishwasher Inspect water supply hoses Every 6 months 5 minutes

    Common mistakes, warning signs, and when to call a professional

    Most homeowners skip the five tasks above entirely. That single habit accounts for the majority of avoidable appliance failures. Knowing what to watch for keeps small problems from becoming expensive ones.

    Mistakes to avoid

    • Skipping dryer vent cleaning because the lint trap looks clean. The trap catches only a fraction of lint; the duct accumulates the rest.
    • Using the wrong cleaner on door gaskets. Harsh abrasives damage rubber seals and cause leaks.
    • Ignoring water hose age. A hose that looks fine can burst without warning after five years.
    • Running a dishwasher with a clogged filter. It forces the pump to work harder and shortens motor life.
    • Forgetting to unplug appliances before cleaning internal components.

    Warning signs that need professional attention

    Call a technician when you hear grinding, banging, or screeching noises that persist after cleaning. Persistent error codes, appliances that trip circuit breakers, and burning smells all require professional diagnosis before you use the appliance again.

    Technicians perform diagnostics through conversation, error code retrieval, and voltage testing before recommending any repair. This process confirms the root cause and prevents unnecessary part replacements. A typical repair call takes 1–3 hours; if parts must be ordered, add 1–5 business days. Prepare for the visit by noting when the problem started, what sounds or smells you noticed, and which error codes appeared.

    Pro Tip: Before calling a technician, write down the appliance model number, the error code if displayed, and a brief description of the symptom. This cuts diagnostic time and may reduce your service bill.

    The appliance repair process works best when you give the technician accurate information upfront. Guessing or omitting details leads to repeat visits. Your maintenance log is the single most useful document you can hand a technician.

    Key takeaways

    A structured appliance maintenance workflow prevents most emergency repairs, extends appliance life by 3–5 years, and costs far less in time and money than reactive fixes.

    Point Details
    Start with the right tools A coil brush, lint trap brush, and vacuum cover most routine maintenance tasks.
    Schedule by usage, not just time Households with pets or heavy dryer use need twice-yearly vent cleaning, not annual.
    Five tasks prevent most failures Coils, dryer vents, filters, gaskets, and hoses account for the majority of emergency calls.
    Replace hoses on a fixed interval Swap water supply hoses every 3–5 years to prevent costly water damage.
    Track everything A maintenance log gives technicians context and helps you spot recurring problems early.

    What I’ve learned from years of treating appliances like investments

    Most homeowners wait until something breaks. I used to do the same thing. A dryer that took two cycles to dry a load, a fridge that ran constantly, a washer that smelled like a gym bag. Every one of those problems had a simple fix that I had been putting off for months.

    The shift that changed everything was treating appliances the same way I treat my car. You would not skip oil changes and wait for the engine to seize. The same logic applies to a refrigerator running with clogged condenser coils or a dryer pushing air through a blocked vent. The benefits of preventive maintenance are not theoretical. They show up on your utility bill and in the years you get out of a machine before replacing it.

    The hardest part is not the tasks themselves. Each one takes under 20 minutes. The hard part is remembering to do them on schedule. A digital reminder system, whether a phone calendar or a platform like Workbenchguide, removes that friction entirely. Once the reminders are set, the workflow runs itself.

    One thing most articles will not tell you: your maintenance log is more valuable than any single task. When a technician arrives and you can say “I cleaned the coils 4 months ago, replaced the hoses last year, and the error code appeared 3 days ago,” you cut the diagnostic conversation in half. That detail saves time and money.

    — Sean

    How Workbenchguide keeps your appliance care on track

    Workbenchguide is built for homeowners who want to stay ahead of repairs without spending hours managing spreadsheets or sticky notes. The platform gives you step-by-step DIY guides, maintenance checklists for every room, and automatic reminders so tasks never slip past their due date. You can log completed maintenance, track appliance history, and pull up the right guide the moment you need it. When a job goes beyond DIY, Workbenchguide connects you with contractor help. It is the practical tool that turns a good intention into a consistent habit, keeping your appliances running longer and your repair bills lower.

    FAQ

    What is an appliance maintenance workflow?

    An appliance maintenance workflow is a planned sequence of routine tasks, including cleaning, inspecting, and replacing parts, that keeps home appliances running efficiently and safely. It replaces reactive repairs with a proactive schedule tied to each appliance’s needs.

    How often should I clean dryer vents?

    Clean dryer vents at least once a year. If you have pets, run the dryer heavily, or have a duct longer than 15 feet, clean it every 6 months to prevent fire hazards and thermal fuse failures.

    When should I replace water supply hoses?

    Replace water supply hoses every 3–5 years, even if they look undamaged. Aging rubber hoses can burst without warning and cause serious water damage to floors and walls.

    What are the signs I need a professional appliance repair?

    Persistent error codes, grinding or burning smells, appliances that trip breakers, and problems that return after cleaning all require a technician. A professional uses error code retrieval and voltage testing to confirm the root cause before making repairs.

    How do I maintain home appliances without special skills?

    The five most impactful tasks, cleaning refrigerator coils, clearing dryer vents, washing machine gaskets, dishwasher filters, and inspecting water hoses, require no technical skills and take under 20 minutes each. A printed or digital checklist from a resource like Workbenchguide keeps you on schedule.

  • What Is Pest Prevention? A Homeowner’s Guide

    What Is Pest Prevention? A Homeowner’s Guide

    Pest prevention is the practice of stopping pests from entering and thriving in your home by controlling their access, food, and shelter. The U.S. EPA classifies prevention as the first and most effective step in any pest management strategy, placing it above chemical treatments in priority. Unlike reactive pest control, which responds to an existing infestation, prevention removes the conditions that make your home attractive to pests in the first place. Homeowners and renters who build consistent prevention habits spend less on treatments, face fewer structural risks, and avoid the stress of dealing with established colonies or nests.

    What is pest prevention and why does it matter?

    Pest prevention is a proactive set of strategies designed to deny pests the three things they need to survive: access, food, and water. The EPA’s access-plus-opportunity model defines this clearly: seal entry points, eliminate moisture, and remove food sources to reduce infestation risks. This framework applies to every common household pest, from rodents and cockroaches to ants and termites.

    The importance of pest prevention goes beyond comfort. Rodents chew through electrical wiring, cockroaches trigger asthma in children, and termites cause billions of dollars in structural damage across the U.S. each year. Preventing these pests from establishing a foothold costs far less than treating an active infestation. Preventative home care consistently reduces repair costs over time.

    Chewed electrical wires in home basement

    Prevention also reduces your household’s exposure to pesticides. When you stop pests before they arrive, you rarely need chemical treatments at all. That protects your family, your pets, and the beneficial insects in your yard.

    What are the key pest prevention methods homeowners can use?

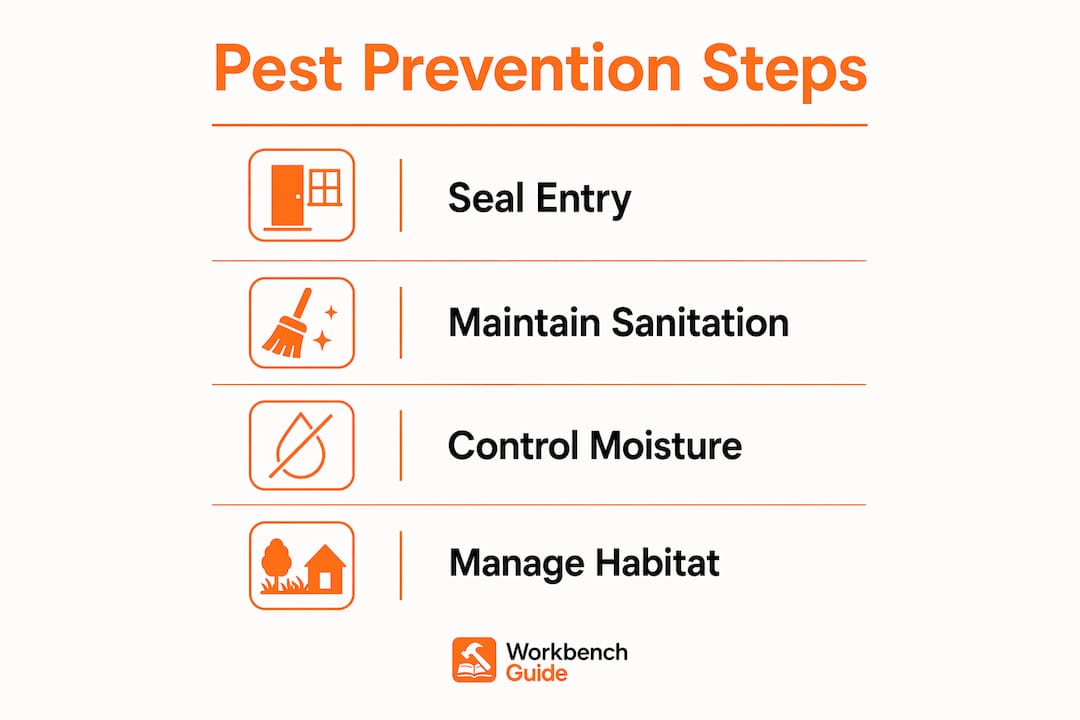
    The best pest prevention methods fall into four categories: sealing, sanitation, moisture control, and habitat management. Each one targets a different resource pests depend on.

    Sealing entry points

    Every gap around pipes, vents, windows, and doors is a potential pest highway. Caulk small cracks in your foundation and exterior walls. Use weatherstripping on doors and windows that don’t close tightly. Pay special attention to utility penetrations, where gas lines, water pipes, and electrical conduits enter the home. Utility line entry points should be sealed with steel wool or professional foam, since rodents can chew through standard caulk but not steel wool.

    Sanitation and food storage

    Pests follow food. Store dry goods like flour, rice, and cereal in airtight glass or hard plastic containers. Take out garbage regularly and use bins with tight-fitting lids. Wipe down counters and sweep floors after every meal. Pet food left out overnight is one of the most common reasons cockroaches and ants establish themselves in kitchens.

    Infographic listing key pest prevention methods

    Moisture control

    Standing water and persistent dampness attract mosquitoes, cockroaches, silverfish, and rodents. Fix leaky faucets and pipes promptly. Check under sinks and around water heaters for slow drips. Empty saucers under houseplants after watering. In basements and crawl spaces, run a dehumidifier if humidity stays above 50%.

    Habitat and clutter management

    Clutter gives pests places to hide and nest. The EPA recommends keeping vegetation at least 20 feet from your home’s foundation to reduce harborage zones. Firewood stacked against the house invites termites and carpenter ants. Inside, replacing cardboard boxes with heavy-duty plastic bins removes nesting material, since cardboard absorbs moisture and creates ideal conditions for pests to breed.

    Pro Tip: Inspect your home’s exterior every spring and fall. Walk the perimeter and look for new cracks, gaps around utility lines, and areas where soil has shifted away from the foundation. A 30-minute inspection twice a year catches problems before pests do.

    How does Integrated Pest Management support effective pest prevention?

    Integrated Pest Management, or IPM, is the structured framework that pest control professionals and the EPA use to manage pests with the least environmental impact. IPM prioritizes non-chemical methods such as sanitation, mechanical barriers, and biological controls before reaching for pesticides. It organizes pest management into four control types, applied in order of impact and risk.

    Control type Method Example
    Cultural Change conditions that support pests Remove standing water, store food properly
    Mechanical Physical barriers and traps Seal cracks, install door sweeps, use snap traps
    Biological Use natural predators or pathogens Introduce nematodes for grub control in lawns
    Chemical Targeted pesticide application Bait stations, spot treatments as a last resort

    IPM does not eliminate chemical treatments entirely. It places them last, after cultural and mechanical methods have been applied. This order matters for two reasons. First, avoiding early chemical use preserves beneficial insects like ground beetles and spiders that naturally suppress pest populations. Second, it slows the development of pesticide resistance, which makes future treatments more effective when you actually need them.

    For homeowners, adopting an IPM mindset means thinking about pest management as a system rather than a single spray. You monitor for early signs of activity, address the root conditions, and use targeted treatments only when a pest population crosses a threshold that causes real damage.

    What are the differences between pest prevention and pest control treatments?

    Pest prevention and pest control are not the same thing, though many homeowners use the terms interchangeably. Prevention is proactive. Pest control is reactive.

    Liquid chemical barriers remain active for 60–90 days, and bait systems can take 1–3 weeks to fully eliminate a colony. That means even after a professional treatment, you are waiting weeks for results and paying for repeat visits. Prevention, by contrast, works continuously as long as you maintain the habits.

    Here is how the two approaches compare directly:

    Factor Pest prevention Pest control treatment
    Timing Proactive, ongoing Reactive, after infestation
    Cost Low, mostly labor and materials Higher, professional service fees
    Chemical exposure Minimal to none Moderate to high
    Duration of effect Continuous with maintenance 30–90 days per treatment
    Long-term outcome Reduces infestation frequency Addresses current infestation only

    The most common misconception homeowners hold is that one professional treatment solves the problem permanently. Prevention requires continuous habits like moisture control and trash management to stop pests from returning. A chemical treatment kills the pests present at the time. It does nothing to fix the crack in your foundation or the leaky pipe under the sink that attracted them.

    Treatments are most effective when combined with prevention. A pest control professional who treats your home without addressing entry points and food sources will be back within a season.

    What mistakes should homeowners avoid in pest prevention?

    Most pest prevention failures come from a small set of repeatable mistakes. Knowing them in advance saves you time, money, and frustration.

    • Ignoring utility penetrations. Most homeowners seal visible cracks but miss the gaps where pipes and conduit enter the home. These are the primary entry points for rodents. Seal them with steel wool packed tightly, then cover with foam sealant.
    • Using sprays on ant trails. Spraying visible ants with a contact insecticide kills the workers you see but triggers colony splitting. The colony senses the threat and divides, creating multiple new nests. Bait stations are more effective because worker ants carry the poison back to the colony, eliminating the source.
    • Storing items in cardboard boxes. Cardboard absorbs moisture and provides nesting material for rodents and cockroaches. Switch to sealed plastic bins, especially in basements, garages, and attics.
    • Letting yard debris accumulate. Leaf piles, overgrown shrubs, and stacked wood near the house create shelter zones. Keep a clear perimeter around your foundation.
    • Treating prevention as a one-time project. Pests are persistent. Gaps reopen as homes settle, screens tear, and weather strips wear out. Schedule a regular home inspection to catch new vulnerabilities before pests find them.

    Pro Tip: For ant problems, place bait stations along the trails you observe rather than spraying. Leave the trails intact so worker ants can find the bait and carry it back. Disrupting the trail with spray before the bait works defeats the purpose.

    Prevention is a habit, not a project

    I have watched homeowners spend hundreds of dollars on professional treatments, then wonder why the pests came back three months later. The answer is almost always the same: they treated the symptom and ignored the cause.

    Pest biology explains this clearly. Cockroaches can survive on crumbs invisible to the human eye. Mice need a gap no larger than a dime to enter a wall. Ants communicate chemically, so even after you kill a trail, the scent path remains until you clean it with soap and water. These creatures are not random. They follow resources with precision.

    The homeowners I have seen succeed at long-term pest prevention share one trait: they treat it as part of regular home maintenance, not a crisis response. They check weatherstripping when they change smoke detector batteries. They inspect the attic for signs of rodent activity during their attic maintenance checks. They fix drips the week they appear, not the month after.

    The cost difference is real. A tube of caulk and an hour of your time costs under $20. A professional rodent exclusion service costs $300–$600 or more. The habits that prevent the need for that service are not complicated. They just require consistency.

    My honest recommendation: build pest prevention into your seasonal home checklist. Treat it like changing your furnace filter or cleaning your gutters. Do it on a schedule, not in response to a problem.

    — Sean

    How Workbenchguide helps you stay ahead of pest problems

    Workbenchguide is built for exactly this kind of consistent, proactive home care. The platform gives you scheduled maintenance reminders, step-by-step DIY guides, and project checklists that cover pest prevention as part of your broader home upkeep routine. Instead of remembering to check weatherstripping or inspect crawl spaces on your own, Workbenchguide prompts you at the right time of year. Start with the year-round maintenance checklist to build a pest-resistant home care routine that runs on autopilot. When a problem goes beyond DIY, the platform connects you with contractors who can handle it properly.

    Key takeaways

    Pest prevention is the most cost-effective strategy available to homeowners because it removes the conditions pests need before an infestation can start.

    Point Details
    Prevention beats treatment Stopping pests before entry costs far less than eliminating an active infestation.
    Seal utility penetrations Use steel wool and foam on pipe and conduit entry points, not just visible cracks.
    IPM is the gold standard Apply cultural and mechanical controls first; use chemical treatments only as a last resort.
    Avoid sprays on ant trails Bait stations eliminate the colony; sprays cause splitting and worsen the problem.
    Consistency is the strategy Schedule prevention tasks seasonally, not in response to a pest sighting.

    FAQ

    What is the simplest definition of pest prevention?

    Pest prevention is the practice of removing the access, food, and water sources that allow pests to enter and survive in a home. It focuses on stopping infestations before they start rather than treating them after they occur.

    How often should homeowners inspect for pest entry points?

    Inspect your home’s exterior and interior at least twice a year, ideally in spring and fall. Pay close attention to utility penetrations, door seals, window screens, and foundation cracks.

    Are natural pest prevention methods effective?

    Natural methods like sealing gaps, removing standing water, storing food in airtight containers, and managing yard debris are highly effective as a first line of defense. They form the foundation of IPM and reduce or eliminate the need for chemical treatments.

    Why do pest control treatments stop working after a few months?

    Liquid chemical barriers remain active for 60–90 days before breaking down. Without addressing the underlying conditions that attract pests, new individuals will enter the home once the treatment fades. Prevention habits close that gap permanently.

    What is the difference between IPM and standard pest control?

    Standard pest control applies chemical treatments reactively to an existing pest problem. IPM is a structured system that prioritizes cultural, mechanical, and biological controls first, using chemicals only when other methods are insufficient to keep pest populations below a damage threshold.

  • Why Replace Your Furnace Filter: Costs and Health Risks

    Why Replace Your Furnace Filter: Costs and Health Risks

    Replacing your furnace filter is the single most cost-effective maintenance task in your home. A clogged filter forces your HVAC system to work harder, drives up energy bills, and allows dust, allergens, and mold spores to circulate through every room. The U.S. Department of Energy and the EPA both identify filter maintenance as a front-line defense for indoor air quality and system efficiency. Most homeowners change filters too infrequently, and that one habit quietly costs them hundreds of dollars a year.

    Why replace your furnace filter: the efficiency and cost case

    A clean furnace filter is the difference between an HVAC system that runs efficiently and one that burns extra energy every single hour. Replacing a dirty filter can cut heating and cooling energy use by 5% to 15%. On an average American utility bill, that adds up to real money across a heating season.

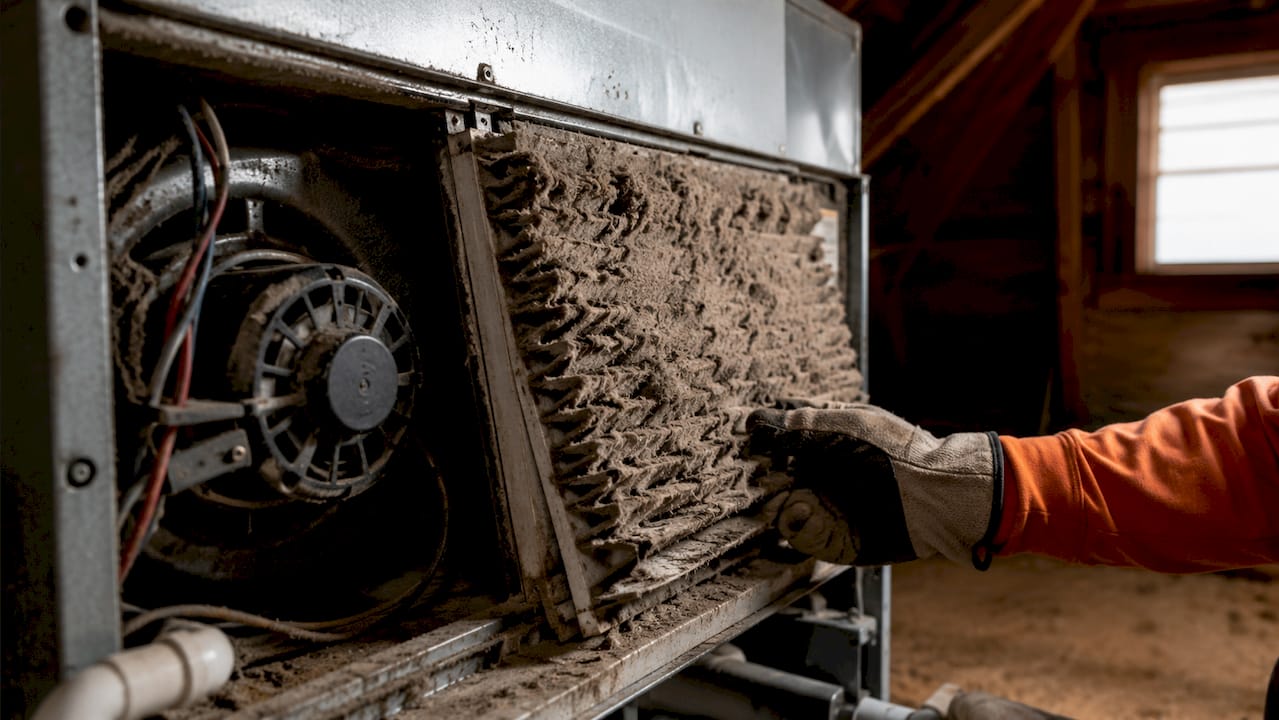
    The mechanics are straightforward. When a filter clogs with dust and debris, the blower motor must pull harder to move air through the system. That extra strain raises electricity consumption and generates more heat inside the motor itself. Over time, the motor wears out faster than it should.

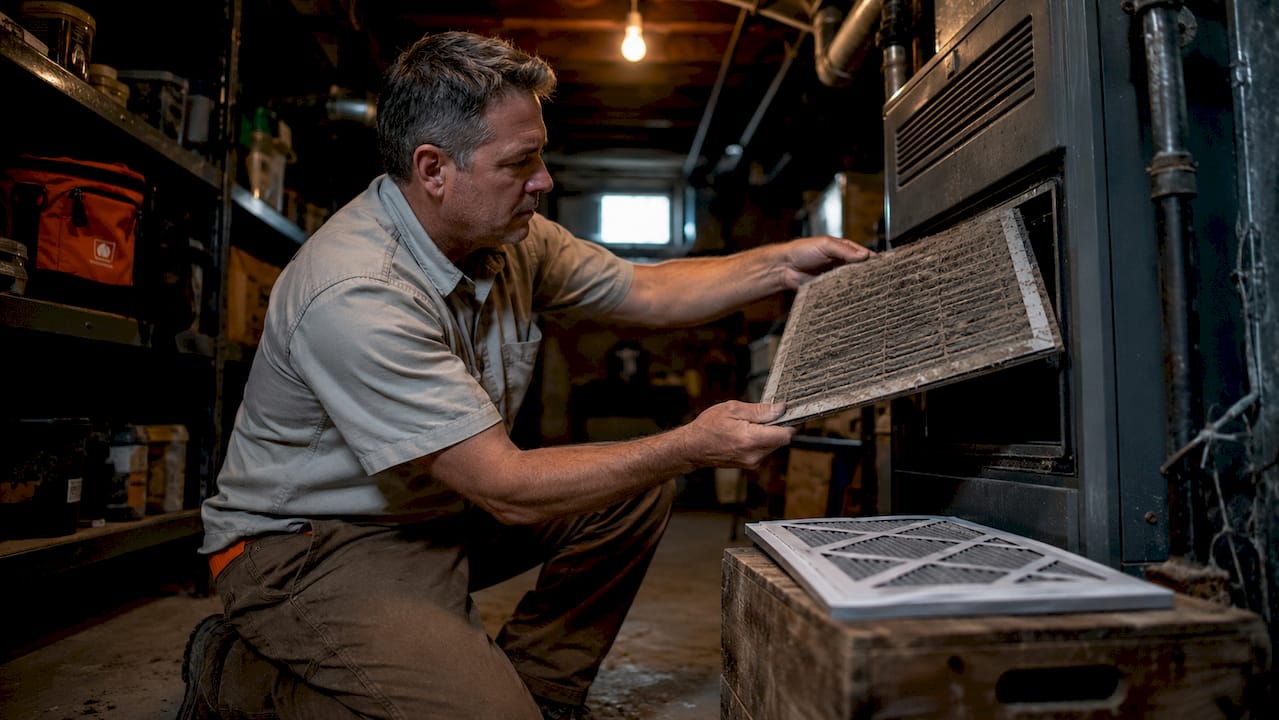
    Clogged furnace filter inside HVAC blower compartment

    The financial risk goes beyond monthly bills. Blower motor failures increase by 25% in homes that skip regular filter changes. A blower motor replacement typically costs $400 to $600 in parts and labor. That is a steep price for ignoring a $10 filter.

    Here is what a neglected filter costs you across three categories:

    • Energy waste: The system runs longer cycles to reach the thermostat setpoint, burning more fuel or electricity each time.
    • Component wear: The blower motor, capacitor, and heat exchanger all experience accelerated stress under restricted airflow.
    • Repair bills: Emergency HVAC service calls average $150 to $500, not counting parts. Most are preventable.

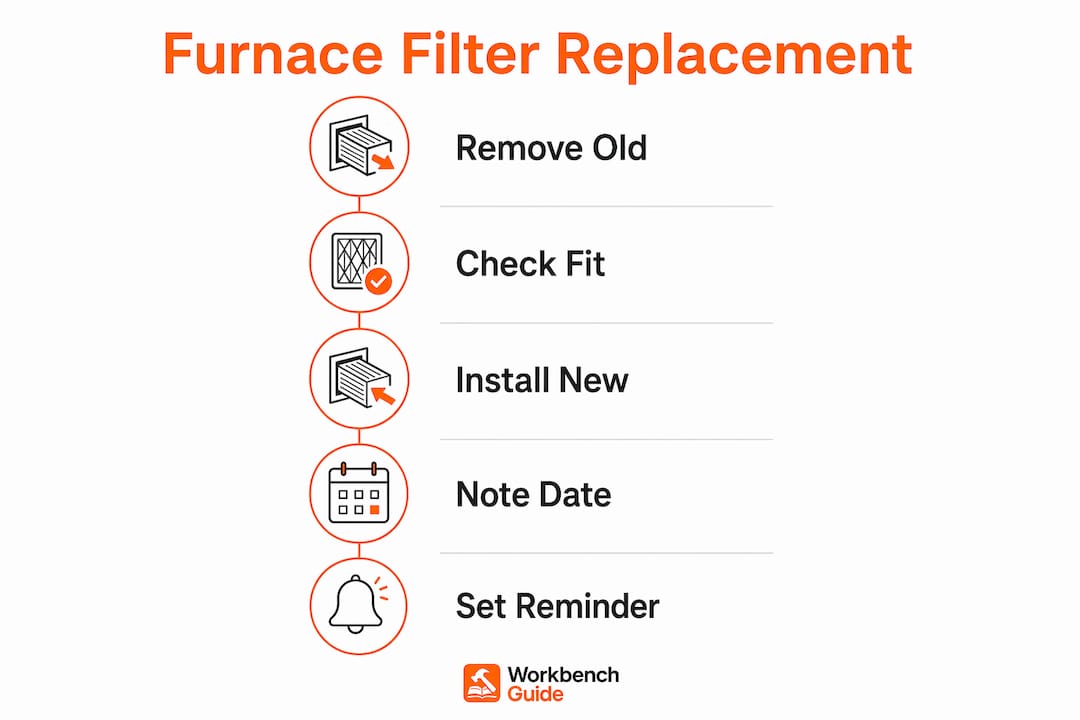
    Pro Tip: Set a phone reminder the day you install a new filter. Write the installation date on the filter frame with a marker so you always know exactly how long it has been in service.

    What happens inside your furnace when the filter is neglected?

    Infographic illustrating furnace filter replacement steps

    A clogged filter does not just reduce airflow. It starts a chain of mechanical failures that can end with a cracked heat exchanger and a carbon monoxide hazard in your home. Understanding this sequence is the strongest argument for staying on schedule.

    Restricted airflow causes heat to build up inside the furnace cabinet. The system’s high-limit switch detects the excess temperature and shuts the furnace down before it overheats. This is called short cycling. Short cycling stresses the heat exchanger, the metal component that separates combustion gases from the air you breathe. Thermal stress causes heat exchanger cracks, and a cracked heat exchanger can leak carbon monoxide directly into your living space.

    “A dirty filter creates a destructive chain reaction, stressing furnace parts and creating system failure risks that compound over time.” — The Spruce

    The damage does not stop at the furnace itself. Dust that bypasses or accumulates around a saturated filter coats the evaporator coils and lines the inside of your ductwork. Coated coils lose their ability to transfer heat efficiently. Dust-lined ducts become breeding grounds for mold, especially in humid climates.

    Your HVAC system acts as the lungs of your home. When the filter saturates, it stops trapping particles and begins releasing them back into circulation. The EPA reports that indoor air can be 2 to 5 times more polluted than outdoor air. A failed filter makes that problem significantly worse, particularly for anyone in the household with asthma or seasonal allergies.

    The furnace filter health effects extend to the whole family. Indoor air pollutants include dust mite debris, pet dander, mold spores, and volatile organic compounds. A functioning filter reduces all of these. A saturated one traps none of them.

    How often should you replace your furnace filter?

    The old rule of changing your filter every 90 days no longer applies to most American homes. HVAC professionals now recommend a 45-day replacement cycle for modern homes. Two factors drove that shift: airtight construction and higher-MERV filters.

    Modern homes are built tighter than homes from the 1980s or 1990s. Less outside air infiltrates the building envelope, so the same air recirculates through the filter more frequently. Higher-MERV filters, which are more common now, also load up with particles faster than the basic fiberglass filters of previous decades.

    Your specific situation may require even more frequent changes. Use this schedule as a starting point:

    1. Basic 1-inch fiberglass filter, no pets, no allergies: Every 30–45 days.
    2. Pleated filter, MERV 8–10, one pet: Every 30 days.
    3. High-efficiency filter, MERV 11–13, multiple pets or allergy sufferers: Every 20–30 days.
    4. Vacation home or low-occupancy property: Every 60–90 days is acceptable.
    5. After home renovation or construction work: Replace immediately, regardless of age.

    The flashlight test is a reliable field check. Pull the filter out and hold it up to a light source. If you cannot see light passing through the media, the filter is overdue for replacement. Do not wait for the scheduled date if the filter is visibly gray or brown.

    Pro Tip: Buy filters in multipacks from brands like Filtrete or Nordic Pure. Storing three or four filters near the furnace removes the friction of a hardware store trip and makes you far more likely to stay on schedule.

    How to choose and replace your furnace filter correctly

    Choosing the wrong filter or installing it incorrectly wastes money and can damage your system. The process takes less than five minutes when you know what to look for.

    Reading filter dimensions

    Every filter has three dimensions printed on its frame: length, width, and depth. The depth is typically 1 inch, 2 inches, or 4 inches. Buy the exact size your system requires. A loose-fitting filter allows unfiltered air to bypass the media entirely, which defeats the purpose of having a filter at all.

    Understanding MERV ratings

    MERV stands for Minimum Efficiency Reporting Value. The scale runs from 1 to 16 for residential use. A MERV 8 filter captures most dust, pollen, and mold spores. A MERV 11 or 13 filter also captures fine particles, pet dander, and some bacteria. However, high-efficiency filters rated MERV 11 and above can increase static pressure and strain older HVAC blowers not designed for that resistance. Check your furnace manual or ask your HVAC technician before upgrading to a high-MERV filter.

    MERV Rating Best For Caution
    MERV 1–4 Basic dust control Minimal allergen protection
    MERV 8–10 Most homes, good balance Replace more often with pets
    MERV 11–13 Allergy and asthma households May strain older systems
    MERV 14–16 Hospital-grade, not typical residential Requires compatible blower

    Step-by-step replacement process

    1. Turn off the furnace at the thermostat before opening the filter compartment.
    2. Note the size printed on the old filter frame before discarding it.
    3. Slide the old filter out carefully to avoid shaking loose debris into the cabinet.
    4. Check the directional arrow on the new filter frame. It must point toward the furnace, in the direction of airflow.
    5. Slide the new filter in firmly so no gaps exist around the edges.
    6. Close the access panel and restore power.

    Never run your system without a filter in place, even for a few minutes. Dust buildup on coils from even brief unfiltered operation reduces efficiency and promotes mold growth that is difficult to remediate. You can learn more about keeping your whole system in shape with Workbenchguide’s HVAC maintenance guide for homeowners.

    Key takeaways

    Replacing your furnace filter on a consistent schedule is the highest-return maintenance habit a homeowner can build, protecting both system longevity and indoor air quality.

    Point Details
    Energy savings are real A clean filter cuts HVAC energy use by 5%–15%, reducing monthly utility bills.
    Mechanical damage compounds Skipping changes raises blower motor failure risk by 25% and risks heat exchanger cracks.
    45-day cycle is the new standard Modern airtight homes and high-MERV filters load up faster than older 90-day schedules assumed.
    MERV rating must match your system Filters rated MERV 11 and above can strain older blowers; check your furnace specs first.
    Installation direction matters The arrow on the filter frame must point toward the furnace or airflow is compromised.

    The mistake most homeowners make with furnace filters

    I have talked with hundreds of homeowners about HVAC maintenance, and the pattern is almost always the same. They know they should change the filter. They just do not do it on time. The reason is not laziness. It is that the consequences are invisible until they are expensive.

    Most people change their filter when they remember, which turns out to be every four to six months. By that point, the blower has been working against restricted airflow for weeks. The heat exchanger has been cycling through thermal stress repeatedly. The coils have a thin layer of dust on them. None of this is visible from the living room.

    The second mistake I see constantly is buying the cheapest fiberglass filter available and assuming it does the job. A MERV 4 filter stops large dust particles. It does nothing for pet dander, mold spores, or the fine particles that trigger asthma. If anyone in your home has respiratory issues, a MERV 10 or 11 filter from a brand like Filtrete 3M or Honeywell Home is worth the extra $5 per filter.

    The third mistake is treating filter changes as isolated tasks rather than part of a broader annual HVAC service routine. A filter change takes five minutes. A professional tune-up once a year catches the problems a filter change cannot fix. Together, they keep a furnace running for 20 years instead of 12. That math is hard to argue with.

    View filter replacement not as a chore but as a $10 insurance policy against a $500 repair call. The role of HVAC in indoor air quality is significant, and the filter is the first line of that defense.

    — Sean

    Stay ahead of furnace filter maintenance with Workbenchguide

    Workbenchguide makes it easy to track every home maintenance task, including furnace filter changes, so nothing slips through the cracks. The platform provides smart reminders, step-by-step DIY guides, and project checklists built specifically for homeowners who want to stay ahead of repairs rather than react to them. Start with the home maintenance checklist to build a complete schedule for your property, including seasonal HVAC tasks. For a deeper look at filter essentials and efficiency, Workbenchguide connects you with trusted resources to keep your system running at its best year-round.

    FAQ

    Why should I replace my furnace filter regularly?

    A dirty furnace filter restricts airflow, forces the blower motor to work harder, and allows dust and allergens to recirculate through your home. Regular replacement cuts energy use by 5%–15% and prevents costly mechanical failures.

    How often should I change my furnace filter?

    HVAC professionals now recommend changing filters every 45 days in modern airtight homes, down from the traditional 90-day cycle. Homes with pets or allergy sufferers may need changes every 20–30 days.

    What MERV rating is best for a home furnace filter?

    MERV 8–10 is the right balance for most households, capturing dust, pollen, and mold spores without straining the blower. Homes with allergy or asthma concerns can use MERV 11–13, provided the furnace is rated to handle the added resistance.

    Can a dirty furnace filter cause carbon monoxide exposure?

    Yes. A clogged filter causes the furnace to overheat and short cycle, which stresses the heat exchanger. A cracked heat exchanger can leak carbon monoxide into living spaces, making filter replacement a direct safety issue.

    What happens if I install my furnace filter backward?

    Installing the filter with the arrow pointing away from the furnace compromises airflow and shortens filter life significantly. Always confirm the directional arrow points toward the furnace before closing the access panel.

  • Why Check Downspouts: Protect Your Home’s Foundation

    Why Check Downspouts: Protect Your Home’s Foundation

    Downspouts are vertical pipes that channel rainwater from your gutters safely away from your home’s foundation, and skipping regular inspections is one of the most expensive mistakes a homeowner can make. Neglected downspouts cause foundation repairs that average $2,300 to $6,800, not counting water damage to siding, landscaping, and basements. Understanding why check downspouts matters comes down to one fact: your gutters collect water, but your downspouts decide where that water goes. If they fail, the water goes straight into your home’s structure.

    Why check downspouts before water damage starts

    Downspouts are the final critical component in your home’s water runoff system. When they work correctly, they move thousands of gallons of rainwater away from your foundation every year. When they fail, that water has nowhere to go except into the soil directly beside your home.

    The protective role downspouts play goes beyond simple drainage. They prevent hydrostatic pressure from building up against your foundation walls, stop basement leaks before they start, and keep your siding dry during heavy rain. Overflow from clogged downspouts can degrade fascia boards and siding within hours during a heavy storm. That kind of rot is invisible until it becomes a major structural repair.

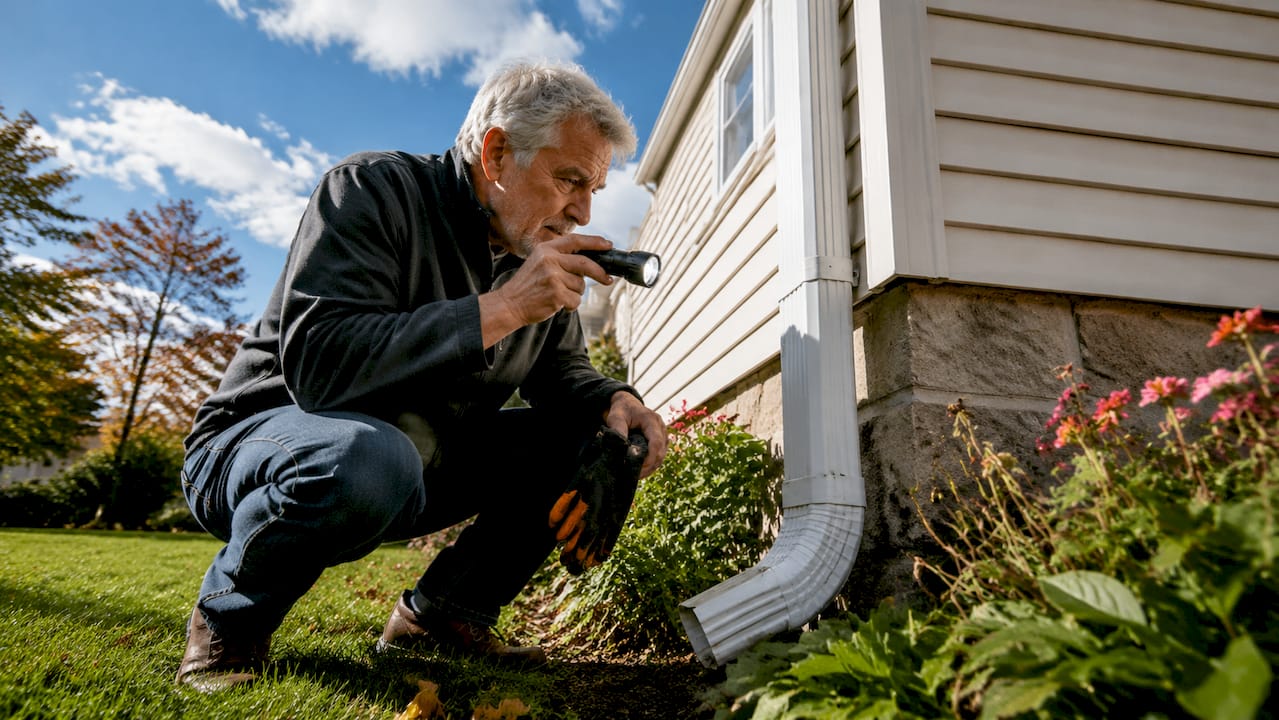
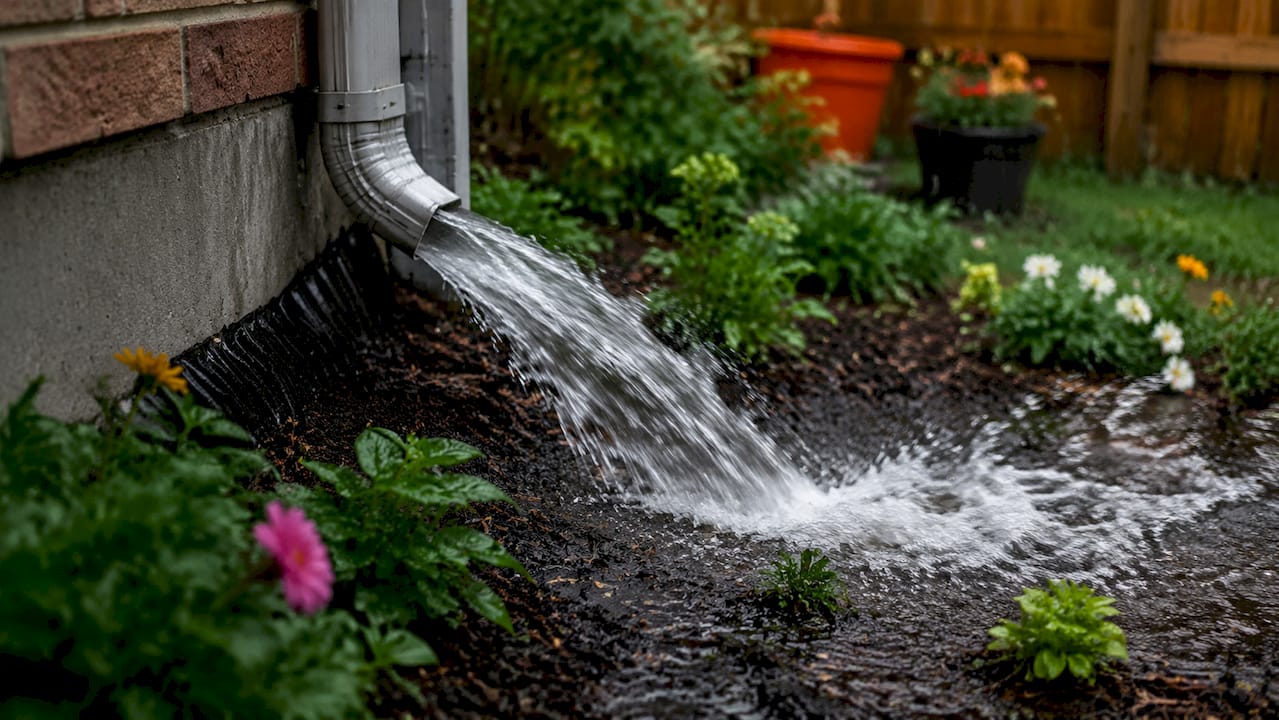
    Water flowing from downspout away from foundation

    The downspout maintenance importance also extends to your landscaping. Poorly directed water erodes topsoil, kills grass and plants near your foundation, and creates low spots that pool water even further. Over time, that pooling accelerates soil saturation and puts direct pressure on basement walls.

    Industry guidance calls for cleaning and inspecting downspouts twice a year, with homes near heavy tree cover requiring quarterly checks. With consistent care, downspouts can last up to 50 years. Without it, you are looking at premature replacement and the collateral damage that comes with failure.

    Pro Tip: Set your twice-yearly inspections to align with spring and fall. Spring catches freeze-thaw damage from winter, and fall clears debris before the wet season hits.

    The check downspouts benefits are straightforward: you spend 30 minutes twice a year, or you risk spending thousands on repairs that were entirely preventable.

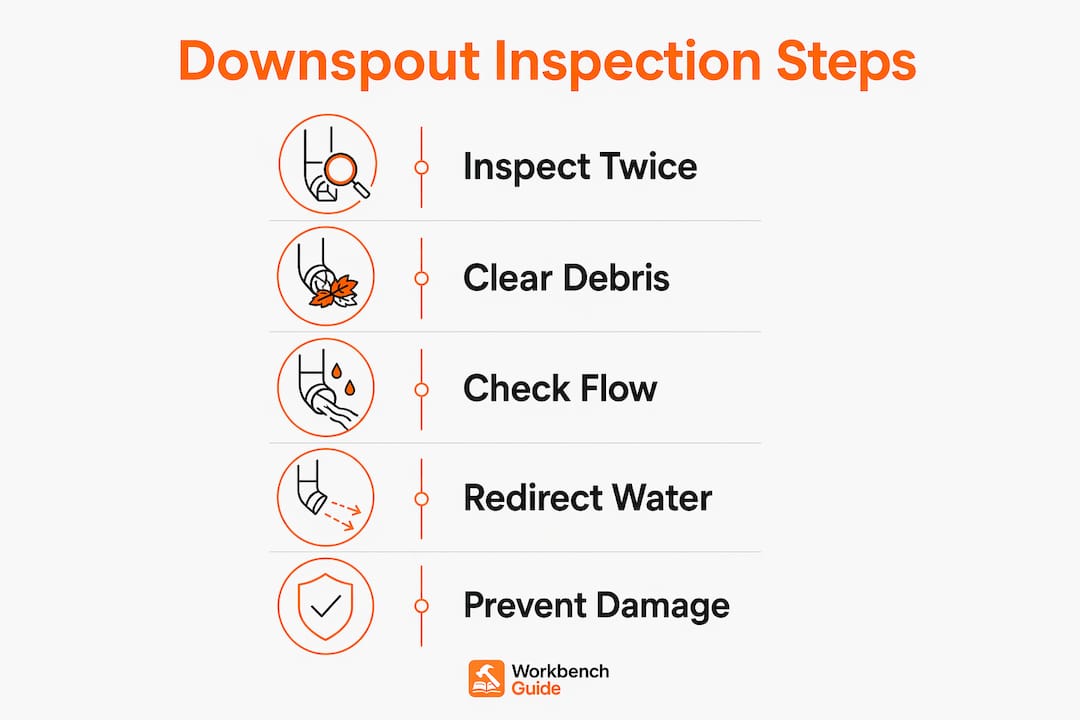
    Infographic showing downspout inspection steps

    What are the warning signs of downspout problems?

    Catching downspout problems early requires knowing what to look for. Most homeowners only notice a problem after water has already entered the home or rotted out a fascia board. The signs appear much earlier than that.

    Visible warning signs to watch for:

    • Water overflowing the sides of gutters during rain, even light rain
    • Green streaks or algae stains on siding directly below gutters
    • Splash marks or soil erosion at the base of the downspout
    • Sagging gutters that have pulled away from the fascia
    • Standing water pooling near the foundation after rain
    • Loose or separated joints where downspout sections connect

    Common causes of downspout blockage issues include leaf and debris buildup, pine needle accumulation, pollen clogs in spring, and ice damage in winter. Blocked elbows at the bottom of the downspout are a particularly common problem because debris collects at the bend and is hard to spot without a close look.

    Silent failures like water backing up at elbows are more dangerous than obvious overflow because the damage happens out of sight. Water pools inside the downspout, seeps into joints, and causes hidden structural rot in the wall behind it. By the time you see the damage, the repair bill is already large.

    Pro Tip: Inspect downspouts during rainfall to catch flow restrictions and leaks that are completely invisible on dry days. A garden hose can simulate rain if you cannot wait for a storm.

    The impact of surrounding trees on your maintenance schedule is real. A home with mature oaks or maples overhead may need quarterly checks rather than twice-yearly ones. Pine trees are especially problematic because needles clump together and form dense plugs inside downspout elbows.

    How to properly inspect and clean your downspouts

    Knowing how to inspect downspouts correctly saves you from guesswork and missed problems. The process is straightforward and requires only basic tools.

    Tools you need:

    • Garden hose with a spray nozzle
    • Plumber’s snake or drain auger
    • Work gloves
    • A stable ladder
    • Flashlight for checking inside the downspout opening

    Step-by-step inspection process:

    1. Start at the top. Check the gutter outlet where it connects to the downspout opening. Remove any visible debris by hand.
    2. Run water from a garden hose into the gutter and watch how quickly it drains through the downspout. Slow drainage signals a partial blockage.
    3. Check every joint and elbow along the downspout for separation, rust, or visible leaks while the water runs.
    4. At the bottom, confirm water exits at least 5 feet away from your foundation. Downspouts should discharge water at least 5 feet from the foundation to minimize hydrostatic pressure and soil saturation.
    5. If water backs up or drains slowly, feed a plumber’s snake down from the top to break up the clog, then flush again with the hose.
    6. After clearing, check the discharge area for erosion or pooling that suggests the water is not moving far enough from the house.
    Task DIY or Professional
    Flushing and clearing debris DIY with garden hose and snake
    Reattaching loose brackets DIY with screws and sealant
    Replacing a cracked section DIY if comfortable on a ladder
    Regrading soil near foundation Professional recommended
    Replacing full downspout system Professional recommended

    The best times for this work are spring and fall. Freeze-thaw cycles in winter cause cracks and loosen brackets, so a spring inspection after the thaw is the most important one of the year. Fall inspection clears debris before winter freezes it in place.

    Pro Tip: Splash blocks alone are insufficient if the ground near your foundation does not slope away from the house. A downspout extension that routes water 5 or more feet out is a far more reliable fix and costs under $20 at most hardware stores.

    Call a professional when you see significant rust, large cracks, or sections that have fully separated. Also call one if your basement shows water intrusion despite clean downspouts, since the issue may be grading or a drainage problem that requires more than a simple flush.

    What are the long-term benefits of regular downspout inspections?

    The financial case for routine downspout care is clear. Foundation repairs average $2,300 to $6,800, and water damage restoration adds thousands more on top of that. A twice-yearly inspection that takes under an hour is the most cost-effective home maintenance task most homeowners consistently skip.

    Beyond the foundation, regular inspections preserve your fascia boards, siding, and landscaping. Fascia rot from water backing up at joints can spread to roof decking and require full board replacement. Siding that stays wet from overflow develops mold, warps, and loses its protective coating faster than it should. You can read more about the connection between water management and exterior damage in this guide to inspecting siding.

    Long-term benefits of consistent downspout care:

    • Avoidance of foundation repair costs averaging thousands of dollars
    • Extended lifespan of gutters and downspouts, up to 50 years with proper maintenance
    • Protection of fascia boards, siding, and exterior paint from moisture damage
    • Preserved landscaping and topsoil near the foundation
    • Reduced risk of basement flooding and mold growth
    • Maintained curb appeal and home resale value

    The environmental benefits are worth noting too. Properly directed runoff reduces soil erosion and limits the amount of polluted stormwater that reaches storm drains and local waterways. When downspouts discharge correctly, water soaks into the ground gradually rather than rushing across paved surfaces and carrying oil, fertilizer, and sediment into drainage systems.

    Foundation problems usually stem from poor water management rather than weak foundations. That reframes the entire task. You are not just cleaning pipes. You are actively managing where water moves around your home, and that decision has consequences that last decades.

    Key takeaways

    Regular downspout inspections are the single most cost-effective maintenance task a homeowner can do to prevent foundation damage, siding rot, and basement flooding.

    Point Details
    Inspect twice a year minimum Spring and fall checks catch freeze damage and pre-winter debris before problems worsen.
    Discharge water 5 feet from foundation Extensions prevent soil saturation and hydrostatic pressure that crack foundation walls.
    Silent blockages cause hidden rot Water backing up at elbows damages structure invisibly before any visible overflow appears.
    Foundation repairs cost thousands Neglected downspouts lead to repairs averaging $2,300 to $6,800, far more than prevention costs.
    Downspouts last up to 50 years Consistent maintenance extends lifespan dramatically and protects every connected system.

    The maintenance task most homeowners underestimate

    I have walked through hundreds of homes where the gutters looked fine from the street but the downspouts were completely blocked at the elbow. The homeowner had no idea. The fascia behind the downspout was soft and rotting, and water had been pooling against the foundation for at least two seasons. The repair bill was over $4,000 for work that a $15 plumber’s snake and two hours would have prevented.

    The pattern I see most often is that homeowners treat downspouts as part of the gutter system and assume that cleaning the gutters covers everything. It does not. The downspout is a separate component with its own failure points, and the elbows and joints are where problems hide. A clean gutter trough means nothing if water cannot actually exit the system.

    What I tell every homeowner is this: add downspout checks to your regular home inspection routine and treat them as seriously as you treat smoke detector batteries. The consequences of skipping them are just as real, they just take longer to show up. The good news is that once you know what to look for, the whole inspection takes less time than mowing the lawn.

    — Sean

    Keep your home protected with Workbenchguide

    Downspout checks are one piece of a larger maintenance picture, and staying on top of all of it is easier when you have a system. Workbenchguide gives homeowners a year-round maintenance checklist that tells you exactly what to inspect and when, so nothing falls through the cracks. From gutter and downspout reminders to seasonal exterior checks, the platform keeps your schedule organized and your home protected. Skipping one inspection can cost thousands. Having a reliable system costs almost nothing. Workbenchguide is built for homeowners who want to stay ahead of repairs rather than react to them.

    FAQ

    How often should you check your downspouts?

    Inspect downspouts at least twice a year, in spring and fall. Homes surrounded by heavy tree cover need quarterly checks to prevent debris buildup from causing blockages.

    What happens if you never clean your downspouts?

    Clogged downspouts cause water to overflow against your foundation, leading to soil saturation, basement leaks, fascia rot, and foundation damage that costs $2,300 to $6,800 to repair.

    How far should downspouts discharge from the house?

    Downspouts should direct water at least 5 feet away from the foundation. Splash blocks alone are not enough if the ground does not slope away from the house.

    Can you inspect downspouts without a ladder?

    You can check for overflow, splash marks, and soil erosion from the ground. For a full inspection including joint and elbow checks, a stable ladder gives you the access you need to catch hidden problems.

    What is the best time of year to inspect downspouts?

    Spring is the most critical time because freeze-thaw cycles crack downspout sections and loosen brackets over winter. Fall inspection clears debris before it freezes in place and blocks flow during the wet season.

  • Benefits of Preventive Maintenance for Homeowners

    Benefits of Preventive Maintenance for Homeowners

    Preventive maintenance is defined as scheduled, routine upkeep performed on home systems and appliances before failures occur. The benefits of preventive maintenance include direct cost savings, longer equipment life, fewer emergency repairs, and lower utility bills. The U.S. Department of Energy estimates 12–18% annual cost savings with preventive programs over reactive approaches. For homeowners and property managers, that difference compounds every year you stay ahead of breakdowns instead of chasing them.

    1. What are the real cost savings from preventive maintenance?

    Reactive repairs cost 3–5 times more per incident than planned maintenance due to emergency parts, overtime labor, and collateral damage. That means a $200 scheduled service call can prevent a $600 to $1,000 emergency repair. The math is not subtle.

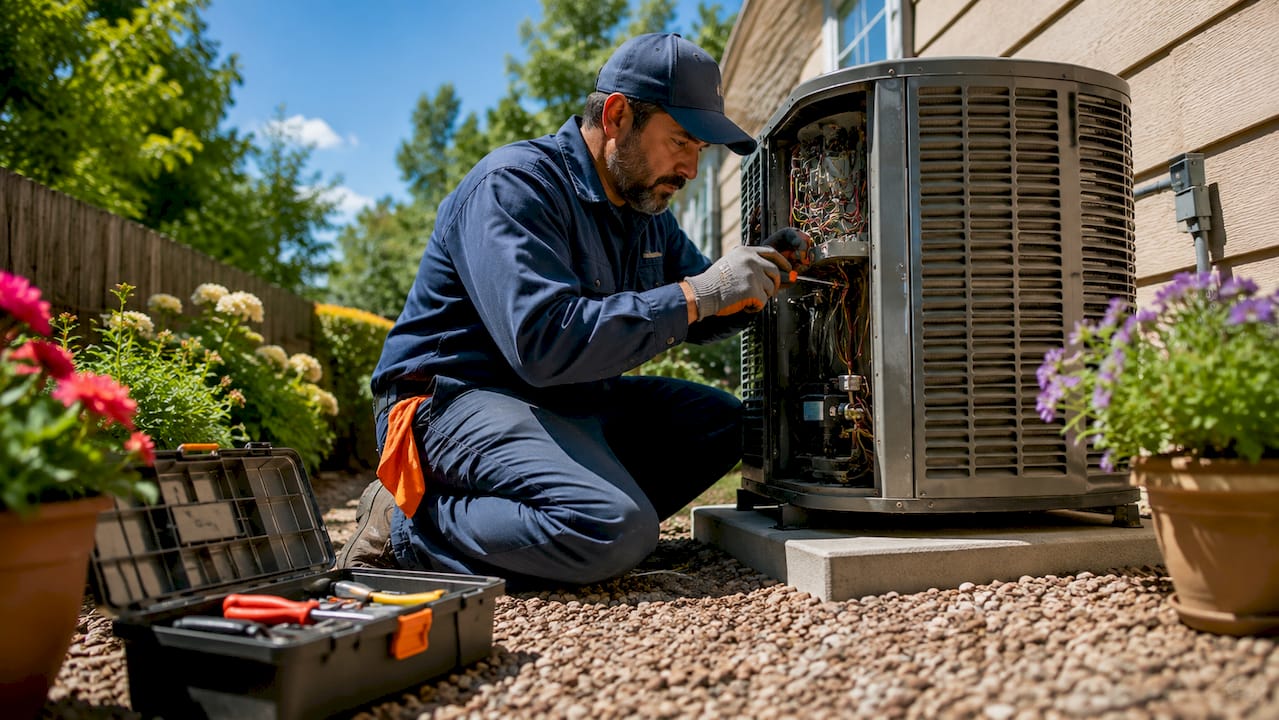
    Technician inspecting outdoor HVAC unit

    Preventive maintenance programs deliver 12–18% direct maintenance cost savings versus reactive approaches. That percentage may sound modest, but applied across HVAC systems, plumbing, roofing, and electrical panels over a decade, the savings are substantial.

    The hidden cost problem makes this worse. Invisible costs of reactive repairs like production losses, secondary damage, and emergency callouts rarely show up on a single invoice. They get absorbed across multiple bills, making reactive maintenance look cheaper than it actually is.

    • Scheduled service eliminates overtime labor premiums
    • Planned parts orders cost less than emergency sourcing
    • Secondary damage (a burst pipe flooding drywall) is avoided entirely
    • Budget forecasting becomes predictable rather than crisis-driven

    Pro Tip: Track your emergency callout frequency each quarter. If it rises, your preventive schedule has gaps. Tracking this single KPI justifies preventive budgets to skeptical landlords or HOA boards better than any argument.

    2. How preventive maintenance extends the life of home systems

    Regular servicing prevents the gradual wear that shortens asset life. Preventive maintenance extends equipment lifespan by 20–40% compared to run-to-failure approaches. For a $5,000 HVAC unit, that difference can mean 4–6 additional years of service before replacement.

    The systems that benefit most in a typical home include:

    • HVAC units: Filter changes, coil cleaning, and refrigerant checks keep compressors from overworking
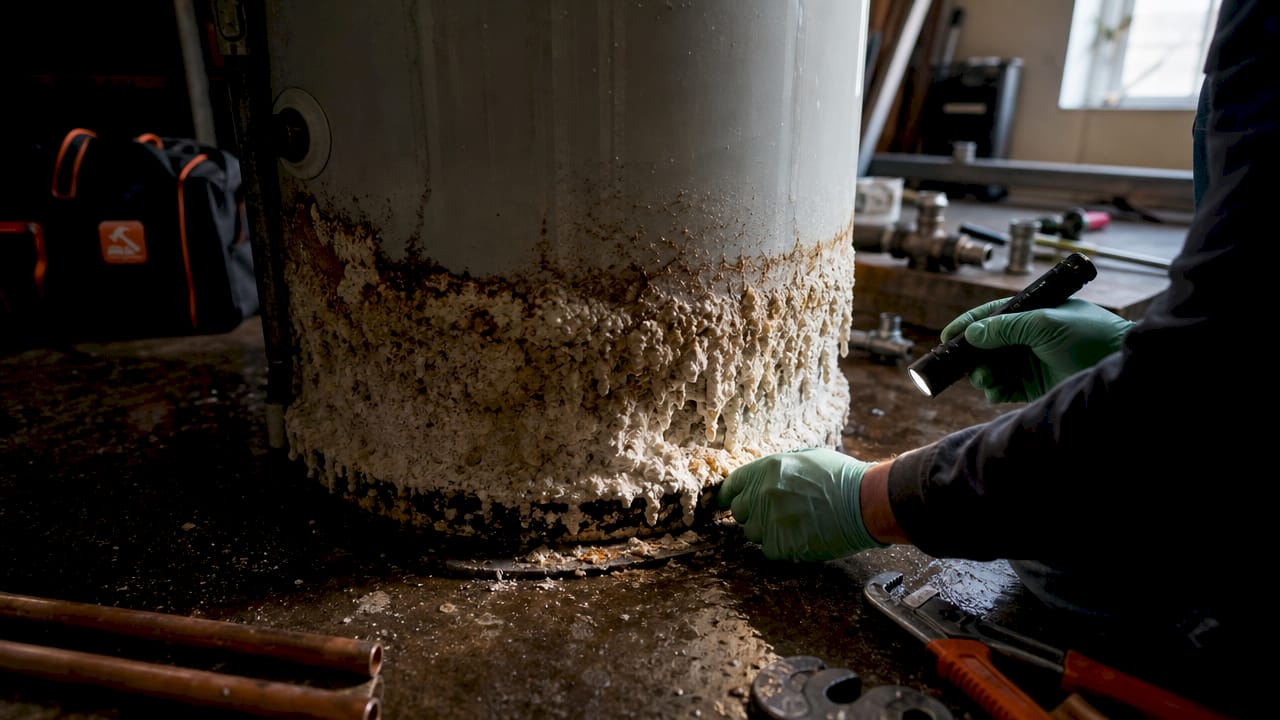
    • Water heaters: Annual flushing removes sediment that forces heating elements to work harder
    • Electrical panels: Periodic inspections catch loose connections before they cause fires or failures
    • Plumbing: Drain cleaning and pressure checks prevent pipe corrosion and joint failures

    Property value is a direct beneficiary of this discipline. Detailed maintenance logs provide audit trails that prove the condition and care of property assets to prospective buyers. A home with documented service records sells faster and at a higher price than one with a mystery history. Learn more about appliance longevity strategies that apply this principle to specific household systems.

    3. How preventive maintenance reduces unexpected downtime

    Preventive maintenance reduces unplanned downtime by 25–50%. For a property manager, that number translates directly into fewer tenant complaints, fewer emergency contractor calls at 11 p.m., and more stable rental income.

    Downtime in a home or rental property is not just inconvenient. A failed furnace in January, a broken water heater in a multi-unit building, or a malfunctioning sump pump before a rainstorm all carry real financial and reputational costs.

    Moving from reactive to planned maintenance stabilizes labor costs and improves occupant satisfaction by eliminating emergency disruptions. Technicians work scheduled hours instead of scrambling, which also reduces turnover. A stable maintenance team performs better work.

    Pro Tip: Prioritize maintenance by asset criticality. Your HVAC system and water heater affect daily habitability. Your garage door opener does not. Focus your annual HVAC service schedule on the systems that cause the most disruption when they fail.

    4. Energy efficiency gains from regular upkeep

    Proper maintenance keeps HVAC and electrical systems operating within manufacturer specifications. When systems drift outside those specs due to dirty filters, worn belts, or corroded contacts, they consume more energy to deliver the same output. Neglected systems can lose up to 20% of operational output due to wear or inefficiency.

    That 20% loss shows up directly on your utility bill every month. A well-maintained central air system uses significantly less electricity than one running with a clogged filter and low refrigerant.

    Here are the highest-impact maintenance tasks for energy savings:

    1. Replace HVAC filters every 1–3 months depending on usage and air quality
    2. Clean condenser and evaporator coils annually before cooling season
    3. Seal duct leaks, which can waste 20–30% of conditioned air in unconditioned spaces
    4. Flush water heater sediment annually to maintain heating efficiency
    5. Check weatherstripping on doors and windows each fall before heating season
    6. Inspect attic insulation every few years to confirm R-value is maintained
    7. Test thermostat calibration to prevent over-cycling

    Regular air conditioning service addresses most of these points in a single annual visit. Pairing that with a home efficiency checklist helps you catch the gaps between professional visits.

    5. Safety improvements that come with scheduled maintenance

    Preventive maintenance is one of the most underrated safety tools a homeowner has. Electrical fires, carbon monoxide leaks, and structural failures rarely announce themselves. They develop slowly through deferred maintenance and missed inspections.

    A scheduled inspection of your electrical panel catches loose connections before they arc. Annual chimney cleaning removes creosote buildup that causes chimney fires. HVAC tune-ups include heat exchanger checks that detect carbon monoxide risks before they become emergencies.

    Preventive maintenance is better viewed as a risk management strategy rather than just a cost center. Framing it that way changes how you prioritize it in your budget. You do not skip your car’s brake inspection to save money. The same logic applies to your home’s critical systems.

    6. How preventive maintenance improves budgeting and financial planning

    One of the most practical advantages of regular maintenance is budget predictability. Reactive repairs are financially random. A water heater fails, a roof leaks, a furnace dies. Each event hits without warning and demands immediate cash.

    Preventive maintenance converts those random shocks into scheduled line items. You know the HVAC service costs $150 in spring. You know the roof inspection costs $200 every two years. You can plan for those expenses the same way you plan for property taxes.

    Tracking KPIs like emergency callouts helps justify preventive budgets and reveals where deferred maintenance is accumulating risk. Property managers who present this data to owners or boards gain approval for maintenance spending far more easily than those who show up with surprise repair invoices.

    7. Preventive vs. reactive maintenance: side-by-side comparison

    The difference between these two approaches becomes clear when you compare them across the factors that matter most to homeowners and property managers.

    Factor Preventive maintenance Reactive maintenance
    Cost per incident Planned, lower cost 3–5x higher due to emergency rates
    Downtime Reduced by 25–50% Unpredictable, often extended
    Equipment lifespan Extended by 20–40% Shortened by cumulative wear
    Energy efficiency Systems run at full spec Up to 20% output loss
    Safety risk Proactively identified Discovered after failure
    Budget predictability Scheduled, foreseeable Random, crisis-driven
    Occupant satisfaction High, fewer disruptions Low, frequent emergencies

    The data makes a consistent case. Preventive maintenance wins on every dimension that affects long-term home value and livability. The only argument for reactive maintenance is lower upfront cost, and that argument collapses once you account for the full cost of a single major failure.

    Key takeaways

    Preventive maintenance delivers measurable advantages across cost, safety, energy efficiency, and property value that reactive repairs cannot match.

    Point Details
    Cost savings are significant Preventive programs save 12–18% annually versus reactive approaches.
    Equipment lasts longer Regular servicing extends system lifespan by 20–40% across HVAC, plumbing, and electrical.
    Downtime drops sharply Scheduled maintenance reduces unplanned failures by 25–50%.
    Energy bills decrease Well-maintained systems avoid up to 20% output loss from wear and inefficiency.
    Budgeting becomes predictable Planned maintenance replaces random repair shocks with foreseeable scheduled costs.

    Why I stopped thinking of maintenance as a chore

    I used to treat home maintenance the way most people do: something you do after something breaks. The furnace dies in February, you call someone. The water heater starts making noise, you wait and hope. That approach is exhausting and expensive, and I learned that the hard way.

    The shift that changed everything was treating maintenance as a risk management decision rather than a cost. Once I started scheduling annual HVAC service, flushing the water heater every fall, and walking the roof after major storms, the emergency calls stopped. Not completely, but dramatically. My repair spending dropped, and more importantly, I stopped dreading what might break next.

    The psychological benefit is real and underrated. Knowing your systems are in good shape is worth something beyond the dollars saved. For property managers, that calm extends to your tenants and your bottom line. A structured preventive maintenance approach does not require a large budget. It requires consistency and a good checklist.

    The one thing I would tell any homeowner starting out: do not try to maintain everything equally. Focus on asset criticality. The systems that affect daily habitability and carry the highest replacement cost deserve the most attention first.

    — Sean

    Start your preventive maintenance plan with Workbenchguide

    Workbenchguide gives homeowners and property managers the tools to stop reacting and start planning. The platform includes step-by-step DIY guides, smart maintenance reminders, and task tracking so nothing falls through the cracks. You can use the year-round maintenance checklist to build a complete schedule for every season, covering HVAC, plumbing, electrical, roofing, and more. Whether you manage one home or multiple properties, Workbenchguide keeps your maintenance organized, your budget predictable, and your systems running the way they should. Visit Workbenchguide to get started today.

    FAQ

    What are the main benefits of preventive maintenance for homeowners?

    The main benefits include 12–18% cost savings over reactive repairs, equipment lifespan extension of 20–40%, reduced unplanned downtime, lower utility bills, and improved home safety. These advantages compound over time as systems stay in better condition.

    How much does preventive maintenance actually save?

    Reactive repairs cost 3–5 times more per incident than planned maintenance. The U.S. Department of Energy estimates annual savings of 12–18% for homes and properties that follow a preventive maintenance schedule.

    How often should home systems be serviced?

    HVAC systems need service at least once a year, ideally before each heating and cooling season. Water heaters, electrical panels, and plumbing should be inspected annually, while filters and weatherstripping require more frequent attention every 1–3 months.

    Does preventive maintenance increase property value?

    Detailed maintenance logs prove the condition and care of property assets to prospective buyers. Homes with documented service records reduce buyer concerns about hidden failures and typically sell faster and at stronger prices.

    What is the difference between preventive and reactive maintenance?

    Preventive maintenance is scheduled upkeep performed before failures occur. Reactive maintenance addresses problems after they happen. Preventive approaches cost significantly less per incident, extend equipment life, and keep systems running efficiently, while reactive repairs are unpredictable and far more expensive.

  • The Role of House Wrap: A Homeowner’s Guide

    The Role of House Wrap: A Homeowner’s Guide

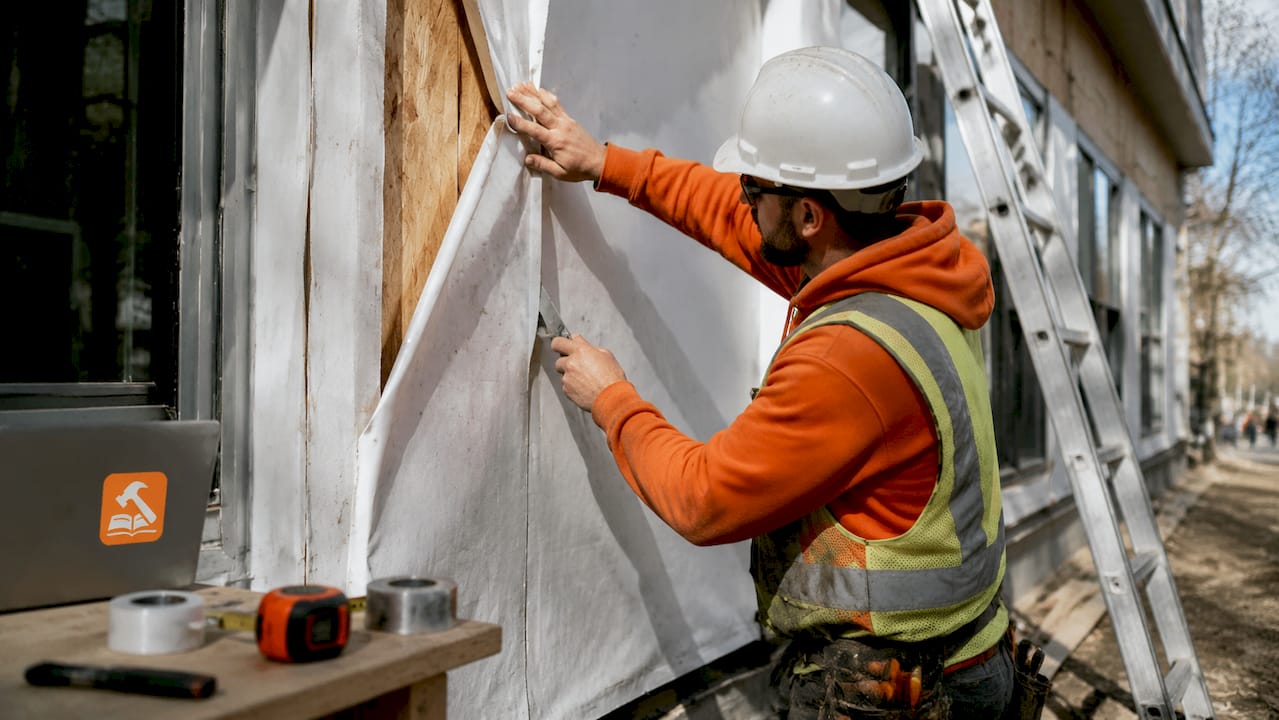
    House wrap is defined as a water-resistive barrier (WRB) installed over exterior wall sheathing, beneath siding, to block liquid water from reaching your home’s structure while allowing water vapor to escape. The role of house wrap goes beyond simple weather protection. Mandatory under the International Residential Code since 2006, it is a building code requirement, not an optional upgrade. Products like DuPont Tyvek HomeWrap and Benjamin Obdyke HydroGap have become industry standards precisely because they solve two problems at once: keeping rain out and letting your walls breathe.

    What is the role of house wrap in protecting your home?

    House wrap does two jobs that sound contradictory until you understand the science. It blocks bulk water from rain and wind-driven moisture, and it lets water vapor pass through so trapped humidity can escape. Without that vapor release, moisture builds up inside your wall cavity and creates the exact conditions mold and rot need to thrive.

    Think of house wrap like a Gore-Tex jacket. Rain beads off the outside, but sweat vapor moves through from the inside. Your walls work the same way. Cooking, showering, and breathing all push moisture vapor toward your exterior walls. If that vapor cannot escape, it condenses on cold surfaces inside the wall and causes damage you will not see until it is expensive.

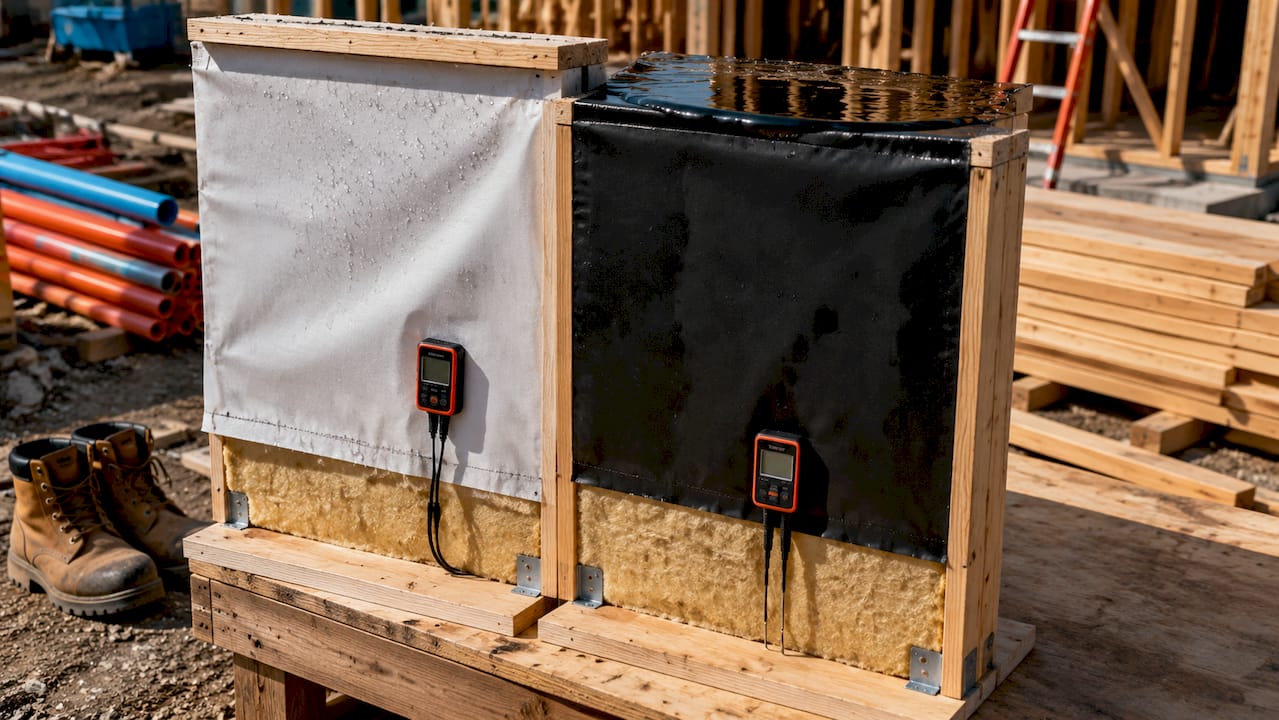
    Samples illustrating water resistance and vapor permeability

    Proper house wrap reduces air leakage, which directly improves energy efficiency and indoor comfort. A well-sealed wall system can meaningfully cut heating and cooling costs. That benefit alone makes house wrap worth understanding before you touch a single piece of siding.

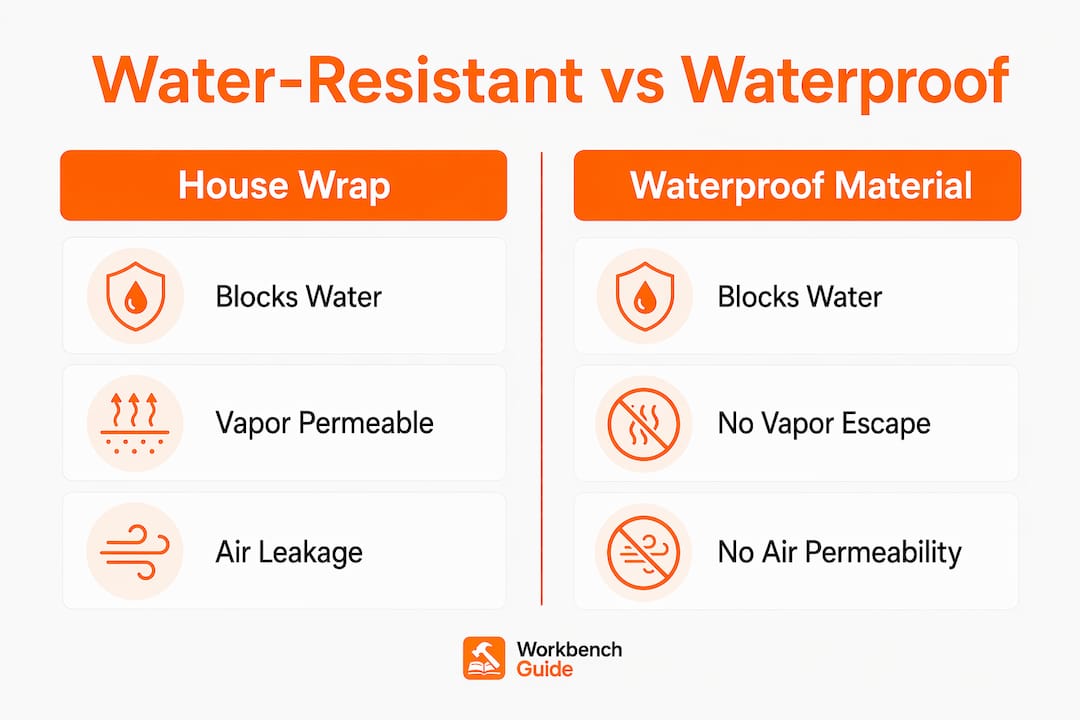
    Water-resistant vs. waterproof: what the difference means for your walls

    Property Water-Resistant (House Wrap) Waterproof Material
    Blocks liquid water Yes Yes
    Allows vapor to escape Yes No
    Risk of moisture trapping Low High
    Suitable for wall systems Yes No
    Example products DuPont Tyvek, HydroGap Polyethylene sheeting

    Infographic comparing house wrap and waterproof materials

    The table above shows why choosing the wrong material is a serious mistake. Polyethylene sheeting is fully waterproof, which makes it the wrong choice for exterior walls. It traps vapor and creates a moisture time bomb inside your wall assembly.

    Why house wrap is not waterproof (and should not be)

    The biggest misconception homeowners carry into a siding project is that house wrap should be fully waterproof. That thinking leads to real damage. Using a truly waterproof material traps moisture and leads to mold growth and premature structural failure. A wall that cannot breathe is a wall that rots from the inside out.

    Perm ratings measure how much water vapor a material allows to pass through. Quality house wraps maintain perm ratings of 10–60, with premium products exceeding 100 perms. Higher perm ratings mean better vapor release, which is critical in humid climates and tightly built homes.

    Here is what gets homeowners into trouble:

    • Confusing vapor barriers with water-resistive barriers. A vapor barrier (like poly sheeting) belongs on the warm side of insulation in cold climates, not on the exterior wall.
    • Assuming more layers mean more protection. Doubling up with non-breathable materials cuts off vapor escape entirely.
    • Skipping house wrap on “covered” walls. Brick, stone, and vinyl siding all allow water infiltration. The wrap behind them is the real line of defense.

    “Wall claddings are not waterproof. House wrap manages the water that gets behind siding.” — Pro Remodeler

    This is the insight most homeowners miss. Your siding is not a waterproof shell. It is a rain screen. House wrap is what actually protects the structure behind it.

    House wrap installation tips that actually matter

    Installation quality determines whether house wrap performs or fails. A product installed incorrectly can actually funnel water into your wall cavity instead of directing it away. Installing house wrap shingle-style with correct overlaps is the single most important technique to get right.

    Follow these steps for a correct installation:

    1. Start at the bottom and work up. Begin at the base of the wall and roll the wrap horizontally. Each upper course overlaps the one below by at least 6 inches, just like roof shingles shed water downward.
    2. Overlap vertical seams by 6–12 inches. Vertical seams are where most installation errors happen. Insufficient overlap lets wind-driven rain find a path behind the wrap.
    3. Seal the bottom edge to the sheathing. Sealing the bottom edge prevents air leakage and directs any water that gets behind the wrap away from the foundation. Most installers leave this edge loose, which turns it into an air leak point.
    4. Tape all seams, tears, and penetrations. Use manufacturer-approved tape. Generic tape fails over time and voids product warranties. Around windows and doors, tape is non-negotiable.
    5. Wrap around corners continuously. Never butt two pieces at a corner. A continuous wrap around corners eliminates one of the most common leak points on any house.

    Pro Tip: If you are doing this project solo, consider a self-adhered house wrap. Self-adhered wrap eliminates the need for staples and multiple installers, making it a realistic one-person job with better airtightness than mechanically fastened products.

    Reversed overlaps are the most damaging installation error. If you lap the lower course over the upper course, you create a pocket that collects water and directs it straight into the wall. That mistake turns a protective layer into a water injection system.

    How house wrap works with siding, flashing, and your full wall system

    House wrap does not work alone. Builder David Joyce describes it as the skin of a building, working alongside flashing, sealants, and siding to prevent structural rot and air infiltration. Remove any one of those components and the system weakens significantly.

    Here is how each component plays its part:

    • Siding is the first line of defense against rain and wind. It sheds the majority of water before it ever reaches the wrap. But siding is not sealed. Water gets behind it at every seam, nail hole, and corner.
    • House wrap is the secondary defense. It catches the water that siding misses and directs it downward and out. The WRB is the last line of defense before water reaches your structural sheathing and framing.
    • Flashing seals the transitions. Window sills, roof-to-wall intersections, and door frames all need metal or flexible flashing integrated with the house wrap. Flashing without proper wrap integration leaks at every edge.
    • Sealants fill the gaps flashing cannot cover. Around utility penetrations, hose bibs, and electrical boxes, sealant applied over the wrap creates a continuous barrier.

    House wrap is compatible with virtually every cladding type. Brick veneer, vinyl siding, fiber cement, stone, and wood all require a WRB behind them. For brick and stone specifically, the wrap also needs to accommodate a drainage plane so water that enters the cavity can exit at the weep holes. Choosing the right siding material for your climate affects which house wrap product performs best behind it.

    UV-resistant house wraps can withstand exposure to sun and freeze cycles for 90–180 days during construction pauses. That matters if your project gets delayed between sheathing and siding installation. Standard wraps degrade faster and should be covered within 30–60 days.

    Key takeaways

    House wrap is a non-negotiable part of any wall system because it blocks liquid water, releases trapped vapor, and reduces air infiltration in a single layer of material.

    Point Details
    Vapor permeability is critical House wrap must allow vapor to escape; fully waterproof materials trap moisture and cause rot.
    Perm ratings guide product selection Choose wraps rated 10–60 perms minimum; high-performance products exceed 100 perms for humid climates.
    Shingle-style overlap prevents leaks Always lap upper courses over lower by at least 6 inches to direct water down and out.
    Seal the bottom edge Taping the bottom edge to sheathing closes a frequently missed air leakage point.
    House wrap is a system component It works with flashing, sealants, and siding together; no single element protects the wall alone.

    What i have learned after years of watching house wrap go wrong

    I have seen house wrap installed on dozens of homes, and the pattern is always the same. Homeowners and even some contractors treat it like a formality, something to slap up fast before the siding crew arrives. That attitude is what leads to mold discoveries during a bathroom remodel five years later.

    The detail that surprises most people is the bottom edge. Every guide talks about overlapping seams. Almost none of them emphasize sealing the bottom edge to the sheathing. That gap at the base of the wall is where cold air rushes in during winter and where any water that gets behind the wrap sits instead of draining. Tape it. Every time.

    My other strong opinion: if you are doing a DIY re-side or new build, spend the extra money on a self-adhered product. The continuous adhesion gives you a better air seal than stapled wraps, and you can do it yourself without a second set of hands. The weatherproofing benefits you get from a properly installed self-adhered wrap are measurably better than a stapled product with gaps at every fastener.

    Finally, treat house wrap as part of your ongoing home inspection routine, not just a one-time installation task. When you inspect your siding each year, check for any exposed wrap, tears near windows, or lifted edges at the bottom. Catching a small tear before it becomes a wet wall cavity is the difference between a $10 roll of tape and a $10,000 mold remediation.

    — Sean

    Keep your home protected year-round with Workbenchguide

    Understanding house wrap is one piece of a larger home protection picture. Moisture damage, air leaks, and structural rot all start with small maintenance gaps that compound over time. Workbenchguide gives you the tools to stay ahead of those problems with step-by-step DIY guides, seasonal reminders, and project checklists built for homeowners who want to do things right. Start with the year-round maintenance checklist to build a complete schedule that covers your exterior, insulation, and weatherization tasks before they become costly repairs.

    FAQ

    What does house wrap actually do?

    House wrap blocks liquid water from reaching your wall sheathing while allowing water vapor to pass through and escape. It also reduces air infiltration, which improves energy efficiency and prevents moisture buildup inside wall cavities.

    Is house wrap necessary for all homes?

    Yes. House wrap has been mandatory under the IRC since 2006 as a water-resistive barrier for all new residential construction. Existing homes being re-sided should also have wrap installed or replaced.

    What is the difference between house wrap and building paper?

    Both serve as water-resistive barriers, but house wrap is a synthetic material with higher tear resistance, better vapor permeability, and longer UV exposure ratings than traditional asphalt-saturated building paper. House wrap also offers measurably better air resistance in most product comparisons.

    Can i install house wrap myself?

    Yes, especially with a self-adhered product. Self-adhered house wrap eliminates staples and can be applied by one person. The critical steps are starting at the bottom, overlapping upper courses over lower by at least 6 inches, and sealing all seams and the bottom edge with manufacturer-approved tape.

    How long does house wrap last?

    House wrap is designed to last the life of the building when properly covered by siding. Exposed wrap degrades from UV exposure, with most products rated for 90–180 days of UV exposure before siding must be installed.

  • How to Maintain Appliances: Save Money Year-Round

    How to Maintain Appliances: Save Money Year-Round

    Appliance maintenance is the practice of regularly performing specific tasks like cleaning filters, coils, and seals to keep household appliances running at peak performance. Done consistently, these tasks extend appliance lifespan by up to 50% and prevent the kind of breakdowns that cost hundreds in emergency repairs. Most homeowners treat their refrigerator, washer, or water heater as a set-and-forget investment. That mindset is expensive. This guide covers the exact upkeep methods that keep your appliances running longer, cost less to operate, and stay out of the repair shop.

    What are the essential routine maintenance tasks for home appliances?

    Preventative appliance maintenance follows a simple rule: small, regular tasks prevent large, costly failures. The table below gives you a quick appliance maintenance checklist to work from.

    Appliance Task Frequency
    Refrigerator Clean condenser coils Every 3–6 months
    Refrigerator Test door seals Monthly
    Dishwasher Clean filter Monthly
    Dryer Clean lint trap After every use
    Dryer Clean vent duct Annually
    Washing Machine Run cleaning cycle Every 1–3 months
    Washing Machine Inspect hoses Monthly
    Water Heater Flush sediment Annually

    Hands cleaning refrigerator coils with brush

    Refrigerator: coils and seals

    Clean condenser coils every 3–6 months to prevent compressor strain and maintain cooling efficiency. Dust-coated coils force the compressor to work harder, which shortens its life and raises your energy bill. Use a vacuum cleaner with a brush attachment to pull dust from the coils, which are typically located at the back or underneath the unit.

    Door seals are just as important. Use the dollar bill test by closing a bill in the door and pulling it out. If it slides out easily, the seal is weak and cold air is escaping. Weak seals cause compressor strain and wasted electricity.

    Dishwasher: filters and cycles

    Cleaning dishwasher filters monthly prevents clogs, eliminates odors, and keeps wash performance sharp. Most filters twist out from the bottom of the tub and rinse clean under warm water with a soft brush. Running a hot cycle with white vinegar once a month also removes grease buildup from the spray arms and interior walls.

    Dryer: lint trap and vent duct

    Clean the lint trap after every single load. That habit takes ten seconds and directly reduces fire risk. Beyond the trap, annual dryer vent duct cleaning is critical because lint buildup in the duct is one of the leading causes of house fires. A lint brush kit with a flexible rod reaches deep into the duct where standard vacuums cannot.

    Infographic outlining appliance maintenance steps

    Washing machine: drum and hoses

    Running a cleaning cycle every 1–3 months with white vinegar or a commercial washer cleaner removes mold, residue, and odor from the drum. Check the inlet hoses monthly for cracks, bulging, or mineral deposits. A burst washing machine hose is one of the most common causes of serious water damage in homes.

    Leaving the washer door open for at least an hour after each use lets moisture escape and prevents mold growth. This simple habit reduces musty smells better than deep cleaning alone.

    Water heater: annual flushing

    Flushing your water heater annually removes sediment buildup from the tank floor and can extend the unit’s lifespan from 6–8 years to 12–15 years. That is a significant return on a task that takes about 30 minutes. Workbenchguide has a full water heater maintenance guide if you want step-by-step instructions.

    Pro Tip: Set a recurring phone reminder for each appliance task. Assign them to the first day of each month so nothing gets skipped during busy seasons.

    How do local conditions affect your appliance care routine?

    Homeowners should tailor maintenance frequency based on local environmental stressors like hard water and humidity. These factors accelerate wear in ways that a standard schedule does not account for. Ignoring them means your appliances age faster than they should.

    Here is how to adjust your routine based on where you live:

    1. Test your water hardness. Use a water hardness test kit, available at most hardware stores, to measure mineral content. Readings above 7 grains per gallon indicate hard water that will coat heating elements and clog components in washers and dishwashers.
    2. Install a water softener. Installing a water softener can extend appliance life by up to 50% and reduce energy use by 15–30%. That payoff makes it one of the highest-return home upgrades for appliance longevity.
    3. Run monthly vinegar treatments. In high-hardness areas, run white vinegar through your dishwasher and washing machine monthly. This dissolves mineral deposits before they harden into scale on heating elements.
    4. Increase inspection frequency in humid climates. High humidity accelerates corrosion on rubber hoses, electrical connections, and metal components. In coastal or high-humidity regions, inspect hoses and connections every two weeks instead of monthly.
    5. Check for condensation around appliances. Moisture pooling near a refrigerator or dishwasher in a humid home signals a ventilation or seal problem that needs attention before corrosion sets in.

    For homes with central air conditioning, the local climate also affects your HVAC system. Workbenchguide’s HVAC maintenance guide covers how humidity and temperature swings affect your system specifically.

    Pro Tip: Your local water utility publishes annual water quality reports. Search “[your city] water quality report” to find your exact hardness level without buying a test kit.

    What tools make appliance maintenance easier?

    The right tools make appliance upkeep faster and more thorough. Most of these cost under $30 and pay for themselves the first time they prevent a repair call.

    Tool Best Use Approximate Cost
    Vacuum with brush attachment Refrigerator condenser coils $0 (use existing vacuum)
    Lint brush kit with flexible rod Dryer vent duct cleaning $15–$25
    Dishwasher filter brush Filter and spray arm cleaning $8–$12
    Water hardness test kit Diagnosing mineral buildup risk $10–$20
    White vinegar (gallon jug) Descaling washers, dishwashers $4–$6
    Washing machine cleaner tablets Monthly drum cleaning $10–$15 for 12 tablets

    A few notes on using these tools effectively:

    • Affresh washing machine cleaner tablets are a reliable commercial option for front-load washers where vinegar alone may not fully address biofilm buildup.
    • For dryer vent cleaning, a kit like the Holikme Dryer Vent Cleaning Brush extends up to 30 feet and fits most standard duct diameters.
    • White vinegar is the most versatile tool on this list. It descales, deodorizes, and cuts grease without damaging rubber seals or plastic components.

    For air conditioning maintenance, the tool requirements differ. Coil cleaner spray and fin combs are specific to HVAC units and worth keeping in your maintenance kit if you handle that work yourself.

    When should you repair an appliance vs. replace it?

    The repair-or-replace decision comes down to four factors. Getting this wrong costs money in either direction.

    Consumer Reports stresses the economic benefit of maintaining older appliances rather than replacing them prematurely. The key is balancing repair costs against energy use and remaining lifespan.

    Use this framework when facing a repair decision:

    • Age of the appliance. If the unit is past 75% of its expected lifespan, a major repair rarely makes financial sense. A refrigerator typically lasts 10–15 years. Spending $400 on a compressor repair for a 13-year-old unit is a poor investment.
    • The 50% rule. If the repair cost exceeds 50% of the cost of a new replacement unit, replace it. This threshold is widely used by appliance technicians and Consumer Reports analysts.
    • Energy efficiency gains. Newer appliances, especially those with Energy Star certification, often use 20–30% less electricity than models from 10 years ago. The monthly savings can offset the cost of replacement within a few years.
    • Availability of parts. For appliances older than 10 years, replacement parts may be discontinued or expensive. A repair that costs $150 today could require another $200 repair in six months if the underlying components are aging out.
    • Features you actually need. Replacing a functioning appliance just for new features is rarely cost-effective. Focus on energy savings and reliability, not upgrades.

    The best appliance upkeep methods keep your units running long enough that replacement becomes a planned decision, not an emergency one. Consistent preventative maintenance is what gives you that control.

    Key takeaways

    Consistent, task-specific appliance maintenance is the single most effective way to extend appliance life, reduce energy costs, and avoid unplanned repair bills.

    Point Details
    Routine tasks prevent failures Clean coils, filters, and lint traps on a fixed schedule to stop small problems from becoming costly repairs.
    Local conditions change your schedule Hard water and high humidity require more frequent inspections and monthly vinegar treatments to prevent buildup and corrosion.
    Annual flushing doubles water heater life Flushing sediment once a year extends water heater lifespan from 6–8 years to 12–15 years.
    Use the 50% rule for repairs If a repair costs more than half the price of a new unit, replacement is the smarter financial choice.
    Simple tools cover most tasks A vacuum brush attachment, lint brush kit, and white vinegar handle the majority of routine appliance upkeep.

    The maintenance habit nobody talks about enough

    Most appliance advice focuses on what to do. The harder problem is actually doing it consistently. I’ve seen homeowners with every tool on the shelf and a perfectly written checklist who still let their dryer vent go three years without cleaning. The issue is not knowledge. It is friction.

    The fix I’ve found most reliable is using a maintenance calendar with specific task reminders rather than a general “do maintenance” note. Assigning each task to a specific date removes the mental overhead of deciding when to do it. When the reminder fires, the decision is already made.

    The other mistake I see constantly is treating all appliances the same. A refrigerator in a dusty workshop needs coil cleaning every two months, not every six. A washing machine in a humid basement needs a cleaning cycle monthly, not quarterly. Your home has specific conditions, and your schedule should reflect them. Generic advice is a starting point, not a final answer.

    Consistent upkeep also changes how you think about appliances. When you know your water heater was flushed eight months ago and your dryer vent was cleaned last spring, you stop worrying about surprise failures. That peace of mind is real, and it comes from building a system, not from one-time deep cleans.

    — Sean

    Stay organized with Workbenchguide

    Knowing what to do is half the battle. Remembering when to do it is the other half. Workbenchguide gives you a complete home maintenance checklist that covers appliances, seasonal tasks, and home systems in one organized place. You get step-by-step DIY guides, smart reminders, and task tracking so nothing falls through the cracks. Whether you are managing a full appliance care schedule or just getting started, Workbenchguide keeps you ahead of repairs instead of reacting to them. Start your organized maintenance plan at Workbenchguide and stop paying for problems that routine upkeep prevents.

    FAQ

    How often should you clean appliance filters?

    Dishwasher filters need cleaning monthly to prevent clogs and odors. Dryer lint traps require cleaning after every single use to reduce fire risk.

    What is the best way to extend appliance life?

    Routine preventative maintenance, including cleaning coils, flushing water heaters annually, and running drum cleaning cycles, can extend appliance lifespan by up to 50%.

    Does hard water really damage appliances?

    Hard water deposits coat heating elements and clog components in washers and dishwashers, which is a leading cause of premature failure. Installing a water softener reduces this damage and can cut energy use by 15–30%.

    When is it better to replace than repair an appliance?

    Replace an appliance when the repair cost exceeds 50% of the replacement cost or when the unit is past 75% of its expected lifespan. Energy efficiency gains from newer models often make replacement the better long-term value.

    How do you prevent washing machine odors?

    Leave the washer door open for at least an hour after each use to let moisture escape. Run a cleaning cycle with white vinegar or Affresh tablets every 1–3 months to remove mold and residue.

  • Bathroom Upgrade Checklist: Avoid Costly Mistakes

    Bathroom Upgrade Checklist: Avoid Costly Mistakes

    A bathroom upgrade checklist is a step-by-step planning tool covering scope definition, budgeting, material selection, renovation sequencing, and final inspections for a successful remodel. Without one, homeowners routinely discover mid-project that they have ordered the wrong tile, skipped a required inspection, or failed to budget for hidden water damage. The industry term for this process is a bathroom renovation guide, and the most effective versions treat the project like active construction management rather than a weekend hobby. Labor accounts for 40 to 65% of total remodel costs, which means every planning gap translates directly into money lost. This checklist covers every phase so you finish on time, on budget, and without rework.

    1. Your bathroom upgrade checklist starts with defining scope

    The first decision in any bathroom remodel planner is whether you are doing a full gut renovation or a cosmetic refresh. These two paths have completely different timelines, permit requirements, and cost structures. A cosmetic refresh replaces fixtures, paint, and accessories without touching plumbing or walls. A full gut renovation removes everything down to the studs and subfloor, which is where hidden problems like rot and outdated wiring get discovered and fixed.

    Defining scope before anything else prevents the most expensive mistake in remodeling: starting demolition before the plan is finalized. Rushing demolition without confirmed designs causes project halts while you wait for materials or decisions, and those halts cost money every day. Write down exactly what stays, what goes, and what gets upgraded. That list becomes the foundation of every other decision on this checklist.

    Hands marking bathroom floor plan at table

    2. Set a realistic budget with a contingency buffer

    Budget 5 to 10% of your home’s value for a primary bathroom and 3 to 5% for a secondary bath. These are industry benchmarks, not suggestions. Going below them typically means cutting corners on waterproofing or ventilation, which creates failures within two to three years.

    • Set aside a contingency fund of 10 to 20% on top of your base budget to cover hidden issues like subfloor rot, outdated plumbing, or mold behind walls.
    • Get at least three itemized quotes from contractors after in-person site visits. Verify contractor credentials such as WSIB coverage and licensing to protect yourself from liability.
    • Keep fixture locations where they are. Moving plumbing lines adds $2,000 to $3,500 to your budget and introduces complexity that invites errors.
    • Plan for a temporary bathroom arrangement if your home has only one full bath. This is a logistics detail most homeowners ignore until day three of demolition.

    Pro Tip: Ask each contractor to break out labor and materials separately in their quote. A contractor who refuses to itemize is hiding something, and that something usually shows up on your final invoice.

    3. Material selection and design decisions

    High-quality bathroom remodels begin with moisture control and ventilation, not tile choices or vanity styles. This is the insight most homeowners miss because showrooms sell aesthetics, not performance. Choose your waterproofing membrane, your exhaust fan, and your subfloor treatment before you pick a single tile color.

    For materials, prioritize durability in wet zones and style everywhere else:

    • Tiles: Porcelain and ceramic tile rated for wet areas outperform natural stone in moisture resistance and are easier to maintain.
    • Vanities: Solid wood or PVC-core vanities resist humidity better than particleboard, which swells and fails within a few years in a poorly ventilated bathroom.
    • Fixtures: Brushed nickel and matte black finishes hide water spots better than polished chrome, which requires constant cleaning to look presentable.
    • Exhaust fans: Size your fan to the room’s cubic footage and make sure it vents outdoors, not into the attic. Inadequate exhaust fans lead to premature remodel failures regardless of how good the tile looks.

    Finalize your layout before ordering any materials. Changing the layout after materials arrive creates delays, return shipping costs, and restocking fees that add up fast.

    “Moisture control and ventilation are the foundation of every durable bathroom remodel. Aesthetic choices built on a weak moisture strategy will fail within years, not decades.” — Home Renovation Expert Insights 2026

    For additional guidance on preventing bathroom damp, particularly around windows and wall junctions, that resource covers ventilation strategies that complement your exhaust fan selection.

    4. Follow the correct renovation sequence

    The standard renovation sequence runs in this order, and skipping or reordering any phase causes rework that costs more than doing it right the first time.

    1. Demolition (1 to 3 days): Remove fixtures, tile, drywall, and flooring. Do not start until your design is finalized and materials are ordered.
    2. Subfloor inspection (same day as demo): Inspect subfloor for water damage and unevenness immediately after demo. Cracked tiles and waterproofing failures within months of completion almost always trace back to a subfloor problem that was visible but ignored.
    3. Rough-in work (2 to 4 days): Plumbing, electrical, and HVAC rough-ins happen before any walls close. This is when you add or upgrade your exhaust fan.
    4. Inspections (1 to 3 days): Schedule municipal inspections for plumbing and electrical before walls close. Skipping this step means opening walls later if you ever sell the home.
    5. Waterproofing and walls (3 to 5 days): Apply waterproofing membrane in wet zones before any tile goes up. This step is non-negotiable.
    6. Tile installation (5 to 10 days): Wall tile at tubs and showers must overlap the tub lip to create a watershed, directing water into the tub rather than behind it. This single detail prevents the most common source of structural water damage in bathrooms.
    7. Fixture installation (2 to 4 days): Vanity, toilet, shower door, and accessories go in after tile is fully cured.
    8. Finishing touches (1 to 2 days): Paint, trim, mirrors, lighting, and hardware complete the project.

    Pro Tip: Stage your materials in a dry, accessible location before demolition begins. Contractors who have to wait for a tile delivery or a missing fixture part bill you for that time regardless.

    Phase Typical duration
    Demolition 1 to 3 days
    Rough-in work 2 to 4 days
    Inspections 1 to 3 days
    Waterproofing and walls 3 to 5 days
    Tile installation 5 to 10 days
    Fixture installation 2 to 4 days
    Finishing touches 1 to 2 days

    5. Common pitfalls that derail bathroom renovation projects

    Most bathroom renovation failures are not caused by bad contractors or poor materials. They are caused by decisions made in the planning phase that seemed harmless at the time. A solid bathroom improvement checklist prevents the following:

    • Starting demo too early. Premature demolition without finalized plans is the single most expensive mistake in bathroom remodeling. Once the walls are open, you are paying for a contractor to stand by while you make decisions you should have made weeks earlier.
    • Skipping moisture control. Tile over an unprotected substrate will fail. Grout cracks, mold grows behind the wall, and you are back to demolition within three years.
    • Underestimating labor costs. Labor runs 40 to 65% of total project cost. Homeowners who budget only for materials are consistently shocked by their final invoices.
    • Ignoring ventilation upgrades. If your existing exhaust fan is undersized or vents into the attic, replacing it during the remodel costs a fraction of what mold remediation costs after the fact.
    • Skipping the final walkthrough. Before your contractor leaves for the last time, test every fixture, check every grout line, run the exhaust fan, and flush the toilet. Punch list items caught on day one are free to fix. The same items caught six months later are not.

    “The checklist is not bureaucracy. It is the difference between a bathroom that lasts 20 years and one that needs remediation in three.” — Workbenchguide editorial team

    For a broader view of planning home upgrades without costly errors, that guide covers contingency planning and contractor vetting across all room types.

    Key takeaways

    A bathroom upgrade checklist works because it forces every decision into the correct sequence before money is spent or walls are opened.

    Point Details
    Define scope first Decide between full gut and cosmetic refresh before contacting any contractor.
    Budget with a buffer Set aside 10 to 20% contingency on top of your base project budget.
    Moisture before aesthetics Choose waterproofing and ventilation before selecting tile or fixtures.
    Follow the sequence Never tile before waterproofing or install fixtures before inspections pass.
    Final walkthrough is mandatory Test every fixture and check every finish before the contractor leaves the site.

    What I’ve learned from treating a remodel like a real project

    I have watched homeowners spend $15,000 on a bathroom that needed $4,000 in remediation work within two years. Every single time, the failure traced back to one of two things: skipping the subfloor inspection after demo, or installing tile over an unprotected wet zone because the waterproofing step felt like an unnecessary delay.

    The checklist does not slow a project down. It prevents the restarts that do. When I work through a bathroom remodel planner with a homeowner, the first thing I push them to do is treat the project like a construction manager would. That means no demo until materials are confirmed, no tile until waterproofing is done, and no final payment until the punch list is signed off.

    The other thing most articles will not tell you: document everything. Photograph the rough-in work before walls close. Keep copies of inspection reports. Save every contractor invoice with line-item detail. If you sell the home in five years, that documentation is worth real money in buyer confidence. If something fails, it is worth even more in warranty and liability conversations.

    The peace of mind that comes from a completed, documented remodel is not a soft benefit. It is a financial asset. Treat it like one.

    — Sean

    Keep your bathroom in top shape after the remodel

    The renovation is finished, but the maintenance clock starts the day the contractor leaves. Workbenchguide is built for exactly this phase: the ongoing care that protects the investment you just made. From grout sealing reminders to exhaust fan cleaning schedules, the platform keeps you ahead of the small tasks that prevent big repairs. Explore the home maintenance checklist to set up year-round reminders for your newly upgraded bathroom and every other system in your home. You can also browse the full library of step-by-step renovation guides to plan your next project with the same structured approach.

    FAQ

    What is a bathroom upgrade checklist?

    A bathroom upgrade checklist is a structured planning document covering scope definition, budgeting, material selection, renovation sequencing, inspections, and final walkthroughs. It functions as a project management tool that keeps homeowners and contractors aligned from start to finish.

    How much should I budget for a bathroom remodel?

    Budget 5 to 10% of your home’s value for a primary bathroom and 3 to 5% for a secondary bath, plus a contingency fund of 10 to 20% to cover hidden issues like subfloor damage or outdated plumbing.

    What order should bathroom renovation steps follow?

    The correct sequence is demolition, subfloor inspection, rough-in work, municipal inspections, waterproofing, tile installation, fixture installation, and finishing touches. Skipping or reordering any phase typically causes rework that costs more than the time saved.

    Why is subfloor inspection so important?

    Subfloor damage discovered after demo must be repaired before any tile or waterproofing goes down. Ignoring it causes cracked tiles and waterproofing failures within months of project completion.

    Should I move plumbing during a bathroom remodel?

    Keeping fixtures in their existing locations is the best practice for budget control. Relocating plumbing lines adds $2,000 to $3,500 to the project and introduces complexity that increases the risk of errors and future leaks.

  • Why Check Foundation Cracks: A Homeowner’s Guide

    Why Check Foundation Cracks: A Homeowner’s Guide

    Foundation cracks are defined as fractures in a home’s structural base that signal changes in soil pressure, moisture levels, or concrete aging. Knowing why check foundation cracks matters is the difference between a $500 repair and a six-figure reconstruction. Not every crack is a crisis, but every crack deserves attention. This guide explains what different cracks mean, how to inspect them yourself, and when to call a structural engineer before small problems become catastrophic ones.

    Why checking foundation cracks protects your home

    Foundation cracks are the earliest visible sign that stress is building beneath your home. By the time those cracks are obvious, stress has already been accumulating for months or years, making repairs longer and more expensive than early interventions would have been. That single fact is the strongest argument for regular inspection.

    The importance of checking foundation cracks goes beyond aesthetics. Cracks allow water to enter, which accelerates concrete deterioration and creates conditions for mold growth inside walls and crawl spaces. Left unchecked, what starts as a hairline fracture can widen into a structural gap that compromises the load-bearing capacity of your entire home.

    Wet foundation crack with moisture and garden tools

    Soil moisture is the main driver of foundation movement, according to structural consultant Michael Cummings. Seasonal wet and dry cycles cause soil to expand and contract, which pushes and pulls against your foundation walls continuously. That is why a crack that appears in spring may look different by fall, and why tracking behavior over time matters as much as the crack’s appearance on any single day.

    What are the common types of foundation cracks?

    Not all foundation cracks carry the same risk. The type, orientation, and location of a crack tell you far more than its width alone.

    Crack Type Typical Cause Risk Level
    Hairline (thin surface cracks) Concrete curing and shrinkage Low, monitor only
    Vertical Normal settling, minor movement Low to moderate
    Diagonal / stair-step Uneven settlement Moderate
    Horizontal Lateral soil or hydrostatic pressure High, urgent review
    Displaced or widening Active structural movement High, immediate action

    Hairline cracks appear during the first few years after construction as concrete cures and dries. They are generally cosmetic but should be monitored for widening or water intrusion.

    Vertical cracks run straight up and down and usually result from normal settling. They become concerning when they widen over time, show displacement, or allow water inside.

    Diagonal and stair-step cracks often appear in block or brick foundations and point to uneven settlement beneath one section of the home. A stair-step pattern running along mortar joints in a block wall is a reliable indicator that one corner is sinking faster than the rest.

    Infographic comparing low and high risk foundation cracks

    Horizontal cracks are the most serious type. Lateral soil pressure on basement walls can reach 500 pounds per square foot, and saturated soil can double that through hydrostatic pressure. Horizontal cracks signal that the wall is being pushed inward and may be at risk of buckling. Any horizontal crack requires immediate professional evaluation, full stop.

    How should homeowners inspect foundation cracks regularly?

    A systematic inspection twice a year catches problems before they escalate. Experts recommend inspecting at least twice yearly, with additional checks after major storms, droughts, or flooding events that shift soil conditions rapidly.

    Follow these steps for a thorough DIY inspection:

    1. Walk the perimeter outside. Look at the full exterior foundation wall. Note any cracks, staining, efflorescence (white mineral deposits), or areas where soil has pulled away from the wall.
    2. Inspect the interior basement or crawl space. Bring a flashlight and check all visible walls for cracks, moisture, or bowing. Look at the floor for uneven surfaces or cracks in the slab.
    3. Measure every crack you find. Use a ruler or a crack width gauge to record the width in fractions of an inch. Mark the ends of each crack with a pencil and write the date beside it.
    4. Check associated symptoms. Walk through the home and test every door and window. Sticking doors or windows, sloping floors, and gaps between walls and ceilings are all foundation damage indicators that confirm movement is occurring.
    5. Document everything. Photographs help, but dated crack monitors with baseline marks are more reliable for tracking growth over months. A physical mark on the wall with a date tells you exactly how much a crack has grown between visits.

    Pro Tip: Use masking tape to mark the ends of a crack, write the date on the tape, and check it again in 30 days. If the crack has grown past the tape, you have active movement and need a professional opinion.

    Contractor Tom Silva notes that crack behavior over time and related symptoms like sticking doors and sloping floors are more telling than the crack’s appearance alone. A crack that stays stable through two full seasons is far less alarming than a crack that grows an eighth of an inch in three months.

    What risks and costs come from ignoring foundation cracks?

    Ignoring foundation cracks is one of the most expensive decisions a homeowner can make. The financial consequences follow a predictable pattern: small problems become large ones, and large ones become catastrophic.

    • Repair cost escalation. Targeted foundation repairs typically cost between $3,000 and $8,000. Full foundation replacement and reconstruction can reach six figures. That gap represents years of neglect, not a single event.
    • Moisture intrusion and mold. Water entering through cracks deteriorates concrete from the inside and creates mold conditions that affect indoor air quality and require costly remediation.
    • Structural failure risk. Active foundation movement can cause walls to bow, floors to separate, and load-bearing elements to shift. At that stage, the home becomes a safety hazard.
    • Legal disclosure requirements. Foundation issues require legal disclosure during a home sale. Undisclosed problems can void a sale, trigger lawsuits, and reduce the final sale price significantly.
    • Insurance gaps. Standard homeowners’ insurance rarely covers structural repairs. That means the full cost of neglected foundation damage falls entirely on the homeowner.

    The effects of foundation cracks compound over time. A crack that allows a quarter inch of water intrusion per rain event will cause far more damage in year three than it did in year one. Moisture cycles weaken concrete progressively, and the repair bill grows with every season of inaction.

    When should you call a professional about foundation cracks?

    Some cracks are safe to monitor yourself. Others require a structural engineer within days of discovery. Knowing the difference protects both your home and your budget.

    Call a professional immediately if you observe any of the following:

    • Any horizontal crack in a basement or foundation wall
    • A crack wider than 1/8 inch, especially with visible displacement where one side sits higher than the other
    • Bowing basement walls or walls that visibly lean inward
    • Rapid crack growth, meaning a crack that measurably widens or lengthens within weeks
    • Multiple new cracks appearing simultaneously across different walls
    • Water actively entering through a crack after rain

    A professional foundation inspection evaluates cracks alongside soil conditions, drainage patterns, structural movement, and moisture levels. That combination gives you a diagnosis, not just a description. A structural engineer can tell you whether a crack is cosmetic, whether it reflects past movement that has stabilized, or whether active forces are still at work.

    Pro Tip: When hiring a professional, ask specifically for a structural engineer rather than a general contractor. Structural engineers are licensed to assess load-bearing capacity and provide written reports you can use for insurance claims, disclosures, or repair planning.

    Early professional assessment consistently costs less than delayed assessment. A structural engineer’s evaluation typically runs a few hundred dollars. Waiting until walls bow or floors separate can push repair costs into the tens of thousands before a contractor even starts work.

    How foundation monitoring fits into your overall home maintenance

    Foundation health is the backbone of every other system in your home. A shifting foundation stresses plumbing lines, cracks drywall, misaligns doors and windows, and can compromise roof framing over time. Treating foundation inspection as a standalone task misses the bigger picture.

    Regular home inspections that include the foundation, roof, attic, and drainage systems give you a complete picture of your home’s condition. Problems in one area often signal stress in another. A roof that leaks near a wall, for example, can saturate soil against the foundation and accelerate crack formation below.

    Building foundation checks into a seasonal maintenance schedule removes the guesswork. Spring inspections catch damage from winter freeze-thaw cycles. Fall inspections identify issues before winter moisture and cold stress the structure again. Using a year-round maintenance checklist keeps these tasks from falling through the cracks, literally and figuratively.

    Preventive maintenance also preserves home value in ways that reactive repairs cannot. A home with documented inspection records and no deferred maintenance commands a stronger sale price and faces fewer financing obstacles than one with a history of ignored problems.

    Key takeaways

    Checking foundation cracks regularly is the single most cost-effective action a homeowner can take to prevent structural failure and protect property value.

    Point Details
    Inspect twice a year Check the foundation every spring and fall, plus after major weather events.
    Know your crack types Horizontal cracks are urgent; hairline and stable vertical cracks can be monitored.
    Track changes, not just appearance Use dated marks or crack monitors to measure growth over 30 to 90 days.
    Ignoring cracks is expensive Repairs range from $3,000 to $8,000 when caught early and can reach six figures if neglected.
    Professionals diagnose, not just describe A structural engineer evaluates soil, moisture, and movement, not just the crack itself.

    What I’ve learned from watching homeowners ignore their foundations

    I have seen the same pattern repeat itself more times than I can count. A homeowner notices a crack, tells themselves it is probably just settling, and checks on it again two years later when a door stops closing properly. By then, the crack has widened, water has been entering for 18 months, and the repair estimate has tripled.

    The misconception I push back against hardest is the idea that foundation cracks are normal and therefore ignorable. Some cracks are normal. None of them are ignorable. Normal means cosmetic and stable, not harmless and permanent. Every crack deserves a baseline measurement and a follow-up date on the calendar.

    What I find genuinely useful is the seasonal monitoring approach. Soil moisture is the main driver of foundation movement, and that moisture follows predictable seasonal patterns. Checking your foundation in April and October, every single year, gives you a consistent comparison point. You are not looking for perfection. You are looking for change.

    The homeowners who avoid expensive repairs are not the ones with perfect foundations. They are the ones who catch problems early and act on them before the damage compounds. That habit costs almost nothing to build and pays for itself the first time it catches something real.

    — Sean

    Stay ahead of foundation problems with Workbenchguide

    Workbenchguide is built for exactly this kind of maintenance challenge. The platform gives you structured home maintenance checklists that include foundation inspections alongside roof checks, drainage reviews, and seasonal tasks, so nothing gets skipped. You get smart reminders before each inspection window, step-by-step DIY guides for documenting what you find, and direct access to vetted contractors when a crack crosses the line from “monitor it” to “call someone now.” Protecting your foundation does not require expertise. It requires consistency, and Workbenchguide makes consistency easy.

    FAQ

    Why should you check foundation cracks at all?

    Foundation cracks signal structural changes caused by soil movement, moisture, and settling. Checking them regularly lets you catch serious problems early, when repairs cost thousands rather than tens of thousands.

    How often should homeowners inspect their foundation?

    Experts recommend inspecting at least twice a year, in spring and fall, plus after major storms or drought periods that shift soil conditions.

    What crack width should trigger a professional call?

    Any crack wider than 1/8 inch, especially with displacement or a horizontal orientation, requires professional evaluation. Cracks that grow measurably within weeks are also a red flag regardless of width.

    Do foundation cracks affect home resale value?

    Yes. Foundation issues must be legally disclosed during a sale, and undisclosed structural problems can reduce sale price, delay financing, or void a transaction entirely.

    Can you monitor foundation cracks yourself?

    You can track hairline and stable vertical cracks yourself using dated marks and a ruler. Any crack showing active growth, water intrusion, or horizontal orientation needs a licensed structural engineer, not a DIY assessment.

  • Why You Should Service Your Water Heater Regularly

    Why You Should Service Your Water Heater Regularly

    Servicing a water heater is the single most effective action a homeowner can take to lower energy bills, extend appliance life, and protect household water quality. Water heater maintenance, the industry-standard term for this practice, covers flushing sediment, inspecting safety valves, checking the anode rod, and calibrating the thermostat. Water heaters account for roughly 18% of average household energy use, meaning even modest efficiency gains translate directly into real dollar savings every month. Homeowners who skip annual service are not just risking a cold shower. They are quietly paying more on every utility bill while shortening the life of a $500 to $1,500 appliance.

    Why service a water heater for energy savings?

    Sediment is the hidden enemy of every tank-style water heater. Hard water deposits calcium and magnesium minerals at the bottom of the tank, and over time that layer acts as a thermal barrier between the burner and the water. Sediment buildup forces heating elements to work harder, driving up energy consumption and causing the tank itself to overheat and become brittle. The result is a unit that runs longer cycles, costs more to operate, and wears out faster.

    The financial impact is measurable. Routine maintenance can cut energy bills by 5% to 30%, depending on how much sediment has accumulated and how well the thermostat is calibrated. A 10% reduction on a $100 monthly energy bill saves $120 per year, which more than covers the cost of an annual professional flush. For homeowners in areas with hard water, the savings potential sits at the higher end of that range.

    Sediment buildup inside water heater tank

    Thermostat calibration is a frequently overlooked efficiency lever. Most water heaters ship from the factory set to 140°F, but the U.S. Department of Energy recommends 120°F for typical households. Dropping the temperature to 120°F reduces standby heat loss and slows mineral scale formation without sacrificing comfort for most families.

    Pro Tip: If your water heater is in an unheated garage or basement, wrapping the tank with an insulating blanket rated for water heaters can reduce standby heat loss by an additional 25% to 45%, according to the Department of Energy.

    Key efficiency tasks a technician performs during a service visit include:

    • Flushing the tank to remove accumulated sediment
    • Testing and adjusting the thermostat setting
    • Inspecting the burner flame or heating element for proper operation
    • Checking pipe insulation on the first six feet of hot and cold supply lines
    • Verifying the pressure relief valve opens and closes correctly

    Hard water accelerates mineral scale buildup, making annual flushing especially critical in cities like Phoenix, Las Vegas, and Dallas where water hardness regularly exceeds 200 parts per million. If you hear a rumbling or popping noise from your tank, that sound is sediment being agitated by the burner. It is a clear signal that a flush is overdue.

    How maintenance extends your water heater’s lifespan

    A neglected water heater typically lasts 8 to 10 years. With regular professional servicing, that lifespan stretches to 12 to 15 years, and tankless units can reach 20 years. That difference represents thousands of dollars in delayed replacement costs. The math alone makes the case for annual service.

    Infographic on water heater servicing steps

    The anode rod is the most critical and most ignored component in a standard tank water heater. This magnesium or aluminum rod suspends inside the tank and corrodes in place of the steel tank walls, a process called sacrificial protection. Replacing the anode rod every 3 to 5 years is the single most effective way to prevent tank corrosion and premature failure. Once the rod is fully depleted, the tank itself begins to rust from the inside out, and no amount of flushing will reverse that damage.

    Here is what happens when homeowners skip maintenance over a multi-year period:

    1. Sediment accumulates and the tank overheats, stressing the glass lining.
    2. The anode rod depletes completely, leaving bare steel exposed to corrosive water.
    3. The T&P relief valve seizes from mineral deposits and stops functioning as a safety device.
    4. The tank develops pinhole leaks or, in worst cases, ruptures entirely.
    5. Emergency repair costs run between $150 and $500, not counting water damage to floors, walls, or stored belongings.

    Warranty protection is another reason to keep service records. Some manufacturers require documented professional maintenance to keep the warranty valid. Without a service record, a warranty claim on a prematurely failed unit can be denied outright, leaving the homeowner responsible for the full replacement cost.

    “Lack of documented professional maintenance visits can void manufacturer warranty claims, leaving homeowners financially exposed.” — Water Heater Pete

    The preventative maintenance approach that protects appliance warranties also protects your budget. Spending $80 to $150 on an annual inspection is a straightforward trade against a $1,200 emergency replacement.

    How servicing improves water quality and home safety

    Rusty, discolored, or foul-smelling hot water is not a plumbing mystery. It is almost always a sign that the anode rod has failed and the tank is corroding, or that sediment and bacteria have built up inside the tank. Both problems are preventable with regular service. Flushing removes the sediment layer where bacteria like Legionella can colonize, particularly in tanks set below 120°F.

    Safety is the other dimension of maintenance that homeowners tend to underestimate. The temperature and pressure relief valve, known as the T&P valve, is the last line of defense against a catastrophic tank failure. If water pressure or temperature exceeds safe limits and the valve is seized shut from mineral deposits, the tank can rupture with explosive force. Testing the T&P valve annually is a non-negotiable safety check.

    Pro Tip: Never ignore a T&P valve that drips continuously after testing. A dripping valve either means the tank pressure is too high or the valve itself has failed. Both conditions require a licensed plumber, not a DIY fix.

    For gas water heaters, annual service includes a combustion inspection that catches cracked heat exchangers and improper venting before they become carbon monoxide hazards. Carbon monoxide is colorless and odorless, and a malfunctioning gas appliance can produce dangerous concentrations without any visible warning sign.

    Signs your water heater needs service right now:

    • Hot water has a rust color or metallic smell
    • Visible corrosion or moisture around the base of the tank
    • Rumbling, popping, or banging sounds during heating cycles
    • Hot water runs out faster than it used to
    • The pilot light on a gas unit goes out repeatedly
    • Water temperature fluctuates unpredictably

    Any one of these signs warrants a call to a licensed technician. Waiting compounds the damage and the cost.

    DIY vs. professional service: what you can do and when to call a pro

    Homeowners can handle a meaningful portion of water heater upkeep without any special tools. Visual inspections take five minutes and catch obvious problems early. Checking for moisture around the base, confirming the pilot light is burning blue on a gas unit, and listening for unusual sounds are all tasks any homeowner can perform monthly.

    Task DIY or Professional?
    Visual inspection for leaks or corrosion DIY monthly
    Checking water temperature at the tap DIY as needed
    Flushing sediment from the tank Professional annually
    Testing the T&P relief valve Professional annually
    Replacing the anode rod Professional every 3 to 5 years
    Inspecting gas burner or electrical elements Professional only
    Adjusting gas pressure or electrical connections Professional only

    Licensed professionals must handle tasks involving gas lines and electrical components to avoid safety hazards. This is not a liability disclaimer. Gas line work done incorrectly can cause fires or explosions, and electrical work on a 240-volt heating element carries a real electrocution risk. The line between DIY and professional is drawn at anything involving fuel supply, electrical connections, or safety valves.

    Professional flushing includes a full condition assessment that a DIY flush cannot replicate. A technician checks the anode rod condition, tests the T&P valve, inspects the burner or element, and evaluates whether the unit is worth servicing or approaching end of life. That diagnostic value alone justifies the service call. Flushing a heavily sedimented tank without first assessing its condition can dislodge rust that stresses failing components, turning a maintenance visit into an emergency replacement.

    For homeowners who want a clear picture of what annual service covers, the 2026 water heater maintenance guide from Workbenchguide breaks down every task by frequency and skill level.

    Key takeaways

    Regular water heater servicing reduces energy costs, prevents premature failure, and protects household water quality in ways that no reactive repair strategy can match.

    Point Details
    Energy savings are significant Maintenance cuts energy bills by 5% to 30%, directly reducing monthly utility costs.
    Lifespan nearly doubles Serviced units last 12 to 15 years versus 8 to 10 years for neglected ones.
    Anode rod replacement is critical Replace every 3 to 5 years to prevent tank corrosion and avoid premature failure.
    Safety checks are non-negotiable Annual T&P valve testing and gas inspections prevent dangerous and costly failures.
    Warranty protection requires documentation Skipping professional service can void manufacturer warranties and expose you to full replacement costs.

    What I’ve learned after years of watching homeowners skip this one task

    Most homeowners treat their water heater the way they treat their car’s spare tire. They know it exists, they hope they never need to think about it, and they find out it matters at the worst possible moment. I have seen this pattern repeat itself more times than I can count, and the outcome is almost always the same: a flooded utility room, a panicked call to a plumber, and a bill that could have been avoided entirely.

    The misconception I hear most often is that maintenance is only necessary when something goes wrong. Preventative servicing stops major problems before any visible sign appears. By the time you notice rusty water or hear a rumbling tank, the damage is already done. The anode rod is gone, the sediment layer is inches thick, and you are looking at a replacement, not a repair.

    What I find genuinely underappreciated is the water quality angle. Homeowners spend money on filtered pitchers and under-sink systems while ignoring the corroding tank that is contaminating their hot water supply at the source. Fixing the tank is cheaper and more effective than filtering around the problem.

    My practical advice: schedule a professional service visit every 12 months and put it on your calendar the same way you schedule a furnace tune-up. If you are in a hard water area, consider asking your technician about a whole-house water softener. The combination of annual flushing and softened water can push a tank water heater well past the 15-year mark. That is not a guarantee, but it is the closest thing to one that exists in home maintenance.

    — Sean

    Protect your water heater investment with the right checklist

    Staying ahead of water heater problems does not require guesswork. Workbenchguide gives homeowners a clear, organized path through every maintenance task, from monthly visual checks to annual professional service. The home maintenance checklist covers water heater care alongside every other major system in your home, so nothing falls through the cracks. If you want to know exactly when to flush, when to replace the anode rod, and when to call a licensed technician, that checklist is the place to start. Pair it with the HVAC service guide to cover all your home’s major mechanical systems in one organized plan.

    FAQ

    Why should I service my water heater every year?

    Annual service removes sediment buildup, tests safety valves, and inspects the anode rod before small problems become expensive failures. Water heaters account for roughly 18% of household energy use, so even minor efficiency gains from servicing produce real savings on monthly bills.

    What happens if I never service my water heater?

    A neglected water heater typically fails within 8 to 10 years, compared to 12 to 15 years for a well-maintained unit. Skipping service also risks voiding the manufacturer warranty and can lead to emergency repair costs between $150 and $500, not counting potential water damage.

    Can I service my water heater myself?

    Homeowners can perform monthly visual inspections and check water temperature, but flushing, T&P valve testing, anode rod replacement, and any gas or electrical work require a licensed technician. Attempting gas or electrical repairs without proper training creates serious safety hazards.

    How do I know if my water heater needs service now?

    Rusty or smelly hot water, rumbling sounds during heating cycles, moisture around the tank base, and inconsistent water temperature are all signs that service is overdue. Any single one of these symptoms warrants a professional inspection.

    Does servicing a water heater actually save money?

    Routine maintenance reduces energy consumption by 5% to 30% and delays costly replacements by several years. The annual cost of professional service is typically $80 to $150, a straightforward trade against a $1,200 or higher emergency replacement.