
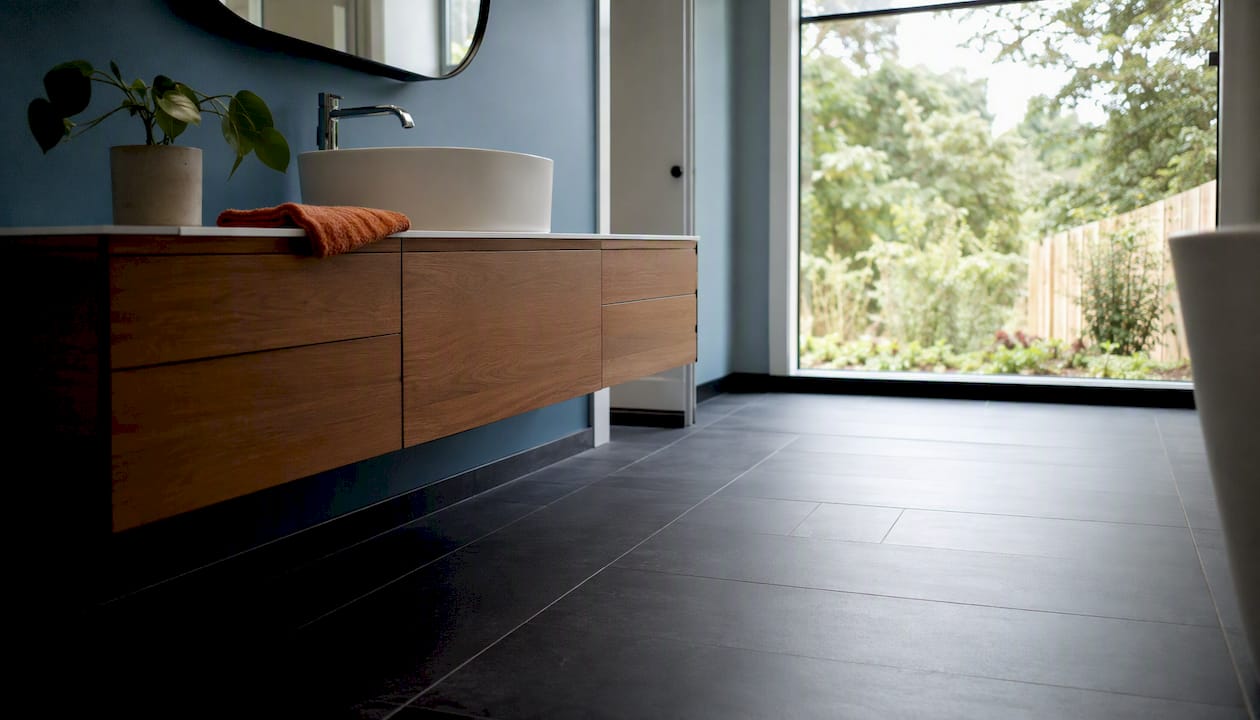
The three moves that deliver the most value in any bathroom remodel are securing wet-area waterproofing, choosing one clear style anchor, and upgrading the fixtures you touch every day. Get those right and everything else falls into place. Skip them and even a beautiful tile job will disappoint you within a year.
Here is what to do first:
- Secure the wet area. Waterproofing behind tile and around the shower pan is the one failure that causes the most expensive damage. Fix or confirm this before anything cosmetic.
- Pick one style anchor. A single dominant material or finish (matte black hardware, warm oak vanity, subway tile) keeps the room coherent without requiring a designer.
- Upgrade daily-touch fixtures. Faucets, showerheads, and vanity hardware deliver the highest perceived-value return because you interact with them every single day.
Budget reality check:
| Scope | Typical range | What it covers |
|---|---|---|
| Cosmetic refresh | $6,456–$10,883 | Paint, fixtures, vanity swap, no plumbing moves |
| Midrange remodel | $14,609–$19,040 | New tile, vanity, lighting, minor layout work |
| High-end / full gut | $27,492+ | Custom tile, layout changes, full fixture replacement |
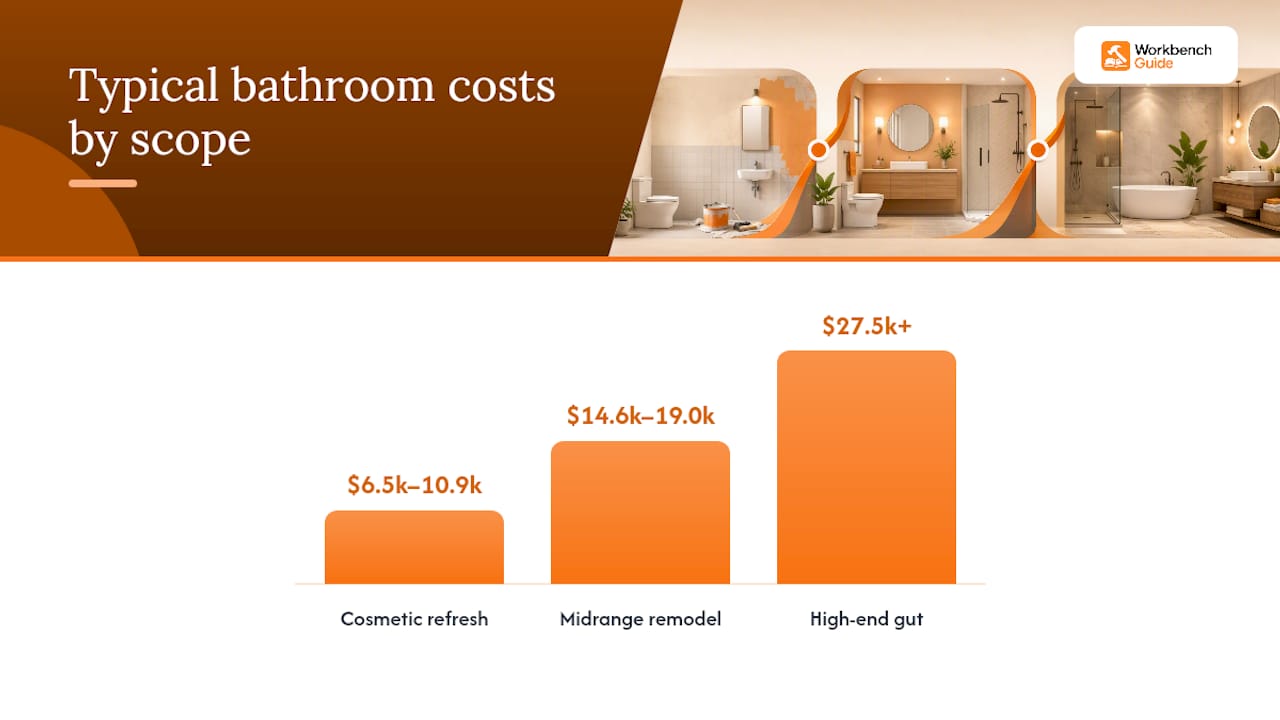
Ranges above reflect national survey data from This Old House for a 50-square-foot bathroom.
Pro Tip: Scope creep is the number-one budget killer. Write down every task before you start and mark each one “in scope” or “out of scope.” Anything that moves a drain or a vent stack is automatically a budget conversation, not an impulse decision.
Table of Contents
- 1. Modern-minimal style: clean lines and calm materials
- 2. Spa-like retreat: the most-searched luxury bathroom design idea
- 3. Farmhouse and transitional: warm wood tones and vintage fixtures
- 4. Bold pattern and color: statement tile and painted ceilings
- 5. Kid-friendly bathrooms: durable, easy-clean, and fun
- 6. Budget refresh under $5,000: the cosmetic-only remodel
- 7. Accessible and aging-in-place: design that works for everyone
- 8. Small-bathroom refresh: big impact in tight spaces
- 9. Wet-area tile and shower enclosure upgrades
- 10. Lighting and mirror upgrades: the fastest visual transformation
- 11. Storage and vanity upgrades: function before aesthetics
- 12. Eco-friendly and sustainable upgrades
- How do you make a small bathroom feel bigger?
- Shower vs. tub: which wet-area option fits your situation?
- Storage and vanity solutions that maximize function and style
- Permits, hiring contractors, and a contractor checklist
- Key Takeaways
- Why planning is the real difference-maker in any remodel
- Workbenchguide keeps your remodel on track from start to finish
- Useful sources and further reading
1. Modern-minimal style: clean lines and calm materials
A modern-minimal bathroom strips the room to its best elements: a floating vanity, large-format porcelain tile, and a frameless glass shower panel. The visual effect is a room that reads larger than it is because there are no busy grout lines or ornate details pulling the eye.
Implementation note: Floating vanities are DIYable if the rough-in plumbing is already at the right height. The frameless glass panel is a pro install — the channel must be perfectly plumb or the door will swing open on its own.
Pair with: matte white or warm greige tile, brushed nickel or matte black fixtures, and a single pendant or wall-mounted sconce over the mirror.
2. Spa-like retreat: the most-searched luxury bathroom design idea
Warm stone-look tile, a rain showerhead, a soaking tub, and layered lighting are the four ingredients of the spa bathroom. You do not need all four. A rain showerhead and a single slab of large-format stone-look porcelain on the shower wall will get you 80% of the effect at a fraction of the cost.
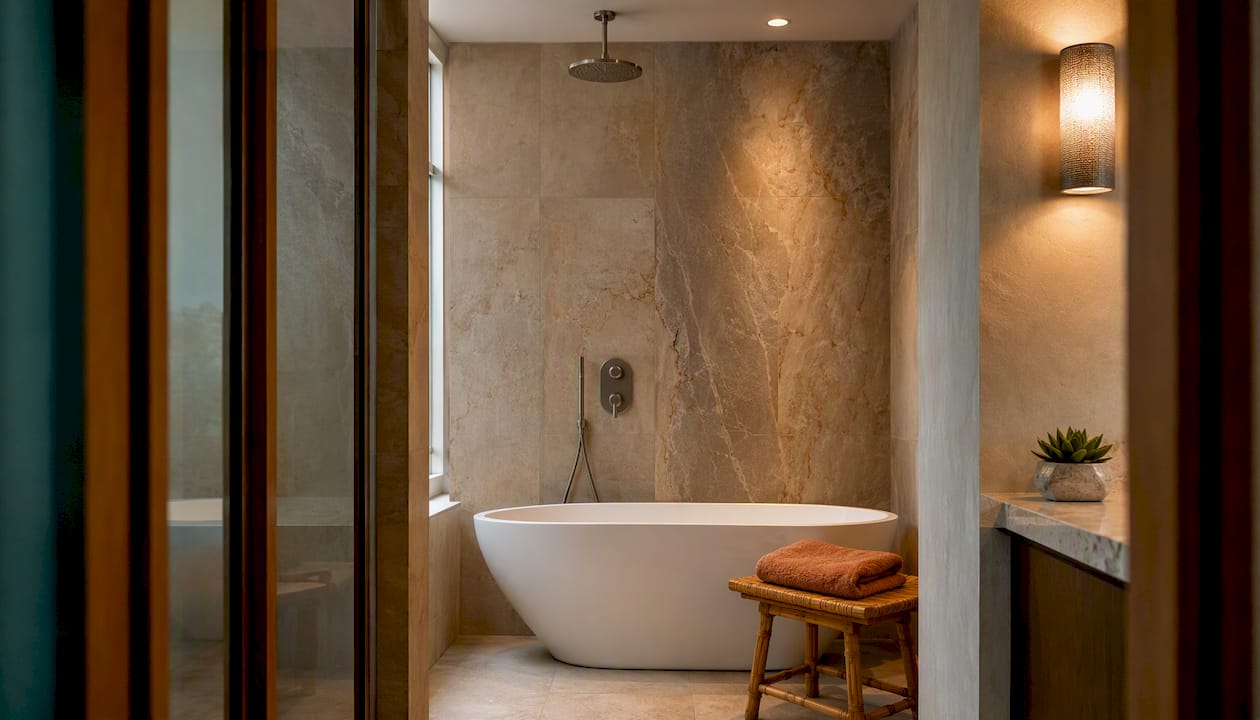
Implementation note: Stone-look porcelain is the practical choice over real marble for wet areas. Real marble requires annual sealing and is prone to etching from soap and shampoo. Porcelain mimics the look with near-zero maintenance.
For luxury bathroom design ideas at every budget tier, image-led galleries are the fastest way to narrow your style before you talk to a contractor.
3. Farmhouse and transitional: warm wood tones and vintage fixtures
A shiplap accent wall, an apron-front or vessel sink, and oil-rubbed bronze or unlacquered brass fixtures define the farmhouse bathroom. The transitional version softens the rustic edges with cleaner lines and a neutral tile field.
Implementation note: Shiplap in a bathroom requires a moisture-resistant primer and paint, and should never go directly behind a shower or tub. Use it on the dry-zone wall opposite the shower. Real wood vanities in wet rooms need a marine-grade finish or they will swell within two years.
4. Bold pattern and color: statement tile and painted ceilings
A patterned cement or encaustic tile floor, a painted ceiling in a deep color (navy, forest green, terracotta), or a single wall of zellige tile can turn a small bathroom into the most memorable room in the house.
Implementation note: Limit bold pattern to one surface. A patterned floor with a plain white wall reads intentional. A patterned floor AND a patterned wall reads chaotic. Cement tile requires sealing before grouting and again after installation — skip this step and staining is permanent.
5. Kid-friendly bathrooms: durable, easy-clean, and fun
Durable surfaces, easy-clean grout (epoxy grout or large-format tile with fewer grout lines), a handheld showerhead on a slide bar, and built-in storage at kid height make a family bathroom work for the next decade.
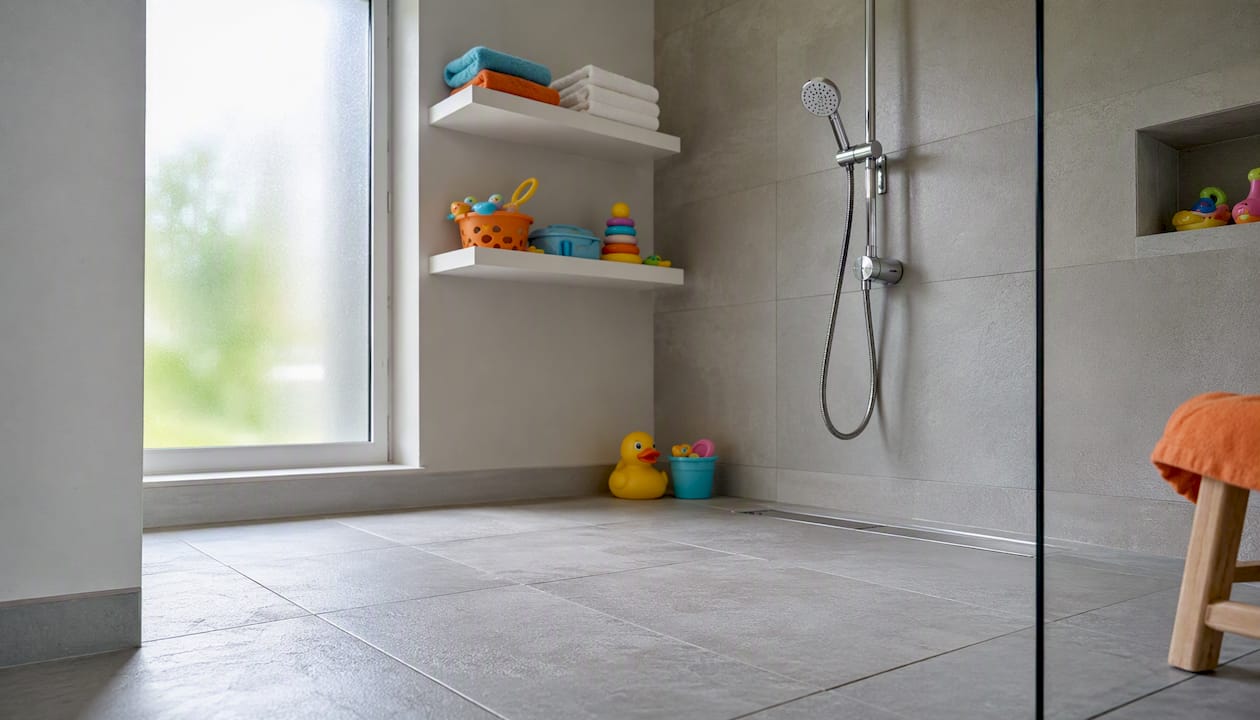
Implementation note: Slip-resistant floor tile rated R10 or higher is the single most important safety spec in a kid’s bathroom. Avoid polished porcelain on the floor — it looks great dry and becomes a skating rink wet.
6. Budget refresh under $5,000: the cosmetic-only remodel
A $5,000 remodel is achievable when you keep the plumbing exactly where it is and focus on cosmetic changes: a new vanity, updated fixtures, fresh paint, and peel-and-stick or luxury vinyl plank flooring. Before-and-after projects under $5,000 often use remnant countertops, refinished tile, and expensive materials limited to a single accent niche.
Implementation note: Refinishing an existing tub or tile surround (reglazing) costs $300–$600 and can look nearly new. It is a DIY-friendly weekend project with the right epoxy kit, though professional reglazing lasts significantly longer.
7. Accessible and aging-in-place: design that works for everyone
A curbless shower, comfort-height toilet, and lever-style faucet handles are the three upgrades that add the most long-term value. None of them look medical when specified in the right finish. A curbless shower with a linear drain and large-format tile reads as a luxury spa feature, not an accessibility accommodation.
Implementation note: Blocking for future grab bars (installing 2×6 backing inside the wall during a remodel) costs almost nothing at rough-in stage and saves a full demo later. If you are already opening the walls, always add blocking.
8. Small-bathroom refresh: big impact in tight spaces
Consistent floor-to-wall tile, a wall-hung vanity, and a single glass shower panel are the three moves that make a small bathroom feel significantly larger. The goal is to eliminate visual interruptions: fewer grout lines, no bulky vanity base, no opaque shower curtain cutting the room in half.
Implementation note: A pocket door instead of a swing door recovers 8–10 square feet of usable floor space in a tight bathroom. It is a moderate DIY project if the wall is non-load-bearing.
9. Wet-area tile and shower enclosure upgrades
Replacing a dated fiberglass surround with subway tile or a large-format porcelain panel is one of the highest-impact visual upgrades in any bathroom. The enclosure defines the room more than any other single surface.
Implementation note: A prefab shower base (acrylic or solid surface) is the most DIY-friendly wet-area option and eliminates the risk of a failed mortar bed. Custom tile showers require a licensed waterproofing membrane and are best left to a pro unless you have tile-setting experience.
10. Lighting and mirror upgrades: the fastest visual transformation
Swapping a builder-grade bar light for a pair of flanking sconces and replacing a frameless mirror with a framed or backlit mirror is a half-day DIY project that changes the entire feel of a bathroom. Backlit mirrors add ambient light and eliminate harsh shadows on the face.
Implementation note: Sconces flanking the mirror at eye level (roughly 60–65 inches from the floor to the center of the fixture) give the most flattering task lighting. A single overhead bar light creates shadows under the eyes and chin.
11. Storage and vanity upgrades: function before aesthetics
A vanity with deep drawers instead of doors, a recessed medicine cabinet, and a vertical niche in the shower wall solve the storage problem without adding bulk. The recessed medicine cabinet is the single most underused storage upgrade in American bathrooms.
Implementation note: A recessed medicine cabinet requires cutting between studs. In most bathrooms, the wall behind the mirror is a non-load-bearing interior wall, making this a straightforward DIY cut. Confirm no plumbing or electrical runs in that cavity before cutting.
12. Eco-friendly and sustainable upgrades
WaterSense-labeled showerheads use no more than 2.0 gallons per minute versus the standard 2.5 GPM, cutting water use without a noticeable pressure drop. LED lighting, low-flow toilets (1.28 GPF or less), and recycled-content tile are the three sustainability upgrades with the fastest payback.
Implementation note: Low-flow toilets and WaterSense fixtures qualify for rebates in many U.S. utility districts. Check your local water utility’s website before purchasing — rebates of $50–$150 per fixture are common.
How do you make a small bathroom feel bigger?
Small bathrooms gain the most from spatial tricks. The goal is a continuous visual plane with as few interruptions as possible.
Layout tactics:
- Wet/dry zoning. Keep the shower and toilet on one wall; keep the vanity on the opposite wall. This creates a clear circulation path even in a 5×8 bathroom.
- Wall-hung vanity. Exposing the floor underneath a floating vanity makes the room read larger. It also makes cleaning easier.
- Pocket or barn door. A swing door in a small bathroom eats floor space. A pocket door solves this at moderate cost.
- Single glass panel. A fixed glass panel instead of a full enclosure or curtain keeps the shower visually open.
Storage that does not add bulk:
- Recessed medicine cabinet (zero floor footprint)
- Vertical niche in the shower wall (built into the stud bay)
- Floating shelf above the toilet (uses dead vertical space)
- Drawer organizers inside the vanity (doubles usable storage without adding a piece of furniture)
Material choices that open up space:
Large-format tile (12×24 or 24×24) with minimal grout lines reads as a continuous surface. Light palettes reflect more light. Running the same tile from floor to wall (a “wet room” approach) eliminates the visual break at the baseboard and adds perceived height.
Pro Tip: If you can keep the drain in its existing location, do it. Moving a drain requires breaking the subfloor, rerouting the P-trap, and potentially re-sloping the drain line. That single decision can add $1,500–$3,000 to a small bathroom project. Design around the existing drain position whenever possible.
Shower vs. tub: which wet-area option fits your situation?
The right answer depends on who uses the bathroom and what you plan to do with the house.
Families with young children: Keep the tub. A tub is nearly impossible to sell around for bath time with small kids, and removing it can hurt resale in family-oriented markets. A tub/shower combo with a quality surround tile job is the practical choice.
Empty nesters and couples: A walk-in shower with a curbless entry and a rain showerhead is the upgrade most likely to be used daily and appreciated most. A freestanding soaking tub adds luxury but is used less frequently than most buyers expect.
Resale-focused renovations: At least one tub in the house is a common buyer expectation in most U.S. markets. If the bathroom being remodeled is the only full bath, keep the tub or plan a tub/shower combo.
Accessibility: A curbless shower with a linear drain is the most accessible option and also the most design-forward. It works for aging-in-place and reads as a luxury feature to buyers.
Cost spread (approximate):
- Prefab acrylic shower unit: $500–$1,500 installed (DIY-friendly)
- Tile shower with prefab base: $2,000–$5,000 installed
- Custom tile shower with mortar bed: $5,000–$12,000+ installed
- Tub replacement (drop-in or alcove): $1,000–$3,500 installed
- Freestanding soaking tub: $1,500–$8,000+ (fixture only; plumbing extra)
Pro Tip: A prefab shower base (acrylic or solid surface) is almost always the better choice over a mortar bed for a DIY or budget project. A mortar bed requires precise sloping toward the drain — get it wrong and water pools. A prefab base is pre-sloped and eliminates that risk entirely.
Storage and vanity solutions that maximize function and style
The vanity is the hardest-working piece of furniture in the bathroom. Getting the type right before you shop saves a full reinstall later.
Floating vs. freestanding vs. built-in:
A floating (wall-hung) vanity works best in small bathrooms where exposing the floor matters visually. It requires blocking in the wall for proper support and is a moderate-to-pro install depending on your wall construction. A freestanding vanity is the easiest to swap and the most DIY-friendly. A built-in vanity (custom cabinetry) maximizes storage and fits odd dimensions but costs the most and requires a cabinet installer.
Stock vs. semi-custom vs. custom:
- Stock vanities (Home Depot, IKEA GODMORGON) are the fastest and cheapest option. Sizes are fixed, so measure carefully.
- Semi-custom vanities allow width and finish adjustments at moderate cost. Lead times run 4–8 weeks.
- Custom cabinetry fits any dimension and any finish but adds $2,000–$8,000+ to the budget and 8–12 weeks to the timeline.
Storage organizing ideas that keep the visual field clean:
- Deep drawers with dividers instead of cabinet doors (drawers are more accessible and easier to organize)
- Pull-out trays under the sink for cleaning supplies
- Recessed medicine cabinet behind the mirror (zero floor footprint, hides clutter)
- Floating shelf above the toilet for towels and decor
- Integrated linen tower beside the vanity for a built-in look without custom cabinetry
Layout clearances to check before ordering:
- Minimum 21 inches of clear floor space in front of the toilet and vanity (30 inches is comfortable)
- Minimum 15 inches from the toilet centerline to any side wall or obstruction
- Vanity depth: 18–21 inches for a standard bathroom; 16 inches for a tight space
- Double vanity minimum width: 60 inches for two sinks with usable counter space between them
Permits, hiring contractors, and a contractor checklist
When permits are required:
In most U.S. jurisdictions, a permit is required for any work that involves moving or adding plumbing, electrical work beyond a simple fixture swap, or structural changes (moving a wall, widening a doorway). A cosmetic refresh (vanity swap, paint, flooring) typically does not require a permit, but rules vary by city and county. Always check with your local building department before starting.
The contractor typically pulls the permit for licensed trade work. If a contractor tells you permits are unnecessary for plumbing or electrical work, that is a red flag.
What to look for when vetting contractors:
- State contractor’s license (verify on your state’s licensing board website)
- General liability insurance and workers’ compensation coverage (ask for certificates)
- References from bathroom remodel projects specifically (not just general remodels)
- A written, itemized bid (not a verbal estimate)
- A clear payment schedule (never pay more than 10%–30% upfront)
Contractor checklist and questions for the first call:
- Are you licensed and insured in this state?
- Have you completed bathroom remodels of this scope in the past 12 months?
- Who pulls the permits, and is that included in your bid?
- Who does the tile work — your crew or a subcontractor?
- What is your payment schedule, and what triggers each payment?
- What is your process when you find something unexpected behind the walls?
- Can you provide two or three references I can call this week?
Red flags that warrant walking away:
- Requests for more than 30% upfront
- No written contract or itemized scope
- Pressure to start immediately without a signed agreement
- Unwillingness to pull permits
- No verifiable license or insurance
For a step-by-step renovation planning guide that covers contractor communication and scope control, Workbenchguide has a full resource built specifically for homeowners navigating this process.
Key Takeaways
A successful bathroom remodel comes down to three decisions made before a single tile is pulled: keep the layout, pick one style anchor, and know which tasks require a licensed trade.
| Point | Details |
|---|---|
| Labor is the biggest cost driver | Labor runs 40%–65% of total remodel cost; keeping the layout unchanged is the single best way to control it. |
| Budget tiers are well-defined | A cosmetic refresh runs $6,456–$10,883; a midrange remodel runs $14,609–$19,040; a full gut starts at $27,492. |
| $10k is a real budget | $10,000 buys an effective cosmetic refresh if the layout stays the same and custom tile showers are avoided. |
| DIY has clear limits | Paint, fixtures, vanity swaps, and LVP flooring are safe DIY tasks; plumbing moves and wet-area waterproofing require licensed pros. |
| Workbenchguide simplifies planning | Use Workbenchguide’s bathroom upgrade checklist to track tasks, avoid missed steps, and stay on budget from day one. |
Why planning is the real difference-maker in any remodel
Most bathroom remodels do not fail because of bad tile choices or the wrong vanity. They fail because the scope was never written down, the contingency budget did not exist, and the contractor conversation happened without a checklist in hand.
The homeowners who come out of a remodel satisfied almost always did one thing differently: they planned the project before they started spending. Not a mood board. An actual task list with a budget line for each item, a decision made on DIY vs. pro for each trade, and a written scope handed to every contractor who bid the job.
Workbenchguide’s project checklists and step-by-step renovation guides exist precisely for this. The contractor Q&A feature means you can get a quick expert read on a behind-wall surprise without paying for a full service call. That combination of pre-built structure and on-demand advice is what separates a remodel that finishes on budget from one that does not.
One thing worth saying plainly: the most expensive mistake in a bathroom remodel is not the tile you chose. It is the drain you moved without fully pricing out the cascading demo, plumbing, and waterproofing work that follows. Write that decision down before you make it, price it out completely, and then decide.
Workbenchguide keeps your remodel on track from start to finish
A bathroom remodel has more moving parts than most homeowners expect: permit timelines, material lead times, contractor schedules, and a list of decisions that compounds every week. The projects that finish on budget are the ones where every task was tracked, every contractor conversation was documented, and nothing fell through the cracks.
Workbenchguide is built for exactly this. The platform gives you project checklists that cover every phase of a bathroom remodel, maintenance records to track what was done and when, and contractor Q&A access for the moments when you hit something unexpected behind a wall. You can schedule follow-up maintenance, log photos and notes, and manage everything from one place.
Start with the home maintenance checklist to build a baseline for your bathroom and every other system in the house. Then use the step-by-step renovation guide to move from inspiration to a real project plan. Both are free to start.
Useful sources and further reading
The sources below are the best starting points depending on what you need next.
- Bathroom Remodel Cost in 2026: Is It Worth It? – NerdWallet
- Bathroom Remodeling Cost: 2026 Pricing & Real Examples
- Bathroom remodel cost – This Old House
- Can You Remodel a Bathroom for $5,000? | Showcase Remodels Philadelphia
- Before-and-After Bathroom Remodels Under $5,000 | HGTV
- 75 Bathroom Pictures & Ideas You’ll Love – Houzz
- Bathroom Remodel Cost Guide – The Home Depot
- Is $10,000 Enough For A Bathroom Remodel? Yes, Here’s What You Get