Author: Sean C

  • Why Clean Chimney Flue: Safety and Fire Prevention

    Why Clean Chimney Flue: Safety and Fire Prevention

    Cleaning your chimney flue is the single most effective step you can take to prevent a house fire caused by your fireplace. The chimney flue is the interior channel that carries smoke, gases, and combustion byproducts safely out of your home. Over time, it collects creosote, a sticky and highly flammable residue that the NFPA identifies as the leading cause of chimney fires in the United States. The Chimney Safety Institute of America (CSIA) and NFPA both recommend annual inspections, with cleaning scheduled based on how often you use your fireplace.

    Why clean chimney flue: the creosote problem

    Creosote is the core reason chimney flue maintenance matters. It forms when wood burns incompletely, releasing unburned gases that cool inside the flue and condense into a dark, tar-like coating on the flue walls. At low levels it looks like a light, flaky soot. Left unchecked, it hardens into a thick, glossy layer that is extremely difficult to remove and extremely easy to ignite.

    Creosote buildup over 1/8 inch in thickness is highly combustible and requires professional removal to prevent chimney fires. That 1/8-inch threshold is not arbitrary. At that depth, a single spark from your fire can ignite the residue and send flames racing up the flue at temperatures exceeding 2,000°F.

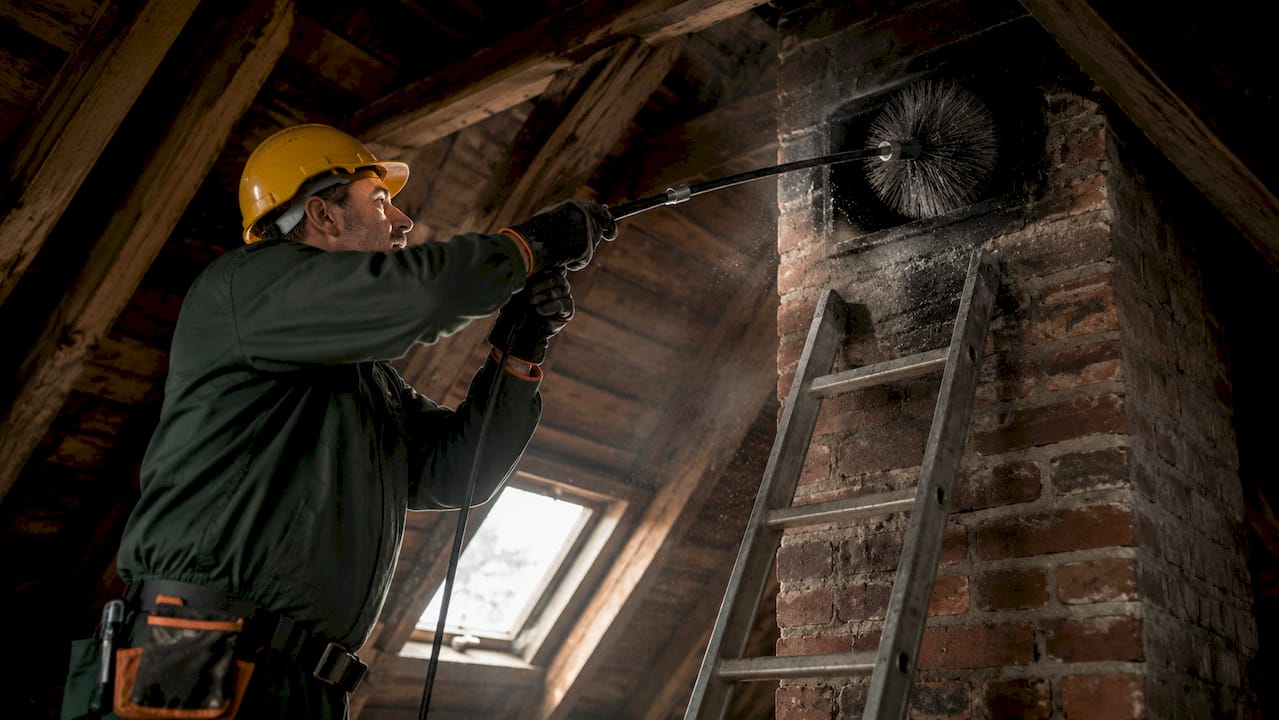
    Close-up of creosote buildup inside chimney flue

    The danger compounds because creosote does not announce itself. The most dangerous buildup is invisible and odorless, escalating chimney fire risk if left unmanaged. Many homeowners assume they would smell or see a problem before it became serious. That assumption is wrong and has cost people their homes.

    Creosote also chokes airflow. Restricted airflow due to creosote forces fireplaces to burn inefficiently, leading to increased fuel use and more creosote buildup. The cycle accelerates: less draft means cooler flue temperatures, which means more condensation, which means faster creosote accumulation.

    • Stage 1 creosote: Flaky, gray or black soot. Easiest to remove with standard brushing.
    • Stage 2 creosote: Tar-like, crunchy deposits. Requires professional rotary tools.
    • Stage 3 creosote: Hardened, glazed coating. The most hazardous stage and the hardest to remove.

    Pro Tip: Burn only seasoned hardwood with a moisture content below 20%. Wet or green wood burns cooler and produces far more creosote per fire than properly dried wood.

    How often should you clean your chimney flue?

    Cleaning frequency depends directly on how often you use your fireplace. The NFPA 211 standard sets the baseline: annual inspection is mandatory regardless of use, with cleaning scheduled based on actual buildup. That inspection tells you whether cleaning is needed right now or can wait another season.

    Here is how to match your cleaning schedule to your usage pattern:

    1. Heavy use (3 or more fires per week): Schedule one to two professional cleanings per year. High-frequency burning accelerates creosote buildup faster than a single annual cleaning can address.
    2. Moderate use (one to two fires per week): One cleaning per year, ideally timed with your annual inspection, keeps the flue safe and clear.
    3. Light use (a few fires per season): Cleaning every one to two years is generally sufficient, provided your annual inspection confirms buildup stays below the 1/8-inch threshold.
    4. Gas fireplaces: Gas burns cleaner and produces no creosote, but gas fireplaces still require annual inspections to check for blockages from animal nests and mineral deposits that can cause carbon monoxide backflow.

    Timing your cleaning strategically also saves money. Booking a chimney sweep in late spring or early summer allows easier scheduling and faster cleaning because creosote is fresher and easier to remove. Summer bookings also leave time for any needed masonry repairs before the heating season starts in fall.

    Pro Tip: Call your chimney sweep in may or june, not october. Demand spikes sharply in fall, wait times grow, and prices often rise. Scheduling early costs less and gets you better availability.

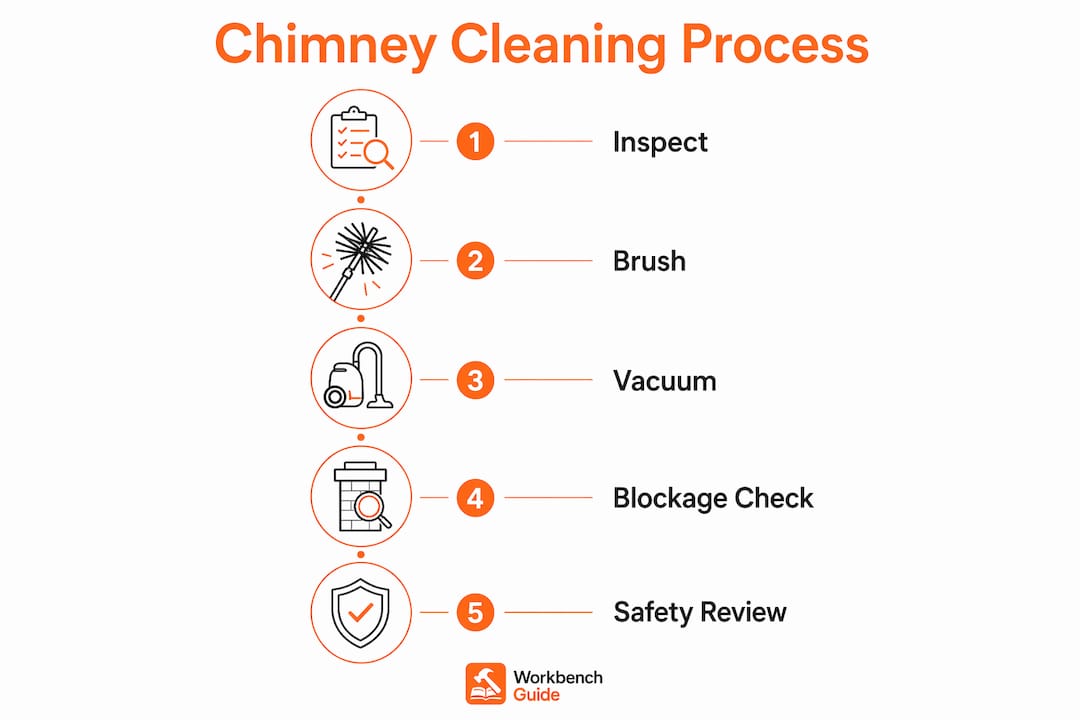
    Infographic illustrating chimney cleaning steps

    What are the health and safety benefits of regular flue cleaning?

    Regular chimney cleaning protects your home on multiple fronts, not just from fire. Each benefit below addresses a real, documented risk that a dirty flue creates.

    “Annual chimney inspection is a critical, low-cost home safety measure that prevents expensive repairs and protects against deadly carbon monoxide poisoning. Early detection avoids thousands in repairs and protects household health.” — Archer Chimneys

    Fire prevention is the most direct benefit. Removing creosote eliminates the fuel source for chimney fires, which can spread to the roof and attic within minutes. A chimney fire is not a contained event. It is a structural emergency.

    Carbon monoxide protection comes from keeping the flue clear of blockages. When smoke and combustion gases cannot exit freely, they back-draft into your living space. Carbon monoxide is colorless and odorless. By the time a detector sounds, exposure may already be dangerous.

    Blockage removal addresses a hazard most homeowners overlook entirely. Birds, squirrels, and raccoons regularly build nests inside unused chimneys. Leaves and debris accumulate at the top. A single nest can completely block airflow and force carbon monoxide back into the home.

    Energy efficiency improves measurably when the flue is clean. A clear flue draws air properly, which feeds the fire with enough oxygen to burn hot and complete. A hot, complete burn produces less creosote and extracts more heat from each log.

    Early structural detection is a benefit that pays for the cleaning cost many times over. A professional sweep inspects the flue liner, mortar joints, and firebox during every visit. Chimneys deteriorate slowly from thermal cycling and moisture exposure. Catching a cracked liner or spalling mortar early costs a fraction of what full reconstruction requires.

    How is chimney flue cleaning performed?

    Professional chimney cleaning follows a defined sequence that DIY methods rarely replicate fully. Understanding the process helps you evaluate the quality of service you receive.

    The professional cleaning process

    A certified sweep begins with a visual inspection of the firebox, damper, smoke chamber, and flue liner. This step identifies structural problems before brushing begins. The sweep then inserts specialized rotary or hand brushes from the top of the chimney, working downward to dislodge creosote and debris. A HEPA-rated vacuum runs simultaneously from the firebox opening to capture falling material and prevent soot from spreading through your home. The job ends with a final safety report documenting the flue condition and any repairs needed.

    Professional chimney cleaning involves inspection, brushing with specialized tools, HEPA vacuuming, and a final safety report to safely and thoroughly clean the flue. That combination of steps is what separates a professional service from a basic brush-and-go job.

    DIY vs. professional cleaning

    Factor DIY cleaning Professional service
    Creosote removal Partial; misses Stage 2 and 3 deposits Complete; uses rotary tools for all stages
    Structural inspection Not performed Full liner and masonry inspection included
    Health risk High; soot exposure without proper equipment Low; HEPA vacuum and protective gear used
    Liner crack detection Not possible without camera Camera inspection available
    Cost Low upfront; higher risk of missed hazards $100–$350 per cleaning

    The CSIA recommends hiring a certified chimney sweep for annual cleaning. Certification requires training in flue inspection, hazard identification, and safe cleaning practices. A certified sweep carries liability insurance and follows documented safety protocols. DIY brushing can remove light Stage 1 deposits, but it cannot detect a cracked liner, a failing damper, or Stage 3 glazed creosote that requires chemical treatment before mechanical removal.

    Pro Tip: Ask your sweep for a written report after every visit. A good report lists the flue condition, creosote stage found, any structural concerns, and the recommended next service date. That document protects you if an insurance claim ever arises.

    Key Takeaways

    Regular chimney flue cleaning prevents fires, blocks carbon monoxide exposure, and extends the life of your chimney by removing creosote before it reaches dangerous levels.

    Point Details
    Creosote is the core hazard Buildup above 1/8 inch is highly combustible and requires professional removal.
    Annual inspection is mandatory NFPA 211 requires yearly inspection regardless of how often you use your fireplace.
    Cleaning frequency matches usage Heavy users need 1–2 cleanings per year; light users can clean every 1–2 years.
    Gas fireplaces need inspection too Annual checks catch blockages from nests and debris that cause carbon monoxide risks.
    Schedule in late spring Off-peak booking saves money and leaves time for repairs before heating season.

    What I’ve learned from years of watching homeowners skip this task

    Most homeowners who skip chimney cleaning are not careless. They are just waiting for a sign that something is wrong. That instinct works fine for a leaky faucet or a squeaky door. It fails completely with a chimney flue.

    Creosote builds silently. There is no warning smell, no visible smoke inside the house, no obvious signal until a fire starts inside the flue itself. I have seen homeowners who used their fireplace twice a week for three winters without a single cleaning, genuinely convinced their chimney was fine because nothing had gone wrong yet. The inspection revealed Stage 2 deposits throughout the upper flue. They were one hot fire away from a serious incident.

    The other mistake I see regularly is assuming that a rarely used fireplace does not need attention. A fireplace used four times last winter still needs an annual inspection. Animal nests, moisture damage, and mortar deterioration happen whether you light a fire or not. The chimney safety benefits extend well beyond creosote removal.

    My practical advice: burn only seasoned hardwood, keep your fires hot rather than smoldering, and schedule your sweep for may or june every year without exception. Those three habits reduce creosote formation, catch problems early, and keep your cleaning costs predictable. Chimney care is not complicated. It just requires consistency.

    — Sean

    Workbenchguide keeps your chimney maintenance on schedule

    Chimney flue cleaning is one of those tasks that is easy to plan and easy to forget. Workbenchguide solves that problem with structured home maintenance checklists that include chimney inspection reminders, seasonal task schedules, and step-by-step guides for homeowners who want to stay ahead of repairs. You get reminders before the fall heating season, guidance on what to ask your sweep, and a complete record of every maintenance task completed. Whether you handle chimney prep yourself or hire a certified professional, Workbenchguide keeps the schedule clear and the guesswork out of home upkeep.

    FAQ

    Why is cleaning the chimney flue necessary every year?

    Annual cleaning removes creosote buildup and blockages that cause chimney fires and carbon monoxide exposure. NFPA 211 requires at least one inspection per year, with cleaning based on actual buildup levels.

    What happens if you never clean your chimney flue?

    Creosote accumulates until it reaches the combustion threshold, at which point a single fire can ignite the flue lining and spread flames to your roof. Blockages from nests and debris also force toxic gases back into your living space.

    How much does chimney flue cleaning cost?

    Professional chimney cleaning typically costs between $100 and $350 per service. The exact price depends on flue length, creosote stage, and whether repairs are needed.

    Can you clean a chimney flue yourself?

    Basic Stage 1 soot removal is possible with chimney brushes, but DIY cleaning cannot detect cracked liners, Stage 2 or 3 creosote, or structural damage. The CSIA recommends hiring a certified sweep for safe, thorough results.

    Do gas fireplaces need chimney cleaning?

    Gas fireplaces produce no creosote but still require annual inspections. Animal nests and mineral deposits can block the flue and create carbon monoxide risks even without wood-burning use.

  • What Is Duct Cleaning? A Homeowner’s Guide

    What Is Duct Cleaning? A Homeowner’s Guide

    Duct cleaning is the professional removal of dust, debris, mold, and contaminants from the air ducts and HVAC components that circulate air throughout your home. The industry term for this service is “source removal cleaning,” which means physically extracting contaminants rather than simply blowing them around. The EPA notes that indoor air can be 2–5 times more polluted than outdoor air, and your HVAC system circulates that air 5–7 times every day. That scale makes your duct system worth understanding, even if cleaning it is not always necessary.

    What is duct cleaning and what does it actually involve?

    Duct cleaning covers every component your HVAC system uses to move air: supply ducts, return ducts, registers, grilles, diffusers, heat exchangers, cooling coils, drain pans, fan motors, and the air handler itself. Cleaning only the visible duct runs without addressing these components is not true source removal cleaning. A thorough job treats the entire system as one unit.

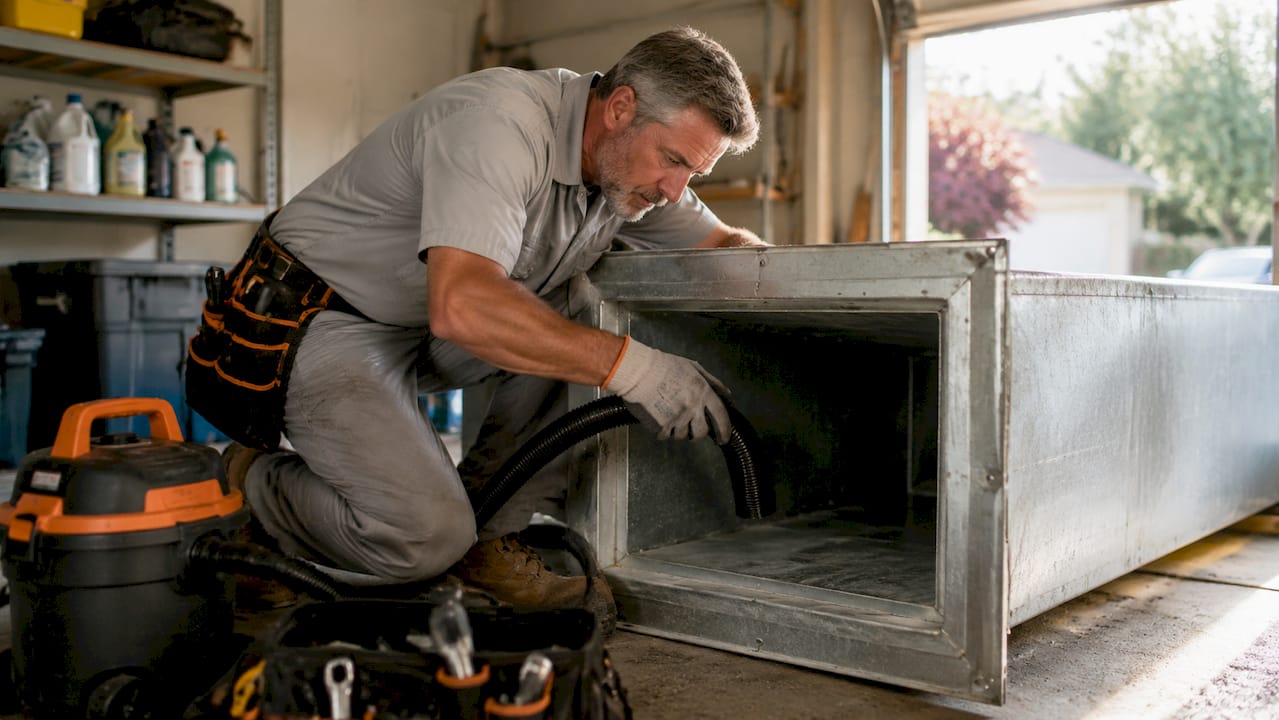
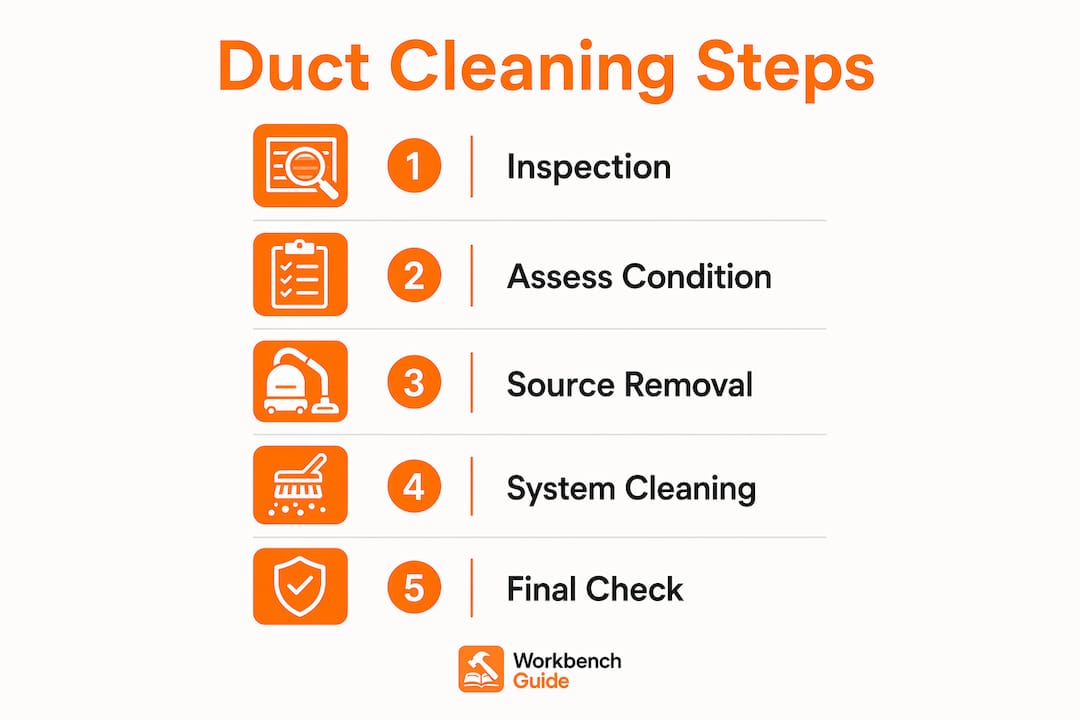
    The professional duct cleaning process typically takes 3–5 hours and follows a structured sequence:

    1. Initial inspection. A technician inspects accessible duct sections and HVAC components, often using a camera or borescope to document existing conditions before any work begins.
    2. Negative pressure setup. A HEPA-filtered vacuum system connects to the main trunk line and creates negative air pressure inside the duct system. This pulls loosened debris toward the vacuum rather than into your living space.
    3. Mechanical agitation. Rotary brushes, air whips, and compressed air tools dislodge dust and debris from duct walls. This step is what separates a real cleaning from a basic vacuuming pass.
    4. Component cleaning. Technicians clean the evaporator coils, blower fan, drain pan, and air handler. Skipping these components leaves the biggest sources of contamination untouched.
    5. Final check. Registers and grilles are cleaned and reinstalled. A post-cleaning inspection confirms debris has been removed.

    Pro Tip: Ask the technician to show you camera footage of the ducts before and after the job. Any reputable service will have this equipment and will not hesitate to use it.

    When is duct cleaning actually necessary?

    Hands showing duct cleaning before and after images on tablet

    The EPA does not recommend routine duct cleaning on a fixed schedule. No scientific evidence supports the idea that regular cleaning prevents health problems in homes without specific contamination issues. That is a significant finding. It means most marketing claims about annual or biannual duct cleaning are not backed by science.

    Duct cleaning is clearly justified in these situations:

    • Visible mold growth inside ducts or on HVAC components
    • Pest or rodent infestation confirmed inside the duct system
    • Excessive dust discharge from registers that coats surfaces quickly after cleaning
    • Recent renovation or construction that pushed drywall dust, insulation fibers, or debris into the system
    • New home purchase where the duct history is unknown
    • Allergy or respiratory symptoms that worsen when the HVAC runs and have no other explanation

    Routine cleaning every 3–5 years is not supported by scientific evidence. Cleaning should be condition-based, triggered by one of the situations above rather than a calendar date. This matters because unnecessary cleaning costs money and, if done poorly, can make air quality worse.

    Air filters are the most effective daily defense against indoor air pollution. Experts confirm that proper filter maintenance is roughly 10 times more important than duct cleaning for day-to-day air quality. Replacing your furnace filter on schedule does more for the air you breathe than a duct cleaning service in most homes. Learn more about filter replacement costs and why skipping it carries real health risks.

    Infographic illustrating steps of duct cleaning process

    How does duct cleaning compare to other HVAC maintenance?

    Duct cleaning is one tool in a larger maintenance picture. Understanding where it fits helps you spend money where it actually makes a difference.

    Proper duct sealing reduces air loss by 20–30%, which delivers more energy savings than duct cleaning alone. That means a leaky duct system costs you money every month, and sealing it pays back faster than cleaning it. Cleaning a sealed, efficient system is a reasonable next step. Cleaning a leaky one first is putting the cart before the horse.

    The table below compares the most common HVAC maintenance actions by their impact on cost, efficiency, and air quality.

    Maintenance action Primary benefit Frequency Relative cost
    Filter replacement Daily air quality Every 1–3 months Low
    Duct sealing Energy efficiency Once, as needed Medium
    Coil and fan cleaning System efficiency Every 1–2 years Medium
    Full duct cleaning Contaminant removal Condition-based Medium to high
    HVAC tune-up Overall performance Annually Low to medium

    Cleaning the coils and fan motor delivers the biggest efficiency gains within the HVAC system itself. Cleaning critical HVAC components like coils and fan motors improves system efficiency far more than cleaning ductwork alone. This is why a full system cleaning, not just a duct pass, is worth the investment when you do decide to hire a service.

    Pro Tip: Schedule coil cleaning and filter replacement together once a year. That single habit does more for your HVAC’s lifespan and your air quality than any other maintenance combination.

    For a full picture of how HVAC efficiency is measured and maintained, the Workbenchguide guide on the topic breaks it down clearly for homeowners.

    How to choose a qualified duct cleaning service

    The duct cleaning industry has a well-documented problem with low-quality providers. A rushed job can leave your ducts dirtier than before. A cleaning under 90 minutes almost always fails to remove deeply embedded dust and risks resuspending contaminants into your home’s air. That is not a minor issue. It means a bad cleaning actively harms your indoor air quality.

    Watch for these red flags when evaluating a service:

    • Quotes under $100 for a whole-home cleaning
    • No mention of negative pressure or HEPA vacuum equipment
    • Technicians who complete the job in under 90 minutes
    • Pressure to add chemical biocides or sealants as standard treatment
    • No camera inspection offered before or after the job

    A legitimate service uses vacuum systems generating over 3,000 CFM of negative pressure to pull debris out of the system effectively. Anything less leaves contamination behind. The vacuum must exhaust to the outside, not into your home.

    On chemical treatments: the EPA recommends extreme caution with biocides and sealants inside ducts. These products are not fully researched for long-term safety, and their use should be limited to specific cases after physical cleaning is complete. Decline any service that pushes chemical treatment as a routine add-on.

    Request before-and-after visual proof of the duct interior, either video or photos from a camera or borescope. This is the only reliable way to confirm the job was done. A technician who refuses this request is telling you something important about the quality of their work.

    Pro Tip: Look for technicians certified by the National Air Duct Cleaners Association (NADCA). Certification requires training in source removal methods and proper equipment standards.

    Key takeaways

    Duct cleaning delivers real value only when done correctly, under the right conditions, using source removal methods with HEPA-filtered negative pressure equipment.

    Point Details
    Definition matters Duct cleaning covers the full HVAC system, not just the visible duct runs.
    Condition-based only Clean ducts when mold, pests, or excessive dust are confirmed, not on a fixed schedule.
    Filters come first Replacing your air filter regularly does more for daily air quality than most duct cleanings.
    Quality over frequency A rushed cleaning under 90 minutes can worsen air quality by resuspending debris.
    Verify the results Always request before-and-after camera footage to confirm the job was effective.

    What I’ve learned about duct cleaning after years of home maintenance advice

    Most homeowners I talk to fall into one of two camps. Either they have never thought about their ducts at all, or they have been scared into booking an annual cleaning by a company with a $99 special. Both positions miss the point.

    The honest truth is that your air filter is doing the heavy lifting every single day. If you are changing it on schedule and your HVAC is running well, your ducts are probably fine. The cases where duct cleaning genuinely matters are specific: visible mold, confirmed pests, post-renovation debris, or a home with unknown history. Outside of those situations, a good filter and annual coil cleaning will serve you better.

    What I find most frustrating is the number of “quick clean” services that charge $150, spend 45 minutes in the house, and leave without ever creating proper negative pressure. That is not cleaning. That is theater. And it can actually make things worse by disturbing settled dust without capturing it. If you are going to spend money on this, spend it on a service that brings the right equipment and takes the time to do it properly.

    The source removal philosophy now guiding the HVAC industry is the right framework. Fix the source of contamination, maintain your filters, seal your ducts if they leak, and clean the whole system only when conditions actually call for it. That approach protects both your air quality and your wallet.

    — Sean

    Duct cleaning and your home maintenance plan

    Duct cleaning fits into a broader picture of keeping your home running well and avoiding expensive repairs. Workbenchguide makes it easier to stay on top of every maintenance task, from HVAC filter reminders to seasonal checklists, so nothing gets missed. The home maintenance checklist on Workbenchguide covers HVAC care alongside every other system in your home, with clear guidance on what to do and when. Preventive maintenance costs a fraction of what emergency repairs run, and having a structured plan is the difference between catching a problem early and replacing a furnace. Workbenchguide also offers step-by-step HVAC maintenance guides built specifically for homeowners who want to stay ahead of issues without needing a contractor for every task.

    FAQ

    What is duct cleaning in simple terms?

    Duct cleaning is the professional removal of dust, debris, and contaminants from your home’s air ducts and HVAC components using specialized vacuum and agitation equipment. The goal is source removal, meaning contaminants are physically extracted rather than redistributed.

    How often should air ducts be cleaned?

    Duct cleaning should be condition-based, not scheduled. The EPA finds no scientific evidence supporting routine cleaning; clean only when mold, pests, or excessive dust buildup are confirmed.

    How long does a professional duct cleaning take?

    A thorough professional duct cleaning takes 3–5 hours. Any service completed in under 90 minutes is unlikely to remove deeply embedded debris and may worsen air quality.

    Does duct cleaning actually improve air quality?

    Duct cleaning can improve air quality when genuine contamination exists, but air filter replacement has a far greater impact on daily indoor air quality for most homes. Poorly done cleaning can make air quality worse by resuspending settled dust.

    What should I ask a duct cleaning company before hiring them?

    Ask whether they use HEPA-filtered vacuum systems generating over 3,000 CFM of negative pressure, and request before-and-after camera footage of the duct interior. Decline any company that cannot answer both questions clearly.

  • Top 4 HomeManager.io Alternatives for 2026

    Top 4 HomeManager.io Alternatives for 2026

    Finding home management software that combines home upkeep, records, project tracking, and transparent pricing is more difficult than it should be. Several platforms hide pricing details, limit features to single properties, or require workarounds for mobile or integration needs. This article compares price, feature access, and app support across four alternatives so homeowners and property managers can pick the right fit without extra research.

    Table of Contents

    WorkbenchGuide

    https://workbenchguide.com

    At a Glance

    Plans start at $7/month and scale up to $99/month for large property management companies. This pricing makes the service accessible to a single homeowner and to professional managers. The product combines maintenance reminders, inspection checklists, and contractor written guides into one property system.

    Core Features

    Guided DIY maintenance and repair instructions are written by professionals and presented as clear, step by step procedures that match common household tasks. Customizable maintenance schedules support recurring tasks and link to routine inspection checklists that preserve inspection history. Task management stores notes and photos, and organization tools keep warranties, property records, and key details grouped by property.

    Key Differentiator

    WorkbenchGuide was developed from real world contractor experience, and that practical background shapes the content and workflows. The guides read like instructions a licensed contractor would give on site. That origin makes the guidance specific to real repairs rather than abstract maintenance lists.

    Pros

    The product makes scheduled upkeep easier by tying maintenance schedules to reminders and inspection records, so tasks do not disappear from view. Its inspection checklists include history tracking, which helps document recurring issues and verify completed work. The task management area accepts photos and notes, which speeds handoffs during tenant turnovers and creates a usable repair history for each property.

    Cons

    • Requires active user engagement to realize benefits; passive setup without regular use limits the value you get.

    Who It’s For

    Homeowners who want to protect a single property with a clear maintenance plan will find the tool practical. Landlords can use it to document repairs across rental units and speed tenant turnover. Property managers maintaining multiple properties will use the stored histories and checklists to coordinate vendors and track recurring tasks.

    Unique Value Proposition

    The platform pairs contractor written instructions with documented maintenance histories and automated reminders. That pairing turns tactical repair steps into an auditable workflow you can hand to a contractor or a tenant. For property managers, this reduces guesswork during inspections and creates a chronological maintenance record for each asset.

    Real World Use Case

    A property manager schedules seasonal inspections across a portfolio and assigns tasks with photos and notes. Technicians upload repair photos and the manager records completion dates in the inspection history. The result is a clear maintenance trail that simplifies tenant move outs and supports faster repairs.

    Pricing

    Pricing varies by plan. Plans start at $7/month for a single homeowner and rise to $99/month for large property management companies.

    Website: https://workbenchguide.com

    HomeZada

    https://homezada.com

    At a Glance

    HomeZada offers co branded platforms for real estate, mortgage, insurance, and property service providers alongside homeowner tools. The vendor highlights AI driven insights and a visual design AI for remodeling visualization. The product also ties inventory, maintenance, project planning, and financial tracking into a single homeowner workflow.

    Core Features

    HomeZada centralizes home inventory with photos and document storage and pairs that with maintenance scheduling and automated reminders. The platform adds homeowner AI for personalized recommendations and a visual design AI to preview remodel ideas while keeping projects and budgets organized. Multi property management and financial tracking link everyday tasks to long term value planning.

    Key Differentiator

    HomeZada mixes homeowner AI with co branded professional portals so homeowners and service providers share a common set of records and workflows. That mix positions it less like a simple task tracker and more like a single place for record keeping, client handoff, and project planning. Professionals can use the same platform to deliver branded services to clients.

    Pros

    Users report the product is easy to set up and use and the interface keeps inventory, maintenance, and budgets in one place. The combination of inventory with photo and document storage helps when preparing insurance claims or compiling resale records. The AI driven recommendations and the visual design preview reduce guesswork when planning remodels and translate plans into budget items.

    Cons

    • Pricing is not clearly listed on the website. This makes budget planning harder before signup.
    • The site gives limited detail about integrations with third party home systems or apps. You may need additional tools to connect smart devices.
    • The product description does not state whether a mobile app or offline capabilities exist. That gap affects users who need field access.

    When It May Not Fit

    If you need transparent pricing before evaluating a platform, this product may frustrate you. If your setup depends on direct smart home integrations, this may require extra connectors or workarounds. If field access via a mobile app or offline use is critical, pick a tool that lists those features explicitly.

    Who It’s For

    Homeowners who want a single system to track inventory, maintenance, projects, and home finances will find this approach useful. Property professionals who want co branded portals for clients can use the platform to share records and project plans. Investors managing multiple properties can also benefit from the multi property tracking capabilities.

    Real World Use Case

    A homeowner inventories possessions with photos and important documents, then links each item to maintenance dates and warranty papers. The homeowner uses the visual design AI to mock up a kitchen remodel and adds cost estimates to the project budget. When an insurance claim is needed the organized records and photos speed the process.

    Pricing

    Pricing is not specified on the website. The vendor mentions promotional discount codes, so costs appear to come from subscription plans sold through the site or partners. Expect to contact sales for exact tiers and trial options.

    Website: https://homezada.com

    Homer

    https://homer.co

    At a Glance

    Generates accurate floor plans via phone scanning. The app acts as a digital home binder that stores manuals, warranties, receipts, and valuations for each property. It pairs automated document recognition with proactive reminders for maintenance and renovation tasks.

    Core Features

    Homer lets you store and organize manuals, warranties, receipts, and other home documents in one place while tracking inventory, expenses, and home valuations. The app creates and manages task lists and reminders, and it can generate floor plans from phone scans. An AI powered Helper Bot assists with tips, information retrieval, and basic automation.

    Key Differentiator

    Homer centers on AI powered automatic organization that interprets documents and ties them to the right home and room. That focus reduces manual filing and speeds up retrieval for renovation projects, warranty claims, and handover packets for future owners.

    Pros

    Homer reports high user satisfaction and ratings in 2025. The app combines a broad set of homeowner features with AI assistance and automatic recognition to cut the time you spend documenting repairs. Secure, cloud based storage with encryption protects uploaded documents, and the app supports multiple languages on iOS and Android. The built in floor plan scanning and the Helper Bot are useful when you need faster documentation for a remodel.

    Cons

    • Limited to single home and household use. The app is not designed for managing large rental portfolios or dozens of units.

    • Premium features require a subscription or one time purchase. Advanced tools are behind paywalls.

    • Extensive features can feel complex at first. New users may need a few sessions to find a comfortable workflow.

    When It May Not Fit

    If you manage scores of rental units or operate as a commercial property manager, Homer will feel narrow. The app depends on your phone camera for scanning and photo recognition, so older devices will reduce accuracy. Teams that need advanced multi user access and bulk property reporting will find the feature set limited.

    Who It’s For

    Homeowners who want a single, digital place for manuals, warranties, receipts, and maintenance schedules will get the most from Homer. People planning renovations benefit from the floor plan scans and the task reminders. Owners who prefer mobile first workflows and AI assisted search will find the app aligns with their habits.

    Real World Use Case

    A homeowner uses Homer to collect contractor invoices, store warranty PDFs, and set recurring reminders for HVAC and gutter maintenance. The homeowner scans rooms with a phone to produce a floor plan for contractors. The Helper Bot then pulls the right manuals when a repair is scheduled.

    Pricing

    Homer is free to use with core features available at no cost. Premium features are offered via subscription or a one time purchase for specific upgrades. Exact tiers and pricing are available on the vendor site.

    Website: https://homer.co

    HomeLedger

    https://homeledger.app

    At a Glance

    An on-board AI assistant named Joe gives instant answers to inspection and maintenance questions. The system ties invoicing and payments directly to work orders, so records and billing stay linked. HomeLedger also supports multiple properties and teams, which helps firms keep consistent history across listings.

    Core Features

    Standardized inspection workflows combine checklists, photos, and notes into a single record that teams can reuse. Invoicing and payments management connect directly to work orders while maintenance task tracking handles recurring items across multiple properties. The platform stores warranties and service history and includes secure messaging for team and client communication in app or in exported reports.

    Key Differentiator

    HomeLedger centers its design on a home’s data, using that structure to automate task organization and reporting. The built in AI assistant applies that data to answer questions and pull up history on demand. That approach shifts work from manual file hunting to query driven retrieval.

    Pros

    HomeLedger organizes service history and warranties so you can find past invoices and guarantees quickly. It supports multiple properties and teams, which makes handoffs between technicians and property managers cleaner. Invoicing tied to work orders reduces reconciliation time and preserves an audit trail. Secure messaging keeps client conversations inside the platform instead of scattered across email and text. The AI assistant speeds common lookups and helps nontechnical staff find the right record.

    Cons

    • Some third party reviews report the interface feels complex at first, which raises the learning curve.
    • The feature set is mainly digital, so less tech savvy homeowners may need time to adapt.
    • Pricing is billed per seat, which may be costly for very small operations.

    When It May Not Fit

    If you prefer paper records or simple spreadsheets, HomeLedger may add unnecessary complexity. Small solo operators with tight budgets may find seat based billing expensive. Implementing standard workflows and importing property history requires setup time and process changes.

    Who It’s For

    Homeowners who want organized records, scheduled maintenance tracking, and searchable service history will benefit. Property managers and home service professionals who run inspections, assign technicians, and invoice clients will find the platform aligned to their workflows. Home watch operators who must produce regular reports will also get value from structured inspections and photo evidence.

    Real World Use Case

    A property management company uses HomeLedger to standardize its inspection checklist across sites and to attach photos to each reported issue. Technicians receive work orders with linked invoices and return history, which shortens follow up cycles. Clients get clear reports and a searchable archive of past repairs and warranties.

    Pricing

    Pricing is billed per seat for team members, and early adopter discounts are available. Detailed public pricing is not listed. Contact the vendor for current seat pricing and discount terms.

    Website: https://homeledger.app

    Comparison of alternatives

    When selecting a home management platform, factors such as the scale of property management, advanced features offered, and ease of use are. Each platform analyzed here excels in specific aspects, which makes them suitable for different user needs.

    Maintenance and guidance quality

    WorkbenchGuide provides contractor-grade DIY instructions for household maintenance and repair tasks, a feature making it distinctive. Its methodology, drawn from real-world contractor experience, ensures practical and guidelines for both everyday homemakers and property management professionals. Comparatively, HomeZada combines the homeowner’s view with AI-assisted remodeling visualization, straddling inventory and financial tracking.

    Scaling management needs

    When considering multi-property management, HomeLedger excels, offering inspection workflows and integrated invoicing, which directly connects maintenance activities with financial operations—a key benefit for property managers. On the other hand, Homer shines when consolidating warranties, receipts, and home-related documents, paired with mobile-first workflows and practical inventory utilities.

    Best fit

    • Single-property owners seeking detailed contractor-style guidance can benefit greatly from WorkbenchGuide.
    • Managers handling extensive multi-unit properties and requiring integrated financial management will find HomeLedger particularly useful.
    • Mobile-first users valuing digitized document organization alongside floor plan capabilities will prefer Homer.
    • DIY homeowners wanting a broad platform inclusive of home inventory and project tracking features might align with HomeZada.

    Our pick

    For those emphasizing practical contractor-quality repair and maintenance guidance, WorkbenchGuide uniquely delivers valuable step-by-step workflows tailored to real-world needs. While platforms like HomeLedger focus on scaling and billing, or Homer emphasizes mobile accessibility, single-property managers who value detailed maintenance plans will find WorkbenchGuide unbeatable.

    By comparing the offerings of key home management software solutions, users can identify the platform that best addresses their property maintenance and organizational needs.

    Product Key Highlight Unique Differentiator Pricing Limitation
    Workbenchguide Maintenance schedules with reminders Contractor-written repair instructions $7–$99/month Requires regular use for maximum value
    HomeZada Centralized inventory and AI recommendations Co-branded portals for professionals Price not published Limited detail on integrations and mobile capabilities
    Homer Digital home binder with AI support AI-powered document organization Free with paid premium features Limited to single-home use and may feel complex initially
    HomeLedger Integrated invoicing and maintenance tasks AI assistant for instant data retrieval Price not published Interface complexity and seat-based billing may increase costs

    Finding the Right Alternative for HomeManager.io Challenges

    Many homeowners and property managers face difficulty keeping up with maintenance schedules and documentation. The article highlights key concerns like the need for detailed, contractor-based repair instructions and clear maintenance histories. Workbenchguide answers those needs by offering step-by-step DIY guides, comprehensive inspection checklists, and smart maintenance reminders all in one platform. This makes it easier for homeowners and landlords to avoid costly repairs and keep organized with a trustworthy workflow.

    If your goal is to protect one or multiple properties with practical upkeep plans and expert advice, explore how Workbenchguide supports your tasks. Get started by visiting the site and try managing your home maintenance schedules and checklists with confidence today.

    FAQ

    How does Workbenchguide simplify property maintenance scheduling?

    Workbenchguide effectively simplifies property maintenance scheduling by linking maintenance schedules to automated reminders and inspection records. This integration ensures that tasks remain visible and organized, making it easier for homeowners or property managers to maintain their properties. Users can expect a streamlined approach to managing routine upkeep and staying on top of essential tasks.

    What is the difference between Workbenchguide and HomeZada?

    HomeZada excels in co-branded platforms for professionals, allowing real estate, mortgage, and insurance providers to offer a shared experience to clients. Workbenchguide, on the other hand, focuses specifically on guided DIY maintenance with practical contractor-written instructions directly correlating to real household tasks. Users looking for contractor-driven guidance may find Workbenchguide more beneficial for hands-on management of maintenance tasks.

    Which platform offers the best features for property documentation?

    HomeZada centralizes home inventory with photos and document storage, making it easier for users to prepare for insurance claims or resale. Workbenchguide also provides substantial documentation features, including maintenance histories and inspection checklists, but it specifically emphasizes guidance tailored to actual repair procedures. Users should choose based on whether they prioritize inventory management or detailed maintenance instructions.

    Can users rely on automated reminders with Workbenchguide for timely maintenance?

    Yes, users can rely on automated reminders offered by Workbenchguide to keep track of their maintenance schedules. This feature helps property owners avoid missing crucial tasks, facilitating timely upkeep of their homes. Users aiming for organized management of property maintenance will benefit from this functionality.

    What are the costs associated with Workbenchguide compared to its competitors?

    Workbenchguide’s pricing starts at $7 per month for individual homeowners, scaling to $99 per month for larger property management companies. While competitors like HomeZada do not list their pricing online clearly, this transparency in Workbenchguide’s pricing might be appealing for users seeking budget-friendly management solutions. Users should consider their property size and specific needs when evaluating costs.

  • Home Energy Savings Steps: Cut Bills in 2026

    Home Energy Savings Steps: Cut Bills in 2026

    Home energy savings steps are proven methods that reduce utility bills, improve comfort, and lower your home’s environmental footprint. The U.S. Department of Energy and the Environmental Protection Agency confirm that air sealing and insulation alone can cut heating and cooling costs by 10–15%. That single improvement pays for itself within a few seasons. Add smart thermostats, appliance upgrades, and behavioral changes, and the savings compound quickly. The home energy efficiency improvements covered here are ranked by impact, so you can act on the highest-return fixes first.

    What are the best home energy savings steps to start with?

    Air sealing is the highest-return starting point for most homeowners. Gaps and cracks let conditioned air escape constantly, forcing your heating and cooling system to work harder than it should. The most overlooked leak points are not windows and doors. They are utility penetrations, recessed lighting fixtures, and the spaces behind kitchen and bathroom cabinets.

    You can find leaks yourself with a few simple methods:

    • Draft feeling: Run your hand along baseboards, window frames, and outlet covers on a cold day. Any cool air movement signals a gap.
    • Smoke stick or incense test: Hold a lit incense stick near suspected leak points. Smoke that wavers or bends toward the wall confirms airflow.
    • Infrared thermometer: Point it at walls and ceilings to spot cold patches that indicate air infiltration.
    • Professional blower-door test: A contractor depressurizes your home and uses a fan to reveal every leak simultaneously. This is the most thorough method available.

    Once you find the leaks, the fix is straightforward. Use caulk for gaps around window and door frames. Apply spray foam for larger gaps around pipes and utility penetrations. Add weatherstripping to door edges and door sweeps to the base of exterior doors.

    Pro Tip: Prioritize the unsexy leaks. Gaps around pipes in your basement ceiling and behind recessed lights in your attic often waste more energy than a drafty window. Seal those first.

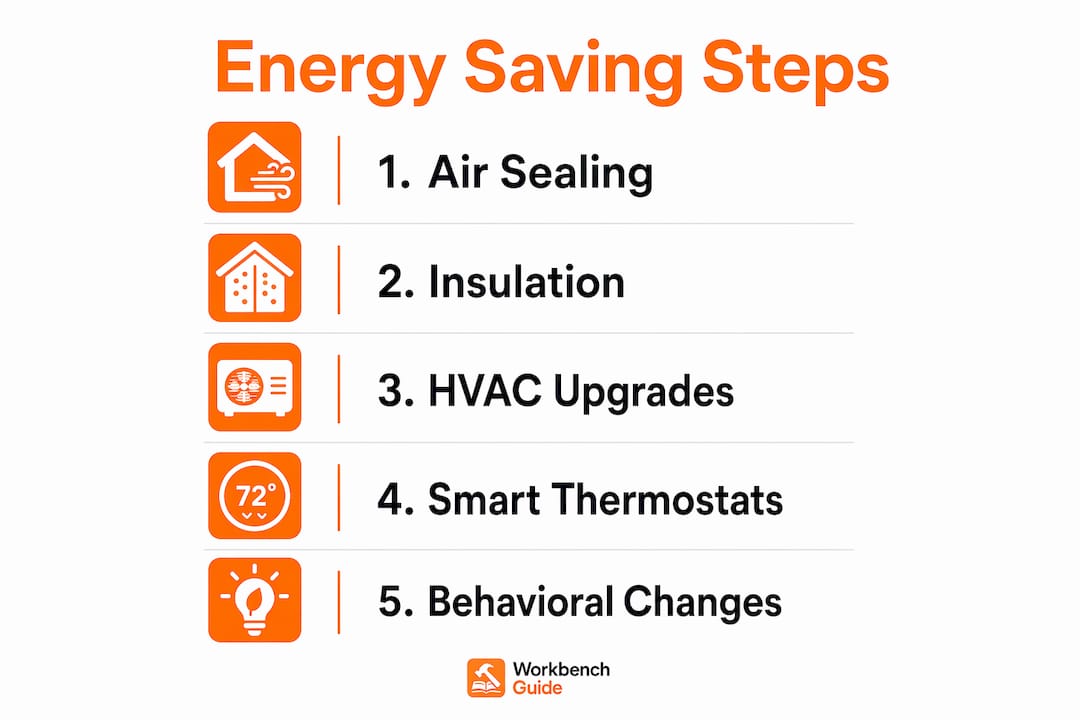
    Infographic listing home energy saving steps

    How does insulation affect your heating and cooling costs?

    Insulation keeps conditioned air inside your home by slowing heat transfer through walls, floors, and ceilings. Without adequate insulation, your HVAC system runs longer cycles and burns more fuel to maintain the same temperature. The attic is the single most important area to address because heat rises and escapes through the roof.

    The U.S. Department of Energy recommends attic insulation levels between R-38 and R-60 depending on your climate zone. Homes in colder northern states need the higher end of that range. Homes in the South can often get by with R-38. Check your current attic insulation depth. If you can see the floor joists, you do not have enough.

    Follow these steps to assess and upgrade your insulation:

    1. Run the touch test. On a cold day, press your hand flat against an interior wall. A cold or damp wall surface signals missing or settled insulation behind it.
    2. Check the attic floor. Measure insulation depth with a ruler. Anything below 10 inches likely falls short of current recommendations.
    3. Inspect the crawl space and basement rim joists. These areas are frequently uninsulated and account for significant heat loss in winter.
    4. Choose the right material. Blown-in cellulose or fiberglass works well for attics and hard-to-reach spaces. Batt insulation suits open wall cavities during a renovation.
    5. Add insulation in layers. For attics, lay new batts perpendicular to existing ones to cover gaps and eliminate thermal bridging.

    Improving home insulation delivers a compounding benefit. Better insulation reduces the load on your HVAC system, which extends equipment life and lowers repair costs over time.

    How do HVAC and water heater upgrades reduce home energy costs?

    Your heating and cooling system accounts for the largest share of your home’s energy use. Keeping it efficient requires both regular maintenance and strategic upgrades. Annual HVAC maintenance prevents unnoticed efficiency losses and extends equipment life. A tune-up includes cleaning coils, lubricating moving parts, and checking refrigerant levels. Skipping it for even one season can quietly raise your energy bills.

    Technician inspecting heat pump outside home

    Smart thermostats deliver measurable savings with minimal effort. Models with occupancy sensors or geofencing detect when you leave home and adjust the temperature automatically. Smart thermostat savings average around 8% on annual heating and cooling bills. That adds up to a meaningful amount over a full year, especially in climates with extreme winters or summers.

    Your water heater is another significant energy draw that most homeowners ignore. Lowering the water heater temperature from 140°F to 120°F cuts annual energy costs by 4–22% with no noticeable change in shower comfort. Wrapping an older tank with an insulating blanket and insulating the first few feet of hot water pipes further reduces standby heat loss.

    Key upgrades and maintenance actions to prioritize:

    • Schedule annual HVAC service every fall before heating season starts.
    • Replace HVAC filters every 1–3 months depending on household dust levels and pet hair.
    • Seal leaky ductwork with mastic sealant or metal tape. Leaky ducts can waste 20–30% of conditioned air before it reaches living spaces.
    • Set your water heater to 120°F and service it regularly to flush sediment and maintain efficiency.
    • Look for Energy Star certified equipment when replacing any major system.

    Pro Tip: Seal your ductwork before upgrading to a higher-efficiency HVAC unit. A new system pushing air through leaky ducts performs no better than the old one.

    What behavioral and appliance changes lower energy bills fast?

    Structural upgrades matter, but daily habits and appliance choices drive a significant portion of your monthly bill. LED bulbs use up to 90% less energy than incandescent bulbs and last years longer. Replacing every bulb in your home costs less than $100 and pays back within months.

    Electronics in standby mode are a hidden drain. Vampire energy from standby devices accounts for 5–10% of household energy use. That is a meaningful slice of your bill for devices that are not actively doing anything. Smart power strips cut power completely to idle devices and eliminate this waste more effectively than standard strips.

    Additional ways to save on energy through daily habits:

    • Thermostat setbacks: Setting your thermostat 7–10 degrees lower during sleep or when you leave home saves about 10% on heating and cooling costs. Target 68°F in winter and 78°F in summer when home.
    • Shorter showers and low-flow fixtures: Installing a low-flow showerhead reduces hot water use without sacrificing pressure. Cutting a 10-minute shower to 6 minutes trims water heating costs noticeably over a month.
    • Off-peak appliance use: Running dishwashers, washing machines, and dryers after 9 p.m. takes advantage of lower electricity rates in areas with time-of-use pricing.
    • Window management: Closing blinds on south-facing windows in summer blocks solar heat gain. Opening them in winter captures free passive solar warmth.
    • Appliance maintenance: Clean refrigerator coils twice a year and check door seals. A refrigerator with dirty coils uses more electricity to maintain temperature. Workbenchguide’s appliance maintenance guide walks through each major appliance step by step.

    How do you perform a DIY home energy audit?

    A DIY home energy audit is a structured walkthrough of your home to identify where energy is being wasted. You do not need special equipment to get started. A notepad, a flashlight, and your hands are enough for a first pass.

    Follow these steps:

    1. Check all draft points. Walk the perimeter of every exterior wall, window, and door. Note any spots where you feel air movement or see daylight around frames.
    2. Inspect your insulation. Use the touch test on interior walls and check the attic depth with a ruler.
    3. Evaluate your HVAC system. Check the filter condition, listen for unusual sounds, and note the age of the unit. Systems older than 15 years often run at significantly reduced efficiency.
    4. Audit your lighting. Count incandescent or halogen bulbs still in use. Each one is a candidate for an LED swap.
    5. Review your appliances. Check the age and Energy Star status of your refrigerator, dishwasher, and washing machine. Older appliances without Energy Star ratings use substantially more electricity.

    Pro Tip: Take photos during your audit and organize them by room. When you get quotes from contractors or buy materials, you will have a clear record of exactly what needs attention and where.

    A DIY audit identifies the obvious problems. A professional audit goes further. Certified energy auditors use blower-door tests and infrared cameras to find leaks and insulation gaps invisible to the naked eye. If your bills remain high after sealing and insulating, a professional audit is worth the cost. Workbenchguide’s home audit guide explains what to expect from both approaches.

    Key Takeaways

    The most effective approach to reducing home energy costs combines air sealing, insulation upgrades, system maintenance, and consistent behavioral habits applied in order of return on investment.

    Point Details
    Air sealing first Seal utility penetrations, recessed lights, and door frames before any other upgrade.
    Insulation pays long-term Attic insulation at R-38 to R-60 reduces HVAC load and extends equipment life.
    Smart thermostat savings Occupancy-based setbacks save around 8% on annual heating and cooling bills.
    Water heater adjustment Dropping temperature from 140°F to 120°F cuts water heating costs by 4–22%.
    Audit before spending A DIY or professional audit identifies the highest-return fixes before you invest.

    What I’ve learned after years of watching homeowners overspend on energy

    Most homeowners spend money on the visible upgrades and ignore the invisible ones. New windows get all the attention. Duct sealing and attic bypasses get none. The data tells a different story. A house with perfectly sealed ducts and R-50 attic insulation will outperform a house with brand-new triple-pane windows and a leaky attic every single time.

    The other mistake I see constantly is treating energy efficiency as a one-time project. You seal the gaps, add insulation, and consider it done. Then the HVAC filter goes unchanged for 18 months, the water heater sediment builds up, and the savings quietly erode. Energy efficiency is a maintenance practice, not a renovation. The homeowners who keep their bills low year after year are the ones who schedule seasonal checks the same way they schedule oil changes.

    Start with a DIY audit. Fix the air leaks. Check your insulation. Then build a maintenance schedule and stick to it. The small checks that prevent big repairs are the same ones that keep your energy bills predictable. That combination of upfront fixes and ongoing care is what actually moves the needle on your utility costs.

    — Sean

    Workbenchguide makes energy-efficient home care easier

    Keeping up with every maintenance task that affects your energy bills is hard to do from memory alone. Workbenchguide gives homeowners a structured system to stay on top of it. The platform includes step-by-step DIY guides for HVAC maintenance, insulation checks, and appliance care, plus seasonal reminders so nothing falls through the cracks. When a job calls for a professional, Workbenchguide connects you with expert advice to make the right call. Start with the home maintenance checklist to build a year-round schedule that covers every system in your home and keeps your energy costs under control.

    FAQ

    How much can air sealing and insulation save on energy bills?

    Air sealing and insulation upgrades reduce heating and cooling costs by 10–15%, according to the U.S. Department of Energy and the Environmental Protection Agency. The exact savings depend on your climate and how leaky your home currently is.

    What temperature should I set my thermostat to save energy?

    Set your thermostat to 68°F in winter and 78°F in summer when you are home. Dropping or raising it 7–10 degrees during sleep or absence cuts heating and cooling costs by about 10%.

    What is vampire energy and how do I stop it?

    Vampire energy is the electricity electronics draw while in standby mode, accounting for 5–10% of household energy use. Smart power strips that cut power completely to idle devices eliminate this waste more effectively than standard power strips.

    When should I hire a professional energy auditor?

    Hire a professional auditor when your bills remain high after completing basic air sealing and insulation improvements. Professionals use blower-door tests and infrared cameras to find hidden leaks and insulation gaps that DIY methods miss.

    Does lowering my water heater temperature actually save money?

    Lowering your water heater from 140°F to 120°F reduces annual energy costs by 4–22% with no meaningful loss in comfort. It also reduces the risk of scalding and slows mineral buildup inside the tank.

  • Step by Step Home Winterization: Your 2026 Guide

    Step by Step Home Winterization: Your 2026 Guide

    Step by step home winterization is the process of preparing your home to withstand freezing temperatures by sealing drafts, insulating pipes, servicing your heating system, and securing the exterior before cold weather arrives. Done right, it prevents burst pipes, ice dams, and heating failures that cost thousands to repair. This guide covers every stage of the process, from tools and materials to safety checks, so you can protect your home and your budget this winter. Whether you own or rent, these steps apply directly to you.

    What tools and materials do you need for step by step home winterization?

    Gathering your supplies before you start saves time and prevents mid-project trips to the hardware store. A complete home winterization checklist starts with tools you likely already own and a short list of materials to buy.

    Core tools you need:

    • Caulking gun and exterior-grade caulk (silicone or latex)
    • Weatherstripping (foam, V-strip, or door sweep styles)
    • Ladder for gutter and roof access
    • Utility knife and measuring tape
    • Pipe wrench and bucket for outdoor faucet work

    Materials to stock up on:

    • Foam pipe insulation sleeves (sized to your pipe diameter)
    • Heat tape for pipes in unheated spaces
    • Furnace filters (look for MERV 8–11 ratings for residential use)
    • Weatherproofing window film kits
    • Insulated faucet covers for outdoor spigots
    Tool or Material Primary Use
    Caulking gun and caulk Seal gaps around windows, doors, and foundation
    Weatherstripping Block drafts at door and window frames
    Foam pipe insulation Protect exposed pipes in crawl spaces and garages
    Heat tape Prevent freezing in pipes with no other insulation option
    MERV 8–11 furnace filter Maintain HVAC airflow and heating efficiency
    Insulated faucet cover Protect outdoor spigots from freezing

    Pro Tip: Measure your window and door frames before shopping for weatherstripping. Buying in bulk for a standard size saves money and avoids mismatched strips that leave gaps.

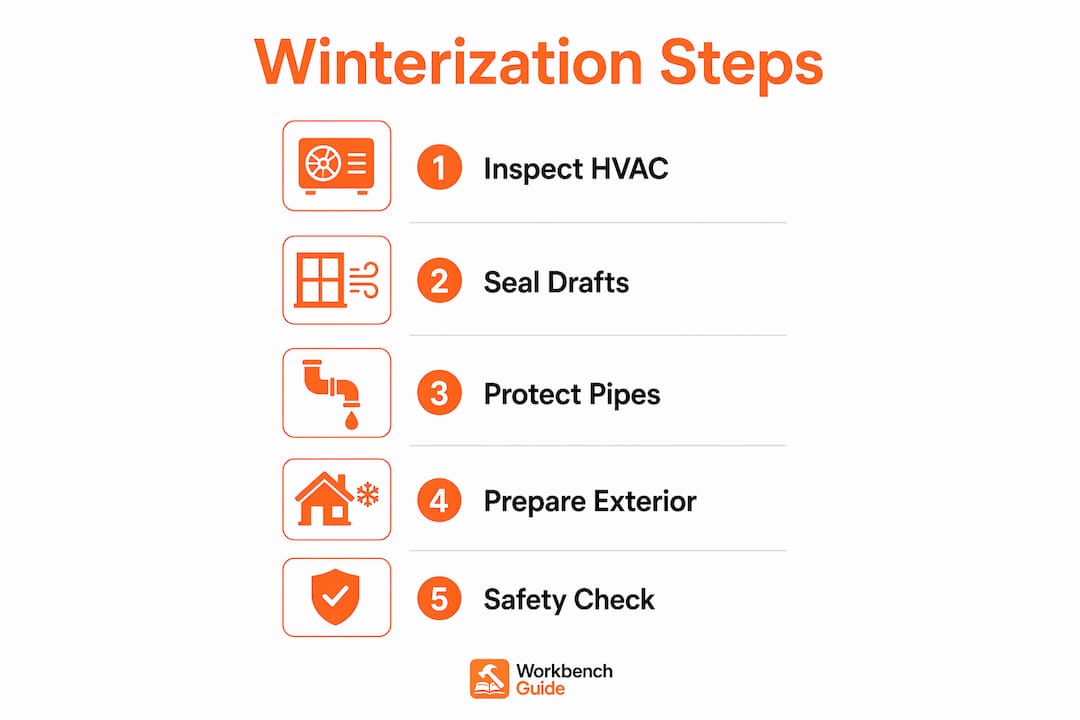
    Infographic illustrating step by step home winterization process

    How do you winterize heating and HVAC systems step by step?

    Your heating system is the most critical piece of your winter prep. A failure in january or february is not just uncomfortable. It can freeze your pipes within hours.

    1. Schedule a professional HVAC inspection. A professional HVAC inspection and tune-up costs an average of $350, and it catches problems before they become emergencies. Book in september or october, before technicians are fully booked.
    2. Test your heating system early. Turn on your furnace or heat pump before the first cold snap. Run it for at least 30 minutes and check every vent for airflow.
    3. Replace your furnace filter. Regular filter changes keep your system running efficiently and prevent cold spots. A clogged filter forces your furnace to work harder and shortens its lifespan.
    4. Reverse your ceiling fans. Clockwise fan rotation in winter pushes warm air that rises to the ceiling back down into the room. This simple switch reduces how hard your furnace works. Most fans have a small switch on the motor housing to change direction.
    5. Test smoke and carbon monoxide detectors. Heating systems that sit idle all summer can develop issues. Carbon monoxide leaks from furnaces are a serious winter risk. Test detectors and replace batteries before you need them.
    6. Check your thermostat settings. Set your thermostat no lower than 55°F if you leave the house for extended periods. Dropping below that risks pipe freezing even with insulation in place.

    Pro Tip: Book your annual HVAC service in late summer. Technicians are less busy, and you get faster scheduling and sometimes better pricing.

    A common mistake is skipping the HVAC inspection and only replacing the filter. Filters matter, but a cracked heat exchanger or a failing ignitor will not show up on a filter check. A professional catches those issues before they leave you without heat.

    What are the essential steps to protect plumbing from freezing and bursting?

    Hands installing foam insulation on basement pipes

    Pipe protection is the highest-stakes part of winterizing your home. Water expands about 9% when frozen, generating enough pressure to split copper and PVC pipes. That expansion is what causes burst pipes, and the water damage that follows can cost far more than the repair itself.

    Where to focus your pipe insulation efforts:

    • Pipes in unheated spaces: garages, crawl spaces, basements, and attics
    • Pipes along exterior walls where cold air penetrates
    • Any pipe within 6 inches of an exterior wall or uninsulated surface

    Foam pipe insulation sleeves are the easiest fix for most exposed pipes. They slip on without tools and cost very little per foot. For pipes in extremely cold spaces, heat tape provides active warmth and is controlled by a built-in thermostat.

    Insulation Method Best For Cost Level
    Foam pipe sleeves Crawl spaces, basements, garages Low
    Heat tape Extreme cold, unheated attics Medium
    Fiberglass wrap Long pipe runs needing extra protection Medium
    Cabinet doors left open Under-sink pipes on exterior walls Free

    Outdoor faucets and hose bibs need specific steps:

    • Shut off the dedicated indoor valve that feeds each outdoor faucet
    • Open the outdoor faucet to drain any remaining water
    • Disconnect and drain all garden hoses before the first freeze
    • Install insulated faucet covers over each outdoor spigot

    Closing the outdoor valve alone is not enough. If a hose stays connected, water trapped between the valve and the hose end can freeze and damage the pipe inside your wall. This is one of the most common and preventable winter plumbing failures.

    Pro Tip: If a pipe does freeze, open the faucet slightly to let water drip. That slow movement reduces pressure buildup. Thaw the pipe gently with a hair dryer, starting from the faucet end and working back. Never use an open flame.

    How can you winterize your home’s exterior to prevent damage and heat loss?

    The exterior of your home takes the hardest hit in winter. Drafts, ice dams, and water infiltration all start outside. A thorough exterior check is a non-negotiable part of any complete winterization plan.

    1. Seal drafts around windows and doors. Run your hand along window and door frames on a cold day. Any cold air you feel is energy leaving your home. Apply weatherstripping to door frames and caulk any gaps where the frame meets the wall. Replace cracked or missing caulk around window edges.
    2. Clean your gutters and downspouts. Clogged gutters cause roof and interior water damage by trapping water that backs up under shingles. In freezing temperatures, that trapped water becomes ice and forces shingles apart. Clean gutters in late fall after leaves have finished dropping. Check that downspouts direct water away from your foundation by at least 6 feet.
    3. Inspect your roof. Look for missing, cracked, or curling shingles. Check the flashing around chimneys and vents. A small gap in flashing lets water in, and freezing temperatures turn that small leak into a major one.
    4. Install insulated faucet covers. These foam covers fit over outdoor spigots and cost under $5 each. They add a meaningful layer of protection even after you have shut off the water supply.
    5. Check attic and crawl space insulation. The U.S. Department of Energy recommends R-38 to R-60 insulation for attics in most cold climates. Inadequate attic insulation is a leading cause of ice dams because heat escaping through the roof melts snow, which then refreezes at the cold eaves.

    Safety note: Use a stable ladder on level ground for gutter and roof work. Never lean a ladder against a gutter. Have a second person present when working at height. If your roof pitch is steep or your gutters are high, hire a professional.

    Pro Tip: Walk your home’s exterior with a notepad and photograph every gap, crack, or damaged area you find. That record helps you track repairs and supports any future insurance claim.

    What safety and emergency preparedness steps are critical when winterizing your home?

    Safety prep is the part of winterizing your home that most people skip until something goes wrong. These steps protect your household, not just your property.

    Safety checks to complete before winter:

    • Test smoke detectors and carbon monoxide detectors. Replace batteries and units older than 10 years.
    • Have your chimney inspected and cleaned if you use a fireplace or wood stove. Creosote buildup is a leading cause of house fires.
    • Check that your heating system’s exhaust vents are clear of debris, nests, and ice blockage.
    • Keep a fire extinguisher accessible near the furnace and fireplace.

    Emergency supplies to have on hand:

    • Flashlights and extra batteries
    • A battery-powered or hand-crank weather radio
    • At least three days of food and water for every household member
    • Blankets, warm clothing, and a first aid kit
    • Ice melt or sand for walkways

    Icy sidewalks and steps create real legal liability for homeowners. A slip-and-fall on your property can result in a lawsuit even when the ice formed overnight. Keep ice melt stocked before the season starts, not after the first storm.

    Thermostat management also matters for safety. If you travel during winter, do not set your thermostat below 55°F. Below that threshold, interior temperatures in unheated rooms and crawl spaces can drop low enough to freeze pipes even with insulation.

    Key takeaways

    Effective home winterization requires addressing heating, plumbing, exterior sealing, and safety in a specific sequence before cold weather arrives.

    Point Details
    Start with HVAC Schedule a professional inspection early; average cost is $350 and it prevents mid-winter failures.
    Insulate exposed pipes Use foam sleeves or heat tape on pipes in garages, crawl spaces, and exterior walls.
    Disconnect outdoor hoses Closing the outdoor valve alone is not enough; trapped water in connected hoses still freezes.
    Clean gutters before freezing Clogged gutters cause ice dams and roof damage; clear them after leaves fall.
    Document every step Photographed winterization records support insurance claims for frozen pipe damage.

    What I’ve learned from years of watching homeowners skip the obvious

    Most homeowners focus on the heating system and stop there. That is understandable. A cold house is immediately uncomfortable, so the furnace gets attention. But the calls that turn into expensive repairs almost always trace back to two things: gutters and outdoor hoses.

    Gutters feel like a chore with no payoff. You clean them, nothing dramatic happens, and you move on. But when they are blocked and temperatures drop, water backs up, freezes under shingles, and works its way into the attic or walls. By the time you see a stain on the ceiling, the damage is already done. The same logic applies to garden hoses. Leaving one connected to an outdoor spigot feels harmless. It is not.

    The other thing I tell every homeowner: document your winterization. Take photos of your pipe insulation, your furnace filter replacement, your sealed windows. Insurance companies can deny frozen pipe claims if you cannot show you took reasonable steps. That photo takes 10 seconds and could save you thousands.

    For renters, the scope is smaller but still real. You likely cannot insulate the crawl space or replace the furnace filter yourself. But you can disconnect your hoses, seal drafts around your windows with removable weatherstripping film, and tell your landlord in writing about any drafts or exposed pipes you find. That written notice protects you and creates a paper trail.

    The fall maintenance checklist approach works best when you treat winterization as a season-long habit rather than a single weekend project. Start in september. Finish before the first hard freeze. You will spend less money and sleep better in january.

    — Sean

    Workbenchguide makes winterization easier to manage

    Keeping track of every winterization task across plumbing, HVAC, exterior, and safety is a lot to hold in your head. Workbenchguide gives you a structured way to manage it all. The platform offers step-by-step DIY guides, seasonal maintenance reminders, and project checklists built specifically for homeowners and renters. You can track what you have done, schedule what is coming up, and get contractor help when a task is beyond DIY. Start with the home maintenance checklist to build a full winterization plan and stay ahead of costly repairs all year long.

    FAQ

    What is home winterization?

    Home winterization is the process of preparing a house for cold weather by insulating pipes, sealing drafts, servicing the heating system, and securing the exterior to prevent damage and energy loss.

    When should I start winterizing my home?

    Start in early fall, ideally september or october, before temperatures drop below freezing. Booking HVAC service early also gives you better scheduling availability.

    How do I prevent pipes from freezing?

    Insulate exposed pipes with foam sleeves or heat tape, disconnect outdoor hoses, shut off outdoor water valves, and keep your thermostat set no lower than 55°F when the home is unoccupied.

    Does home winterization affect my insurance coverage?

    Yes. Insurance claims for frozen pipe damage can be denied if you cannot document that reasonable winterization steps were completed. Photograph your work as you go.

    Can renters winterize their homes?

    Renters can seal window drafts with removable film, disconnect garden hoses, and notify landlords in writing about exposed pipes or drafts. Written notice creates a record and prompts landlords to act.

  • Why Check Circuit Breakers: A Homeowner’s Safety Guide

    Why Check Circuit Breakers: A Homeowner’s Safety Guide

    Circuit breakers are the primary defense against electrical fires, overloads, and shock hazards in any home. Electrical malfunctions cause over 30,000 home fires annually in the U.S. That number makes regular breaker inspection one of the most consequential home maintenance tasks you can do. Knowing why check circuit breakers matters goes beyond flipping a switch back on after a trip. It means verifying that your safety system actually works before a fault turns into a fire. This guide covers how breakers fail, what warning signs to watch for, how to test them safely, and when to call a licensed electrician.

    Infographic illustrating circuit breaker maintenance steps

    Why do circuit breakers need regular checking?

    A circuit breaker is a protective switch that automatically cuts power when it detects an overload, short circuit, ground fault, or arc fault. When it works correctly, it stops dangerous current before wiring overheats. When it fails silently, your home has no protection at all.

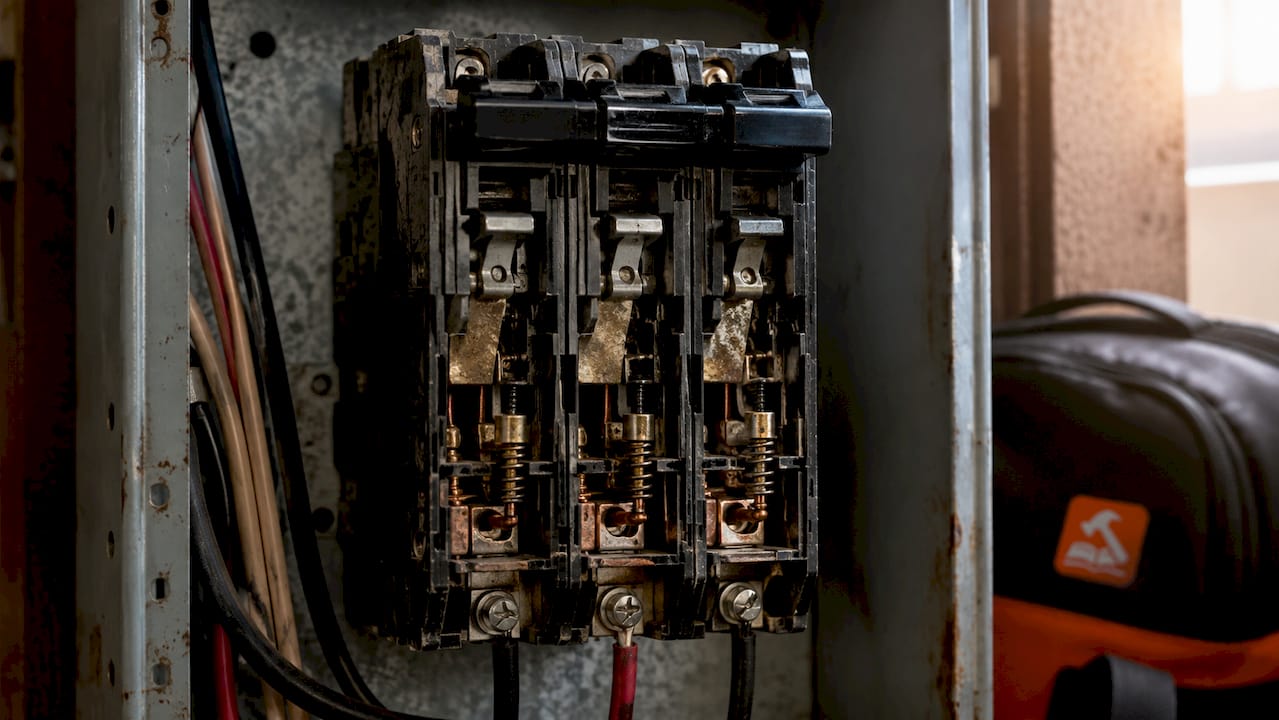
    Breakers can weaken internally without any visible signs, making regular function testing the only way to confirm they will trip when needed. A breaker that looks perfectly normal on the outside may have corroded contacts, worn trip mechanisms, or reduced sensitivity to overloads. You cannot see these problems without testing.

    Close-up of circuit breaker internal components

    The importance of checking breakers also comes down to age. Panels in homes built before 1990 often contain breakers that no longer meet current safety standards. Older homes with outdated panels may have unreliable or degraded breakers that require professional evaluation and possible upgrades. Checking your breakers annually gives you an early warning before a degraded component causes real damage.

    What happens when a breaker fails

    Breaker failure falls into two categories: obvious and hidden. Obvious failures include breakers that trip constantly, won’t reset, or show physical damage. Hidden failures are more dangerous because the breaker appears functional but no longer trips under fault conditions.

    Breaker contacts can weld shut after repeated resets during a short circuit, leaving the breaker stuck in the ON position with no ability to interrupt current. That is the worst-case scenario. The breaker looks fine, the lights stay on, and your home has zero overcurrent protection on that circuit.

    A breaker that never trips is not a sign of a healthy circuit. It may be a sign of a breaker that has lost the ability to protect you.

    Common failure modes include:

    • Welded contacts: The breaker stays ON permanently and cannot trip.
    • Mechanical wear: The trip mechanism degrades and responds too slowly or not at all.
    • Loss of trip sensitivity: The breaker requires a much higher current than rated before it trips.
    • Corrosion: Moisture causes internal corrosion that weakens the breaker’s response.

    What are the signs of faulty circuit breakers?

    Recognizing warning signs early is the fastest way to prevent a small electrical problem from becoming a house fire. Some signs are obvious. Others are easy to dismiss as minor annoyances.

    Visible signs like scorch marks, burning smells, hot breaker switches, or flickering lights are clear indicators of breaker or circuit problems that need immediate attention. A warm breaker panel is normal under load. A hot breaker switch is not. If you smell burning plastic near your electrical panel, treat it as an emergency.

    Watch for these specific warning signs:

    • Frequent unexplained trips: A breaker that trips repeatedly on a lightly loaded circuit points to a failing breaker or a wiring fault downstream.
    • Breaker won’t stay reset: If it trips immediately after you reset it, the fault is still present. Do not keep resetting it.
    • Flickering or dimming lights: This can signal an overloaded circuit, a loose connection, or a breaker that is not maintaining a solid contact.
    • Burning smell or discoloration: Scorch marks around a breaker slot indicate arcing, which is a fire risk.
    • Breaker feels hot to the touch: Excess heat means the breaker is working harder than it should, often because of an overloaded or undersized circuit.

    A tripping breaker is a warning indicator, not a nuisance. Homeowners who reset breakers repeatedly without investigating the cause are masking a problem that will eventually get worse. The circuit breaker safety check starts with taking these signals seriously.

    How to safely test your circuit breakers at home

    Testing your breakers does not require an electrician for basic checks. With the right approach and a few simple tools, you can confirm whether your breakers are functioning as designed. Safety comes first throughout this process.

    Follow these steps for a safe, practical circuit breaker safety check:

    1. Check GFCI and AFCI test buttons first. Ground Fault Circuit Interrupter (GFCI) and Arc Fault Circuit Interrupter (AFCI) breakers have built-in TEST buttons. Press the TEST button. The breaker should trip immediately and move the toggle to the OFF or tripped position. If it does not trip, the breaker has failed its function test and needs replacement.
    2. Inspect the panel visually. With the panel door open, look for scorch marks, corrosion, moisture, or any breaker that sits at an odd angle. Do not touch any wiring inside the panel.
    3. Test voltage output with a multimeter. Set your multimeter to AC voltage. With the breaker switched ON, touch the red probe to the breaker’s terminal screw and the black probe to the neutral bar. A single-pole breaker should read approximately 120V; a double-pole breaker should read approximately 240V. A significantly lower reading points to a weak or failing breaker.
    4. Turn the breaker OFF before testing continuity. Testing continuity requires turning the breaker OFF first to protect your meter and prevent electrical hazards.
    5. Test the manual trip and reset function. Flip the breaker fully OFF, then back ON. It should move smoothly and click firmly into position. A breaker that feels loose, gritty, or does not click into place may have worn internals.

    Pro Tip: Label every circuit in your panel before you start testing. Knowing which breaker controls which room saves time and prevents accidental shutdowns of critical equipment like refrigerators or medical devices.

    Test method What it checks Tools needed
    TEST button press GFCI/AFCI trip function None
    Visual inspection Physical damage, scorch marks Flashlight
    Multimeter voltage test Output voltage under load Multimeter
    Manual trip/reset Mechanical function None

    Safety experts warn homeowners never to attempt complex electrical panel work due to shock and arc flash risks. If you see exposed wiring, signs of arcing, or anything that looks damaged inside the panel, close the door and call a licensed electrician. Basic visual checks and TEST button presses are safe for most homeowners. Opening the panel and probing live terminals is not a task for beginners.

    Best practices for circuit breaker maintenance and home electrical safety

    A consistent maintenance routine keeps your breakers reliable and extends the life of your electrical system. The goal is to catch problems early, before they escalate into costly repairs or fire hazards.

    These circuit breaker maintenance tips apply to most homes and take less than 30 minutes per year:

    • Inspect your panel annually. Set a reminder each year to open the panel door and do a visual check. Look for corrosion, moisture, loose breakers, and any signs of heat damage.
    • Keep the panel area clear and dry. Panels located in garages, basements, or utility rooms are vulnerable to moisture. A damp panel is a dangerous panel.
    • Never ignore repeated tripping. Resetting a breaker without diagnosing the underlying fault can cause fires and permanent damage. Investigate the circuit before resetting more than once.
    • Balance your electrical load. Spreading high-draw appliances across multiple circuits prevents any single breaker from running near its rated limit constantly. Correct breaker sizing and load balancing can prevent unnecessary trips and extend breaker lifespan.
    • Schedule a professional inspection for older homes. If your home is more than 30 years old or you have never had the panel professionally evaluated, book an electrician for a full diagnostic.

    Pro Tip: Ask your electrician about infrared scanning during their visit. Infrared technology detects hidden hot spots inside panels that indicate overloaded circuits or failing breakers invisible to the naked eye. It is one of the most effective diagnostic tools available for residential panels.

    Professional inspections are especially valuable for homes with Federal Pacific or Zinsco panels, both of which have documented reliability issues and are widely recommended for replacement. A licensed electrician can also verify that your breakers are correctly sized for the circuits they protect, which is something no visual inspection can confirm on its own. Pairing your own annual checks with a professional inspection every 5–10 years gives you the most complete picture of your panel’s health. You can track all of this as part of a broader annual home safety schedule to stay organized and ahead of problems.

    Key Takeaways

    Regular circuit breaker inspection is the single most effective step homeowners can take to prevent electrical fires and confirm that their home’s primary safety system actually works.

    Point Details
    Breakers can fail silently Internal failures leave breakers looking normal while losing the ability to trip.
    Test GFCI and AFCI breakers annually Press the built-in TEST button; the breaker must trip immediately to pass.
    Warning signs demand action Scorch marks, burning smells, and hot switches require immediate professional evaluation.
    Never reset without diagnosing Repeated resets without finding the fault mask a problem that can cause a fire.
    Professional inspections add depth Infrared scanning and licensed evaluation catch hazards no visual check can find.

    The breaker check most homeowners skip until it’s too late

    I have talked to a lot of homeowners about their electrical panels, and the pattern is almost always the same. They know where the panel is. They have reset a tripped breaker once or twice. Beyond that, the panel is a black box they prefer not to think about.

    That attitude makes sense until it doesn’t. A breaker that trips is doing its job. The problem is when homeowners treat the trip as an inconvenience rather than a signal. They reset it, move on, and never ask why it tripped in the first place. That is how small wiring faults turn into house fires.

    What surprises most people is how easy the basic checks actually are. Pressing the TEST button on a GFCI or AFCI breaker takes five seconds. A visual scan of the panel takes two minutes. These are not technical tasks. They are observation tasks. The barrier is not skill. It is the habit of treating the panel as something that only matters when something goes wrong.

    My honest recommendation is to add a breaker check to your annual home maintenance list right now, not after the next trip. Pair it with your smoke detector test and your HVAC filter change. Make it a routine, not a reaction. If you find something that concerns you, call a licensed electrician. That call costs far less than the alternative.

    — Sean

    Workbenchguide keeps your home electrical safety on track

    Workbenchguide is built for homeowners who want to stay ahead of problems instead of reacting to them. The platform gives you step-by-step DIY guides and maintenance checklists covering electrical safety, circuit breaker checks, and dozens of other home systems. You get maintenance reminders so annual inspections do not slip through the cracks, and access to contractor resources when a job calls for a licensed professional. Whether you are doing your first panel inspection or building a full year-round home maintenance plan, Workbenchguide gives you the structure and guidance to do it right.

    FAQ

    Why should I check my circuit breakers regularly?

    Circuit breakers can fail internally without any visible signs, leaving your home unprotected from overloads and electrical faults. Regular checks confirm they will trip when needed, which is the only way to verify your home’s primary electrical safety system is working.

    How often should I test my circuit breakers?

    Test GFCI and AFCI breakers monthly using their built-in TEST buttons, and do a full visual panel inspection at least once a year. Homes older than 30 years benefit from a professional evaluation every 5–10 years.

    What does it mean when a breaker keeps tripping?

    A breaker that trips repeatedly signals an overloaded circuit, a short circuit, or a ground fault downstream. It can also indicate a failing breaker. Do not keep resetting it without identifying the cause, as repeated resets without repair can cause fires or permanent damage.

    Can I test my circuit breakers myself?

    Yes, for basic checks. Pressing the TEST button on GFCI and AFCI breakers and doing a visual inspection are safe for most homeowners. Voltage testing with a multimeter is manageable with care. Opening the panel and working with live wiring carries serious shock and arc flash risks and should be left to a licensed electrician.

    What are the signs that a circuit breaker needs replacement?

    Scorch marks, a burning smell, a hot breaker switch, a breaker that won’t stay reset, or a breaker that fails its TEST button check all indicate the breaker needs professional evaluation and likely replacement.

  • Why Declutter Garage: Reclaim Space and Save Time

    Why Declutter Garage: Reclaim Space and Save Time

    Garage decluttering is the process of removing unneeded items from your garage before organizing what remains, and it is the single most effective way to reclaim usable space at home. The average American spends 55 minutes daily searching for lost items, with garage disorganization as a major cause. That adds up to over six hours a week lost to a cluttered space. Professional organizers, including members of the National Association of Professional Organizers, consistently rank the garage as the hardest room to reclaim because it collects overflow from every other area of the house. The good news is that a clear system fixes it permanently.

    What are the main benefits of decluttering a garage?

    Decluttering your garage delivers practical, financial, and mental health benefits that most homeowners underestimate until they experience them firsthand.

    More usable space and safer conditions. A cleared garage gives you room to park your car, set up a workbench, or create dedicated storage zones. Cluttered garages present serious safety hazards including tripping risks, unstable stacked piles, and fire danger from improperly stored flammables like gasoline and paint thinner. Removing those hazards is not cosmetic. It is a direct reduction in injury and property risk.

    Clean, organized single-car garage interior

    Lower costs over time. Disorganized garages cause damage and premature wear to tools and equipment, leading to unnecessary replacement costs. When a cordless drill sits buried under boxes for two years, the battery degrades and the tool may be written off as lost. Clearing the space means you stop buying duplicates of items you already own.

    Time savings every single day. Finding your leaf blower, extension cord, or holiday decorations should take under a minute. When your garage is organized by zone, retrieval time drops to seconds rather than the 55-minute daily average tied to general household disorganization.

    Higher home value and curb appeal. Real estate agents consistently note that a clean, organized garage signals overall home care to buyers. A garage that fits two cars and has visible wall storage reads as a feature, not a liability.

    Reduced stress and mental clarity. Decluttering the garage reduces mental fog by eliminating visual reminders of unfinished tasks. Every pile you see triggers a low-level stress response. Clearing it removes that trigger entirely.

    Pro Tip: Schedule a 15-minute garage walkthrough every month. Catching small accumulations early prevents the full-day purge from ever becoming necessary.

    Why do garages accumulate clutter more than other home areas?

    The garage collects clutter faster than any other room because it functions as the default overflow zone for the entire house.

    Infographic of benefits of decluttering garage

    Garages are often “holding spaces” for emotionally charged items and household overflow. Old sports equipment, a deceased relative’s tools, your child’s first bicycle. These items carry memory and meaning, which makes the decision to remove them genuinely difficult. This is not a willpower problem. It is a psychological one.

    The “just in case” mindset compounds the problem. Homeowners keep broken appliances, duplicate garden hoses, and outdated car parts on the theory that they might be useful someday. People struggle most with garage decluttering because these items represent past versions of their lives rather than current needs. A useful test: if the item costs less than $20 to replace and you have not used it in a year, it does not belong in your garage.

    Physical conditions make the garage worse than other rooms. Poor lighting, awkward layouts, and bulky items that are hard to move all create friction that discourages regular tidying. Unlike a kitchen drawer, a garage pile requires real physical effort to address.

    “Garage drift is the quiet killer of organization. Items meant for the basement, attic, or donation box end up in the garage and stay there permanently because no one makes a deliberate decision to move them.” — GarageDaily.com

    Garage drift describes exactly this pattern: items from other rooms migrate to the garage and never leave. The fix is simple but requires intention. Every decluttering session needs a dedicated “Relocate” pile that goes back inside the house the same day.

    How to declutter your garage: effective steps and tips

    The single most important rule in garage decluttering is this: never organize before you declutter. Organizing clutter only masks the problem and prevents you from realizing the true potential of the space.

    Step-by-step garage decluttering process

    1. Empty everything onto the driveway or yard. Pull every item out of the garage completely. Seeing everything at once forces honest decisions and prevents the “I’ll deal with that later” trap.

    2. Sort into five piles: Keep, Donate, Sell, Trash, and Relocate. The Relocate pile is critical. Items that belong inside the house go back inside today, not eventually.

    3. Evaluate emotional attachments with a direct question. Ask yourself: “Would I buy this again today?” If the answer is no, it leaves. For borderline items, apply the $20 replacement test. If it costs less than $20 to replace and you have not used it in 12 months, let it go.

    4. Clean the garage thoroughly before anything goes back. Sweep, degrease the floor, and check for moisture or pest issues. A clean surface makes the next step far more effective.

    5. Use vertical space after the purge. Install pegboards for hand tools, wall-mounted bike hooks, and ceiling storage racks for seasonal items. Clear labeled bins and vertical storage maximize space and keep frequently used items accessible. Buy shelving units only after the purge is complete.

    6. Establish a maintenance habit. A 5-Minute Rule tidying habit can prevent up to 90% of clutter re-accumulation. Before you leave the garage each time, spend five minutes returning items to their designated spots.

    Pro Tip: Label every bin with both a category and a short list of contents. “Seasonal: Halloween, Thanksgiving” is more useful than a label that just says “Holiday.”

    Purge first vs. organize first: why the order matters

    Approach Result
    Purge first, then organize You discover true available space and buy only the storage you actually need
    Organize first, then purge You fill containers with items you do not need and run out of space again within months
    Buy storage before purging You keep more items to justify the purchase, which defeats the project entirely

    Installing storage before decluttering leads to keeping excess items just to fill the space. This is one of the most common and costly mistakes homeowners make.

    A full 2-car garage declutter takes 1–2 days when done continuously. If that feels like too much, break it into three sessions: one for emptying and sorting, one for cleaning and planning storage, and one for putting everything back in its new place.

    How often should you declutter your garage?

    Professional organizers recommend a full garage declutter and reorganization at least once every 12 months to maintain function and prevent buildup from getting out of hand.

    The best time for an annual purge depends on your climate and how you use the space:

    • Spring is ideal for most homeowners. Winter gear comes out, summer tools go in, and the weather makes working in the garage comfortable.
    • Fall works well if you store holiday decorations and seasonal equipment. Clearing space before winter prevents the garage from becoming a dumping ground during the cold months.
    • After a major life event such as a move, a child leaving for college, or a home renovation is a natural trigger for a full purge.

    Small habits between annual purges make the biggest difference. A weekly 5-minute tidy prevents garage drift from taking hold. Pair your garage check with an existing routine, such as taking out the trash or mowing the lawn, so it becomes automatic rather than a separate task.

    Integrate garage decluttering into your broader home maintenance schedule so it never gets skipped. A calendar reminder set for the same week each year removes the decision fatigue of figuring out when to start.

    Frequency Task
    Daily or after each use Return tools and equipment to their designated spots
    Weekly (5 minutes) Scan for misplaced items and relocate them immediately
    Seasonally Swap out seasonal gear and check for new accumulation
    Annually Full purge, deep clean, and storage reorganization

    The spring cleaning checklist from Workbenchguide includes garage tasks alongside the rest of the house, which makes it easier to treat the garage as part of your regular home care routine rather than a separate project.

    Key Takeaways

    Decluttering your garage before organizing is the only approach that creates lasting space, reduces safety hazards, and saves you real time and money.

    Point Details
    Purge before organizing Organizing clutter only hides the problem; always remove items first.
    Safety is a real risk Cluttered garages create tripping hazards, unstable piles, and fire risk from stored flammables.
    Time loss is measurable Americans lose 55 minutes daily to disorganization; a clear garage cuts retrieval time to seconds.
    Annual declutter is the standard Professional organizers recommend a full purge and reorganization at least once every 12 months.
    Maintenance prevents re-accumulation A 5-Minute Rule tidying habit after each garage visit prevents up to 90% of clutter from returning.

    The part most homeowners skip entirely

    Most garage decluttering advice focuses on the physical steps. Empty it out, sort into piles, buy some bins. That advice is correct, but it skips the part that actually determines whether the project succeeds long-term.

    The real challenge is the emotional weight of the stuff. I have seen homeowners spend three hours sorting a single shelf because every item connects to a memory or a version of themselves they are not ready to let go of. A box of old car parts from a vehicle they no longer own. A set of golf clubs from a hobby they stopped in 2015. These items are not junk to the person holding them. They are identity.

    The mindset shift that actually works is reframing the garage as a functional extension of your living space, not a storage unit you happen to own. You would not keep broken furniture in your living room. The same standard applies here.

    Breaking the project into smaller sessions also changes the emotional math. One hour on a Saturday feels manageable. A full weekend feels like a confrontation. Start with one shelf, one corner, one category. Visible progress builds momentum faster than any organizational system.

    The goal is not a perfect garage. The goal is a garage that works for how you actually live today, not how you lived five years ago.

    — Sean

    Workbenchguide tools to keep your garage organized year-round

    Workbenchguide is built for homeowners who want to stay ahead of maintenance instead of reacting to it. The home maintenance checklist covers garage care alongside every other area of your home, with task timing and seasonal reminders built in. You can also find step-by-step DIY project guides for garage storage builds, wall organization installs, and seasonal prep. Treating your garage as part of a whole-home maintenance routine is the most reliable way to keep it functional all year. Workbenchguide gives you the structure to make that happen without having to figure it out from scratch.

    FAQ

    Why should I declutter my garage first before organizing?

    Organizing before decluttering only hides clutter inside containers and prevents you from seeing how much space you actually have. Always remove unneeded items first, then buy storage solutions sized to what remains.

    What should I throw away in my garage?

    Throw away broken tools, expired chemicals, duplicate items, and anything you have not used in over a year. Apply the $20 test: if it costs less than $20 to replace and you have not touched it in 12 months, it goes.

    How long does it take to declutter a garage?

    A full 2-car garage declutter takes 1–2 days when done in one continuous effort. Breaking it into three focused sessions over a weekend makes the process more manageable without losing momentum.

    How often should I clean out my garage?

    Professional organizers recommend a full declutter and reorganization at least once per year, with brief weekly tidying sessions to prevent drift between annual purges.

    Does a clean garage actually increase home value?

    A clean, organized garage signals overall home care to buyers and real estate agents. It adds functional square footage to the home’s appeal, which supports a stronger asking price and faster sale.

  • Top 6 Homekeeper.Agentive.Bz Alternatives 2026

    Top 6 Homekeeper.Agentive.Bz Alternatives 2026

    Managing home maintenance and records across several properties quickly turns into a confusing mess of paper, photos, and disconnected apps. Most home maintenance tools either require manual data entry, hide advanced features behind high subscription fees, or limit access to specific regions. This comparison details pricing, automation, geographic coverage, and record features so homeowners and property managers can pick the best alternative for 2026.

    Table of Contents

    WorkbenchGuide

    https://workbenchguide.com

    At a Glance

    Created by a licensed general contractor, WorkbenchGuide mixes trades experience with digital task tracking and property records. The platform bundles guided repair instructions, recurring maintenance schedules, inspection checklists, and photo-backed task history. That combination targets homeowners and managers who prefer practical, hands-on guidance over abstract project lists.

    Core Features

    WorkbenchGuide provides guided DIY repair instructions written by experienced professionals and plain-language maintenance checklists you can follow without prior trade skills. The system includes maintenance schedules for recurring tasks across multiple properties and inspection checklists for routine walkthroughs. Task management stores notes, photos, reminders, and a history log alongside organized property records and warranty details.

    Key Differentiator

    The single most distinguishing feature is the vendor’s contractor background shaping content and workflows. That background shows in repair guides that match common jobsite practices and in templates built for realistic inspection rhythms. For owners who want practical guidance and repeatable maintenance, this product turns irregular upkeep into a predictable set of tasks.

    Pros

    WorkbenchGuide helps prevent avoidable repairs by prompting routine checks and follow ups tied to specific systems. It centralizes warranties, system details, and repair histories so you do not hunt for paper records when a contractor arrives. The user interface guides nonexperts through repairs with clear steps and photos, which reduces uncertainty for DIYers. It also supports multiple properties with separate schedules, making it suitable for small portfolios and rental landlords.

    Cons

    • May not support highly customized or complex building automation systems, which limits fit for large commercial portfolios.

    Who It’s For

    Homeowners who want organized maintenance routines and DIY guidance will find this platform practical. Landlords with several rental units benefit from per property schedules and shared inspection templates. Small property managers who need a simple way to track repairs, warranties, and maintenance history will also find this useful.

    Unique Value Proposition

    Guided repair content authored by a licensed general contractor gives WorkbenchGuide a practical edge. Those guides reduce guesswork during repairs and help you decide when to call a pro. For owners juggling maintenance across units, the operational effect is fewer emergency calls and clearer documentation for contractor handoffs.

    Real World Use Case

    A property manager schedules quarterly inspections in the platform, attaches photos to each task, and assigns follow up repairs to a maintenance tech. The manager keeps warranty documents and repair history per unit and uses the platform notes when billing or negotiating contractor work.

    Pricing

    Pricing starts at $7/month for homeowners. Tiered plans add features and higher property limits for landlords and property managers. Billing options include monthly or yearly payments.

    Website: https://workbenchguide.com

    HomeZada

    https://homezada.com

    At a Glance

    AI analyzes your home and generates personalized insights and visualization previews. That analysis links inventory, scheduled maintenance, projects, and finances into a single record for each property. HomeZada also offers branded portals for real estate and service professionals, and charges some one time fees for value added services.

    Core Features

    HomeZada centralizes home inventory with photos, receipts, and documents for insurance and resale records. It adds scheduled maintenance reminders and project tools to track tasks, costs, and documents while keeping financials like expenses, value, and equity in one place. The platform layers AI powered design visualizations over those records so you can compare ideas before spending.

    Key Differentiator

    The product stands out for using AI to scan a property and produce tailored maintenance suggestions and visual previews. That focus on automated, property specific insight helps owners prioritize repairs, scope renovations, and present a clear record to buyers or insurers.

    Pros

    HomeZada combines inventory, maintenance, projects, and finances in one system, which cuts the need to juggle spreadsheets and separate apps. The AI driven insights speed decision making by suggesting what to fix and when. The platform supports multiple properties and collaborative access for families and professionals, and it offers tiered plans that match individual and professional use. Data sits in the cloud, which reduces local backup chores.

    Cons

    • Pricing might be high for casual users or those managing a single property. Subscription tiers and extra service fees add up over time.

    • Offline functionality is limited since the app relies on cloud access for full features. Work in places without reliable internet will be constrained.

    • Some people report a learning curve when they first use all features. Getting the most from AI suggestions and project tracking can take time.

    • Functionality and support are mostly aimed at U.S. users, which limits usefulness for international homeowners.

    When It May Not Fit

    If you manage a single rental or need a simple checklist app, the subscription cost may outweigh the benefits. If you often work without internet, the cloud first design will slow you down. If you want global support or local tax handling outside the United States, the product may not meet those needs.

    Who It’s For

    Homeowners who want a single place to store receipts, warranties, and maintenance history will find clear value. Real estate agents and service professionals who want branded portals can use it to add client value and generate fees. Property managers overseeing several homes will benefit from the multi property and collaboration features.

    Real World Use Case

    A homeowner catalogs appliances and room photos, sets recurring maintenance reminders, and tracks a kitchen renovation budget. The homeowner uses visualization previews to compare cabinet and paint options, and then hands a complete maintenance and expense record to their agent when listing the home.

    Pricing

    A free basic version is available. Premium options are listed at $99/year or $15.95/month, and a deluxe plan is $189/year. Additional charges apply for services such as publishing Zada Files or adding extra properties.

    Website: https://homezada.com

    HomeKeep

    https://homekeep.com

    At a Glance

    You can build a personalized maintenance plan and attach receipts, warranties, and manuals to each item. This keeps service history and documentation tied to the right appliance or system. Mobile access and task reminders make following a schedule easier for busy homeowners. The app also stores service contacts so records and providers live in one place.

    Core Features

    Home inventory management pairs with custom maintenance plans and lets you link documents to specific items. The app issues scheduled reminders and stores receipts, warranties, and manuals for quick retrieval. A simple contacts list holds service providers so you can call or reference a technician from the same record.

    Key Differentiator

    HomeKeep centers on a step by step maintenance plan combined with integrated record keeping. That combination turns isolated checklists into a maintained history you can reference across devices. The result reads more like a homeowner file cabinet than a standalone reminders app.

    Pros

    HomeKeep helps homeowners keep records and schedules in one place, which reduces the guessing around when to service systems. The reminders and task guides reduce the chance of missed maintenance, which often leads to bigger repairs. Multi device availability on iOS and Android means you and your family can access the same plans from phones and tablets.

    Cons

    • Dependence on user input for accurate records and schedules. If you stop updating inventory or dates, reminders and history become unreliable.
    • Limited details on integration with third party service providers. The product lists integrations in general terms but does not provide a public roster.
    • Subscription costs have appeared in buyer feedback as a consideration. Some reviewers report paying for premium features or encountering feature limits for DIY tasks.

    When It May Not Fit

    If you want automatic syncing from appliance manufacturers or smart home devices, HomeKeep may fall short. The product relies largely on manual entry and manual updates. If budget is tight, subscription costs for advanced features could rule it out for some homeowners.

    Who It’s For

    This product fits homeowners who prefer hands on management of their home records and schedules. It suits people who like to keep receipts, manuals, and service contacts in one searchable place. New homeowners who need a structured way to learn upkeep will find the guided plans helpful.

    Real World Use Case

    A homeowner photographs appliance serial numbers, uploads warranty PDFs, and tags each item with a maintenance schedule. The app sends reminders before seasonal tasks like AC servicing or chimney cleaning. All documents and the service contact appear on the homeowner’s phone when a contractor calls.

    Website: https://homekeep.com

    Homer

    https://homer.co

    At a Glance

    Homer creates floor plans from phone scans that include measurements and fixtures. The app uses AI to detect inventory and pull manuals automatically. A free basic tier exists and paid subscriptions unlock advanced features and extra storage.

    Core Features

    Homer combines AI powered inventory detection with automatic retrieval of documentation and manuals, so appliances and fixtures populate your digital binder quickly. The app also offers expense tracking and a Home timeline for recording repairs, renovations, and warranty dates. Mobile and web apps include task lists, reminders, and AI Helper Bot assistance, plus secure cloud storage for documents and photos.

    Key Differentiator

    Homer stands out for its AI powered automatic detection that links scanned items to manuals, warranties, and maintenance entries. That automation reduces manual data entry and helps tie reminders to specific appliances or projects. The linkage between inventory, timeline, and reminders is the main workflow advantage here.

    Pros

    Homer makes it simple to gather and organize home information in one place, which saves time when you need a manual or warranty. The automation speeds setup, especially if you scan several rooms by phone. Built in reminders and the Home timeline reduce the risk of missed maintenance, and secure cloud storage keeps documents accessible from mobile or desktop.

    Cons

    • Paid features are behind premium subscriptions, so advanced tools require an ongoing cost.
    • API access and other advanced capabilities appear limited to larger plans, which constrains integration for power users.
    • Public details about third party integrations are sparse, so connecting Homer to other services may be unclear.

    When It May Not Fit

    Homer may not fit if you need deep third party integrations or a public API for automation. Avoid it if you require free access to advanced features, because those features are gated by paid tiers. Large property management operations that need custom enterprise connectors may find the available integration details too thin.

    Who It’s For

    Homer suits homeowners who want a single place for manuals, warranties, and home records. Property managers who need to track multiple units will find the inventory and timeline useful. Renovators and contractors can use the floor plan and timeline features to document project progress and expenses.

    Real World Use Case

    A homeowner scans kitchen appliances with the phone camera and Homer auto populates manuals and warranty dates. The owner sets maintenance reminders tied to those items and logs a roof repair on the Home timeline. The result is a searchable record of expenses, documents, and scheduled upkeep.

    Pricing

    Homer offers a free tier for basic use and optional premium subscriptions for advanced features and added storage. Pricing details for individual plans are available on the vendor site. Larger accounts can request information about enterprise or multi property pricing.

    Website: https://homer.co

    Oply

    https://oply.app

    At a Glance

    Charges only when a job is invoiced. That fair pricing model avoids upfront service fees for homeowners who prefer pay-per-job billing. Oply focuses on Tennessee for now while indicating plans to expand. The app pairs maintenance reminders with photo-based project scoping and inspection uploads.

    Core Features

    Oply centralizes maintenance scheduling, inspection uploads, and service history so you can keep records for each system and project. It offers Smart project creation from photos, tailored maintenance reminders, and a Home Score that tracks milestones and visible progress. The app also connects you with vetted local pros and supports bringing your own service providers.

    Key Differentiator

    Oply combines predictive maintenance ideas with an integrated vendor network that you can hire directly from the app. The combination of an AI assistant for suggestions and in-app booking of vetted professionals narrows the gap between diagnosis and repair. That pairing is aimed at homeowners who want fewer phone calls and clearer next steps.

    Pros

    Oply keeps home records, service history, and reminders in one place, which helps with resale documentation and routine upkeep. The photo-based project scoping speeds up estimates and clarifies repair needs before you call a contractor. The pay-on-invoice pricing reduces upfront cost anxiety, and the vendor vetting reduces time spent vetting contractors yourself.

    Cons

    • Availability limited to Tennessee for now, which blocks access for homeowners outside that region.
    • Several predictive features and autopay are listed as forthcoming and are not fully available yet.
    • The app requires a smartphone, which may exclude people who prefer desktop access or paper records.

    When It May Not Fit

    If you live outside Tennessee, Oply will not serve you until the vendor expands. If you need full predictive insights today, several promised features are still upcoming. If you rely on desktop workflows or prefer not to use a mobile app, this option will feel constrained.

    Who It’s For

    Homeowners in Tennessee who want a single place to track repairs, receipts, and maintenance reminders will get the most from Oply. Younger homeowners managing upgrades or families juggling multiple properties will appreciate photo scoping and in-app hiring. People who prefer phone-based booking and vetted local pros will find this approach practical.

    Real World Use Case

    A family uses Oply to schedule HVAC filter changes and log DIY plumbing fixes with photos. They upload inspection reports, generate scoped projects for a roof repair, and then hire a vetted pro through the app. The service history and Home Score then live in a single record for resale preparation.

    Pricing

    Oply is free to start, with paid features available for booking services and other premium capabilities. The vendor lists subscriptions as coming soon, while booking fees apply when a job is invoiced. That pricing model keeps the barrier to entry low for basic maintenance tracking.

    Website: https://oply.app

    Jackknife

    https://jackknife.co

    At a Glance

    Free to use with no signup or ads, and its service focuses on Essex County, MA. The platform emphasizes privacy and says it earns revenue from contractor fees rather than selling user data. That local focus pairs photo-based diagnostics with verified contractor connections for neighborhood-level trust.

    Core Features

    Jackknife identifies appliances and common issues from photos and generates DIY repair plans with step-by-step instructions. It matches homeowners to local pros using reviews tied to real homes and tracks home inventory with value estimates and documentation. The product also manages projects and tasks with reminders and scheduling to keep repairs on track.

    Key Differentiator

    The central difference is the photo-driven identification combined with neighbor verification. Photos feed the diagnostics, and reviews link to actual homes and projects to reduce fake testimonials. That mix makes contractor matches feel more grounded in local experience than web-only review sites.

    Pros

    The platform is free and requires no account, which lowers the barrier to try photo diagnostics and basic tracking. Verified reviews tied to real homes make pro matching more practical for homeowners worried about anonymous ratings. Users keep control over what they share, and integrated documentation helps when filing insurance claims or preparing a house for resale. Jackknife also uses AI-driven diagnostics to speed identification and produce clearer DIY instructions.

    Cons

    • Limited geographic availability. The service currently focuses on Essex County, MA only.
    • Narrow coverage scope. It centers on appliances and obvious home issues rather than every maintenance area.
    • Photo quality dependence. Accurate identification requires clear, well-lit photos which not all homeowners can produce.

    When It May Not Fit

    If you live outside Essex County, MA this tool will not provide its core local contractor matching. If your needs include detailed structural inspections or landscape and exterior systems, the platform may not cover those areas. Teams that require multiuser account controls or enterprise workflows will find the feature set focused on single-home use.

    Who It’s For

    Homeowners in Essex County, MA who want quick, private answers about appliances and simple home issues will benefit most. People preparing documentation for insurance or resale will value the integrated records and project history. DIYers who prefer photo-guided instructions plus an easy path to vetted local pros will find the product useful.

    Real World Use Case

    A homeowner photographs a failing water heater and uploads the images to Jackknife. The tool identifies the unit age and common maintenance items then offers a step-by-step DIY plan and a list of nearby plumbers with verified neighbor reviews. The homeowner saves the repair documentation to their inventory and uses it when filing a water damage claim.

    Website: https://jackknife.co

    Comparison of alternatives

    Among home maintenance management options, WorkbenchGuide stands out for its guided, expert-level DIY repair instructions, setting a high standard for hands-on usability. When comparing this offering to other platforms, evaluating dimensions such as task guidance, automation, and accessibility highlights key distinctions that assist in identifying the ideal solution for varying requirements.

    Focused functionality versus broad versatility

    WorkbenchGuide prioritizes guided DIY repair instructions and organized record-keeping approaches, a unique value derived from its developer’s professional contracting experience. HomeZada, on the other hand, emphasizes AI-driven tools for planning and visualization, catering to users who prefer technologically supported forecasting and financial integration. Homer aids in rapid initial household inventory setups through AI, reducing manual overhead where applicable. For users seeking tailored, contractor-specific guidance, WorkbenchGuide maintains a distinctive edge.

    Accessibility and availability considerations

    While WorkbenchGuide, HomeZada, and Homer deliver nationwide digital access, Oply and Jackknife focus on their respective local audiences, emphasizing community-driven functionalities or regional expertise. Although this localized approach offers superior relevance for their targeted demographics, it inherently excludes broader geographical applicability. HomeKeep’s manually intensive data entry method works best for owners prioritizing detail over automation.

    Best fit

    • Hands-on homeowners and managers looking for contractor-authored, step-by-step task assistance will appreciate WorkbenchGuide.
    • Users wanting AI-driven maintenance visualizations and detailed expense tracking should consider HomeZada.
    • Owners requiring rapid system documentation and effortless inventory creation might prefer Homer.
    • Residents within Tennessee or Essex County seeking vetted contractor networks and local insights will find Oply and Jackknife match their specialized needs.

    Our pick

    WorkbenchGuide is the ideal choice for homeowners seeking meticulously authored DIY repair instructions coupled with effective task and maintenance tracking. However, for those needing AI-based visualization features or localized professional networks, other platforms such as HomeZada or Jackknife could serve better depending on the context of use.

    Homeowners looking for a platform with practical guided maintenance supported by professional insights may find clarity in this comparison.

    Product Core Feature Best For Pricing Limitation
    Workbenchguide Guided DIY repair instructions Homeowners organizing maintenance routines $7/month to start Limited support for complex building automation systems
    HomeZada AI-driven property analysis Multi-property real estate agents Free version; $99+/year Higher pricing for single-property users
    HomeKeep Step-by-step maintenance planning New homeowners learning upkeep Subscription required Dependence on manual entry
    Homer AI-powered inventory auto-detection Homeowners centralizing manuals and records Free version; premium tier pricing No deep third-party integration details
    Oply Photo-based project estimation Tennessee residents managing home repairs Free with billed services Restricted to Tennessee
    Jackknife Local contractor review portal Essex County residents seeking trusted pros Free Limited to Essex County area usage

    Which Homekeeper.Agentive.Bz Alternative Can Simplify Your Home Maintenance?

    Homeowners and landlords managing multiple properties often struggle with scattered records and unclear maintenance plans. This can lead to costly repairs and last-minute contractor calls. Workbenchguide helps by combining practical, contractor-backed repair guides with recurring maintenance reminders and a clear history log for every property.

    If you want a solution that guides you step-by-step and keeps warranties and service contacts in one place, Workbenchguide offers an easy way to stay organized. Visit the site to see how you can reduce uncertainty and stay ahead of home repairs and maintenance tasks.

    FAQ

    What unique features does Workbenchguide offer for home maintenance management?

    Workbenchguide provides guided DIY repair instructions authored by experienced professionals. This unique feature makes it accessible for homeowners who may not have prior trade skills, allowing them to follow step-by-step instructions with confidence.

    How does Workbenchguide compare to HomeZada regarding user experience?

    HomeZada offers AI-driven insights that generate personalized maintenance suggestions based on property analysis, which is a genuine strength for prioritizing renovations. Workbenchguide, however, excels in providing practical guidance through its contractor-written repair guides tailored to common jobsite practices, making it a better fit for hands-on maintenance tasks.

    Which platforms offer comprehensive inventory management features?

    HomeZada stands out for its centralization of home inventory, linking photos, receipts, and documents for insurance needs. In comparison, Workbenchguide focuses more on repair instructions and maintenance schedules, making it the go-to option for those needing practical task management rather than extensive inventory capabilities.

    Can Workbenchguide help homeowners manage multiple properties?

    Yes, Workbenchguide supports multiple properties with separate schedules and shared templates, making it suitable for small landlords and property managers. This allows users to keep organized maintenance routines for each unit without losing track of specific tasks.

    What pricing options are available for Workbenchguide users?

    Pricing for Workbenchguide starts at $7 per month for homeowners, with tiered plans that cater to landlords and property managers as their property limits increase. This affordability makes it accessible for various user needs.

  • Why Ventilate Your Attic: Benefits Every Homeowner Needs

    Why Ventilate Your Attic: Benefits Every Homeowner Needs

    Attic ventilation is the controlled movement of air through your attic space to regulate heat and moisture. Without it, your attic becomes a trap. Summer temperatures in a poorly ventilated attic can reach 140–170°F, while a well-ventilated attic stays within 10–20°F of outdoor air. That difference shows up directly in your energy bills, your roof’s lifespan, and the air quality inside your home. Understanding why ventilate your attic is the first step to protecting one of your biggest investments.

    How does attic ventilation work to control heat and moisture?

    Attic ventilation relies on two physical forces: the stack effect and wind pressure. Warm air rises naturally and exits through exhaust vents near the roof peak. Cooler outside air enters through intake vents at the eaves, replacing the hot air and creating continuous circulation. This process requires no electricity and works around the clock when the system is properly balanced.

    The two main components are soffit vents and ridge vents. Soffit vents sit along the underside of your roof overhang and act as intake points. Ridge vents run along the roof peak and serve as exhaust. A ridge vent and soffit vent working together create the most effective continuous airflow pattern available in residential construction.

    Close-up of soffit and ridge vents in attic

    Moisture control is just as critical as heat control, especially in winter. When warm, humid air from your living space leaks into a cold attic, it condenses on roof sheathing and framing. That condensation leads to mold, rot, and ice dams. Balanced intake and exhaust ventilation prevents this moisture buildup more effectively than any unbalanced system.

    Key signs that your attic ventilation is working correctly:

    • Attic temperature stays close to outdoor temperature in summer
    • No frost or condensation on roof sheathing in winter
    • No visible mold or dark staining on wood framing
    • Ice dams do not form along your roof edge after snowfall

    Pro Tip: Check your soffit vents for insulation blockage. Blown-in insulation frequently covers soffit vent openings, cutting off intake airflow entirely and making the rest of your ventilation system useless.

    What are the benefits of ventilating your attic properly?

    Proper attic ventilation extends asphalt shingle lifespan by 20–30% compared to poorly ventilated attics. Heat trapped beneath shingles accelerates the breakdown of the asphalt binder, causing shingles to curl, crack, and lose granules years ahead of schedule. Replacing a roof costs tens of thousands of dollars. Keeping your attic cool costs almost nothing by comparison.

    Lower attic temperatures also reduce the workload on your air conditioning system. When your attic runs at 140°F, that heat radiates through your ceiling insulation and into your living space. Your HVAC system then works harder to compensate. A well-ventilated attic keeps that radiant heat load down, which translates directly to lower cooling costs each summer.

    Infographic showing key attic ventilation benefits

    The attic ventilation health benefits extend beyond energy savings. Moisture that accumulates in an unventilated attic creates ideal conditions for mold growth. Mold spores can migrate through ceiling penetrations, such as recessed lights and bathroom fans, into your living areas. Controlling attic moisture through proper ventilation is one of the most direct ways to protect your indoor air quality.

    The full list of benefits includes:

    • Roof longevity: Shingles last significantly longer when not subjected to extreme heat cycles
    • Lower energy bills: Reduced cooling load means your air conditioner runs less
    • Mold prevention: Dry attic conditions stop mold before it starts
    • Ice dam prevention: Consistent attic temperatures prevent the freeze-thaw cycle that creates ice dams
    • HVAC efficiency: A cooler attic reduces the strain on your entire HVAC system, extending its service life

    What common attic ventilation methods exist, and how do they compare?

    Not all ventilation systems perform equally. The right choice depends on your roof design, climate, and existing setup.

    Ventilation Type How It Works Best For Key Drawback
    Soffit and ridge vents (passive) Natural convection and wind pressure Most homes with gable or hip roofs Requires balanced installation
    Gable vents Cross-ventilation through end walls Simple gable roofs Less effective on complex roof lines
    Powered attic fans Electric motor exhausts hot air Homes with inadequate passive flow Can increase energy costs if poorly sealed
    Solar attic fans Solar-powered exhaust fan Sunny climates with high heat loads Limited output on cloudy days
    Turbine vents Wind-driven spinning exhaust Areas with consistent wind Ineffective in calm conditions

    Passive attic ventilation uses the stack effect and wind pressure to push warm air out, requiring no electricity and no ongoing maintenance. This makes it the most reliable long-term solution for most homeowners. The system works 24 hours a day without any intervention.

    Powered attic fans are a common upgrade, but they carry a real risk. Attic fans can backfire by pulling conditioned air from your living space when intake vents are inadequate. That means your air conditioner cools air that immediately gets exhausted out of the attic, driving up your energy bill instead of reducing it. Powered attic fans can reduce attic temps by 10–20°F, but only when attic air sealing is solid.

    Pro Tip: Before installing a powered attic fan, calculate your total intake vent area. If your soffit vents cannot supply enough replacement air, the fan will depressurize the attic and pull conditioned air from your home instead.

    How to assess and improve your attic ventilation effectively?

    Start by going into your attic on a hot summer afternoon. If the temperature feels dramatically hotter than outside, your ventilation is inadequate. You should also look for these warning signs:

    • Wet or stained insulation, which indicates condensation or a leak
    • Dark streaks or fuzzy growth on roof sheathing, which signals mold
    • Ice dams forming along your eaves each winter
    • Shingles curling or losing granules prematurely
    • A musty smell in your attic or upper floor rooms

    Once you identify a problem, follow these steps to improve your system:

    1. Clear soffit vents. Remove any insulation blocking the intake openings. Use foam baffles to create a clear channel from soffit to ridge.
    2. Check vent balance. Measure your total intake vent area and total exhaust vent area. They should be roughly equal.
    3. Verify vent ratios. The 2024 IRC requires 1 square foot of vent area per 150 square feet of attic floor. A balanced system with a vapor retarder can use a 1:300 ratio.
    4. Seal air leaks first. Caulk and foam around all ceiling penetrations, including recessed lights, plumbing stacks, and bathroom exhaust fans. Attic ventilation must be combined with rigorous air sealing to prevent moisture-laden air from entering the attic space.
    5. Add vents where needed. If your ratio falls short, add soffit vents before adding exhaust vents. Intake is almost always the limiting factor.
    6. Inspect annually. Add an attic inspection to your spring and fall maintenance routine.

    Poor attic ventilation causes at least 30% of diagnosed roof problems, and most homeowners never connect the roof damage to the ventilation failure. A contractor who specializes in roofing or building science can assess your system and identify gaps that a visual inspection might miss. If you see active mold growth or significant moisture damage, call a professional before attempting repairs yourself.

    Key Takeaways

    Proper attic ventilation protects your roof, lowers your energy bills, and prevents moisture damage that leads to mold and structural rot.

    Point Details
    Heat and moisture control A well-ventilated attic stays within 10–20°F of outdoor temperature, preventing structural damage.
    Roof lifespan Proper ventilation extends asphalt shingle life by 20–30% by reducing heat and moisture stress.
    Passive beats powered Soffit and ridge vent systems work 24/7 without electricity and avoid the energy risks of powered fans.
    Seal before you vent Air sealing ceiling penetrations prevents moisture migration and makes ventilation far more effective.
    Know your code The 2024 IRC requires 1 sq ft of vent area per 150 sq ft of attic floor as a baseline standard.

    What I’ve learned from watching homeowners ignore their attics

    Most homeowners think about their attic twice: when they move in and when something goes wrong. That gap is exactly where expensive problems grow. I’ve seen roofs fail at 12 years old on houses where the shingles carried a 30-year warranty. Every time, the attic told the story first. Sheathing stained dark, insulation matted with moisture, soffit vents packed solid with blown-in fiberglass.

    The biggest misconception I encounter is that adding a powered attic fan solves a ventilation problem. It often makes things worse. A fan without adequate intake just depressurizes the attic and pulls your air-conditioned air straight out of the house. You pay to cool air that immediately gets exhausted. The fix is almost always cheaper and simpler: clear the soffit vents, add baffles, and let physics do the work.

    The other thing homeowners consistently underestimate is air sealing. Ventilation gets all the attention, but the moisture causing your attic problems usually comes from inside your house. It travels through gaps around recessed lights, bathroom fans, and plumbing penetrations. Seal those gaps and your ventilation system suddenly works the way it was designed to. Check your roof maintenance tips annually, not just after a storm.

    — Sean

    Attic ventilation fits into a bigger home maintenance picture

    Attic ventilation is one task on a longer list of seasonal maintenance that protects your home year-round. Workbenchguide makes it easier to stay on top of that list with a home maintenance checklist that covers attic inspections, roof checks, HVAC service, and dozens of other tasks timed to each season. Skipping one item rarely causes immediate damage, but skipping several in a row is how small problems become costly repairs. Workbenchguide gives you the schedule, the step-by-step guides, and the reminders so nothing falls through the cracks.

    FAQ

    Why ventilate your attic in summer?

    Attic temperatures can reach 140–170°F without ventilation, which accelerates shingle breakdown and forces your air conditioner to work harder. Proper ventilation keeps attic temperatures close to outdoor levels and reduces cooling costs.

    What is the role of attic fans in ventilation?

    Powered attic fans exhaust hot air from the attic but can increase energy costs if intake vents are insufficient. They work best in well-sealed attics where they reduce cooling runtime without pulling conditioned air from the living space.

    How do I know if my attic ventilation is inadequate?

    Signs include attic temperatures far above outdoor levels, moisture or mold on roof sheathing, ice dams forming along the eaves, and shingles that curl or lose granules ahead of schedule.

    What is the minimum ventilation required by code?

    The 2024 International Residential Code requires 1 square foot of net free vent area per 150 square feet of attic floor. A balanced system with a vapor retarder can meet code at a 1:300 ratio.

    Does attic ventilation affect indoor air quality?

    Yes. Poor attic ventilation allows moisture to accumulate and mold to grow. Mold spores can enter your living space through ceiling penetrations, directly affecting the air quality in your home.

  • Benefits of Regular HVAC Servicing for Homeowners

    Benefits of Regular HVAC Servicing for Homeowners

    Regular HVAC servicing is defined as scheduled professional maintenance of your heating, ventilation, and air conditioning system, typically performed twice a year. The benefits of regular HVAC servicing include 15–25% better efficiency, up to $800 in annual energy savings, and a system lifespan that stretches to 15–20 years instead of burning out at 8–12. The U.S. Department of Energy and ASHRAE both identify routine maintenance as the single most effective way to cut home energy costs. This article breaks down every major advantage, with real numbers, so you know exactly what you gain and what you risk skipping.

    1. How does regular HVAC servicing improve system efficiency?

    A properly maintained HVAC system operates 15–25% more efficiently than a neglected one. That gap widens every year you skip service, because dirty components force the system to work harder for the same output.

    The main culprits are dirty filters, fouled evaporator coils, and clogged condensate drains. Each one restricts airflow or heat transfer, which means the compressor and blower motor run longer to hit your thermostat setting. Dirty filters and coils are a simple but costly problem. Neglected systems lose 5–15% efficiency annually, which translates to $300–$800 in unnecessary energy spending depending on your climate.

    Technician inspecting HVAC unit outdoors

    A professional tune-up covers coil cleaning, refrigerant level checks, electrical connection tightening, and blower calibration. These are not DIY tasks. Filter replacement, however, is something you can and should handle yourself every 1–3 months.

    Pro Tip: Set a phone reminder to check your filter on the first day of every month. A $10 filter swap is the cheapest efficiency upgrade you can make.

    ASHRAE 180 identifies professional HVAC maintenance as a key strategy for reducing energy consumption in buildings. Homes follow the same physics. A clean, calibrated system uses less electricity and gas to deliver the same comfort level.

    2. In what ways does servicing prevent costly repairs and emergency breakdowns?

    Preventive maintenance reduces unexpected breakdown risk by up to 70%. That number matters most on the hottest day in july or the coldest night in january, when HVAC companies are fully booked and emergency rates apply.

    The most common failures that routine service catches early include:

    1. Weak capacitors. A failing capacitor strains the compressor. Replacing a capacitor costs $150–$300. Replacing a compressor costs $1,500–$2,500.
    2. Dirty flame sensors. A coated flame sensor causes furnace lockouts. A technician cleans it in minutes. Ignoring it leads to heat exchanger stress and cracked components.
    3. Refrigerant leaks. A slow leak reduces cooling capacity and causes the compressor to overheat. Caught early, a leak repair is a few hundred dollars. Left alone, it destroys the compressor.
    4. Clogged condensate drains. Blocked drains cause water damage to ceilings, walls, and the air handler itself.

    85% of HVAC repairs are linked to lack of proper maintenance. Emergency repairs cost 3–5 times more than a standard maintenance visit. A routine service call runs $150–$250. An emergency compressor replacement on a weekend runs into the thousands.

    Pro Tip: Ask your technician to show you any part they recommend replacing. A reputable technician will explain the failure mode clearly. If the explanation does not make sense, get a second opinion before approving the repair.

    Choosing a reputable service provider who documents all work performed protects you from upsells and gives you a paper trail for warranty claims.

    3. How does regular servicing extend the lifespan of HVAC equipment?

    Well-maintained HVAC systems last 15–20 years. Neglected systems often fail in 8–12 years. That gap represents one full replacement cycle, which costs $5,000–$12,000 for a central system.

    The mechanism is straightforward. Small problems create cascading failures. A dirty blower wheel makes the motor work harder. An overworked motor runs hotter. Heat degrades capacitors and contactors. Failed contactors cycle the compressor on and off incorrectly. The compressor fails prematurely. Each step in that chain was preventable with a $200 annual tune-up.

    Key habits that extend equipment life include:

    • Scheduling in shoulder seasons. Spring and fall tune-ups avoid peak season waitlists and let technicians find problems before you need the system at full capacity.
    • Keeping the outdoor unit clear. Two feet of clearance around the condenser coil maintains proper airflow and prevents overheating.
    • Replacing filters on schedule. A clogged filter is the leading cause of frozen evaporator coils, which stress the compressor every time it happens.
    • Documenting every service visit. A complete service history helps technicians spot trends and helps you negotiate when selling your home.

    “Maintenance can add 5–10 years to system life, significantly reducing replacement costs.” — HVAC Service Guide 2026

    The financial case is clear. Spending $400–$500 per year on two professional tune-ups costs far less than replacing a system five years early. Think of it as paying a small annual premium to avoid a large, unplanned expense.

    4. What additional advantages do homeowners gain from regular HVAC servicing?

    Efficiency, repair prevention, and lifespan are the headline benefits. But regular HVAC maintenance also delivers four advantages that homeowners often overlook until something goes wrong.

    Indoor air quality. Regular servicing improves indoor air quality by up to 40% by reducing dust, allergens, and mold in the system. Clean coils and drain pans prevent mold growth. Clean filters trap pollen, pet dander, and fine particles. If anyone in your home has asthma or allergies, this benefit alone justifies the cost.

    Safety. A furnace inspection includes checking the heat exchanger for cracks. A cracked heat exchanger leaks carbon monoxide into your living space. Technicians also test for gas leaks and verify that the flue is clear. These checks are not optional. Carbon monoxide is odorless and lethal.

    Warranty protection. Manufacturers void warranties without documented annual professional service. A failed compressor can cost thousands out of pocket if you cannot prove the system was maintained. Keep every service invoice in a folder or photograph it for digital storage.

    Consistent comfort. A calibrated system holds your set temperature without wide swings. Homeowners with serviced systems report fewer hot and cold spots, better humidity control, and quieter operation. These are not minor perks. They are the difference between a home that feels right and one that constantly frustrates you.

    Servicing frequency follows a simple rule: twice per year. Schedule the AC tune-up in spring and the furnace inspection in fall. This timing aligns with HVAC servicing recommendations from most industry professionals and gives you maximum protection heading into peak seasons.

    Key takeaways

    Regular HVAC servicing is the most cost-effective action a homeowner can take to protect equipment, reduce energy bills, and prevent expensive emergency repairs.

    Point Details
    Efficiency gains are measurable Maintained systems run 15–25% more efficiently, saving up to $800 per year in energy costs.
    Breakdowns drop sharply Preventive maintenance cuts unexpected breakdown risk by up to 70%, avoiding costly emergency calls.
    Equipment lasts longer Serviced systems reach 15–20 years; neglected ones fail in 8–12 years, forcing early replacement.
    Warranties require documentation Manufacturers void coverage without annual service records, leaving major repairs fully out of pocket.
    Twice-yearly scheduling is the standard A spring AC tune-up and fall furnace inspection cover both peak seasons and catch issues early.

    Why I stopped treating HVAC service as optional

    Most homeowners skip HVAC service for the same reason they skip the dentist. Nothing hurts right now, so why spend the money? I held that view until I watched a neighbor replace a five-year-old system because a $15 capacitor failed, went unnoticed, and destroyed the compressor over two summers.

    The math changed my thinking permanently. A $200 tune-up twice a year is $400. A compressor replacement is $2,000. A full system replacement is $8,000. You are not paying for maintenance. You are paying for insurance against a low-probability, high-cost event that becomes a high-probability event the longer you wait.

    The other mistake I see constantly is homeowners choosing the cheapest technician and then wondering why they keep getting repair recommendations. Choose a licensed contractor who provides a written report after every visit. That report is your warranty protection, your service history, and your early warning system. Schedule in september or april, not july or december, when every HVAC company in your area is slammed and you have no leverage on timing or price.

    Keep a simple folder, physical or digital, with every invoice. When you sell your home, a documented service history adds real value. Buyers notice. Inspectors notice. It signals that the house was cared for.

    — Sean

    Workbenchguide keeps your HVAC service on schedule

    Staying on top of HVAC maintenance is easier when you have a system for it. Workbenchguide gives homeowners a home maintenance checklist that includes HVAC service reminders, filter change schedules, and seasonal task tracking. You can log every service visit directly in the platform, which protects your warranty documentation and keeps your service history organized. Workbenchguide also offers step-by-step DIY maintenance guides for tasks you can handle yourself, plus contractor guidance when you need a professional. It is the practical tool that turns good intentions into a consistent routine.

    FAQ

    How often should HVAC be serviced?

    HVAC systems should be serviced twice per year. Schedule an AC tune-up in spring and a furnace inspection in fall to cover both peak seasons.

    What does a standard HVAC tune-up include?

    A standard tune-up covers coil cleaning, filter inspection, refrigerant level checks, electrical connection tightening, blower calibration, and a safety check of the heat exchanger and flue.

    Does regular HVAC maintenance actually save money?

    Yes. Maintained systems run 15–25% more efficiently and can save $300–$800 per year in energy costs, while avoiding emergency repair bills that run 3–5 times the cost of a routine visit.

    Will skipping service void my HVAC warranty?

    Most manufacturers require documented annual service to honor warranty claims. Without service records, a failed compressor or heat exchanger becomes a full out-of-pocket expense.

    What is the best time of year to schedule HVAC service?

    Spring and fall are the best times. Shoulder season scheduling avoids peak demand waitlists, gives you priority booking, and lets technicians catch problems before you need the system at full capacity.