Author: Sean C

  • Why Update Lighting Fixtures: Benefits for Every Home

    Why Update Lighting Fixtures: Benefits for Every Home

    Updating lighting fixtures is one of the fastest ways to improve your home’s appearance, cut energy costs, and make every room safer and more functional. The term “fixture upgrade” covers everything from swapping a dated ceiling fan light to installing a full layered lighting system with smart controls. Whether you own or rent, the reasons to change fixtures go well beyond style. Modern lighting technology, particularly LED and smart systems, delivers measurable savings and real quality-of-life improvements that older fixtures simply cannot match.

    Why update lighting fixtures for aesthetics and design

    Modern fixtures do more than light a room. They define it. A well-chosen pendant over a kitchen island or a statement chandelier in an entryway acts as a focal point, the same way art or furniture does. Swapping one dated fixture can shift the entire feel of a space without touching a single wall.

    Man adjusting layered lighting in kitchen

    The most effective approach to improving home lighting is layered lighting, which combines three types: ambient (general overhead light), task (focused light for work areas), and accent (decorative or directional light). Layered lighting improves multifunctionality and lets you adapt a room from bright and practical to warm and relaxed within seconds. A living room with only one overhead fixture feels flat. Add a floor lamp, under-shelf lighting, and a dimmer, and the same room feels intentional and polished.

    Fixture style also changes how large or small a room feels. Recessed lighting draws the eye upward and makes ceilings appear higher. A large drum shade pendant in a small dining room creates intimacy. Sconces flanking a bathroom mirror eliminate harsh shadows and make the space feel more like a spa than a utility room.

    Popular fixture choices that deliver strong visual impact include:

    • Pendant lights: Work well over kitchen islands, dining tables, and entryways
    • Recessed downlights: Clean and versatile for kitchens, hallways, and living rooms
    • Under-cabinet lighting: Adds task light in kitchens while highlighting countertops
    • Wall sconces: Ideal for bathrooms, stairways, and bedroom reading nooks
    • Statement chandeliers: Anchor dining rooms and foyers with personality

    Pro Tip: Match your fixture’s finish (matte black, brushed nickel, brass) to other metal accents in the room, like cabinet hardware or faucets. This creates a pulled-together look without a full renovation.

    How much energy do LED fixtures actually save?

    The answer is significant. LED lighting uses 75% less energy than incandescent bulbs. That single fact means a home running 20 light fixtures could cut its lighting electricity use by three-quarters just by switching bulb and fixture technology. That reduction shows up directly on your monthly utility bill.

    LED fixtures also last far longer than incandescent or fluorescent alternatives. Fewer replacements mean lower maintenance costs over time, which matters especially for fixtures in hard-to-reach spots like vaulted ceilings or stairwells.

    Infographic illustrating LED lighting benefits

    Feature Incandescent LED
    Energy use Baseline ~75% less
    Lifespan Short Much longer
    Heat output High Low
    Dimmer compatible Most Many models
    Smart control ready No Yes (many models)

    Smart lighting takes savings further. Smart systems adjust brightness and color temperature dynamically throughout the day, reducing waste when rooms are empty and matching light levels to actual need. Voice control and scheduling mean lights are never left on by accident. For homeowners focused on cutting energy bills, smart LED fixtures are the single most cost-effective upgrade available.

    Pro Tip: When replacing fixtures, check the fixture’s maximum wattage rating. Installing a bulb that exceeds the rating is a fire risk, even with LED bulbs, since some older fixtures have heat-sensitive wiring.

    Does updated lighting improve home functionality and safety?

    Updated lighting improves both, and the two are more connected than most homeowners realize. Poor lighting is a leading cause of household accidents. Stairways without adequate lighting, dark hallways, and unlit exterior steps all create fall and trip hazards. Replacing dim or broken fixtures in these areas is a direct safety improvement, not just a cosmetic one.

    Outdated fixtures often lack proper grounding, and degraded wiring creates fire and shock hazards. This is a hidden risk that many homeowners overlook because the fixture still turns on. A light that works is not necessarily a light that is safe.

    Functional lighting upgrades that make the biggest practical difference:

    1. Stairway and hallway lighting: Install fixtures at both the top and bottom of stairs. Motion-activated options work well here since these areas are used briefly and frequently.
    2. Exterior and entry lighting: Well-lit entries deter crime and improve visibility for guests. Outdoor lighting reduces property crime risks and creates a safer environment around the home.
    3. Kitchen task lighting: Under-cabinet lights eliminate shadows on countertops, making food prep safer and more accurate.
    4. Bathroom vanity lighting: Side-mounted sconces at eye level eliminate the unflattering and unsafe shadows created by overhead-only lighting.
    5. Smart dimmers and schedules: Dimmers let you shift a room from bright work mode to relaxed evening mode. Scheduled lighting can simulate occupancy when you travel, adding a security layer.

    Repeated flickering or breaker trips indicate electrical system issues that require professional evaluation before any fixture replacement. Skipping that step and installing new fixtures over faulty wiring creates new risk on top of old risk. A home safety inspection before a major lighting upgrade is the right starting point.

    Does upgrading lighting increase home value?

    Yes, and the return is stronger than most homeowners expect. Landscape lighting accounts for up to 7% of a home’s total value and scores a perfect 10 out of 10 on the homeowner Joy Score, recovering roughly 59% of its cost at resale. That is a strong return for an upgrade that many homeowners treat as optional.

    Interior lighting upgrades also move the needle. Bright, modern lighting makes homes appear larger and cleaner, which directly influences buyer perception during showings. Real estate agents consistently rank lighting among the highest-ROI minor cosmetic improvements available to sellers.

    “The psychology of lighting influences buyer perception. Modern layered lighting signals a well-maintained, inviting home, and buyers respond to that signal before they consciously process it.”

    The staging effect of good lighting is real. Homes shown with warm, layered lighting feel more livable than homes with harsh overhead fluorescents or dim, dated fixtures. Buyers form impressions in seconds, and lighting shapes those impressions before they read a single feature on the listing sheet.

    Key ways lighting upgrades boost buyer appeal:

    • Exterior lighting creates a strong first impression during evening showings
    • Updated kitchen and bathroom fixtures signal a well-maintained home
    • Recessed and task-specific lighting yields higher perceived value than many large renovations
    • Consistent fixture finishes throughout the home suggest intentional design

    Lighting upgrades typically cost between $100 and $300 per fixture, making them one of the most accessible ways to improve both daily living and resale appeal without structural work.

    Key Takeaways

    Updating lighting fixtures delivers overlapping benefits across aesthetics, energy savings, safety, and home value, making it one of the most cost-effective upgrades available to homeowners and renters.

    Point Details
    Energy savings are immediate LED fixtures use 75% less energy than incandescent bulbs, cutting utility bills from day one.
    Layered lighting transforms rooms Combining ambient, task, and accent lighting improves both function and visual appeal without renovation.
    Safety is a hidden benefit Old fixtures with degraded wiring create fire and shock hazards that new fixtures eliminate.
    Lighting boosts resale value Landscape lighting recovers ~59% of cost at resale and can account for up to 7% of home value.
    Budget is manageable Most fixture upgrades cost $100–$300 per unit, delivering outsized visual and functional impact.

    What I’ve learned from watching homeowners get lighting wrong

    Most homeowners I talk to treat lighting as the last item on a renovation list. They spend months choosing paint colors and cabinet hardware, then pick the first fixture that fits the hole in the ceiling. That approach explains why so many updated kitchens still feel dim and uninviting.

    The mistake I see most often is treating every room as a single-light problem. One overhead fixture, centered in the room, is almost never enough. It creates flat, shadowless light that makes a space feel institutional rather than residential. The fix is not expensive. Adding one or two lamps, a dimmer switch, or under-cabinet lighting costs less than a new appliance and changes the room completely.

    The second mistake is skipping the electrical check. I have seen homeowners install beautiful new fixtures over wiring that should have been replaced a decade ago. The new fixture looks great right up until it causes a problem. Before you spend money on fixtures, spend an hour on a basic electrical safety check. It is the kind of step that feels unnecessary until it is not.

    My honest advice: start with one room, do it properly with layered lighting, and live with it for a week. You will not want to go back. Then work through the rest of the house incrementally. A whole-home lighting overhaul done at once is expensive and exhausting. Room by room, it is manageable and satisfying.

    — Sean

    Plan your lighting upgrade with Workbenchguide

    Lighting upgrades are most effective when they fit into a broader home maintenance plan. Workbenchguide’s home maintenance checklist helps you schedule fixture reviews alongside other annual tasks, so nothing gets overlooked. You can track which rooms need updates, flag electrical concerns before they become problems, and work through upgrades at a pace that fits your budget. Workbenchguide also offers DIY project guides for homeowners who want step-by-step help with fixture installation, wiring checks, and room-by-room lighting plans.

    FAQ

    Why should I update lighting fixtures in my home?

    Updated fixtures improve home aesthetics, cut energy costs with LED technology, and eliminate safety risks from degraded wiring in older fixtures. They also increase perceived home value and buyer appeal.

    How much do lighting fixture upgrades typically cost?

    Most fixture upgrades cost between $100 and $300 per fixture, making them one of the more affordable home improvements with strong visual and functional returns.

    Do LED fixtures really save money on energy bills?

    Yes. LED fixtures use 75% less energy than incandescent bulbs, which translates directly to lower monthly utility costs from the moment you switch.

    Can old lighting fixtures be a safety hazard?

    Old fixtures often have degraded insulation and missing grounding, which creates fire and shock risks. Flickering lights or frequent breaker trips are warning signs that require professional evaluation.

    Does updated lighting increase home resale value?

    Landscape and exterior lighting can account for up to 7% of a home’s total value and recover roughly 59% of its cost at resale. Interior lighting upgrades also improve buyer perception during showings.


  • Easy Weekend Projects That Boost Your Home’s Value

    Easy Weekend Projects That Boost Your Home’s Value

    Easy weekend projects are simple home improvements completed within 4–16 hours that raise your home’s comfort, appearance, and long-term value without requiring professional skills. The best projects combine high impact with low cost, making them accessible to any homeowner regardless of experience. Workbenchguide categorizes these tasks into three types: aesthetic upgrades, functional repairs, and preventive maintenance. Each type fits neatly into a Saturday or Sunday schedule, and the right mix of all three keeps your home in top shape year-round while cutting the cost of future repairs.

    1. What are the best easy weekend projects for homeowners?

    The highest-value weekend projects share one trait: they deliver visible results fast. Interior repainting costs $100–$300 per room and takes 4–8 hours. That makes it one of the most cost-effective upgrades you can do in a single day.

    Here are the top projects ranked by impact and accessibility:

    • Interior repainting. A single gallon of quality paint covers roughly 400 square feet. Stick to neutral tones like warm white or greige to appeal to the widest range of tastes.
    • Kitchen hardware upgrades. Swapping cabinet pulls and a faucet costs $200–$800 and takes 2–8 hours. The visual difference is immediate and dramatic.
    • Bathroom refresh. Replacing a toilet seat, re-caulking the tub, and updating towel bars runs $150–$400 and fits within one to two days. Bathrooms are high-scrutiny spaces for buyers and guests alike.
    • Garage door replacement. This is the single highest-ROI curb appeal project available. A garage door replacement delivers a 268% return on investment at a cost under $5,000. That number puts it ahead of nearly every interior remodel.
    • Steel entry door replacement. At roughly $2,435, a new steel entry door returns 216% on investment. It also improves security and energy efficiency at the same time.

    Pro Tip: Prioritize projects by impact first, not by what bothers you most. A fresh coat of paint in the living room will impress more people than a perfectly organized closet.

    Curb appeal projects consistently outperform major interior remodels on ROI. If you have limited weekends, start outside and work your way in.

    Man planning weekend home improvement projects indoors

    2. How to plan and execute weekend projects effectively

    Good planning separates a finished project from an abandoned one. The most common reason homeowners quit mid-project is underestimating time or missing a key material. A short planning session on Friday evening prevents both problems.

    Follow these steps before you pick up a single tool:

    1. Define the project scope. Write down exactly what done looks like. “Paint the bedroom” is vague. “Two coats on all four walls, trim excluded” is a project.
    2. Estimate time honestly. Double your first guess. First-time tasks always take longer than expected due to prep, cleanup, and small mistakes.
    3. Gather all materials the day before. A mid-project hardware store run kills momentum and adds an hour to any job.
    4. Lay out your tools. Beginners get the best results when they stick to familiar tools and tasks where mistakes have minimal consequences. Check Workbenchguide’s essential DIY tool kit before buying anything new.
    5. Set a stopping point. Know in advance what you will do if the project runs long. Leaving a half-painted wall overnight is fine. Leaving a half-removed toilet is not.
    6. Know when to call a pro. Electrical panel work, load-bearing wall changes, and gas line repairs fall outside safe DIY territory. Stop at the boundary and hire a licensed contractor.

    Pro Tip: Batch similar projects together. If you are already painting one room, prep the next room the same weekend. Setup and cleanup time is shared, so you effectively get two projects done in the time of one and a half.

    Breaking projects into weekend-sized pieces reduces procrastination and prevents the kind of deferred maintenance that turns a $50 fix into a $500 repair.

    3. Which weekend projects prevent costly repairs?

    Preventive maintenance is the most financially important category of weekend work. A small task done today eliminates a large bill six months from now. The step-by-step guides at Workbenchguide walk you through each of these tasks in plain language.

    The highest-priority preventive tasks include:

    • HVAC filter replacement. Monthly filter checks keep your system running efficiently and protect indoor air quality. A clogged filter forces the motor to work harder, shortening its lifespan by years.
    • Gutter cleaning. Clogged gutters push water back under your roofline and into your foundation. Clean them every fall and spring. The job takes 1–2 hours and requires only a ladder and gloves.
    • Weatherstripping replacement. Worn weatherstripping lets conditioned air escape and drives up energy bills. New foam or rubber strips cost under $20 and install in under an hour per door.
    • Window and door caulking. Gaps around frames let in moisture, insects, and drafts. A tube of exterior caulk costs $5 and seals multiple windows. This is one of the highest-return tasks per dollar spent.
    • Annual exterior walk-around. Walk the full perimeter of your home once a year. Look for cracked siding, peeling paint, soft wood near the foundation, and any gaps where pests could enter. Catching these early costs almost nothing to fix.
    • Smoke and carbon monoxide detector testing. Test every detector monthly. Replace batteries annually. Replace the full unit every 10 years. This task takes five minutes and is non-negotiable.

    A full home maintenance checklist from Workbenchguide organizes these tasks by month so nothing gets missed. Consistent upkeep is the single most effective way to protect your home’s value over time.

    4. Creative and fun weekend projects to refresh your living space

    Not every weekend project needs to be about maintenance. Some of the most satisfying work is purely aesthetic. Painting an accent wall, installing floating shelves, or upgrading lighting can transform a room’s feel in 2–4 hours for $50–$300.

    These projects deliver outsized visual impact relative to their cost:

    • Accent wall painting. Pick one wall in a living room or bedroom and paint it a bold or contrasting color. The effect is dramatic, and the cost is one quart of paint plus an afternoon.
    • Floating shelves. A set of three floating shelves adds storage and visual interest to any blank wall. Installation takes about two hours with a drill, a level, and wall anchors.
    • Lighting upgrades. Swapping a dated overhead fixture for a modern pendant or semi-flush mount changes the entire character of a room. Most fixture swaps take under an hour with a voltage tester and basic wiring knowledge.
    • Indoor plants and planters. Adding greenery improves air quality and makes a space feel alive. Group three plants of varying heights in a corner for an immediate design upgrade.
    • Cabinet painting. Kitchen cabinets do not need replacing to look new. Sanding, priming, and painting them in a fresh white or navy takes a full weekend but costs a fraction of new cabinetry.

    Starting with one project at a time builds momentum and keeps the work enjoyable. Tackling too many aesthetic projects at once leads to half-finished rooms and lost motivation.

    Key takeaways

    The most effective weekend projects combine quick execution, clear visual results, and preventive value to protect your home and your budget.

    Point Details
    Start with high-ROI projects Curb appeal upgrades like garage doors return over 200% and take one weekend.
    Plan materials the day before Missing supplies mid-project wastes time and kills momentum.
    Prioritize preventive tasks Monthly HVAC filter checks and annual exterior inspections prevent expensive repairs.
    Batch similar projects Combining two paint jobs in one weekend cuts setup and cleanup time significantly.
    Know your limits Stop at electrical, gas, and structural work. Call a licensed contractor for those tasks.

    What I have learned from years of weekend projects

    The case for starting smaller than you think you should

    Every homeowner I have talked to has made the same mistake at least once: picking a project that was just slightly too big for a weekend. The result is a half-finished room that sits untouched for three months and quietly drains motivation for every future project.

    The fix is simple but counterintuitive. Pick a project that feels almost too easy. Finish it completely. The satisfaction of a done project is more powerful than any productivity tip I know. It creates a pull toward the next one.

    I have also noticed that categorizing tasks by time and impact changes how you feel about home maintenance entirely. When you see a list of 30-minute tasks separate from a list of full-day tasks, you stop avoiding the list. You just pick the right task for the time you have.

    The homeowners who maintain their properties best are not the ones with the most skill. They are the ones who show up consistently. A weatherstripping replacement in october and a gutter cleaning in november add up to thousands of dollars in avoided repairs over a decade. That math is hard to argue with.

    My honest advice: use a checklist, keep it visible, and treat each weekend project as a small investment in a home you will be glad you took care of.

    — Sean

    Workbenchguide makes weekend projects easier to plan and track

    Workbenchguide gives homeowners a single place to organize every project, maintenance task, and repair on their list. The platform includes step-by-step DIY guides, monthly and annual maintenance schedules and checklists, and contractor referrals for the jobs that go beyond DIY. You can sort tasks by time, cost, and priority so you always know what to tackle next. Whether you are planning a full weekend of upgrades or just a quick Saturday fix, Workbenchguide keeps you organized and on track. Check out the full range of DIY project ideas to find your next project.

    FAQ

    How long do easy weekend projects typically take?

    Most easy weekend projects take 2–8 hours. Larger tasks like a full room repaint or cabinet refresh may stretch across one to two days.

    What is the highest-ROI weekend project for homeowners?

    Garage door replacement delivers a 268% return on investment, making it the top-ranked curb appeal project by ROI. Steel entry door replacement follows at 216%.

    How do I avoid running out of time on a weekend project?

    Double your initial time estimate and gather all materials the day before you start. Setting a clear stopping point in advance also prevents projects from running into the work week.

    Which preventive maintenance tasks should I do every month?

    Replace or inspect your HVAC filter every month. Test smoke and carbon monoxide detectors monthly as well. These two tasks take under 10 minutes combined and protect both your home and your family.

    Do I need special tools to start simple DIY projects?

    Most beginner projects require only a drill, a level, a paintbrush, and basic hand tools. Workbenchguide’s essential home tool kit guide lists exactly what to own before starting your first project.

  • Landscaping’s Role in Foundation Protection

    Landscaping’s Role in Foundation Protection

    Landscaping is defined as the primary moisture management system that determines whether your home’s foundation stays stable or shifts, cracks, and leaks. Foundation problems stem from uneven water distribution in the soil surrounding your home, not just from structural defects. The role of landscaping for foundation health is to control where water goes, how fast it drains, and how much moisture the soil holds at any given time. Get that wrong, and you face one of the most expensive repair bills a homeowner can encounter. Basement water damage affects 98% of U.S. homes at some point, with an average repair cost of $15,400 per claim.

    What is the role of landscaping for foundation stability?

    Landscaping controls three forces that directly threaten your foundation: hydrostatic pressure, soil shrinkage, and differential settlement. Hydrostatic pressure builds when water pools against your foundation walls and pushes inward. Soil shrinkage happens when plants or drought pull moisture out unevenly, causing the ground to contract under one section of the slab. Differential settlement is what you see when one corner of your house sinks faster than another.

    Proper grading, strategic planting, and managed irrigation each address one of these forces. No single fix covers all three. That is why the importance of landscaping for buildings goes far beyond curb appeal. It is an active, ongoing system that requires the same attention as your roof or HVAC.

    Properly graded yard with drainage features near foundation

    How does grading protect your foundation?

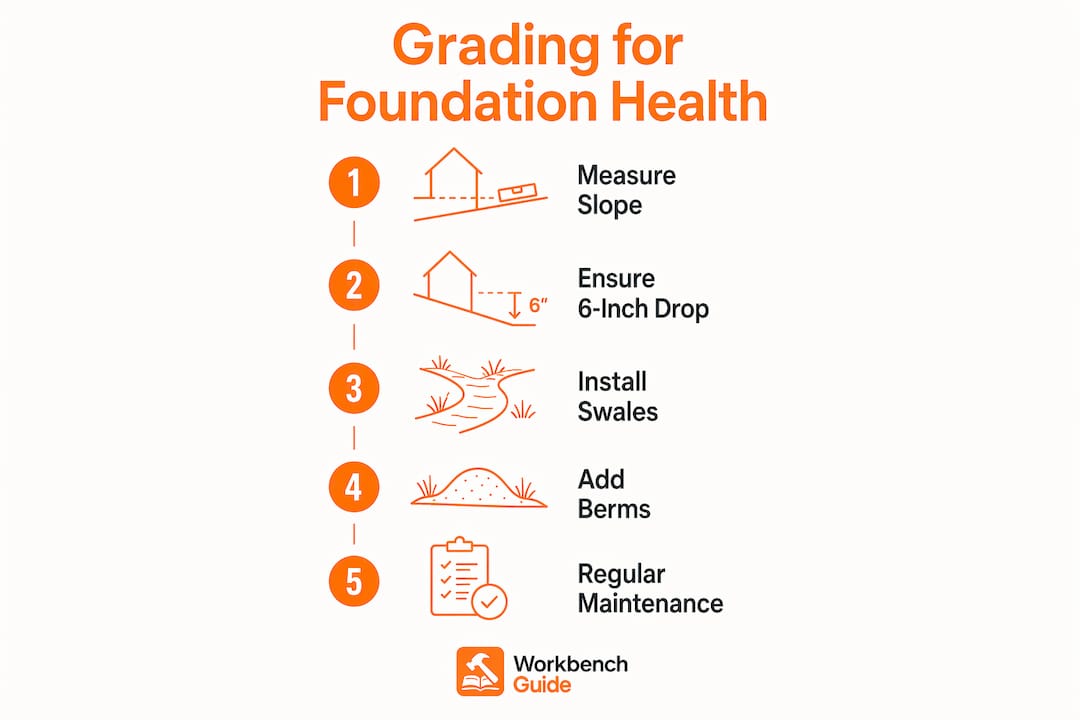
    Grading is the single most effective foundation protection tool available to homeowners. The accepted standard, referenced in IRC Section R401.3, requires a minimum 6-inch drop over 10 feet from the foundation wall. That 5–6% slope sends surface water away before it can saturate the soil and build pressure against your walls.

    When grading fails, water sits against the foundation. Saturated soil creates hydrostatic pressure that forces moisture through hairline cracks and, over time, widens them. Poor grading also accelerates frost heave in cold climates, where water trapped near the footing freezes, expands, and physically lifts sections of the foundation.

    Grading settles and shifts over time. Landscaping changes, tree roots, and seasonal freeze-thaw cycles all alter the slope around your home. A grading inspection every two to three years catches problems before they become structural.

    Drainage features like swales (shallow channels that redirect runoff) and berms (raised soil ridges) complement grading by giving water a clear path away from the house. They work best when designed as part of the overall yard layout, not added as afterthoughts.

    Pro Tip: Place a level on a long board against your foundation and measure the drop at the far end. If the board tips toward the house instead of away, you have negative grading that needs correction.

    Grading slope Effect on foundation Maintenance need
    Less than 2% (under 2.4 inches per 10 feet) Water pools near foundation; high hydrostatic risk Immediate regrading required
    5–6% (6 inches per 10 feet) Rapid runoff; low moisture accumulation Inspect every 2–3 years
    Over 10% Fast runoff but erosion risk; soil loss near footing Add erosion control plants or ground cover

    Infographic illustrating steps for grading to protect foundation

    How far should plants be from your foundation?

    Plant placement is the most underestimated factor in how landscaping affects foundation health. Shrubs should sit 3–5 feet from the foundation; large trees that reach 50 feet or more at maturity need 25–50 feet of clearance. These distances are not arbitrary. They reflect how far roots travel and how much water a mature plant pulls from the surrounding soil.

    Root damage is widely misunderstood. Roots rarely crush intact concrete. The real mechanism is moisture extraction. A large oak or willow pulls hundreds of gallons of water from the soil each week during summer. That extraction causes the soil to shrink and pull away from the foundation unevenly, which triggers differential settlement.

    Overplanting near the foundation creates a second problem: dense foliage traps moisture against the siding and walls. That sustained dampness accelerates wood rot, attracts pests, and keeps the soil near the foundation perpetually wet.

    Mulch is useful for moisture retention in garden beds, but it needs to stay clear of the structure itself. Keep mulch at least 12 inches from the foundation siding to prevent termite attraction and moisture buildup against the wall.

    Pro Tip: Before planting anything near your house, look up the mature spread of the root system, not just the canopy. A plant labeled “compact” at the nursery can still send roots 15 feet in search of water.

    Safe planting distances by plant type:

    • Ground cover and low perennials: 12–18 inches from the foundation wall
    • Small shrubs (under 4 feet mature height): 2–3 feet from the foundation
    • Medium shrubs (4–6 feet mature height): 3–5 feet from the foundation
    • Small ornamental trees (under 25 feet): 10–15 feet from the foundation
    • Large shade trees (over 40 feet): 25–50 feet from the foundation
    • Willows, poplars, and silver maples: 50 feet minimum due to aggressive root systems

    For seasonal garden maintenance that accounts for plant growth and soil conditions, a structured schedule prevents both overplanting and neglect.

    How do irrigation, gutters, and seasonal maintenance protect foundations?

    Inconsistent soil moisture from irrigation and tree root activity causes more foundation movement than most homeowners realize. Overwatering near a slab causes clay-heavy soils to swell. A drought period, or a large tree pulling water from the same area, causes rapid shrinkage. Both extremes stress the foundation in opposite directions.

    Gutters and downspouts are part of the landscaping drainage system, even though most homeowners treat them separately. A clogged gutter dumps concentrated water directly at the foundation during every rainstorm. Extending downspouts 4–10 feet away from the foundation wall prevents that concentrated runoff from saturating the soil in one spot.

    Recommended maintenance tasks and schedules:

    1. Spring: Inspect grading around the full perimeter after frost heave season. Fill any low spots that slope toward the house.
    2. Spring: Check downspout extensions and clean gutters after winter debris accumulation.
    3. Summer: Monitor irrigation zones near the foundation. Adjust timers to avoid overwatering during wet periods.
    4. Late summer: Watch for soil pulling away from the foundation during drought. Slow, deep watering near the perimeter stabilizes moisture levels.
    5. Fall: Clear leaves from drainage swales and check that berms are intact before the rainy season.
    6. Fall: Remove mulch that has crept within 12 inches of the siding and reapply at a safe distance.
    7. Winter: Inspect foundation walls for new cracks after the first hard freeze. Early detection limits repair costs.

    For a full fall home inspection checklist that covers drainage and grading alongside other seasonal tasks, Workbenchguide provides a structured guide built for homeowners.

    Moisture extreme Common cause Preventive landscaping action
    Soil swelling near foundation Overwatering, poor drainage, clay soil Regrade, add drainage swale, reduce irrigation frequency
    Soil shrinkage and gap formation Drought, large tree root uptake Slow deep watering at perimeter; remove or relocate aggressive trees
    Pooling water after rain Negative grading, clogged downspouts Correct slope; extend downspouts; add French drain if needed

    What are the biggest landscaping mistakes that damage foundations?

    The most damaging landscaping mistakes are the ones that look fine for years before the foundation shows symptoms. By then, repair costs are significant.

    Construction-related soil compaction limits healthy root growth and natural water drainage near foundations. Homes built on compacted fill soil have reduced permeability from the start, which means landscaping choices matter even more in those yards.

    Homeowners frequently overplant foundations for instant aesthetics without accounting for mature plant size. A row of arborvitae planted 18 inches from the house looks tidy at three feet tall. At 20 feet tall and 6 feet wide, those same plants trap moisture, block inspection access, and pull water from the soil unevenly.

    Pro Tip: Walk your foundation perimeter after a heavy rain. Any area where water sits for more than 30 minutes after the rain stops is a drainage problem that needs correction before the next season.

    Common mistakes homeowners make and how to avoid them:

    • Planting too close: Always use mature size, not nursery size, to determine placement distance.
    • Mulch against siding: Keep a clear 12-inch gap. Mulch against wood siding invites termites and rot.
    • Ignoring downspout direction: A downspout that empties toward the house negates all other drainage work.
    • Skipping grading checks: Grading shifts every few years. A one-time correction is not permanent.
    • Watering on a fixed schedule regardless of rainfall: Soil near the foundation needs consistent moisture, not a fixed calendar. Adjust irrigation based on actual conditions.
    • Assuming roots are the main threat: Moisture imbalance causes far more foundation damage than direct root pressure. Address water first.

    For guidance on monitoring foundation cracks that may signal soil movement, Workbenchguide offers a practical homeowner’s guide.

    Key Takeaways

    Proper landscaping is the most cost-effective foundation protection a homeowner can maintain, requiring correct grading, strategic planting distances, managed irrigation, and seasonal inspections.

    Point Details
    Grading is the first defense Maintain a 6-inch drop over 10 feet from the foundation to prevent hydrostatic pressure.
    Plant distance matters Keep shrubs 3–5 feet away and large trees 25–50 feet away to prevent moisture-driven soil movement.
    Roots cause indirect damage Roots extract moisture and shrink soil unevenly rather than physically breaking concrete.
    Mulch needs a gap Keep mulch at least 12 inches from foundation siding to prevent termites and moisture buildup.
    Seasonal checks prevent repairs Inspect grading, gutters, and drainage each spring and fall before problems compound.

    What I’ve learned from watching homeowners get this wrong

    Most homeowners treat landscaping as decoration and foundation care as a separate, reactive problem. That split thinking is expensive. Every grading issue I have seen that led to a basement leak started with a yard that looked perfectly fine from the street.

    The grading check is the first thing I recommend to any homeowner, and it is the most skipped. People spend thousands on plants and hardscaping without ever confirming that water moves away from the house. A $15 level and 20 minutes of walking the perimeter would catch most problems before they start.

    The other pattern I see constantly is underestimating how large plants grow. A homeowner plants a fast-growing shrub for privacy, and within five years it is pressing against the siding, trapping moisture, and blocking access to the foundation wall. Planning for mature size is not complicated. It just requires looking at a plant tag before you dig.

    The homeowners who avoid costly foundation repairs are not the ones who spend the most on landscaping. They are the ones who inspect consistently, correct grading when it shifts, and keep water moving away from the house every season. That discipline, more than any specific plant or product, is what protects the investment.

    — Sean

    Workbenchguide makes foundation maintenance manageable

    Foundation protection through landscaping is not a one-time project. It requires consistent attention across every season, from spring grading checks to fall gutter cleaning to summer irrigation adjustments. Workbenchguide gives homeowners a structured way to stay on top of every task without relying on memory or guesswork.

    The home maintenance checklist on Workbenchguide covers foundation care, drainage inspection, gutter maintenance, and seasonal yard tasks in one organized resource. You get reminders when tasks are due, step-by-step guidance for DIY work, and access to contractor help when a job goes beyond what you want to tackle alone. Staying ahead of landscaping maintenance is the most direct way to avoid the repair costs that catch homeowners off guard.

    FAQ

    What is the minimum grading slope for foundation protection?

    The accepted standard is a 6-inch drop over the first 10 feet from the foundation wall, which equals a 5–6% slope. This slope moves surface water away fast enough to prevent soil saturation and hydrostatic pressure buildup.

    How far should trees be planted from a house foundation?

    Large trees that reach 50 feet or more at maturity should be planted 25–50 feet from the foundation. Smaller ornamental trees need at least 10–15 feet of clearance to prevent root-driven soil moisture extraction.

    Do tree roots actually break through concrete foundations?

    Roots rarely break intact concrete directly. The primary damage comes from roots extracting soil moisture unevenly, which causes the soil to shrink and pull away from the foundation, leading to settlement and cracking.

    How does irrigation affect foundation stability?

    Overwatering near a slab causes clay soils to swell, while underwatering during drought allows rapid soil shrinkage. Both extremes create uneven pressure on the foundation, so consistent, moderate irrigation near the perimeter is the goal.

    How often should homeowners check their foundation grading?

    A grading inspection every two to three years is the standard recommendation. Frost heave, landscaping changes, and soil settling all shift the slope over time, so a one-time correction does not stay effective permanently.

  • Why Check Tree Roots: Protect Your Home and Trees

    Why Check Tree Roots: Protect Your Home and Trees

    Checking tree roots is the process of examining a tree’s root system to assess its health, stability, and potential to damage nearby structures. Every homeowner and property manager should understand why check tree roots matters: roots can silently crack sidewalks, invade sewer lines, and destabilize trees long before any visible damage appears above ground. The formal term for this practice is a tree root health assessment, and ISA Certified Arborists recommend it as a core part of property maintenance. Michigan State University Extension and Purdue Extension both link root health directly to overall tree vitality and structural safety. Catching problems early costs far less than repairing a collapsed sewer line or a cracked foundation.

    Why check tree roots before problems become expensive

    Root inspection protects both your trees and your property. Roots grow silently underground, and by the time you see surface damage, the underlying problem has often been developing for years. A tree root health assessment gives you a clear picture of what is happening below the surface before repair bills arrive.

    Routine inspection can identify warning signs such as root flare issues, soil heaving, deadwood, and fungal growth. Each of these signals a different type of stress that, left unaddressed, can escalate into a safety hazard or a costly structural repair.

    Hands inspecting tree root signs and fungus

    One fact surprises most homeowners: roots rarely break solid concrete directly. The real mechanism is subtler. Roots remove moisture from clay soils, which causes the soil to shrink and settle, pulling the foundation with it over years. That slow, invisible process is exactly why regular inspection matters more than waiting for a crack to appear.

    Large trees also reach farther than most people expect. Trees can affect structures within a distance of 1 to 1.5 times their mature height. A 60-foot oak, for example, can influence soil and structures up to 90 feet away. That range puts many suburban homes well within the zone of potential root impact.

    What are the common signs of tree root problems?

    Knowing what to look for makes inspection far more effective. Root problems show up in several distinct ways, both above and below ground.

    Structural and surface signs:

    • Cracks in sidewalks, driveways, or patios that follow a curved or irregular path near a tree base
    • Lifted or buckled pavement sections, especially where surface roots are visible
    • Uneven ground or soil heaving around the base of a tree
    • Gaps forming between a structure and the soil line, such as along a porch or retaining wall
    • New cracks appearing in a foundation or basement wall near a large tree

    Tree health signs:

    • Yellowing or wilting foliage outside of normal seasonal changes
    • Premature leaf drop or sparse canopy growth
    • Fungal growth such as mushrooms or conks at the base of the trunk or on exposed roots
    • Soft or spongy wood at the root flare, which is the point where the trunk meets the soil
    • Deadwood appearing in the upper canopy, which can indicate root stress below

    Plumbing signs:

    • Slow drains or recurring blockages without an obvious cause
    • Gurgling sounds in toilets or drains
    • Unexplained wet patches in the yard, particularly in a line between the house and the street

    Tree roots exploit gaps in older pipe joints, leading to blockages, collapses, and recurring plumbing issues. If you notice any combination of slow drains and a large tree near your sewer line, a camera inspection of the pipe is worth scheduling. Pairing that with a yearly plumbing check catches problems before they become emergencies.

    Pro Tip: Not every crack near a tree is caused by roots. Accurate diagnosis requires both an arborist and a foundation contractor. Getting both opinions before any repair work prevents costly mistakes.

    How and when should you inspect tree roots?

    Timing and method both matter for an effective inspection. The good news is that most of the process requires no special tools and no digging.

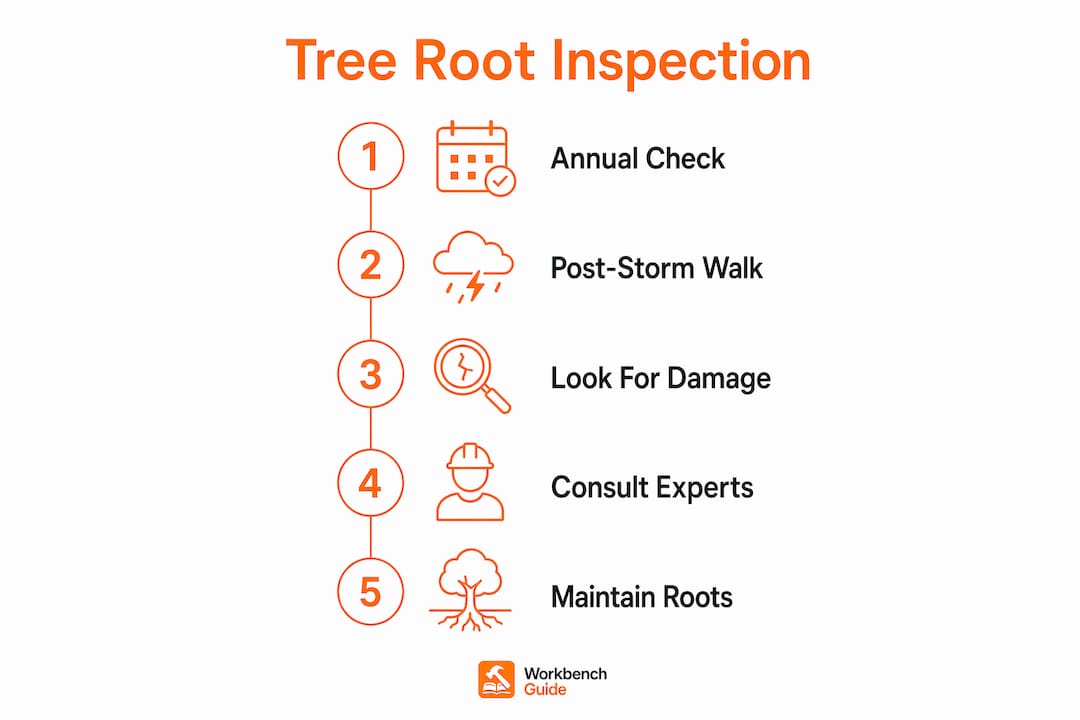
    1. Schedule annual inspections. Homeowners should inspect tree roots at least once a year and after major storms or droughts. Storms can shift soil and expose or damage roots. Droughts stress root systems and accelerate soil shrinkage around foundations.

    2. Walk the perimeter of each large tree. Start at the trunk and work outward to the drip line, which is the outer edge of the canopy. Look for the surface signs listed above. Pay close attention to the root flare where the trunk meets the ground.

    3. Check the soil. Press the soil near the base of the tree. Soft, spongy, or waterlogged soil can indicate root rot. Cracked or pulling-away soil near a foundation suggests moisture loss from root activity.

    4. Look at the tree from a distance. Step back and assess the canopy. Uneven growth, a leaning trunk, or a thin canopy on one side can all point to root problems on the opposite side.

    5. Avoid invasive digging. Do not dig around roots to investigate unless a certified arborist directs you to. Cutting or exposing roots unnecessarily causes more harm than the problem you are trying to diagnose.

    6. Call a professional for anything uncertain. An ISA Certified Arborist can perform a formal root zone assessment, use air spade technology to expose roots without cutting them, and give you a written risk evaluation. The benefits of a professional arborist consultation go well beyond what a visual inspection alone can reveal.

    Adding tree root checks to your fall maintenance checklist is one of the most practical ways to stay consistent. Fall is ideal because leaves have dropped, making it easier to spot canopy thinning, and the soil is often dry enough to reveal shrinkage patterns.

    Pro Tip: After any storm with winds above 40 mph, walk your property and check every large tree for newly exposed roots, soil lifting, or a slight lean that was not there before. These are early signs of root failure.

    Infographic showing tree root inspection steps

    What are the risks of ignoring tree root issues?

    The financial and safety consequences of ignoring root problems are significant. Repairs that cost a few hundred dollars when caught early can reach thousands once structural damage sets in.

    “The most expensive tree root repairs are the ones that were preventable. Sidewalk damage, sewer line failures, and foundation settling all share one thing in common: they give warning signs months or years before they require emergency repair. Homeowners who inspect regularly almost always pay less.”

    Sidewalk damage from tree roots averages $3 per linear foot to repair. Sewer line repairs cost around $1.66 per linear foot. Those numbers add up quickly on a long run of damaged pipe or a full sidewalk panel replacement.

    Risk type Cause Consequence
    Foundation settling Soil shrinkage from root moisture removal Structural cracks, uneven floors, costly repairs
    Sidewalk and driveway damage Surface root growth exploiting existing weaknesses Trip hazards, liability, replacement costs
    Sewer line blockage Root intrusion through pipe joint gaps Recurring clogs, pipe collapse, excavation costs
    Tree instability Root damage from pruning or disease Hazard tree requiring emergency removal
    Soil depression after removal Root decay following tree removal Grading issues, landscape adjustments over years

    Safety is the other side of the equation. A tree with compromised roots can fall without warning, especially during a storm. Root decay after tree removal can also cause soil depressions and grading issues over several years, creating new hazards even after the tree is gone. Protecting your home’s foundation requires thinking about drainage and root activity together, not separately.

    What solutions actually work for managing tree root problems?

    Root management works best when it starts before damage is severe. Several proven approaches protect both the tree and the property.

    Root barriers are physical guides, typically made of rigid plastic or metal sheeting, installed in the soil to redirect root growth away from structures. They work best when installed at the time of planting or early in a tree’s life. Retrofitting a barrier around a mature tree requires professional assessment to avoid cutting structural roots during installation.

    Professional root pruning is effective but carries real limits. Removing more than 20–25% of a tree’s root system at once raises the risk of instability. An arborist will assess the tree’s overall structure before recommending any pruning. Cutting structural roots over 4 inches in diameter can destabilize a tree entirely, making professional consultation non-negotiable before any significant root work.

    Regular monitoring by a certified arborist is the most reliable long-term strategy. An arborist can track changes in root zone health over time, recommend targeted interventions, and document the tree’s condition for insurance or legal purposes if a dispute arises. Learning about preventive tree care helps you understand what a professional monitoring program actually includes.

    Tree removal is a last resort, not a first response. It eliminates the root problem but introduces new ones. Soil settling from root decay after removal can cause depressions and grading issues that require landscaping adjustments over several years.

    • Consult both an arborist and a structural engineer or foundation contractor before deciding on removal near a foundation
    • Request a written risk assessment before any root pruning or removal work begins
    • Ask about air spade root zone excavation as a non-destructive diagnostic option
    • Document the tree’s condition with photos at each annual inspection

    Pro Tip: Root management options almost always include barriers, pruning, and structural support before removal becomes necessary. Preserving a healthy tree while protecting your property is the goal, not choosing one over the other.

    Key Takeaways

    Regular tree root inspection is the most cost-effective way to prevent structural damage, protect tree health, and avoid emergency repairs on your property.

    Point Details
    Inspect at least once a year Schedule inspections annually and after every major storm or drought.
    Roots damage indirectly Roots shrink clay soils and cause foundation settling, not direct concrete breakage.
    Know the warning signs Look for soil heaving, fungal growth, slow drains, and canopy thinning.
    Limit root pruning carefully Never remove more than 20–25% of a root system without professional guidance.
    Early detection saves money Sidewalk and sewer repairs caught early cost a fraction of emergency structural fixes.

    What I’ve learned from watching homeowners skip root inspections

    Most homeowners I talk to think about tree roots only after something goes wrong. A cracked sidewalk, a backed-up sewer, a tree that leans a little more than it used to. By that point, the options are narrower and the costs are higher.

    The misconception I hear most often is that roots are the direct cause of concrete cracking. They rarely are. The real culprit is soil moisture change, and that process is slow and invisible. That is exactly why waiting for visible damage is the wrong strategy. A tree can be quietly drying out clay soil around a foundation for a decade before a crack appears.

    The other mistake I see regularly is aggressive root cutting without expert input. A homeowner sees a root lifting a patio stone, cuts it out, and feels like the problem is solved. What they have actually done is potentially destabilized a tree that now poses a fall risk. The fix created a hazard worse than the original problem.

    The approach that consistently works is simple: annual visual checks, a professional arborist assessment every few years, and a clear record of what you observed and when. That record becomes valuable if you ever need to make an insurance claim or sell the property. Treat tree root inspection the same way you treat a roof check or a furnace service. It is routine maintenance, not emergency response.

    — Sean

    Workbenchguide can help you stay ahead of tree root issues

    Tree root inspection is one of dozens of property tasks that are easy to forget without a system. Workbenchguide gives homeowners and property managers a structured way to track every maintenance task, including seasonal tree checks, so nothing slips through. The home maintenance checklist covers the full year of property care, with timing guidance built in. You can schedule your annual root inspection alongside gutter cleaning, roof checks, and plumbing reviews so they all happen on time. When a task goes beyond DIY, Workbenchguide connects you with qualified contractors and certified professionals. Staying organized is how you avoid the expensive surprises that come from deferred maintenance.

    FAQ

    How often should I check tree roots?

    Inspect tree roots at least once a year and after any major storm or extended drought. Post-storm checks are especially important because soil shifts can expose or damage roots quickly.

    Can tree roots actually break a foundation?

    Roots rarely break solid concrete directly. They cause foundation damage by removing moisture from clay soils, which causes the soil to shrink and the foundation to settle over time.

    What is the safest way to remove problem roots?

    Never remove more than 20–25% of a root system at once, and avoid cutting any structural root over 4 inches in diameter without consulting an ISA Certified Arborist first.

    How do I know if roots are in my sewer line?

    Recurring drain blockages, gurgling sounds, and slow drains without an obvious cause are the main signs. A plumber can run a camera inspection to confirm root intrusion in the pipe.

    Is tree removal the best solution for root damage?

    Tree removal is a last resort. Root barriers, targeted pruning, and structural support address most root problems without removing the tree, and removal itself can cause soil settling issues for years afterward.

  • Why Flush Your Water Heater: Benefits and Best Practices

    Why Flush Your Water Heater: Benefits and Best Practices

    Flushing a water heater is the process of draining accumulated sediment and mineral deposits from the tank to maintain performance and extend its life. Most homeowners never think about this task until they hear strange noises, run out of hot water faster than usual, or face a repair bill that could have been avoided. The U.S. Department of Energy and major manufacturers list annual flushing as a standard maintenance requirement, and some even tie it to warranty coverage. Skipping it costs you money every month in wasted energy, and it shortens the life of one of the most expensive appliances in your home.

    Why flush your water heater? The sediment problem explained

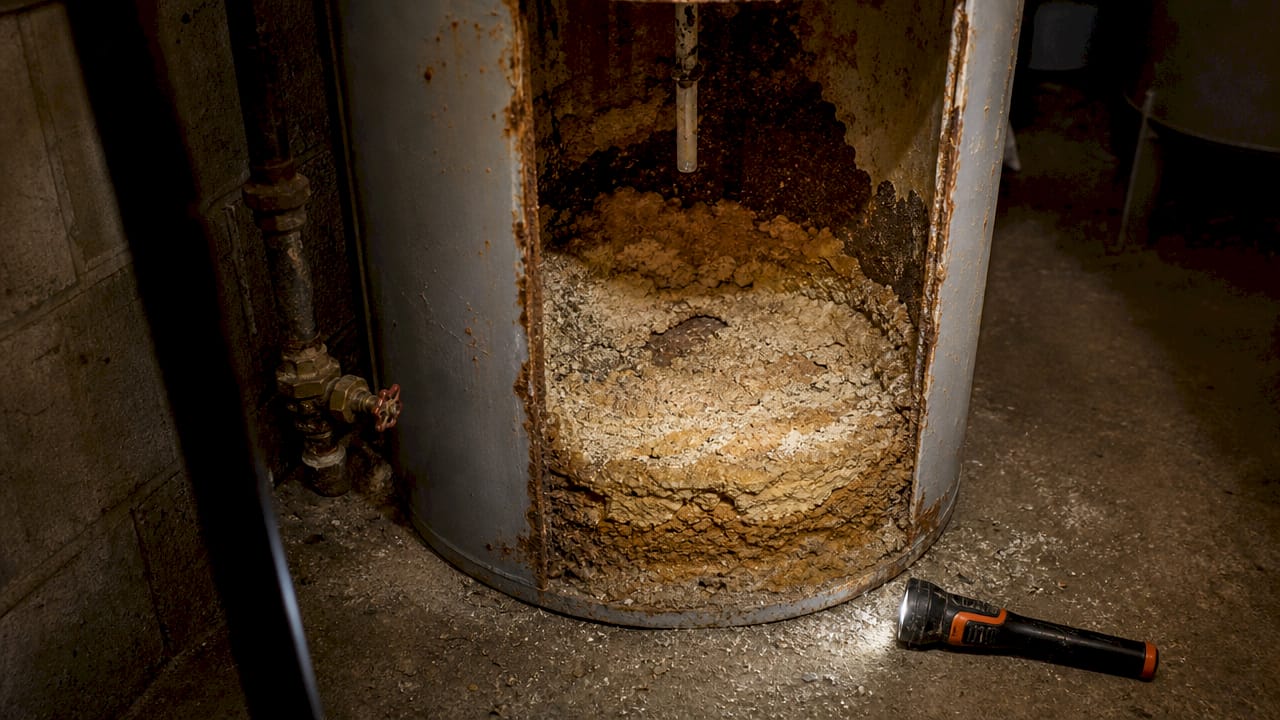
    Sediment buildup is the core reason every water heater needs periodic flushing. As water heats inside the tank, dissolved minerals like calcium carbonate and magnesium separate from the water and sink to the bottom. Over time, this layer grows thicker and harder, and it sits directly between the heating element and the water it is supposed to heat.

    The result is a serious efficiency problem. Sediment reduces efficiency by 20–40% by acting as an insulating barrier between the burner and the water. That means your water heater burns more gas or electricity to deliver the same amount of hot water, and your energy bill climbs every month as a result.

    Close-up of sediment buildup inside water heater tank

    The damage does not stop at efficiency. Sediment also traps moisture against the tank wall, which accelerates corrosion from the inside out. That trapped moisture creates popping and rumbling sounds as steam bubbles form and burst under the sediment layer. Those sounds are not just annoying. They signal that the tank lining is being eroded, which puts you on a fast track toward leaks or total tank failure.

    Hard water regions face the worst buildup rates. In areas with water hardness between 150–300 ppm, sediment can accumulate over an inch per year inside the tank. That is a significant volume of material displacing water and forcing your system to work harder every single day.

    How often should you flush your water heater?

    The general rule is once a year for most homes. Annual flushing keeps mineral deposits from hardening into a thick, difficult-to-remove layer and keeps the system running at full efficiency. Rheem and other major manufacturers back this schedule as a baseline for all tank-style water heaters.

    Homeowners in hard water areas need to flush more frequently. If your municipal water supply tests above 150 ppm in hardness, a six-month flushing schedule is the right call. You can check your water hardness through your local utility’s annual water quality report, which is publicly available in most states.

    A few other factors should influence your schedule:

    1. Tank age. A newer tank that has been flushed regularly is straightforward to service. An older tank that has never been flushed is a different situation entirely.
    2. Water source. Well water often carries higher mineral loads than treated municipal water, which speeds up sediment accumulation.
    3. Household size. More people means more hot water demand, which means more heating cycles and faster sediment formation.
    4. Visible signs. Discolored water, reduced hot water output, or unusual noises all signal that flushing is overdue regardless of your last service date.

    Pro Tip: Set a recurring calendar reminder every september to schedule your annual water heater flush before the heavy winter demand season begins. Pairing it with your furnace checkup makes it easy to remember.

    What are the full benefits of flushing your water heater?

    The benefits of flushing your water heater go well beyond a lower energy bill. Regular maintenance protects the tank itself, the water quality in your home, and your budget over the long term.

    Infographic showing benefits of flushing a water heater

    Longer lifespan. Preventive maintenance extends a tank-style water heater’s life by 3–5 years beyond the average 12-year lifespan. That is a meaningful return on a task that takes less than an hour once a year. Replacing a water heater costs several hundred to over a thousand dollars depending on the unit and labor, so adding years to its life has real financial value.

    Restored tank capacity. Sediment physically displaces water inside the tank. A 50-gallon tank with five inches of sediment buildup may effectively hold only 40 gallons of usable water. That explains why households notice shorter hot showers and faster hot water depletion as the tank ages without maintenance.

    Fewer leaks and less corrosion. Trapped moisture under sediment creates the conditions for rust to form on the tank wall. Flushing removes that moisture-trapping layer before it causes permanent damage. A corroded tank will eventually leak, and water damage to floors, walls, and subfloor is far more expensive than a routine flush.

    Quieter operation. The popping and rumbling sounds many homeowners hear from their water heater are caused by steam bubbles forming under hardened sediment. Flushing eliminates the sediment layer and stops those sounds entirely.

    Safer water. Neglected sediment can create breeding conditions for bacteria like Legionella inside the tank. Routine flushing removes the sediment layer that supports bacterial growth, making it a health maintenance task as much as a mechanical one.

    “Sediment acts as an insulation barrier forcing the system to work harder, increasing utility costs and the risk of leaks from trapped moisture. Flushing is one of the highest-return maintenance tasks a homeowner can perform.” — Bob Vila

    How to safely flush your water heater

    Most homeowners can flush their own water heater safely with basic tools and a clear process. The key is following the steps in order and not skipping the safety precautions at the start.

    1. Turn off the power or gas. For electric heaters, switch off the breaker. For gas heaters, set the thermostat to the “pilot” setting. Never flush a tank with the heating element still active.
    2. Let the water cool. Hot water straight from the tank can cause burns. Wait at least one to two hours after shutting off the heat source before draining.
    3. Connect a garden hose to the drain valve. Route the hose to a floor drain, a bucket, or outside. The water will carry sediment and may be discolored.
    4. Open a hot water faucet inside the house. This prevents a vacuum from forming in the line and allows the tank to drain freely.
    5. Open the drain valve and let the tank empty. Watch the water running out. When it runs clear, the sediment has been flushed out.
    6. Close the drain valve, refill the tank, and restore power or gas. Wait for the tank to fully refill before turning the heating element back on to avoid damaging it.

    Pro Tip: While the tank is drained, check the anode rod. This sacrificial metal rod protects the tank from corrosion and should be replaced every 3–4 years. Replacing it during a flush visit saves a separate service call. You can find guidance on plumbing repairs for homeowners to help with both tasks.

    When to call a professional instead

    Flushing an older tank that has never been serviced carries real risk. Hardened sediment can clog the drain valve, and forcing it open can cause the valve to fail entirely. If your tank is more than three years old and has never been flushed, a licensed plumber should assess it first. The cost to professionally flush a water heater runs roughly $110–$200 depending on tank size and local labor rates. That fee is worth paying if it prevents a failed valve or a cracked tank. Homeowners who are unsure about shutting off gas lines or who have older tanks should always defer to a professional. For a broader look at what residential plumbing upgrades can do for your home’s efficiency and safety, it is worth reviewing your full plumbing system at the same time.

    Key takeaways

    Flushing your water heater once a year removes sediment, restores efficiency, extends the tank’s life, and protects your household water quality.

    Point Details
    Flush annually at minimum Most homes need yearly flushing; hard water areas need every six months.
    Sediment cuts efficiency sharply Buildup reduces water heater efficiency by 20–40%, raising energy bills monthly.
    Lifespan extends by years Regular maintenance adds 3–5 years beyond the average 12-year tank lifespan.
    Old tanks need professional help Tanks never flushed after three or more years risk valve failure during DIY draining.
    Health matters too Sediment supports bacterial growth; flushing removes the conditions that allow it.

    The maintenance task most homeowners regret skipping

    I have talked with a lot of homeowners who discovered their water heater was failing only after the floor was already wet. The pattern is almost always the same. The tank was never flushed, the sediment built up over years, corrosion set in quietly, and by the time anything was noticeable, the damage was done.

    The frustrating part is that flushing is genuinely simple. It takes under an hour, costs nothing if you do it yourself, and the payoff is years of reliable hot water and lower energy bills. Yet it stays off most people’s radar because the water heater sits in a utility closet and works silently until it does not.

    My honest advice: treat your water heater the same way you treat your car’s oil change. You do not wait for the engine to seize before you act. You put it on a schedule and stick to it. Pair the flush with your annual water heater service and check the anode rod at the same time. That combination, done consistently, is what separates a water heater that lasts 15 years from one that fails at 9.

    The one mistake I see most often is homeowners flushing a neglected old tank themselves without checking the drain valve condition first. A stuck or corroded valve that gets forced open can fail completely, turning a simple maintenance task into an emergency. When in doubt, call a plumber for the first flush on an old tank and watch the process. After that, you can take it over yourself with confidence.

    — Sean

    Keep your water heater on a maintenance schedule

    Water heater flushing is one piece of a larger home maintenance picture. When you treat it as a scheduled task rather than a reactive fix, you stay ahead of the repairs that cost the most. Workbenchguide makes that easier with step-by-step home maintenance checklists that cover your water heater, HVAC system, plumbing, and more, organized by season so nothing slips through the cracks. Whether you handle maintenance yourself or bring in a contractor, having a clear schedule and a checklist keeps your home running well and your repair costs low. Workbenchguide also offers preventive maintenance guides that show you exactly where to focus your time and money each year.

    FAQ

    Why flush a water heater at all?

    Flushing removes sediment that reduces efficiency by 20–40% and causes corrosion, noise, and bacterial growth inside the tank. It is the single most effective maintenance task for extending water heater life.

    How often should I flush my water heater?

    Most homes need an annual flush. Homes in hard water areas with water hardness above 150 ppm should flush every six months to prevent rapid sediment accumulation.

    What happens if you never flush your water heater?

    Sediment builds up, efficiency drops, energy bills rise, and the tank corrodes from the inside. Eventually the tank leaks or fails entirely, requiring full replacement.

    Can I flush my water heater myself?

    Yes, if the tank has been serviced regularly and you know how to shut off the power or gas supply. Tanks that have never been flushed after three or more years should be assessed by a licensed plumber first.

    How much does a professional water heater flush cost?

    Professional flushing costs roughly $110–$200 depending on tank size, type, and local labor rates. DIY flushing costs nothing beyond your time if you have the right tools and knowledge.

  • Yard Irrigation Maintenance Steps for a Healthy Lawn

    Yard Irrigation Maintenance Steps for a Healthy Lawn

    Yard irrigation maintenance involves regular inspection, cleaning, adjustment, and seasonal scheduling of your sprinkler system to prevent water waste and costly repairs. A single broken sprinkler head can waste up to 25,000 gallons of water per year. That number puts the stakes in clear terms: neglecting your system costs real money and real water. The industry term for this practice is irrigation system maintenance, and it covers everything from checking spray patterns to winterizing pipes before the first freeze. Residential systems require at least two major maintenance events annually, with a mid-season tune-up strongly recommended. Following the right yard irrigation maintenance steps keeps your lawn green, your water bill low, and your system running for years.

    What tools do you need for yard irrigation maintenance?

    The right tools make every maintenance task faster and safer. You do not need a professional kit, but a few specific items are non-negotiable.

    Essential tools and materials:

    • Pressure gauge: Measures water pressure at the system’s main valve. Pressure that runs too high or too low damages heads and pipes.
    • Flat-head and Phillips screwdrivers: Used to adjust spray arc and radius on most rotary and fixed heads.
    • Replacement nozzles and sprinkler heads: Keep a small stock of the most common sizes for your system. Swapping a damaged head takes under five minutes.
    • Needle-nose pliers: Useful for pulling clogged nozzle inserts without damaging the housing.
    • Small wire brush or toothbrush: Cleans debris from nozzle screens and filter screens inside valve boxes.
    • Catch cups or tuna cans: Used to measure water distribution uniformity across a zone.
    • Teflon tape: Seals threaded connections when replacing heads or risers.
    • Safety glasses and waterproof gloves: Protect you when working near pressurized lines or chemical treatments.
    Tool Primary use
    Pressure gauge Check system operating pressure
    Catch cups Measure water distribution uniformity
    Replacement nozzles Swap damaged or clogged spray heads
    Wire brush Clean filter screens and nozzle inserts
    Teflon tape Seal threaded fittings on new heads

    Pro Tip: Buy a multi-tool sprinkler adjustment key. Most hardware stores carry them for under $10, and they fit the adjustment screws on the majority of residential sprinkler brands.

    A complete DIY tool kit covers most of these items. Having everything on hand before you start saves you from stopping mid-task to run to the store.

    How to inspect and adjust sprinkler heads for optimal coverage

    Sprinkler head inspection is the core of any effective yard irrigation maintenance routine. The EPA WaterSense program recommends catch-cup tests for water distribution uniformity and matching irrigation to specific plant types. That means you need to walk each zone with your eyes open, not just assume the system is working.

    Follow these steps for each zone:

    1. Activate the zone manually at the controller. Stand at one end of the zone and watch every head as it rises and sprays.
    2. Walk the full zone perimeter. Look for heads that are tilted, buried under soil or thatch, or not rising fully. A buried head sprays sideways and soaks one patch while leaving others dry.
    3. Check spray direction. Heads aimed at driveways, sidewalks, or fences waste water and accomplish nothing. Adjust the arc using a screwdriver or adjustment key.
    4. Inspect nozzle condition. Cracked, chipped, or clogged nozzles produce uneven spray patterns. Pull the nozzle insert and rinse it under running water. Replace it if the spray pattern stays distorted.
    5. Run the catch-cup test. Place cups or tuna cans at equal intervals across the zone. Run the zone for 15 minutes, then measure the water in each cup. Cups with significantly less water than others reveal coverage gaps that need head repositioning or nozzle upgrades.
    6. Confirm head-to-head coverage. Each head’s spray should reach the next head in the zone. Gaps between heads create dry patches that no amount of extra run time will fix.

    Pro Tip: Do your inspection early in the morning when wind is calm. Wind shifts spray patterns and gives you a false read on where water is actually landing.

    Matching irrigation to plant requirements reduces runoff and keeps your landscape healthy. Turf zones and shrub beds have different water needs, so never mix head types within a single zone if you can avoid it.

    Close-up hands adjusting sprinkler nozzle

    How to check your system for leaks and mechanical issues

    Leaks are the most expensive problem a homeowner can ignore. Proactive maintenance prevents major failures from compounding into costly repairs. The good news is that most leaks leave visible clues if you know where to look.

    Signs of leaks and mechanical problems:

    • Wet spots or puddles lasting more than 24 hours after an irrigation cycle signal a below-grade pipe leak or a stuck-open valve. These need urgent attention before they undermine soil stability.
    • Slow zone activation. A zone that takes longer than 30 seconds to pressurize often points to a valve or solenoid malfunction, not just low pressure. Do not assume it will self-correct.
    • Unusual sounds. Hissing near valve boxes or a gurgling sound in the pipes during a cycle indicates air intrusion or a cracked line.
    • Backflow preventer drips. Inspect your backflow preventer for visible drips or mineral deposits around the test cocks. A dripping backflow device can indicate internal seal failure. For a deeper look at backflow device maintenance, a licensed inspection is worth scheduling annually.

    The water meter test is the gold standard for finding hidden leaks. Turn off all indoor water use, then go to your water meter and watch the flow indicator. If it moves with all faucets closed, water is escaping somewhere in your outdoor system. This test detects concealed leaks that visual inspections miss entirely.

    Pro Tip: Mark the location of any wet spot with a small flag before you dig. Underground leaks often surface several feet from the actual break point because water follows the path of least resistance through the soil.

    How to clean, winterize, and program your system for seasonal efficiency

    Seasonal maintenance is where most homeowners fall short. Keeping the same watering schedule year-round wastes water and stresses plants. Your system needs different treatment in spring, summer, and fall.

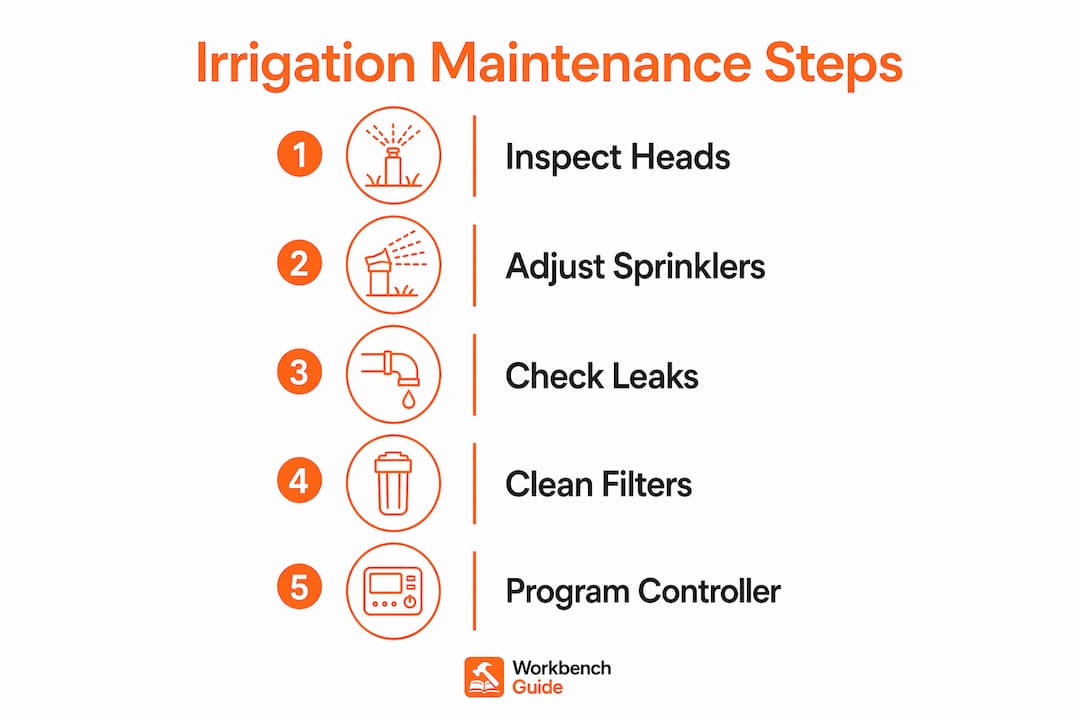
    Infographic showing irrigation maintenance steps

    Cleaning nozzles, filters, and sensors

    Clogged nozzle screens reduce flow and create dry patches. Remove each nozzle insert and rinse it under a faucet every season. Clean the filter screen inside each valve box with a wire brush. Check your rain sensor by holding it under a running faucet. If the system does not shut off, the sensor needs replacement or recalibration.

    Spring startup procedure

    1. Open the main shutoff valve slowly to avoid water hammer, which can crack pipes and fittings.
    2. Pressurize each zone manually and inspect every head as described in the inspection steps above.
    3. Check all valve box lids for cracks or missing covers from winter frost.
    4. Confirm your controller’s date, time, and watering schedule comply with local watering restrictions.
    5. Update the seasonal adjustment percentage on your controller to match spring conditions.

    Spring startup covers pressurization, manual zone testing, and schedule compliance. Skipping any of these steps means you start the season with unknown problems already running.

    Winterization and fall shutdown

    Blow out all water from the system using a compressor before the first hard freeze. Residual water in pipes expands when it freezes and cracks fittings, heads, and valves. A complete fall maintenance checklist covers the full shutdown process. After blowout, close the main shutoff valve and insulate any above-ground components.

    Programming your controller

    Adjusting irrigation schedules to match seasonal changes is the single most effective step for conserving water and maintaining plant health. A weather-based smart controller that replaces a standard clock timer can save about 9,000 gallons of water annually for the average household. Smart controllers require regular validation, though. A controller that loses its Wi-Fi or weather data connection will revert to a generic schedule without alerting you.

    Validate your smart controller connection monthly by checking the weather data feed in the controller’s settings menu. A controller reporting “normal” while disconnected from weather data is running blind.

    What common mistakes should you avoid in irrigation upkeep?

    Most irrigation problems trace back to a short list of repeated errors. Recognizing them is the fastest way to avoid expensive repairs.

    • Running the same schedule year-round. Summer peak demand and cool-season needs differ dramatically. A schedule set in july will overwater in october and underwater in august heat spikes. Adjust run times at least four times per year.
    • Skipping mid-season inspections. Two major maintenance events per year are the minimum, but a mid-season check catches sediment buildup and heat-related head damage before they compound.
    • Ignoring slow zone activation. A zone that takes over 30 seconds to come on is telling you something is wrong with the valve or solenoid. Waiting until the zone stops working entirely turns a $30 solenoid replacement into a full valve rebuild.
    • Trusting the smart controller without checking it. Smart controllers can falsely report normal operation even when disconnected from weather data. Log into the controller’s app or display monthly and confirm the weather station is active.
    • Reactive maintenance only. Waiting for a visible failure before acting is the most expensive approach. Routine, proactive upkeep extends system lifespan and prevents emergencies. A 30-minute inspection twice a year costs nothing compared to a broken main line repair.

    For a broader view of how proactive upkeep protects your home, the benefits of preventive maintenance apply directly to irrigation systems.

    Key Takeaways

    Consistent irrigation system maintenance, done at least twice a year with a mid-season check, is the most reliable way to prevent water waste, protect your landscape, and avoid costly repairs.

    Point Details
    Inspect heads every season Walk each zone manually and use catch-cup tests to find coverage gaps.
    Test for hidden leaks Use the water meter test to catch below-grade leaks that visual checks miss.
    Adjust schedules seasonally Update run times at least four times per year to match plant needs and weather.
    Validate smart controllers Check the weather data connection monthly to prevent generic, wasteful scheduling.
    Winterize before the first freeze Blow out all water from pipes to prevent cracks and costly spring repairs.

    What I’ve learned from years of watching homeowners skip the basics

    The most common irrigation mistake I see is not a broken head or a leaky valve. It is the “set it and forget it” mindset. Homeowners turn on the system in the spring, set a schedule, and do not look at it again until a neighbor mentions a river running down the driveway.

    The second most common mistake is trusting the controller display. A smart controller that shows a green checkmark is not proof the system is working correctly. I have seen controllers running a july schedule in october because nobody checked the seasonal adjustment after summer ended. The lawn looked stressed, the homeowner blamed the heat, and the real cause was a schedule that had not been touched in four months.

    What actually works is treating irrigation like any other mechanical system in your home. You change your HVAC filter on a schedule. You flush your water heater annually. Your irrigation system deserves the same discipline. A 30-minute walk-through twice a year, combined with a quick controller check each month, catches 90% of problems before they become expensive. The exterior maintenance guide at Workbenchguide makes a strong case for this kind of proactive approach across all outdoor systems.

    One more thing: do not skip the backflow preventer. Most homeowners have never looked at theirs. That device protects your drinking water from contamination. Check it for drips and mineral buildup every spring. If you are unsure what compliant irrigation backflow maintenance looks like in your area, a licensed plumber can inspect it in under an hour.

    — Sean

    Workbenchguide keeps your irrigation schedule on track

    Keeping up with seasonal irrigation tasks is easier when you have a system behind you. Workbenchguide gives homeowners step-by-step DIY guides, maintenance checklists, and seasonal reminders so nothing falls through the cracks. You can track spring startup, mid-season checks, and fall winterization all in one place, without relying on memory or sticky notes. The platform also connects you with contractors when a repair goes beyond what a screwdriver can fix. Visit Workbenchguide to set up your irrigation maintenance schedule and get reminders before each seasonal task comes due. A year-round maintenance checklist is a good place to start.

    FAQ

    How often should I inspect my irrigation system?

    Residential irrigation systems need at least two full inspections per year, at spring startup and fall shutdown, with a mid-season check strongly recommended to catch heat stress and sediment issues.

    What is the water meter test for irrigation leaks?

    The water meter test involves shutting off all indoor water use and watching the flow indicator on your meter. Movement with all faucets closed confirms a hidden outdoor leak.

    How much water does a broken sprinkler head waste?

    A single broken sprinkler head can waste up to 25,000 gallons of water per year, making prompt replacement one of the highest-impact steps in lawn irrigation maintenance.

    Can a smart controller save water on its own?

    A certified weather-based smart controller can save about 9,000 gallons annually compared to a standard clock timer, but only if its weather data connection is validated regularly.

    When should I winterize my irrigation system?

    Winterize your system before the first hard freeze in your area. Blow out all water from the pipes using a compressor, close the main shutoff valve, and insulate any above-ground components.

  • Electrical Safety Checklist for Homeowners in 2026

    Electrical Safety Checklist for Homeowners in 2026

    An electrical safety checklist is a structured inspection tool homeowners use to identify wiring faults, missing protective devices, and fire or shock hazards before they cause harm. Home electrical malfunctions cause over 41,000 residential fires, nearly 500 deaths, and $1.3 billion in property damage annually, with 63% of those fires starting from wiring problems. The industry term for this process is a residential electrical safety inspection, and it covers everything from your main panel to outdoor fixtures. Running through this checklist once a season takes less than an hour and can prevent the kind of damage that costs tens of thousands of dollars to repair.

    1. What does an electrical safety checklist cover?

    A complete home wiring safety checklist covers seven core areas: the main electrical panel, outlets and switches, wiring type and condition, protective devices, extension cords and appliances, smoke and carbon monoxide alarms, and outdoor or garage fixtures. Missing any one of these areas leaves a gap in your electrical hazard assessment. Think of it as a flight pre-check. Pilots do not skip steps because the plane “seems fine.” Neither should you.

    2. Main electrical panel inspection

    The panel is the starting point for any electrical panel check. Open the cover and look for scorch marks, rust, or moisture. Every breaker should be clearly labeled with the circuit it controls. A breaker that trips repeatedly or feels loose in its slot is a red flag, not a nuisance.

    Double-tapped breakers, where two wires share one breaker slot, are a common code violation in older homes. They cause overheating and should be corrected by a licensed electrician. Check that breaker ratings match the wire gauge they protect. A 20-amp breaker on 14-gauge wire is an overload waiting to happen.

    Electrician adjusting breakers in electrical panel

    3. Outlets, switches, and wiring condition

    Every outlet in your home should be grounded. A plug-in outlet tester, available at any hardware store for under $15, tells you instantly whether an outlet is wired correctly. Outlets that feel warm to the touch, buzz, or show burn marks around the face plate need professional attention before you use them again.

    Wiring age matters as much as wiring condition. Homes built before 1972 may contain aluminum wiring, which expands and contracts at a different rate than copper and loosens connections over time. Knob-and-tube wiring, found in homes built before 1950, lacks a ground wire entirely and cannot safely support modern electrical loads. Cloth-insulated wiring from the same era becomes brittle and cracks, exposing bare conductors. If your home has any of these wiring types, schedule a professional inspection as part of your home safety inspection plan.

    Pro Tip: Before disconnecting any device for repair, photograph the existing wiring configuration. This single step prevents miswiring mistakes that can take hours to diagnose.

    4. GFCI and AFCI protective devices

    Arc-Fault Circuit Interrupters (AFCIs) could prevent over 50% of residential electrical fires. That statistic alone makes AFCI protection one of the highest-value items on any home wiring safety checklist. AFCI breakers detect dangerous arcing in wiring and shut the circuit down before a fire starts.

    The 2026 National Electrical Code (NEC) mandates GFCI protection for receptacles in kitchens, bathrooms, garages, outdoor areas, unfinished basements, crawl spaces, and laundry rooms. GFCI outlets trip when current imbalance exceeds 4–6 milliamps, which is enough current to cause a serious shock. If your home lacks GFCI outlets in these locations, adding them is a straightforward upgrade that a licensed electrician can complete in a single visit.

    Test GFCI and AFCI devices monthly using the built-in TEST button on each device. Press TEST and confirm the outlet or breaker loses power. Press RESET and confirm power returns. A device that does not respond to this test has failed and must be replaced.

    5. Extension cords and appliances

    Extension cords are temporary solutions, not permanent wiring. Using one as a long-term fix for an outlet shortage is a leading cause of residential fires. Check every cord in your home for fraying, cracking, or heat damage. A cord that feels warm during normal use is carrying more current than it was rated for.

    Never run extension cords under rugs or through doorways. Foot traffic damages insulation over time, and the damage is invisible until the cord arcs or catches fire. Appliances near water, such as hair dryers and countertop mixers, should be unplugged after every use. The habit takes three seconds and eliminates a real shock hazard.

    6. Smoke and carbon monoxide alarms

    Smoke alarms and carbon monoxide detectors should be installed on every level of your home, including inside each bedroom. Test them monthly by pressing the TEST button until the alarm sounds. Replace batteries annually, or choose 10-year sealed-battery models to reduce maintenance. Alarms older than 10 years should be replaced entirely, as the sensors degrade over time.

    Carbon monoxide detectors belong within 15 feet of every sleeping area. CO is odorless and colorless, and a malfunctioning gas appliance or attached garage can push dangerous levels into living spaces within minutes. This is not an optional checklist item.

    7. How to perform tests during an electrical safety inspection

    Safe testing starts with confirming power is off. Use a non-contact voltage tester and verify it works on a known live source before trusting it on the circuit you plan to work on. This step is non-negotiable. A tester with a dead battery gives a false “safe” reading.

    Task Frequency Who performs it
    GFCI/AFCI button test Monthly Homeowner
    Smoke and CO alarm test Monthly Homeowner
    Outlet tester check Annually Homeowner
    Panel visual inspection Annually Homeowner
    Full professional inspection Every 3–10 years (by home age) Licensed electrician

    Homes over 40 years old benefit from professional inspection every 3 years. Homes between 10 and 40 years old should schedule one every 5 years. Newer homes need a professional review every 10 years, and any remodel or major appliance upgrade should trigger an inspection regardless of schedule.

    Pro Tip: Align your monthly GFCI test with Daylight Saving Time clock changes. Two tests per year become automatic when they are tied to a habit you already have.

    8. Warning signs that require immediate professional attention

    Some findings during a residential electrical safety inspection mean you stop work and call a licensed electrician. No exceptions.

    • Burning or ozone-like odors near outlets, switches, or the panel indicate active arcing or overheating.
    • Frequent breaker trips or breakers that will not reset signal an overloaded or faulted circuit.
    • Warm or hot outlets and switches point to loose connections or overloaded wiring behind the wall.
    • Buzzing or sizzling sounds from any electrical device or fixture are signs of arcing.
    • Mixed aluminum and copper wiring at connections causes corrosion and loose joints over time.
    • Brittle or cracked insulation on any visible wire means the conductor is exposed.
    • Sparks or tingling sensations when touching appliances or outlets indicate a ground fault.
    • Damaged electrical boxes or exposed conductors are immediate shock and fire hazards.

    Replacing a buzzing outlet without diagnosing the cause only covers the symptom. Buzzing outlets indicate possible arcing, and without proper diagnosis, the underlying fault continues to build heat inside the wall. The fire risk does not go away because the outlet looks new.

    The most important DIY electrical safety principle is knowing when to stop. Burning smells, repeated breaker trips, and mixed wire types are the three clearest signals that a licensed electrician needs to take over.

    9. Electrical safety in kitchens, bathrooms, and outdoor spaces

    Wet locations require GFCI protection by NEC code, and the 2026 update expanded that requirement to include laundry rooms and crawl spaces. The logic is straightforward: water and electricity share the same path through your body. GFCI protection breaks that path in milliseconds.

    1. Kitchen: Install GFCI outlets on all countertop circuits within 6 feet of a sink. Keep appliances away from the sink edge and unplug small appliances after use.
    2. Bathrooms: Every bathroom outlet must be GFCI protected. Never use a non-GFCI outlet in a bathroom, even temporarily.
    3. Garage and basement: GFCI protection is required for all outlets. Use weatherproof covers on any outlet that could be exposed to moisture or cleaning spray.
    4. Outdoor spaces: All outdoor outlets must be GFCI protected and covered with weatherproof “in-use” covers that protect the outlet even when a cord is plugged in.
    5. Laundry rooms: GFCI protection is now required under the 2026 NEC. Washing machines and dryers near water lines create real shock risk without it.

    A useful addition to any property maintenance checklist is a seasonal walk-through of all outdoor fixtures. Check for cracked covers, corroded outlets, and any fixture that is not rated for outdoor use. Interior-rated fixtures deteriorate quickly when exposed to rain and temperature swings.

    Key takeaways

    A complete electrical safety inspection covers panels, outlets, wiring type, GFCI and AFCI devices, alarms, and wet-area protection, with monthly testing and professional inspections on a schedule based on home age.

    Point Details
    AFCI protection prevents fires AFCIs could stop over 50% of residential electrical fires; install them in all living areas.
    GFCI testing must be monthly Press the TEST button on every GFCI outlet and breaker monthly to confirm it trips and resets.
    Home age drives inspection frequency Homes over 40 years old need a professional electrical inspection every 3 years.
    Stop DIY when warning signs appear Burning smells, buzzing outlets, and repeated breaker trips require a licensed electrician, not a DIY fix.
    Wet areas need NEC-compliant GFCI Kitchens, bathrooms, garages, laundry rooms, and outdoor outlets all require GFCI protection under 2026 NEC.

    What I’ve learned from years of watching homeowners skip this checklist

    Most homeowners treat electrical safety like smoke detector batteries: they know it matters, but they do it only after something goes wrong. I’ve seen that pattern cost people far more than a professional inspection ever would.

    The detail that surprises most people is the ceiling fan box issue. Standard ceiling light boxes are not rated to support the weight and motion of a ceiling fan. A fan-rated box is required, and skipping that upgrade is how fans end up on floors. It is a small thing that the checklist catches before it becomes an emergency.

    My honest advice: do not wait for a remodel to think about your wiring. Walk your panel, test your GFCI outlets, and look at your smoke alarms this weekend. The whole process takes under an hour. If you find anything on the warning signs list, call a licensed electrician before you touch it. The circuit breaker guide on Workbenchguide is a solid starting point for understanding what you are looking at inside the panel. Compliance with the 2026 NEC standards is not bureaucratic overhead. It reflects what decades of fire investigation data show actually keeps people safe.

    — Sean

    Workbenchguide makes electrical safety part of your routine

    Electrical safety does not have to be a once-a-decade scramble before a home sale. Workbenchguide gives homeowners a structured way to track inspections, set monthly reminders for GFCI testing, and follow step-by-step guides for safe DIY work. The home maintenance checklist on Workbenchguide integrates electrical tasks with your full seasonal maintenance schedule, so nothing falls through the cracks. You get reminders when tests are due, guides when you need to know what you are looking at, and contractor connections when the job calls for a licensed pro. Proactive care costs a fraction of reactive repair.

    FAQ

    What is an electrical safety checklist?

    An electrical safety checklist is a structured list of inspection tasks homeowners use to identify wiring faults, missing protective devices, and fire or shock hazards in their home’s electrical system.

    How often should I test GFCI outlets?

    Test GFCI outlets monthly using the built-in TEST button. Aligning tests with Daylight Saving Time clock changes makes the habit easier to maintain.

    When should I call an electrician instead of doing it myself?

    Call a licensed electrician when you detect burning smells, hear buzzing from outlets or switches, experience repeated breaker trips, or find mixed aluminum and copper wiring. These signs indicate hazards that require professional diagnostic tools.

    What does the 2026 NEC require for GFCI protection?

    The 2026 National Electrical Code requires GFCI protection for receptacles in kitchens, bathrooms, garages, outdoor areas, unfinished basements, crawl spaces, and laundry rooms to prevent shock hazards.

    How often do homes need a professional electrical inspection?

    Homes over 40 years old need a professional inspection every 3 years. Homes between 10 and 40 years old need one every 5 years, and newer homes every 10 years. Any remodel or major appliance upgrade should also trigger an inspection.

  • The Role of Building Permits for Homeowners

    The Role of Building Permits for Homeowners

    Building permits are official approvals issued by local government authorities that confirm a construction or renovation project meets established safety and building codes. The role of building permits goes far beyond paperwork. They function as enforcement tools for structural, electrical, plumbing, and fire safety standards, protecting both the people inside a home and the neighbors around it. Skipping a permit is not a shortcut. It is a financial and legal risk that can cost far more than the permit itself, from fines and forced demolition to denied insurance claims and lost home value.

    What risks and consequences do homeowners face without building permits?

    Bypassing permits creates a chain of problems that compounds over time. The immediate risk is financial. Fines range from $100 to over $25,000, and retroactive permit fees typically run 2x to 10x the original permit cost. That means a $300 permit avoided today could cost $3,000 or more to resolve later.

    The consequences do not stop at fines. Here is what homeowners commonly face:

    1. Stop-work orders. A building inspector can halt all construction immediately. Work cannot resume until permits are pulled and reviewed.
    2. Forced demolition. Local authorities can require unpermitted structures to be torn down entirely, at the homeowner’s expense.
    3. Insurance claim denials. If a fire or flood damages unpermitted work, the insurer can deny the claim. The homeowner absorbs the full cost.
    4. Reduced property value. Unpermitted construction reduces home values by 10–20% and complicates resale and refinancing. Title companies may refuse insurance, and lenders may reject loan applications outright.
    5. Criminal charges. In severe cases involving safety violations, homeowners can face criminal liability.

    The inspection problem is especially painful. Retroactive permit inspections are more invasive than standard ones. Inspectors may require drywall removal or exposed plumbing to verify hidden work. The homeowner pays for all of it.

    Some homeowners skip permits hoping to avoid a property tax reassessment. That strategy backfires. Local authorities now use aerial surveillance and neighbor complaints to detect unpermitted improvements, triggering retroactive taxes and penalties on top of permit fees.

    Homeowner consulting building inspector outdoors

    Pro Tip: Before buying a home, request a permit history from the local building department. Unpermitted additions discovered after closing become your legal and financial problem.

    How does the building permit process work?

    The building permits process follows a consistent sequence across most jurisdictions, though timelines and fees vary by location.

    Step 1: Contact your local building department. Confirm which permits your project requires before drawing plans or hiring contractors. Many departments offer pre-application meetings.

    Step 2: Prepare and submit your application. Most applications require site plans, construction drawings, project descriptions, and contractor information. Typical residential permit fees run $75 to $800, with additional fees for trade permits covering electrical, plumbing, and HVAC work.

    Infographic illustrating step-by-step building permit process

    Step 3: Wait for plan review. Standard residential plan reviews take 5 to 20 business days. Complex projects can take 4 to 8 weeks or more. Expedited reviews are available but often cost 50–100% more than standard fees.

    Step 4: Receive your permit and post it. Once approved, the permit card must be posted visibly at the job site throughout construction. Inspectors verify it during site visits.

    Step 5: Schedule inspections. Most projects require multiple inspections at defined stages, such as framing, rough electrical, rough plumbing, and insulation. Each stage must pass before work continues.

    Step 6: Obtain the certificate of occupancy. After the final inspection passes, the building department issues a certificate of occupancy or completion. This document confirms the work is code-compliant.

    Owner-builder vs. contractor permits

    Homeowners can pull owner-builder permits in most jurisdictions, but this transfers full code compliance responsibility to the homeowner. For major electrical, structural, or plumbing work, a licensed contractor is the safer choice. Hiring a licensed professional shifts liability and insurance coverage away from you. Learn more about managing home repairs when deciding whether to go the owner-builder route.

    Pro Tip: Keep a physical folder with your permit card, approved plans, and all inspection reports. You will need these documents when you sell the home.

    Building permits enforce adherence to codes that ensure load-bearing supports, electrical grounding, and gas venting are properly installed and inspected. That is the core benefit. A permit is not a fee. It is a professional verification that your home is safe.

    The practical benefits extend well beyond safety:

    • Structural integrity. Inspectors catch framing errors, foundation problems, and load path failures before walls are closed. Fixing these issues during construction costs a fraction of what repairs cost later.
    • Fire prevention. Electrical and HVAC inspections verify that wiring and venting meet fire safety standards. This directly reduces the risk of house fires.
    • Insurance protection. Permitted work keeps your homeowner’s insurance valid. Unpermitted work gives insurers grounds to deny claims.
    • Property value. Permitted improvements are counted in your home’s appraised value. Unpermitted additions are often discounted or excluded entirely by appraisers.
    • Contractor accountability. Building permits define project scope in writing, which protects you from contractors who might otherwise exploit vague agreements to inflate costs.

    “A building permit is one of the few tools that simultaneously protects your family’s safety, your financial investment, and your legal standing as a property owner. Skipping it trades a small short-term cost for a large long-term risk.”

    Understanding home zoning rules alongside permit requirements gives you a complete picture of what your local government allows on your property.

    Which projects require building permits and which do not?

    Most homeowners are surprised by how many common projects require permits. The general rule is that any work affecting structure, safety systems, or the building envelope needs a permit. Minor cosmetic work typically does not.

    Project type Permit required?
    Room addition or structural alteration Yes
    New electrical panel or wiring Yes
    Plumbing installation or relocation Yes
    HVAC replacement or new system Yes
    Deck construction over 30 inches high Yes
    Interior painting or wallpaper No
    Cabinet refacing or countertop replacement No
    Flooring replacement No
    Small shed under 120 sq ft (varies by jurisdiction) Usually no
    Minor repairs like patching drywall No

    Projects requiring permits include structural changes, new electrical panels, plumbing installations, HVAC replacements, and deck construction. Minor projects like interior painting and cabinet refacing typically do not. The critical word is “typically.” Rules vary significantly by city, county, and state.

    Never assume a project is exempt. Call your local building department or check their website before starting work. A five-minute call can prevent a $10,000 mistake.

    Pro Tip: When in doubt, ask. Building departments are not adversarial. Most inspectors prefer answering questions upfront rather than issuing stop-work orders later.

    How can homeowners work with contractors and inspectors effectively?

    Smooth permit approval depends on preparation and communication. The homeowner’s role does not end after signing a contract.

    • Verify contractor licenses before signing anything. Licensed contractors carry insurance and are legally accountable for code compliance. Commercial and residential projects alike require licensed contractors for permitted work. An unlicensed contractor who pulls a permit creates liability that falls back on you.
    • Clarify who pulls the permit. In most cases, the contractor pulls the permit under their license. Confirm this in writing before work begins.
    • Prepare for inspections in advance. Keep the job site accessible and the permit card visible. Have approved plans on site at every inspection.
    • Respond to correction notices promptly. Failed inspections are a normal part of the process, not a sign of a failing project. Inspectors issue correction notices to clarify required fixes. Address them quickly to avoid project delays.
    • Document everything. Photograph work at each inspection stage. Store all permits, plans, and inspection reports in one place.
    • Know your escalation options. If a permit is delayed or denied, ask for a supervisor review or a pre-inspection meeting. Most disputes resolve faster through direct conversation than through formal appeals.

    Pro Tip: Ask your inspector what they will look for at the next inspection stage. Most are happy to tell you, and that information prevents failed inspections.

    Key takeaways

    Building permits are the single most effective tool homeowners have to protect safety, property value, and legal standing during any construction or renovation project.

    Point Details
    Permits enforce safety codes They verify structural, electrical, plumbing, and fire standards before walls are closed.
    Skipping permits is expensive Fines, retroactive fees, and forced demolition can cost far more than the original permit.
    Unpermitted work hurts resale Home values drop 10–20% and lenders may reject financing for unpermitted improvements.
    The process is predictable Most residential permits follow a six-step sequence from application to certificate of occupancy.
    Contractor choice matters Licensed contractors shift code compliance liability away from the homeowner.

    Why I think most homeowners underestimate permits until it’s too late

    I have seen the same pattern repeat itself. A homeowner finishes a beautiful basement renovation, lists the house two years later, and discovers during the buyer’s inspection that none of the electrical or framing work was permitted. The deal falls apart or the seller takes a significant price cut to compensate.

    The frustrating part is that the permit process is not the obstacle most people imagine. The paperwork is manageable. The fees are reasonable. The inspections, even when they result in correction notices, are genuinely useful. Inspectors catch things that contractors miss. That is the point.

    What I find most underappreciated is how permits protect you from your own contractor. When the scope of work is written into a permit application, it becomes a contractual reference point. Vague verbal agreements disappear. The approved plans define what gets built. That protection alone is worth the permit fee many times over.

    My honest advice: treat the permit as part of your project budget from day one. Factor it into your timeline. Post the card. Schedule the inspections. When you sell, those documents tell the next buyer that your home was built right. That is a selling point, not a liability.

    — Sean

    Plan your next project with Workbenchguide

    Workbenchguide helps homeowners stay ahead of every project, from routine maintenance to permitted renovations. The platform provides step-by-step DIY guides, project checklists, and maintenance reminders so you always know what to do next and when to call a professional. Whether you are tracking inspection stages or planning a deck build, having your tasks organized in one place reduces costly mistakes. Start with the home maintenance checklist to build a solid foundation for every project you take on. For a full overview of what Workbenchguide offers, visit the how it works page.

    FAQ

    What is the role of building permits in construction?

    Building permits are official approvals that confirm a project meets local and national building codes covering structural, electrical, plumbing, and fire safety standards. They protect homeowners, occupants, and neighbors by requiring professional inspection at key construction stages.

    How much does a residential building permit cost?

    Typical residential permits cost between $75 and $800, with additional fees for trade permits covering electrical, plumbing, and HVAC work. Fees generally reflect the project’s scope or declared value.

    What happens if you build without a permit?

    Fines range from $100 to over $25,000, and retroactive permit fees run 2x to 10x the original cost. Homeowners may also face stop-work orders, forced demolition, insurance claim denials, and reduced property value.

    Do all home improvement projects need a permit?

    No. Interior painting, flooring replacement, and cabinet refacing typically do not require permits. Structural changes, new electrical panels, plumbing installations, HVAC replacements, and deck construction over 30 inches generally do.

    Can a homeowner pull their own building permit?

    Most jurisdictions allow owner-builder permits, but major electrical, structural, or plumbing work carries significant liability. Hiring a licensed contractor shifts code compliance responsibility and insurance coverage away from the homeowner.

  • Why Control Indoor Humidity: A Homeowner’s Guide

    Why Control Indoor Humidity: A Homeowner’s Guide

    Controlling indoor humidity is the single most effective step you can take to protect both your health and your home’s structure. The EPA, ASHRAE, and CDC all agree that indoor relative humidity should stay between 30–60%, with 40–50% being the sweet spot for most households. Too much moisture breeds mold, dust mites, and bacteria. Too little dries out your airways, cracks wood floors, and causes static buildup. Understanding why control indoor humidity matters gives you the foundation to act before problems become expensive repairs.

    Why control indoor humidity: the health case

    Humidity levels directly shape how your body feels and how well it fights off illness. The connection is more direct than most homeowners realize.

    When indoor relative humidity drops below 40%, your mucous membranes dry out. That thin layer of moisture lining your nose and throat is your first defense against airborne viruses. RH below 40% nearly doubles influenza transmission by impairing those defenses. Dry air also irritates skin, worsens eczema, and makes eyes feel scratchy.

    High humidity creates the opposite problem. Dust mites thrive above 50% RH, especially in mattresses, pillows, and upholstered furniture. Their waste particles trigger asthma attacks and allergic reactions. Mold spores also become active above 60% RH, releasing compounds that irritate the lungs and sinuses.

    The practical health benefits of staying in the 40–60% range include:

    • Reduced influenza and cold virus survival on surfaces
    • Lower dust mite populations in bedding and carpets
    • Less skin dryness, cracking, and irritation
    • Better sleep quality due to comfortable airway moisture
    • Reduced static electricity, which can affect sensitive electronics and cause minor skin discomfort

    Pro Tip: Place a hygrometer in your bedroom. Most people spend 7–8 hours there, so it is the room where humidity has the greatest impact on your health.

    What does high or low humidity do to your home?

    Your home’s materials react to moisture just as your body does. Wood, paint, insulation, and even concrete all expand, contract, or degrade based on the moisture content of the air around them.

    Condensation and cracked paint on window sill

    High humidity causes condensation on windows, cold pipes, and exterior walls. That standing moisture feeds mold colonies inside wall cavities, under flooring, and behind drywall. You often cannot see the damage until it is severe. Persistent excess moisture indoors also weakens insulation, corrodes metal fasteners, and softens wood framing over time.

    Low humidity brings its own structural risks:

    • Hardwood floors and wood furniture crack and split as they lose moisture
    • Paint peels away from walls and trim, especially on exterior-facing surfaces
    • Drywall joints open up and become visible as the material shrinks
    • Door and window frames warp, causing gaps that let in drafts and pests

    Pro Tip: Check your window sills in winter. Condensation forming there is a clear sign your indoor RH is too high for the outdoor temperature. Wipe it up and lower your humidifier setting.

    Structural damage from humidity is cumulative. A single damp season rarely causes catastrophic failure, but years of uncontrolled moisture weaken a home’s bones quietly. If you suspect moisture is entering through your foundation, basement waterproofing addresses the source rather than just the symptom.

    Where does indoor humidity come from?

    Identifying the source of excess moisture is the first step toward fixing it. Effective humidity control requires knowing which sources dominate in your specific home before choosing a treatment.

    The most common sources of indoor moisture are:

    1. Outdoor air infiltration. Warm, humid outdoor air enters through gaps around windows, doors, and utility penetrations. In summer, this is often the largest single source.
    2. Daily indoor activities. Cooking, showering, doing laundry, and even breathing add significant moisture. A family of four generates several gallons of water vapor per day through normal activity.
    3. Wet building materials. New construction lumber, concrete slabs, and freshly applied drywall compound release moisture for months after installation.
    4. Foundation and crawl space moisture. Groundwater vapor migrates upward through concrete and soil, entering living spaces from below.
    5. Oversized or poorly tuned HVAC systems. An oversized HVAC system cools the air quickly but shuts off before running long enough to remove moisture. The result is air that feels cool but clammy.

    Modern construction makes this problem worse, not better. Tighter, energy-efficient homes trap moisture because they have less natural ventilation. The same sealing and insulation that cuts your energy bill also reduces the natural moisture escape that older, leakier homes relied on. Understanding home weatherization helps you balance energy savings with adequate ventilation.

    How can you measure and control indoor humidity?

    Measuring humidity costs almost nothing. A basic digital hygrometer runs under $15 at most hardware stores and gives you an accurate reading of relative humidity in any room. Place one in the bedroom, one in the basement, and one in the main living area. Those three readings tell you where problems are concentrated.

    Infographic illustrating steps for indoor humidity control

    Ventilation strategies

    Ventilation is the lowest-cost humidity control tool available. Run bathroom exhaust fans during and for 20 minutes after every shower. Use your kitchen range hood when cooking. Open windows briefly on dry days to flush out stale, humid air. These habits alone can drop indoor RH by several percentage points in mild climates.

    For tighter homes, a whole-house energy recovery ventilator (ERV) or heat recovery ventilator (HRV) brings in fresh outdoor air without losing the energy you have already paid to condition. These systems are worth considering if your home was built or renovated after 2000. Proper HVAC maintenance keeps these systems running at full effectiveness.

    Dehumidifiers and humidifiers

    Condition Tool Target RH
    Summer, humid climate Portable or whole-house dehumidifier 45–55%
    Winter, cold climate Humidifier (console or furnace-mounted) 30–40%
    Year-round, mixed climate Both, adjusted seasonally 40–50%

    Portable dehumidifiers work well for basements and single rooms, but they stop working when their reservoir fills. Setting up a continuous drain hose eliminates the need to empty the tank manually and keeps the unit running around the clock. Whole-house dehumidifiers connect directly to your HVAC system and handle larger spaces more reliably.

    Seasonal adjustment matters. ASHRAE recommends dropping indoor RH to 30–35% when outdoor temperatures fall below 20°F. Keeping humidity too high in winter causes condensation inside wall cavities, which leads to mold growth you cannot see or smell until the damage is done.

    Pro Tip: If your home has a dehumidifier in the basement, check that the drain hose runs to a floor drain or sump pit. A full reservoir shuts the unit off and lets humidity climb back up within hours.

    Learning how dehumidifiers reduce dust mites gives you a clearer picture of why consistent operation matters, not just occasional use during the most humid weeks.

    Key Takeaways

    Controlling indoor humidity between 40–60% RH protects your health, prevents structural damage, and reduces allergen populations throughout your home.

    Point Details
    Optimal RH range Keep indoor humidity between 40–60%; drop to 30–35% in cold winter months.
    Health impact RH below 40% doubles influenza risk; above 60% triggers dust mite and mold growth.
    Structural risk Excess moisture weakens insulation and framing; low humidity cracks wood and peels paint.
    Measure first Use a hygrometer in the bedroom, basement, and main living area before buying equipment.
    Seasonal adjustment Adjust your target RH each season to match outdoor temperatures and prevent condensation.

    The part most homeowners get wrong

    Most people treat humidity as a comfort issue. They notice the air feels sticky in July or dry in January, and they buy a dehumidifier or a humidifier to fix the feeling. That is a reasonable start, but it misses the bigger picture.

    The homes I see with the worst moisture problems are not the oldest ones. They are the ones built or renovated in the last 20 years with tight envelopes and no mechanical ventilation to compensate. The builder sealed every gap, the insulation is excellent, and the HVAC system is brand new. But the system is oversized, so it short-cycles and never runs long enough to pull moisture out of the air. The homeowner feels cool but clammy, and they cannot figure out why.

    The fix is rarely buying more equipment. It is usually adjusting what you already have. Slowing the airflow on an oversized air handler gives it more time to dehumidify. Adding an ERV gives the tight envelope a controlled way to breathe. These are not expensive changes, but they require understanding how your home works as a system.

    I also see homeowners ignore seasonal targets entirely. They set their humidifier in November and never touch it again. By February, when outdoor temperatures drop to single digits, that same setting is pushing moisture into wall cavities and growing mold behind the drywall. A five-minute adjustment every month or two prevents that entirely.

    Humidity management is not a one-time fix. It is a habit, like checking your smoke detector batteries or changing your furnace filter. Build it into your regular home maintenance routine and it becomes automatic.

    — Sean

    Workbenchguide makes humidity management part of your routine

    Workbenchguide gives homeowners a structured way to stay on top of tasks like seasonal humidity adjustments, HVAC filter changes, and exhaust fan checks. Instead of remembering everything yourself, you get step-by-step guides and timed reminders that match your home’s specific needs. The home maintenance checklist covers humidity-related tasks across every season, so nothing slips through the cracks. When a job calls for a contractor, Workbenchguide connects you with the right help. Protecting your home from moisture damage starts with a plan, and Workbenchguide builds that plan for you.

    FAQ

    What is the ideal indoor humidity level?

    The ideal indoor relative humidity is 40–60%, with 40–50% recommended for most households. Drop to 30–35% during cold winter months to prevent condensation inside walls.

    How does low humidity affect your health?

    Indoor RH below 40% dries out mucous membranes, impairing your respiratory defenses and nearly doubling influenza transmission risk. Dry air also worsens skin irritation and disrupts sleep.

    Can high humidity damage your home’s structure?

    Yes. Sustained humidity above 60% causes condensation, mold growth inside wall cavities, and corrosion of metal fasteners. Over time, it weakens insulation and softens wood framing.

    How do I know if my home’s humidity is too high or too low?

    Use a digital hygrometer, available at hardware stores for under $15, placed in your bedroom, basement, and main living area. Readings outside the 40–60% range signal a problem worth addressing.

    Why does my home feel clammy even when the AC is running?

    An oversized air conditioning system cools the air quickly but shuts off before removing enough moisture. Adjusting the system’s airflow or adding a dedicated dehumidifier solves the problem more reliably than running the AC longer.

  • Tools Every DIYer Needs: The Essential Home Kit

    Tools Every DIYer Needs: The Essential Home Kit

    A well-chosen home toolkit is defined as the collection of hand tools, power tools, and safety gear that lets you handle the majority of common repairs and improvements without calling a contractor. The tools every DIYer needs fit into roughly 11 to 12 core categories, covering everything from hanging shelves to fixing a leaky cabinet hinge. ANSI-rated safety glasses, a 25-foot locking tape measure, and a 12–18V cordless drill are the three items that appear on every expert-backed list. Get those right, and you have a foundation that handles most of what a home throws at you.

    1. What are the must-have hand tools every DIYer should own?

    Hand tools are the backbone of any home kit. They require no power source, they last decades with basic care, and they handle the tasks you face most often. Smart tool curation matters more than owning every tool on the shelf. A tight set of quality hand tools beats a garage full of cheap ones every time.

    Claw hammer

    A 16–20 oz claw hammer covers nailing, hanging, and light demolition. The weight range gives you enough force without tiring your arm on a long project. Look for a fiberglass or hickory handle, which absorbs vibration better than steel.

    Screwdrivers

    You need both Phillips and flathead in at least two sizes each. A 4-in-1 or 6-in-1 combination screwdriver cuts down on clutter and covers most fastener types in one handle.

    Close-up of hands arranging screwdrivers on table

    Pro Tip: Upgrade to a ratcheting screwdriver when your budget allows. It delivers superior torque and reduces the risk of stripped screws compared to a standard manual driver.

    Tape measure

    A 25-foot locking tape measure is the standard for room-scale projects. The locking blade keeps your measurement in place while you mark, which prevents the most common measuring mistake: the tape snapping back before you write anything down.

    Adjustable pliers

    Slip-joint pliers and a pair of needle-nose pliers together cover gripping, bending, and reaching into tight spaces. Adjustable pliers replace three or four fixed-size pairs, which saves both money and drawer space.

    Utility knife

    A utility knife with snap-off blades stays sharp longer than a fixed blade because you break off the dull segment and expose a fresh edge. Use it for scoring drywall, cutting caulk, and trimming materials to fit.


    2. Which power tools are essential for DIY projects at home?

    Power tools multiply what you can accomplish in a single afternoon. The right ones reduce physical effort and improve accuracy. The wrong ones sit in a closet and collect dust. Start with two and build from there.

    Cordless drill/driver

    A 12–18V cordless drill with a clutch is the single most useful power tool a homeowner can own. The voltage range gives you enough torque for drilling into wood, drywall, and light masonry without the bulk of a professional-grade tool.

    The clutch is the feature most beginners overlook. A torque-setting clutch stops the drill when it reaches a set resistance level, which prevents stripped screws and protects your wrist from the sudden jerk of an overtightened fastener. Set the clutch low for soft materials and higher for hardwood or metal.

    Pro Tip: Buy a drill that comes with two batteries. One charges while you work with the other, so you never stop mid-project waiting for power.

    • Look for a drill with at least 300 inch-pounds of torque for general home use.
    • Variable speed trigger gives you control for delicate tasks like driving screws into trim.
    • A built-in LED work light is worth paying extra for when you work inside cabinets or under sinks.

    Circular saw

    A circular saw handles straight cuts in plywood, lumber, and composite decking. You do not need a miter saw or table saw for most home projects. A 7¼-inch circular saw with a sharp blade covers shelving, framing repairs, and deck boards. Pair it with a straightedge guide for cuts that need to be perfectly straight.

    Glue gun

    A hot glue gun is underrated as a repair tool. It bonds wood trim, fabric, and lightweight materials in seconds. For quick fixes that do not need structural strength, it beats waiting 24 hours for wood glue to cure.


    3. What safety and measuring tools should every DIYer never skip?

    Safety gear is not optional equipment. ANSI-rated safety glasses, work gloves, and a dust mask are the minimum protection for any project that involves cutting, drilling, or sanding. Skipping them is how minor projects turn into emergency room visits.

    Measuring tools belong in the same category as safety gear. Inaccurate cuts waste materials and create gaps that take twice as long to fix. The tools below work together to keep your work square, level, and correctly sized.

    Tool Type Primary use
    ANSI-rated safety glasses Safety Eye protection from debris and dust
    Work gloves Safety Hand protection from cuts and splinters
    Dust mask or N95 respirator Safety Lung protection during sanding or cutting
    Spirit level (24-inch) Measuring Checking horizontal and vertical alignment
    Speed square Measuring Marking 90-degree and 45-degree angles
    Carpenter’s pencil Measuring Marking cut lines that stay visible
    Multimeter Safety/Electrical Checking circuits before electrical work

    A multimeter deserves special mention. Most homeowners never think to own one until they face an electrical problem. It verifies whether a circuit is live before you touch it, which is the difference between a safe repair and a serious shock. A basic digital multimeter costs under $30 and covers voltage, continuity, and resistance checks.

    A home safety inspection before starting any major project helps you identify hazards before tools ever come out.


    4. How to organize and maintain your DIY tools for longevity and readiness

    A disorganized toolkit costs you time and money. Tools left loose in a drawer get damaged, go missing, and take twice as long to find when you need them fast. A toolbox or tool bag keeps everything protected, accessible, and in one place.

    The choice between a toolbox and a tool bag depends on how you work. A rigid toolbox protects tools better and stacks easily in a closet. A canvas tool bag is lighter and easier to carry from room to room. For most homeowners, a medium-sized tool bag with a rigid base is the best starting point.

    Maintenance is what separates tools that last 20 years from tools that rust out in two. Follow these habits:

    • Wipe metal surfaces with a dry cloth after each use to prevent rust.
    • Apply a light coat of machine oil to saw blades and drill bits every few months.
    • Store cordless drill batteries at partial charge (around 40–60%) if you will not use them for weeks. Full charge storage degrades lithium-ion cells faster.
    • Check screwdriver tips for wear. A worn tip strips screws and damages fastener heads.
    • Inspect power tool cords and battery contacts for cracks or corrosion before each use.

    Start small and upgrade based on what your projects actually demand. Buying a full set of specialized tools before you need them leads to wasted money and cluttered storage. The right approach to home upgrades is to let your project list drive your tool purchases, not the other way around.

    Pro Tip: Label your tool bag sections with masking tape and a marker. When you finish a project, return every tool to its labeled spot before putting the bag away. This single habit eliminates the “where did I put that?” problem entirely.


    Key takeaways

    A small, well-chosen toolkit covers the vast majority of home repairs when it includes quality hand tools, a 12–18V cordless drill, ANSI-rated safety gear, and basic measuring tools.

    Point Details
    Start with hand tools A claw hammer, screwdrivers, tape measure, pliers, and utility knife handle most common repairs.
    Prioritize the cordless drill A 12–18V drill with a clutch is the most versatile power tool for home use.
    Never skip safety gear ANSI-rated glasses, gloves, and a dust mask are required for any cutting or drilling task.
    Measure before you cut A spirit level, speed square, and 25-foot tape measure prevent costly material waste.
    Organize from day one A tool bag with labeled sections saves time and protects tools from damage.

    What I’ve learned about building a toolkit that actually gets used

    Most people buy tools the wrong way. They either buy too little and get frustrated halfway through a project, or they spend $500 on a set they use twice. I’ve watched both happen, and neither builds the confidence that makes DIY worth doing.

    The insight that changed how I think about this: a small, well-chosen kit handles 80% of common house problems more effectively than a large random collection. That means your first purchase should be a quality claw hammer, a good set of screwdrivers, and a reliable cordless drill. Not a full 200-piece socket set. Not a compound miter saw. Those come later, when a specific project demands them.

    Proper tool handling is the skill most beginners underestimate. A drill used incorrectly strips screws and splits wood. A circular saw without a guide produces cuts that do not fit together. Learning technique before buying more tools is the faster path to good results. Workbenchguide’s step-by-step repair guides are built around this idea: show the technique first, then let the tool do its job.

    The other thing I’d tell any new homeowner: do not wait for a big project to build your kit. Start with the basics, fix the small things around the house, and let your confidence grow with your skill. The right tools do not make you a better DIYer overnight. Practice does. But the right tools make practice a lot less frustrating.

    — Sean


    Workbenchguide makes home projects easier to plan and track

    Knowing which tools to buy is only half the job. Knowing what to do with them, and when, is what keeps a home in good shape year after year. Workbenchguide gives homeowners a home maintenance checklist that maps out exactly what to check, fix, and schedule across every season. The platform pairs that checklist with step-by-step DIY guides so you always know what the next task is and how to handle it. If a project goes beyond your toolkit, contractor help is one click away. For homeowners who want to stay ahead of repairs instead of reacting to them, Workbenchguide is the place to start.


    FAQ

    What tools should a beginner DIYer buy first?

    A beginner should start with a claw hammer, Phillips and flathead screwdrivers, a 25-foot tape measure, adjustable pliers, a utility knife, and a 12–18V cordless drill. These 11 to 12 core tools cover the majority of common home repairs.

    What voltage cordless drill is best for home use?

    A 12–18V cordless drill is the standard recommendation for home DIY projects. That voltage range delivers enough torque for wood, drywall, and light masonry without excessive weight.

    Do I really need ANSI-rated safety glasses?

    Yes. ANSI-rated safety glasses meet a tested impact resistance standard that regular eyewear does not. Any task involving cutting, drilling, or sanding produces debris that can cause permanent eye damage.

    What is a clutch on a cordless drill and why does it matter?

    A clutch is a torque-limiting ring on a cordless drill that stops driving when it reaches a set resistance. It prevents stripped screws and protects your wrist from sudden kickback, which makes it especially useful for beginners.

    How do I keep my tools in good condition long-term?

    Wipe tools dry after each use, oil metal surfaces every few months, and store cordless batteries at partial charge when not in use. A labeled tool bag keeps everything organized and prevents the physical damage that comes from loose storage.