
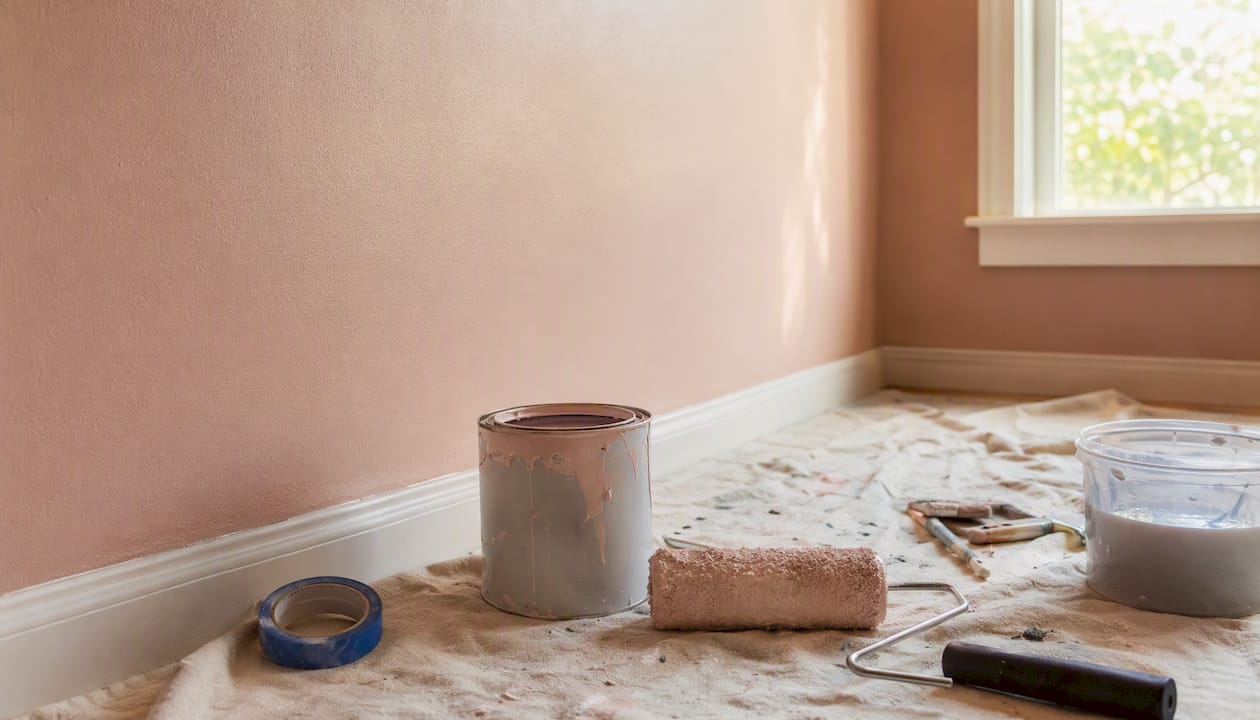
Paint in this order: ceiling first, then trim, then walls. Cut in with a brush along edges, then roll the open surfaces. For a typical room, expect a full weekend: a few hours of prep on Saturday, primer if needed, and two coats of paint with drying time in between. Most people underestimate prep and rush the drying. Those two shortcuts are responsible for most DIY paint failures.
Quick time estimate:
- Room prep (moving furniture, patching, sanding): 2–4 hours
- Primer coat (if required): 1–2 hours, plus 1–2 hours dry time
- First topcoat: 1–2 hours, plus 1–2 hours dry time
- Second topcoat: 1–2 hours, plus overnight cure before removing tape
Safety before you start: Open windows and run a fan for ventilation. Wear an N95 respirator when sanding or using oil-based products. Keep kids and pets out of the room until paint is fully dry.
Key Takeaways
Painting a room successfully comes down to three things: thorough prep, the right order (ceiling, trim, walls), and respecting drying times between coats.
| Point | Details |
|---|---|
| Paint in the right order | Ceiling first, then trim, then walls — each stage covers the mess from the one before. |
| Estimate paint accurately | Most paints cover 300–350 sq ft per gallon; plan for two coats on most surfaces. |
| Prep is non-negotiable | Clean, patch, and sand walls before any paint touches them or the finish will fail. |
| Remove tape at 45° | Pull tape back over itself at a 45-degree angle while paint is slightly tacky to avoid peeling. |
| Workbenchguide | Use Workbenchguide’s project checklists and DIY guides to track paint colors, tasks, and future touch-ups. |
Table of Contents
- What supplies do you need to paint a room?
- How do you plan the job and estimate how much paint you need?
- How do you prep a room and its walls for painting?
- When do you need primer, and which type should you use?
- What’s the right painting order and technique for even coverage?
- How long does paint take to dry, and how do you clean up properly?
- How do you fix lap marks, drips, and uneven texture?
- Your printable checklist and weekend timeline
- Sources
What supplies do you need to paint a room?
Getting the right kit before you start saves two trips to the hardware store. According to BobVila’s essential tools guide, seven tools cover almost every DIY paint job: an angled sash brush, a roller frame with covers, drop cloths, painter’s tape, a paint tray, a putty knife, and sandpaper. Here’s the full list broken down by category.
Painting tools:
- Angled sash brush (2–2½ inches): For cutting in around edges, corners, and trim. The angled bristles give you control where a roller can’t reach.
- Roller frame and covers: A 9-inch frame handles most walls. For smooth drywall, use a ¼-inch nap cover. For textured walls, go with a ⅜- to ½-inch nap.
- Paint tray and liners: Liners make cleanup fast. Buy a few extras.
- Paint can opener and stir sticks: Don’t skip stirring. Pigment settles.
Prep supplies:
- 3M ScotchBlue painter’s tape: The standard for clean lines. Choose the right variant for your surface: ScotchBlue Delicate for freshly painted walls, the standard blue for most trim and baseboards.
- Drop cloths: Canvas holds up better than plastic, which shifts underfoot and tears. Cover the entire floor.
- Spackle and putty knife: For filling nail holes and small dings.
- Sandpaper: 120-grit for smoothing patches; 220-grit for final scuffing before paint.
- Caulk and caulk gun: For gaps between trim and walls.
- Rags and a bucket: For spills and cleanup.
Safety gear:
- N95 respirator (for sanding or oil-based products)
- Safety glasses
- Nitrile gloves
Pro Tip: Choose synthetic (polyester or nylon) bristles for latex paint and natural bristles for oil-based paint. Synthetic bristles absorb water and go limp in oil-based products; natural bristles swell in latex. Getting this wrong makes cutting in a frustrating experience.
For a broader look at what belongs in your home toolkit, the essential DIY home kit guide from Workbenchguide covers everything from paint tools to general repair gear.
How do you plan the job and estimate how much paint you need?
Choosing color and sheen
Color is personal, but sheen is practical. Benjamin Moore’s paint finish guide lays this out clearly: flat and matte finishes hide surface imperfections but are hard to wipe clean, making them best for low-traffic bedrooms and ceilings. Eggshell and satin work well in living rooms and hallways. Semi-gloss and high gloss are the right call for trim, doors, and kitchens or bathrooms where you need a surface you can actually scrub.
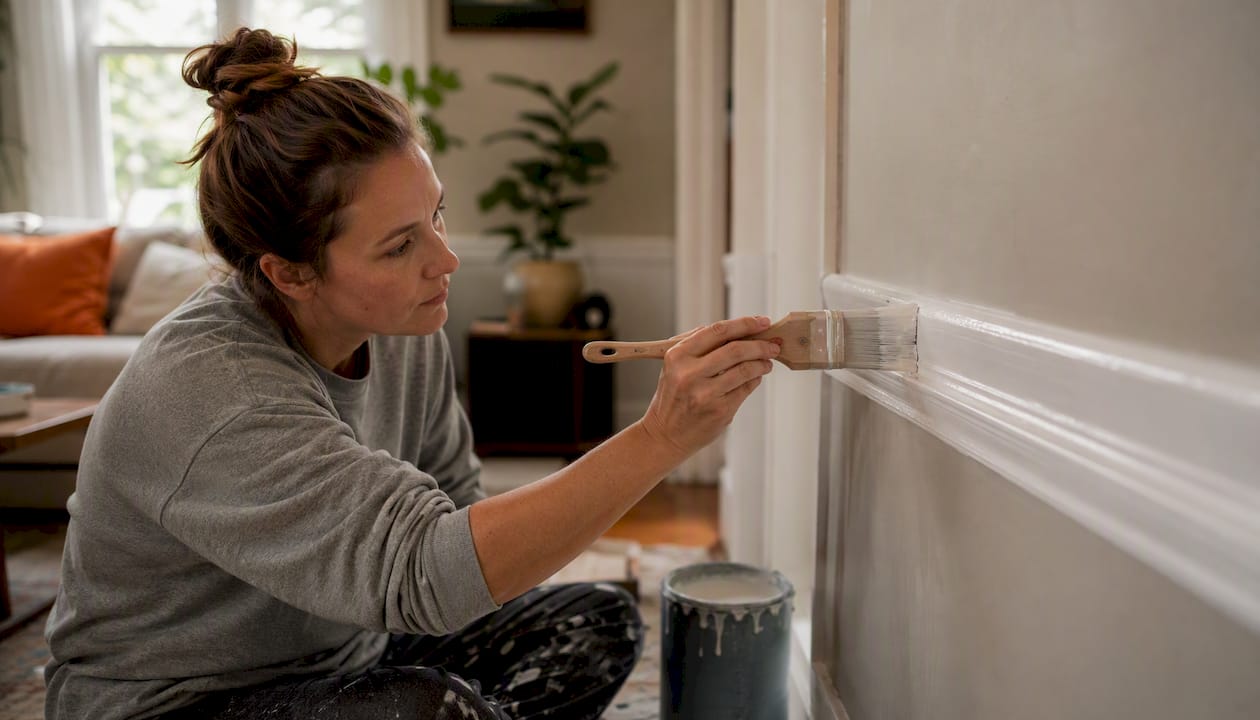
Calculating how much paint to buy
Measure each wall: height multiplied by width. Add the areas together, then subtract roughly 20 square feet for each standard door and 15 square feet for each window. That gives you your paintable square footage.
Dunn-Edwards’ interior painting guide puts average coverage at 300–350 square feet per gallon. Use 350 sq ft/gallon for smooth walls and 300 for textured ones.
Example: a 12×12 room with 8-foot ceilings
- Four walls: (12 + 12 + 12 + 12) × 8 = 384 sq ft
- Subtract two doors and one window: 384 − 40 − 15 = 329 sq ft
- At 350 sq ft/gallon: roughly 1 gallon per coat
- Two coats: 2 gallons of wall paint
| Surface | Approximate coverage | Intended coats | Volume estimate for a small room |
|---|---|---|---|
| Smooth drywall | Typical coverage per gallon varies | Multiple coats generally recommended | Estimated volume varies |
| Textured walls | Lower coverage per gallon than smooth surfaces | Multiple coats generally recommended | Estimated volume varies |
| Ceiling | Similar coverage to walls; coats vary by condition | Variable coats needed | Estimated volume varies |
| Trim (linear) | Coverage per volume less than walls | Multiple coats common | Estimated small volume required |
Pro Tip: If you’re buying more than one can of the same color, ask the paint store to “box” them — pour all cans into a single large bucket and mix before painting. Slight batch-to-batch color variation between cans is real, and boxing eliminates any visible seam on the wall.
How do you prep a room and its walls for painting?
Prep is where most DIY paint jobs are won or lost. A wall that looks fine from across the room can show every flaw under a fresh coat of paint. Cleaning surfaces before painting directly improves adhesion, as noted in Angi’s supply and prep guide.
Room prep checklist:
- Remove small furniture; push large pieces to the center and cover with drop cloths.
- Remove outlet covers, switch plates, and any wall hardware. Tape a small bag of screws to each plate so nothing gets lost.
- Lay drop cloths across the entire floor, overlapping at seams.
- Tape off baseboards, window frames, and door casings with painter’s tape.
Wall prep steps:
- Wash walls with a mild soap-and-water solution. Pay extra attention to kitchen walls where grease builds up. Let dry completely.
- Fill nail holes and dings with spackle using a putty knife. Overfill slightly; it shrinks as it dries.
- Once dry, sand patches smooth with 120-grit sandpaper, then finish with 220-grit.
- Wipe down all sanded areas with a damp cloth to remove dust. Dust under fresh paint causes a gritty, uneven finish.
- Caulk any gaps between trim and walls. Smooth with a wet finger and let cure before painting.
If you’re dealing with peeling or flaking old paint, scrape it off and sand the edges smooth before patching. Painting over loose paint guarantees the new coat will peel too. For sound, well-adhered old paint in the same color family, a light scuff with 220-grit is enough to give the new coat something to grip.
Safety note: If your home was built before 1978, test for lead paint before sanding. Lead dust is a serious health hazard. Use an EPA-approved lead test kit and, if positive, consult a certified lead abatement contractor rather than sanding yourself.
Pro Tip: Run your hand along the wall after sanding. If it feels like fine sandpaper, you haven’t wiped off enough dust. A tack cloth picks up what a damp rag misses.
When do you need primer, and which type should you use?
Primer is not optional in every situation, but skipping it when you need it leads to paint failure. The Rawlins Paints primer guide makes the selection logic clear: match the primer to the surface condition, not just the paint.
When primer is required:
- Bare or new drywall (the paper face absorbs paint unevenly without sealing)
- Fresh plaster or patched areas
- Raw or unfinished wood
- Surfaces with stains (water stains, smoke, tannin bleed from wood)
- Going from a very dark color to a much lighter one
- Glossy surfaces that need adhesion help
When you can skip primer:
- Repainting over sound, same-color paint in good condition
- Using a paint-and-primer-in-one product on a previously painted, clean surface
Primer types by problem:
- Drywall/plaster primer (PVA primer): Seals porous new drywall so paint goes on evenly. Required on any new construction or after major patching.
- Stain-blocking primer: Covers water stains, smoke damage, and tannin bleed. Oil-based versions (like Zinsser BIN) block the most stubborn stains; shellac-based versions work on almost anything.
- Adhesion primer: For glossy or slick surfaces where paint won’t grip. Bonds to surfaces that would otherwise reject topcoats.
- Masonry primer: For brick, concrete, or block walls. Seals the alkaline surface and prevents efflorescence from pushing through.
Application steps:
- Stir primer thoroughly.
- Cut in around edges with a brush, same as paint.
- Roll the field in a consistent pattern.
- Follow the manufacturer’s recoat window before applying topcoat. Most latex primers are ready in 1–2 hours; oil-based primers need longer.
What’s the right painting order and technique for even coverage?
The Behr step-by-step painting guide confirms the order that professionals use: ceiling first, trim second, walls last. The reason is simple. Ceiling paint drips onto walls, and wall paint can smear onto trim. Working top-to-bottom means each stage covers the mess from the one before it.
Step-by-step painting method:
- Paint the ceiling. Use a roller with an extension pole. Cut in around the perimeter with a brush first, then roll in overlapping passes. Work in sections of about 3–4 feet.
- Paint the trim. Use a 2-inch angled sash brush. Work carefully along the edge where trim meets wall. Don’t worry about getting paint on the wall here; you’ll cover it when you roll.
- Cut in the walls. Load your brush, tap off the excess, and paint a 2–3 inch band along all edges: ceiling line, corners, baseboards, and around windows and doors. Keep a wet edge.
- Roll the walls. Use the W or N rolling pattern recommended by Architectural Digest: roll a large W or N shape across a 2–3 foot section, then fill it in with overlapping passes without lifting the roller. This distributes paint evenly and prevents thick ridges.
- Back-roll. On the final pass, lightly roll over the section from top to bottom with a nearly dry roller to even out texture and eliminate lines.
Avoiding lap marks and drips:
- Always maintain a wet edge. Lap marks happen when you roll over paint that has already started to dry. Work in sections and keep moving.
- Don’t overload the roller. Excess paint on the roller causes drips and uneven texture.
- If you see a drip forming, catch it immediately with a brush. A dried drip requires sanding.
Pro Tip: Before cutting in, slightly dampen your brush with water (for latex paint). It improves flow and reduces visible brush marks at the edges. Do the same with your roller cover: dampen it, then roll out the excess on a paper towel before loading with paint.
For breaks longer than 30 minutes, Martha Stewart’s painting guide recommends wrapping brushes and loaded trays tightly in plastic wrap. It keeps paint from skinning over and saves you from washing tools mid-project.
Painting trim, doors, and small details cleanly
Trim is where a paint job looks either professional or amateur. The difference usually comes down to patience and the right brush.
Trim before or after walls? Painting trim before walls is easier for beginners. You can be slightly sloppy at the wall edge because you’ll cut in over it when you paint the walls. Professionals often paint walls first and trim last for a crisper final line, but that requires steadier brush control.
Technique for clean trim:
- Use a 1½- to 2-inch angled sash brush for baseboards and door casings.
- Apply paint in long, smooth strokes following the grain of the wood.
- Sand lightly between coats with 220-grit sandpaper for a smooth gloss finish. Wipe off dust before the next coat.
For door color ideas and finish choices, One Day Doors & Closets’ door color guide is a practical reference.
Sheen for trim: Semi-gloss is the standard for baseboards, door casings, and window trim. It’s durable, washable, and holds up to scuffs. High gloss gives a lacquered look but shows every surface imperfection.
Pro Tip: For door edges and hinge areas, use a small foam roller or a chip brush to get paint into tight spots without removing the door. Tape the hinges with painter’s tape and work slowly. A second thin coat beats one thick one every time.
How long does paint take to dry, and how do you clean up properly?
Drying times and number of coats
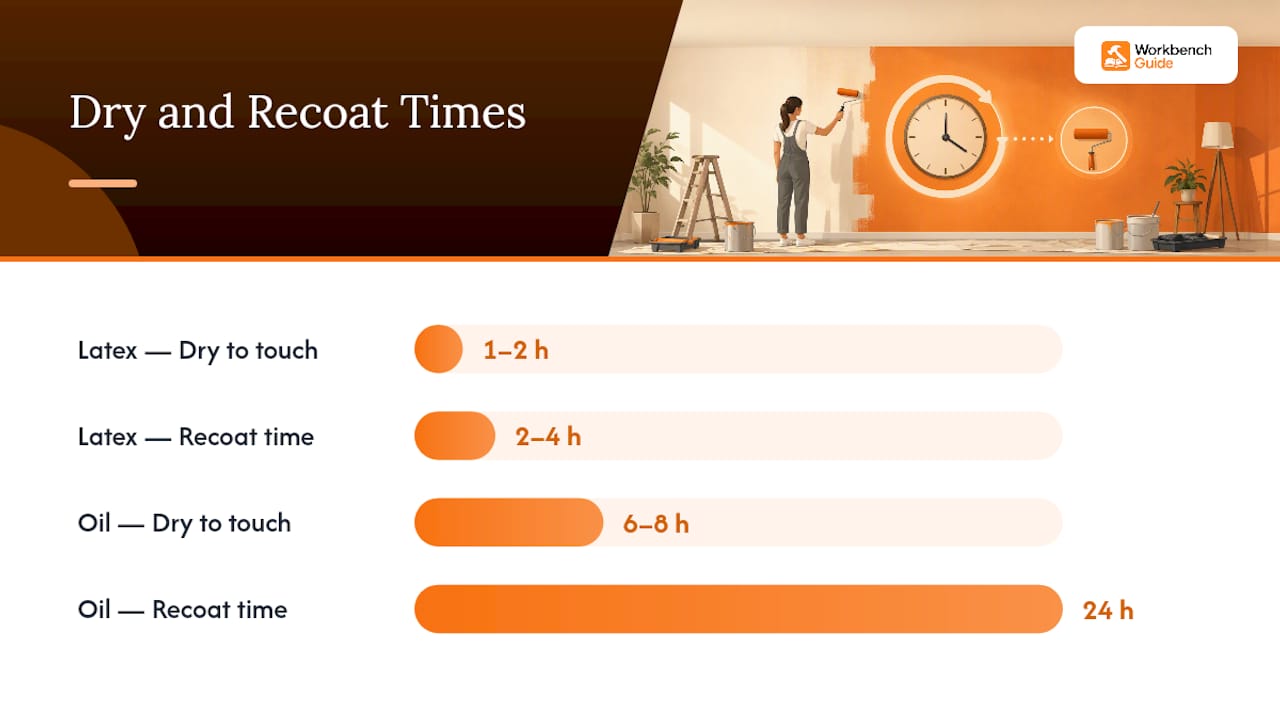
Most latex paints are dry to the touch in 1–2 hours, but recoat time is typically 2–4 hours. Oil-based paints take longer: 6–8 hours between coats. Always follow the label. High humidity and low temperatures slow drying significantly.
Two topcoats are standard for most rooms. Going from a dark color to a much lighter one may require three coats, or a tinted primer to reduce the number of topcoats. High-quality paint and primer can reduce the coats needed, which often pays back in time saved and better durability.
Removing painter’s tape
Remove tape while the paint is still slightly tacky, not fully cured. Pull it back at a 45-degree angle, slowly and steadily. If the paint has fully cured, score along the tape edge with a utility knife first to prevent peeling.
Pro Tip: Pull the tape back over itself, not away from the wall. That 45-degree angle keeps the paint film from tearing.
Cleanup and disposal
Water-based (latex) paint:
- Rinse brushes and rollers under warm water until the water runs clear.
- Wash with mild soap, reshape bristles, and hang to dry.
- Pour leftover paint back into the can, seal tightly, and store upside-down for a few seconds to create an airtight seal.
Oil-based paint:
- Clean tools with mineral spirits or paint thinner.
- Dispose of solvent-soaked rags carefully: lay flat outdoors to dry before disposing. Bunched oily rags can self-ignite.
Never pour paint down a drain. Latex paint can be dried out and disposed of with regular trash in many states (check local rules). Oil-based paint is hazardous waste and must go to a local household hazardous waste facility. Many hardware stores and municipal programs accept it.
| Paint type | Dry to touch | Recoat time | Cleanup solvent | Disposal |
|---|---|---|---|---|
| Latex (water-based) | 1–2 hours | 2–4 hours | Water | Dry out; check local rules |
| Oil-based | 6–8 hours | 24 hours | Mineral spirits | Hazardous waste facility |
How do you fix lap marks, drips, and uneven texture?
Every painter makes these mistakes. The good news is that most are fixable without repainting the whole wall.
Quick fixes:
- Lap marks: Let the wall dry completely, then sand the lap mark lightly with 220-grit sandpaper until the ridge disappears. Feather the edges and repaint the entire wall section in one pass, maintaining a wet edge throughout.
- Drips: Let dry fully. Use a putty knife or fine sandpaper to cut down the drip until it’s flush with the wall. Feather the edges and touch up with a brush, blending into the surrounding paint.
- Uneven texture: Usually caused by an overloaded roller or inconsistent nap pressure. Sand lightly and re-roll the section using the W pattern with a properly loaded roller.
- Brush marks at cut-in edges: Lightly sand and re-cut with a dampened brush using less paint.
When to spot-prime vs. sand and feather:
- If the repair exposes bare drywall or spackle, spot-prime before touching up.
- If the repair is just a surface texture issue over intact paint, sand and feather without primer.
- For touch-ups on older paint, test a small area first. Paint fades over time, and a fresh touch-up can look brighter than the surrounding wall.
Storing leftover paint:
- Label the can with the room name, paint brand, color name and number, and the date.
- Store in a climate-controlled space, away from freezing temperatures. Frozen latex paint is ruined.
- A piece of plastic wrap pressed directly onto the paint surface before sealing the lid prevents skinning.
Your printable checklist and weekend timeline
Use this as your go-to reference on the day of the project. Print it or pull it up on your phone.
Phase 1: Prep (Saturday morning, 2–4 hours)
- [ ] Move or cover furniture
- [ ] Remove outlet covers and hardware
- [ ] Lay drop cloths
- [ ] Apply painter’s tape
- [ ] Wash walls
- [ ] Patch holes with spackle
- [ ] Sand patches smooth (120-grit, then 220-grit)
- [ ] Wipe down all surfaces; remove dust
- [ ] Caulk gaps at trim
Phase 2: Prime (Saturday midday, 1–2 hours + dry time)
- [ ] Cut in primer with brush
- [ ] Roll primer on walls
- [ ] Allow 1–2 hours dry time (or per label)
Phase 3: First coat (Saturday afternoon, 1–2 hours + dry time)
- [ ] Paint ceiling (cut in, then roll)
- [ ] Paint trim
- [ ] Cut in walls with brush
- [ ] Roll walls using W pattern
- [ ] Allow 2–4 hours dry time
Phase 4: Second coat (Saturday evening or Sunday morning, 1–2 hours)
- [ ] Repeat ceiling, trim, and wall sequence
- [ ] Allow overnight cure before removing tape
Phase 5: Cleanup (Sunday, 1 hour)
- [ ] Remove tape at 45°
- [ ] Clean brushes and rollers
- [ ] Store leftover paint (labeled)
- [ ] Replace outlet covers and hardware
- [ ] Remove drop cloths
Workbenchguide offers a full home maintenance checklist that pairs well with this guide, covering seasonal tasks and repair tracking so nothing slips through the cracks.
A few things most beginners get wrong
Most paint guides tell you what to do. Fewer tell you what actually trips people up on the first real project.
The biggest mistake is treating prep as optional. Skipping the wash, the patch, and the sand feels like a time-saver until the paint peels off a greasy kitchen wall six months later. Prep is the job. The painting part is almost easy once the surface is right.
The second mistake is painting too fast. Rushing the recoat window because the wall “looks dry” is how you get lap marks and lifted paint. Touch-dry and recoat-ready are not the same thing. If the label says four hours, wait four hours.
Third: people underestimate how much a quality brush matters for cutting in. A cheap brush leaves bristle marks and holds less paint, which means more passes and more chances for mistakes. A good 2-inch angled sash brush from a reputable brand costs around $15–$20 and makes a visible difference at every edge.
One thing worth knowing about pacing a weekend project: don’t try to do all the prep and both coats in a single day. Fatigue leads to sloppy cutting in and missed spots. Prep on day one, paint on day two. You’ll do better work and actually enjoy it.
If your project involves high ceilings, significant water damage, or any suspected hazardous materials like lead or asbestos, calling a professional residential painter is the right call. Some jobs are genuinely beyond what a weekend and a roller can fix safely.
Workbenchguide keeps your home projects on track
Painting a room is one weekend. Keeping up with everything else your home needs is a year-round job. Workbenchguide gives you step-by-step DIY guides and project checklists built for homeowners who want to stay ahead of repairs without hiring a manager to track it all.
- Save time: Pre-built project templates mean you’re not starting from scratch every time.
- Avoid mistakes: Checklists and maintenance reminders catch the steps most people skip.
- Keep records: Log paint colors, product names, and dates so future touch-ups are fast and accurate.
Start with the free resources, or explore how Workbenchguide works to see the full toolkit.
Sources
- How to Paint Your Home’s Interior (Dunn‑Edwards)
- The Only 7 Tools You Need to Paint Any Room (BobVila)
- How to choose a paint finish (Benjamin Moore)
- What primer do I need? (Rawlins Paints primer guide)
- How to paint a room (Martha Stewart)
Leave a Reply