
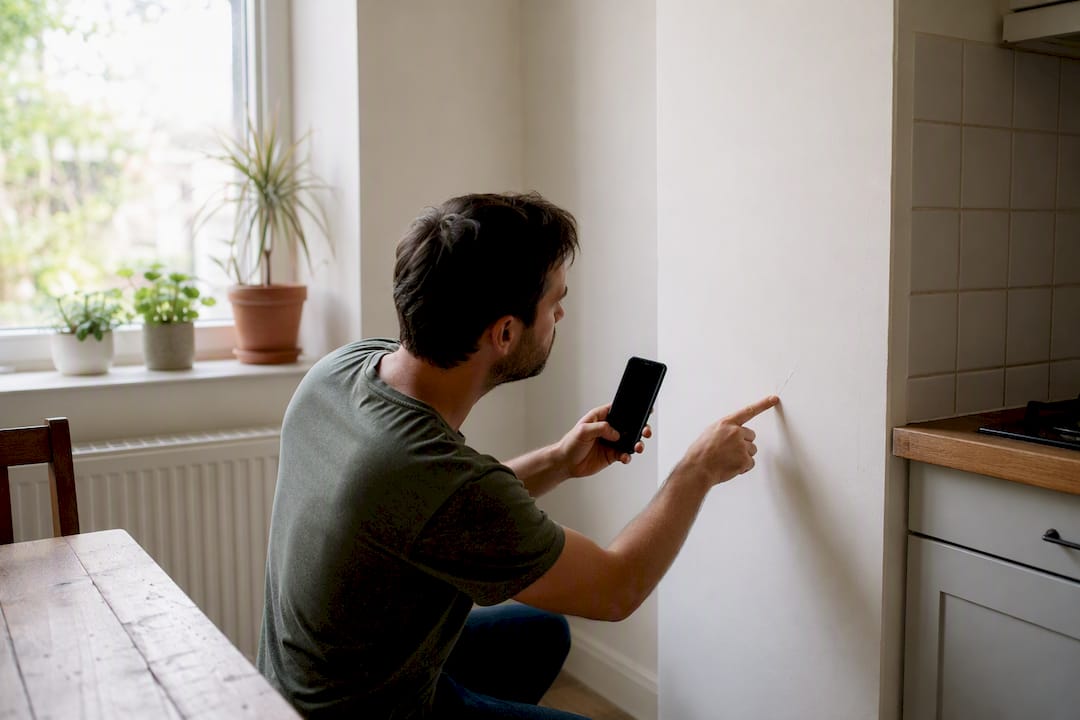
The single action that protects both landlords and tenants is a signed, room-by-room move-in checklist backed by timestamped photos, completed while the unit is empty. Skip it, and you’re relying on memory in a dispute months or years later, when neither side remembers who scratched the floor. A signed move-in and move-out comparison is typically the single most important piece of evidence courts look at, and Workbenchguide’s records show the same pattern across thousands of rental transitions.
Before you walk through a single room, gather:
- A printed checklist or tablet, plus one extra paper copy if you’re signing by hand
- A phone with a working camera and video function, charged and with storage cleared
- A pen and a digital signature tool as backup, in case one method fails
Key Takeaways
A signed, room-by-room move-in checklist with timestamped photos, completed before belongings enter the unit, is the strongest protection either party has in a deposit dispute.
| Point | Details |
|---|---|
| Inspect before move-in | Complete the walkthrough while the unit is empty, allowing 45 to 75 minutes for a two-bedroom unit. |
| Photograph with structure | Shoot wide-then-close, keep 30 to 50 original unedited photos, and preserve timestamp metadata. |
| Get every signature | All adult tenants and the landlord or agent sign each page; note refusals in writing. |
| Know your state’s rules | About a dozen states require a written checklist, and skipping it can limit deposit withholding. |
| Store records centrally | Workbenchguide keeps checklists, photos, and exported PDFs organized by property for fast retrieval later. |
Table of Contents
- What Is a Rental Move-In Checklist and Why Do You Need One?
- What Should You Check in Every Room?
- How Should You Photograph a Rental for Evidence?
- When Should You Do the Walkthrough and Who Needs to Sign?
- Does Your State Require a Move-In Checklist?
- How Do You Use the Checklist After Move-In?
- What Does a Sample Checklist Line Actually Look Like?
- How Fast Should You Report an Issue After Moving In?
- What Are Your Ongoing Responsibilities as a Tenant?
- A Note on Why This Matters More Than It Seems
- Store Your Move-In Records Where You’ll Actually Find Them
- Where to Verify Your State’s Exact Rules
- Sources
What Is a Rental Move-In Checklist and Why Do You Need One?
A rental move-in checklist, sometimes called a check-in or condition report, records the exact state of a unit before a tenant moves belongings inside. It exists to answer one question later: was this damage already there? At move-out, the same form gets compared line by line, and whatever gaps exist between the two becomes the basis for deposit deductions.
The move-in record works because it establishes the baseline. Without one, a landlord claiming carpet damage has no proof the carpet wasn’t already stained, and a tenant with no documentation has no defense against an unfair deduction.
Some states legally require this document. Others treat it as strong practice without mandating it. Either way, skipping it shifts risk onto whoever has the weaker memory or the worse paperwork.
What Should You Check in Every Room?
A thorough inspection follows the same core pattern from room to room, then adds specifics for kitchens, bathrooms, and outdoor spaces. Practitioners following a structured four-phase process, prep, walkthrough, photo archive, and lock-in, tend to catch far more than tenants doing a rushed once-over on move-in day.
Every room, every time:
- Walls (marks, holes, paint condition, nail pops)
- Floors (stains, scratches, loose tile, carpet wear)
- Ceilings (water stains, cracks, popcorn texture damage)
- Outlets and switches (test each one, note any that don’t work)
- Windows and doors (do they open, close, lock, and seal properly?)
- Light fixtures (bulbs working, fixture intact)
- HVAC vents (open, closed, blocked, damaged)
- Smoke and carbon monoxide detectors (test the button, note battery status)
Kitchen specifics: cabinets and drawers (do they close flush, any water damage inside), countertops (chips, burns, seam separation), sink and visible plumbing (leaks, slow drains, caulk condition), stove and oven (burners fire, oven heats, interior condition), dishwasher (runs a cycle, door seal intact), garbage disposal (turns on, no grinding noise).
Bathroom specifics: fixtures (faucet, showerhead, tub, toilet all functional), caulk and grout (cracking, mold, gaps around tub or shower), exhaust fan (actually pulls air, not just spins), water stains around the toilet base or under the sink cabinet.

Bedrooms and closets: closet rods (secure, weight-bearing), closet floor and ceiling (same water and crack checks as main rooms), window egress (does it open fully, a fire code issue in bedrooms), ceiling fan function if one exists.
Exterior, parking, and storage: railings (loose or rusted), decking condition, landscaping state relative to what’s promised in the lease, assigned parking spot condition and any existing damage nearby.

For units with decks or patios, a closer look using a deck maintenance checklist catches structural issues a casual walkthrough misses. Bathroom-specific problems like grout failure or fan performance get more detailed treatment in a bathroom upgrade checklist.
Pro Tip: Write defect notes with three details every time: size, exact location, and nature of the damage. “Scratch” means nothing in a dispute. “3-inch scratch on the north living-room wall, 2 feet above the baseboard” holds up.
How Should You Photograph a Rental for Evidence?
Photo evidence only works if it’s structured, not random. The standard practitioners recommend is wide-then-close: one photo showing the whole wall or surface for context, then a close-up of the specific defect. Judges and arbitrators consistently find this pairing more credible than isolated close-ups with no context, since a close-up alone proves nothing about location.
- Shoot the same angles every time so move-in and move-out photos line up directly
- Aim for 30 to 50 photos for a standard multi-room unit, more if something looks questionable
- Take short video walkthroughs for anything hard to capture in a still, like a wobbly cabinet door or a slow drain
- Never crop or edit originals; cropping strips the EXIF metadata that proves when and where the photo was taken
Name files consistently, something like PropertyAddress_unit_movein_2026-05-12_livingroom_01, so you can find any photo instantly a year from now. Store originals in cloud backup immediately, then link them to the corresponding checklist line item when you export the final signed PDF.
When Should You Do the Walkthrough and Who Needs to Sign?
Do the inspection before a single box comes inside. An occupied unit hides damage under furniture and makes it impossible to tell what belongs to the space versus what arrived with the tenant.
- Schedule sufficient time for a typical two-bedroom unit and allocate more time for larger properties, ensuring the process is not rushed
- Have every adult tenant and the landlord or agent sign each page of the checklist, not just the final page
- If a tenant declines to sign, note “tenant declined to sign” directly on the form, sign your own portion, and bring a witness if one is available
- Deliver copies immediately through email with attachments, a tenant portal upload, or certified mail if a paper trail matters more
- Keep the original signed PDF plus at least one backup copy in a separate location
Does Your State Require a Move-In Checklist?
Several U.S. states legally require landlords to provide a written move-in checklist or condition statement, and roughly a dozen states enforce this rule specifically. Requirements and penalties vary widely by state.
- Failing to provide a required checklist can limit or fully forfeit a landlord’s right to withhold any part of the security deposit
- Most states that regulate deposits also set a strict window, often 14 to 30 days, for returning the deposit or providing an itemized list of deductions
- Landlords making deductions generally must itemize the damage and repair cost rather than withholding a lump sum
- Rules differ enough between states that you should verify your specific state’s statute before signing a lease, not after a dispute starts
How Do You Use the Checklist After Move-In?
The move-in record only pays off if it’s organized and retrievable months later.
- Export the signed form as a PDF and attach indexed photos plus any disclosures in one file
- Store everything in a single, searchable property folder, not scattered across email threads
- At move-out, match the same photo angles from move-in to make comparisons obvious
- If a dispute reaches small claims court, bring the dated record, the photos, and repair receipts. Courts expect exactly this level of documentation.
What Does a Sample Checklist Line Actually Look Like?
A usable entry reads like this: “North living-room wall: 3-inch scratch, 2 feet from baseboard; photo #LR-03.jpg.” That’s specific enough to defend and vague enough to adapt to any unit.
- Templates typically come as PDF, Word doc, or fillable form; adjust furnished-unit entries to note furniture condition separately from the unit itself
- For any property built before 1978, federal law requires a lead-paint disclosure attached to the lease, and it belongs in the same file as your checklist
How Fast Should You Report an Issue After Moving In?
Speed matters more than most tenants realize. An issue reported the same week you notice it reads as a legitimate move-in condition problem. The same issue reported two months later looks like normal wear the tenant is trying to blame on the landlord.
Put every report in writing, even after a phone call or a text. A conversation with the property manager means nothing in a dispute if there’s no dated record of it. Email works, a tenant portal message works, even a text thread works, as long as it has a date stamp attached.
Be specific in every report. “The bathroom fan is loud” is less useful than “the bathroom fan makes a grinding noise and doesn’t seem to move air, noticed the day we moved in.” Attach a photo or short video whenever the problem is visible or audible, using the same wide-then-close approach from your move-in walkthrough.
Reference the original checklist directly when the issue relates to something you already flagged. If your move-in form noted “dishwasher makes noise, unclear if pre-existing,” and it now fails to drain three weeks later, connect the two. That link between original documentation and the follow-up report is exactly what turns a shrug from a landlord into a same-week repair. Units with HVAC systems benefit from an additional layer of scrutiny; an HVAC checklist helps you spot the kind of gradual system failure that’s easy to miss during a fast walkthrough.
What Are Your Ongoing Responsibilities as a Tenant?
The move-in checklist covers day one. Everything after that falls under a different, ongoing set of responsibilities that most leases spell out but few tenants actually read closely.
Report maintenance issues promptly, and understand that “promptly” often carries legal weight, not just courtesy. Delaying a leak report by weeks can shift liability for the resulting damage onto the tenant in some states, since landlords can argue the tenant’s inaction caused the problem to worsen.
Tenants are generally responsible for routine upkeep: replacing light bulbs and HVAC filters, keeping drains clear of buildup they caused, not damaging fixtures through misuse, and maintaining reasonable cleanliness that prevents pest issues. What tenants are not responsible for is structural failure, appliance breakdown from normal use, or pre-existing conditions documented on the move-in checklist. That distinction is exactly why the checklist matters months after you sign it, not just on move-in day.
Keep a simple log of every repair request you submit, with dates. If plumbing issues come up, a yearly plumbing check habit helps you catch small leaks before they become move-out disputes over water damage nobody can date accurately.
A Note on Why This Matters More Than It Seems
Rigorous move-in records look like paperwork busywork until the day they save someone a few hundred dollars, or a few thousand. The pattern is consistent: disputes happen when documentation is thin, and they resolve fast when it isn’t. That’s not a legal opinion, it’s just what the evidence shows.
— Sean
Store Your Move-In Records Where You’ll Actually Find Them
A signed checklist and forty photos are only useful if you can find them eighteen months later, and most tenants and landlords lose that battle to a cluttered phone camera roll or a buried email thread. Workbenchguide gives you a single place to store checklist templates, timestamped photos, and exported signed PDFs, tied to each property instead of scattered across apps.
If you manage more than one unit, Workbenchguide handles multi-property organization so records for each address stay separate and searchable. Pair your move-in documentation with an ongoing home maintenance checklist so the same platform tracking your condition report also reminds you when filters, gutters, and HVAC systems need attention. Start by uploading your first move-in checklist and photos to see how the records hold up next to a move-out comparison.
Where to Verify Your State’s Exact Rules
Confirm state-specific deadlines and requirements through the move-in inspection checklist guide before your tenancy starts.
Sources
- How to Fill Out a Rental Property Check-In and Check-Out Form – LegalClarity
- Move-In Records for Landlords: The Complete 2026 Guide · DiscoveryMark
- Move-In/Move-Out Inspections That Hold Up in Disputes: Photo Standards, Digital Signoffs, and Damage Documentation – Cloud Rental Manager
- Free Move-In / Move-Out Checklist Form (Tenant) – eForms
- How to Do a Move-In Inspection: The Complete Landlord Checklist (2026)
Leave a Reply