

Yard irrigation maintenance involves regular inspection, cleaning, adjustment, and seasonal scheduling of your sprinkler system to prevent water waste and costly repairs. A single broken sprinkler head can waste up to 25,000 gallons of water per year. That number puts the stakes in clear terms: neglecting your system costs real money and real water. The industry term for this practice is irrigation system maintenance, and it covers everything from checking spray patterns to winterizing pipes before the first freeze. Residential systems require at least two major maintenance events annually, with a mid-season tune-up strongly recommended. Following the right yard irrigation maintenance steps keeps your lawn green, your water bill low, and your system running for years.
What tools do you need for yard irrigation maintenance?
The right tools make every maintenance task faster and safer. You do not need a professional kit, but a few specific items are non-negotiable.
Essential tools and materials:
- Pressure gauge: Measures water pressure at the system’s main valve. Pressure that runs too high or too low damages heads and pipes.
- Flat-head and Phillips screwdrivers: Used to adjust spray arc and radius on most rotary and fixed heads.
- Replacement nozzles and sprinkler heads: Keep a small stock of the most common sizes for your system. Swapping a damaged head takes under five minutes.
- Needle-nose pliers: Useful for pulling clogged nozzle inserts without damaging the housing.
- Small wire brush or toothbrush: Cleans debris from nozzle screens and filter screens inside valve boxes.
- Catch cups or tuna cans: Used to measure water distribution uniformity across a zone.
- Teflon tape: Seals threaded connections when replacing heads or risers.
- Safety glasses and waterproof gloves: Protect you when working near pressurized lines or chemical treatments.
| Tool | Primary use |
|---|---|
| Pressure gauge | Check system operating pressure |
| Catch cups | Measure water distribution uniformity |
| Replacement nozzles | Swap damaged or clogged spray heads |
| Wire brush | Clean filter screens and nozzle inserts |
| Teflon tape | Seal threaded fittings on new heads |
Pro Tip: Buy a multi-tool sprinkler adjustment key. Most hardware stores carry them for under $10, and they fit the adjustment screws on the majority of residential sprinkler brands.
A complete DIY tool kit covers most of these items. Having everything on hand before you start saves you from stopping mid-task to run to the store.
How to inspect and adjust sprinkler heads for optimal coverage
Sprinkler head inspection is the core of any effective yard irrigation maintenance routine. The EPA WaterSense program recommends catch-cup tests for water distribution uniformity and matching irrigation to specific plant types. That means you need to walk each zone with your eyes open, not just assume the system is working.
Follow these steps for each zone:
- Activate the zone manually at the controller. Stand at one end of the zone and watch every head as it rises and sprays.
- Walk the full zone perimeter. Look for heads that are tilted, buried under soil or thatch, or not rising fully. A buried head sprays sideways and soaks one patch while leaving others dry.
- Check spray direction. Heads aimed at driveways, sidewalks, or fences waste water and accomplish nothing. Adjust the arc using a screwdriver or adjustment key.
- Inspect nozzle condition. Cracked, chipped, or clogged nozzles produce uneven spray patterns. Pull the nozzle insert and rinse it under running water. Replace it if the spray pattern stays distorted.
- Run the catch-cup test. Place cups or tuna cans at equal intervals across the zone. Run the zone for 15 minutes, then measure the water in each cup. Cups with significantly less water than others reveal coverage gaps that need head repositioning or nozzle upgrades.
- Confirm head-to-head coverage. Each head’s spray should reach the next head in the zone. Gaps between heads create dry patches that no amount of extra run time will fix.
Pro Tip: Do your inspection early in the morning when wind is calm. Wind shifts spray patterns and gives you a false read on where water is actually landing.
Matching irrigation to plant requirements reduces runoff and keeps your landscape healthy. Turf zones and shrub beds have different water needs, so never mix head types within a single zone if you can avoid it.

How to check your system for leaks and mechanical issues
Leaks are the most expensive problem a homeowner can ignore. Proactive maintenance prevents major failures from compounding into costly repairs. The good news is that most leaks leave visible clues if you know where to look.
Signs of leaks and mechanical problems:
- Wet spots or puddles lasting more than 24 hours after an irrigation cycle signal a below-grade pipe leak or a stuck-open valve. These need urgent attention before they undermine soil stability.
- Slow zone activation. A zone that takes longer than 30 seconds to pressurize often points to a valve or solenoid malfunction, not just low pressure. Do not assume it will self-correct.
- Unusual sounds. Hissing near valve boxes or a gurgling sound in the pipes during a cycle indicates air intrusion or a cracked line.
- Backflow preventer drips. Inspect your backflow preventer for visible drips or mineral deposits around the test cocks. A dripping backflow device can indicate internal seal failure. For a deeper look at backflow device maintenance, a licensed inspection is worth scheduling annually.
The water meter test is the gold standard for finding hidden leaks. Turn off all indoor water use, then go to your water meter and watch the flow indicator. If it moves with all faucets closed, water is escaping somewhere in your outdoor system. This test detects concealed leaks that visual inspections miss entirely.
Pro Tip: Mark the location of any wet spot with a small flag before you dig. Underground leaks often surface several feet from the actual break point because water follows the path of least resistance through the soil.
How to clean, winterize, and program your system for seasonal efficiency
Seasonal maintenance is where most homeowners fall short. Keeping the same watering schedule year-round wastes water and stresses plants. Your system needs different treatment in spring, summer, and fall.
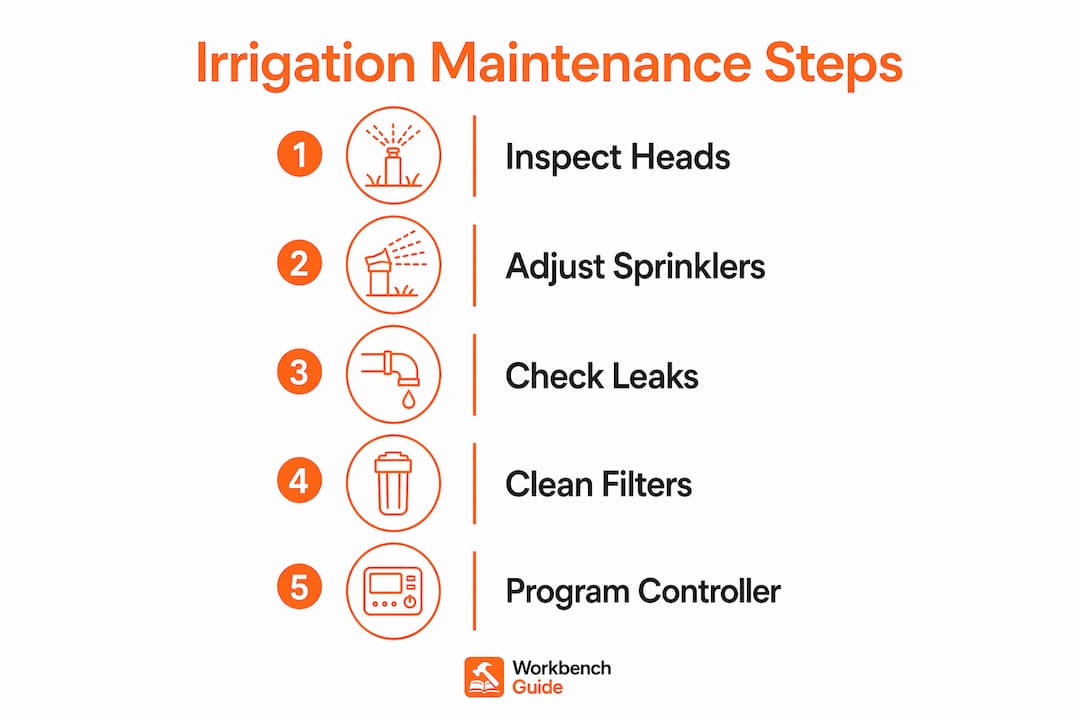
Cleaning nozzles, filters, and sensors
Clogged nozzle screens reduce flow and create dry patches. Remove each nozzle insert and rinse it under a faucet every season. Clean the filter screen inside each valve box with a wire brush. Check your rain sensor by holding it under a running faucet. If the system does not shut off, the sensor needs replacement or recalibration.
Spring startup procedure
- Open the main shutoff valve slowly to avoid water hammer, which can crack pipes and fittings.
- Pressurize each zone manually and inspect every head as described in the inspection steps above.
- Check all valve box lids for cracks or missing covers from winter frost.
- Confirm your controller’s date, time, and watering schedule comply with local watering restrictions.
- Update the seasonal adjustment percentage on your controller to match spring conditions.
Spring startup covers pressurization, manual zone testing, and schedule compliance. Skipping any of these steps means you start the season with unknown problems already running.
Winterization and fall shutdown
Blow out all water from the system using a compressor before the first hard freeze. Residual water in pipes expands when it freezes and cracks fittings, heads, and valves. A complete fall maintenance checklist covers the full shutdown process. After blowout, close the main shutoff valve and insulate any above-ground components.
Programming your controller
Adjusting irrigation schedules to match seasonal changes is the single most effective step for conserving water and maintaining plant health. A weather-based smart controller that replaces a standard clock timer can save about 9,000 gallons of water annually for the average household. Smart controllers require regular validation, though. A controller that loses its Wi-Fi or weather data connection will revert to a generic schedule without alerting you.
Validate your smart controller connection monthly by checking the weather data feed in the controller’s settings menu. A controller reporting “normal” while disconnected from weather data is running blind.
What common mistakes should you avoid in irrigation upkeep?
Most irrigation problems trace back to a short list of repeated errors. Recognizing them is the fastest way to avoid expensive repairs.
- Running the same schedule year-round. Summer peak demand and cool-season needs differ dramatically. A schedule set in july will overwater in october and underwater in august heat spikes. Adjust run times at least four times per year.
- Skipping mid-season inspections. Two major maintenance events per year are the minimum, but a mid-season check catches sediment buildup and heat-related head damage before they compound.
- Ignoring slow zone activation. A zone that takes over 30 seconds to come on is telling you something is wrong with the valve or solenoid. Waiting until the zone stops working entirely turns a $30 solenoid replacement into a full valve rebuild.
- Trusting the smart controller without checking it. Smart controllers can falsely report normal operation even when disconnected from weather data. Log into the controller’s app or display monthly and confirm the weather station is active.
- Reactive maintenance only. Waiting for a visible failure before acting is the most expensive approach. Routine, proactive upkeep extends system lifespan and prevents emergencies. A 30-minute inspection twice a year costs nothing compared to a broken main line repair.
For a broader view of how proactive upkeep protects your home, the benefits of preventive maintenance apply directly to irrigation systems.
Key Takeaways
Consistent irrigation system maintenance, done at least twice a year with a mid-season check, is the most reliable way to prevent water waste, protect your landscape, and avoid costly repairs.
| Point | Details |
|---|---|
| Inspect heads every season | Walk each zone manually and use catch-cup tests to find coverage gaps. |
| Test for hidden leaks | Use the water meter test to catch below-grade leaks that visual checks miss. |
| Adjust schedules seasonally | Update run times at least four times per year to match plant needs and weather. |
| Validate smart controllers | Check the weather data connection monthly to prevent generic, wasteful scheduling. |
| Winterize before the first freeze | Blow out all water from pipes to prevent cracks and costly spring repairs. |
What I’ve learned from years of watching homeowners skip the basics
The most common irrigation mistake I see is not a broken head or a leaky valve. It is the “set it and forget it” mindset. Homeowners turn on the system in the spring, set a schedule, and do not look at it again until a neighbor mentions a river running down the driveway.
The second most common mistake is trusting the controller display. A smart controller that shows a green checkmark is not proof the system is working correctly. I have seen controllers running a july schedule in october because nobody checked the seasonal adjustment after summer ended. The lawn looked stressed, the homeowner blamed the heat, and the real cause was a schedule that had not been touched in four months.
What actually works is treating irrigation like any other mechanical system in your home. You change your HVAC filter on a schedule. You flush your water heater annually. Your irrigation system deserves the same discipline. A 30-minute walk-through twice a year, combined with a quick controller check each month, catches 90% of problems before they become expensive. The exterior maintenance guide at Workbenchguide makes a strong case for this kind of proactive approach across all outdoor systems.
One more thing: do not skip the backflow preventer. Most homeowners have never looked at theirs. That device protects your drinking water from contamination. Check it for drips and mineral buildup every spring. If you are unsure what compliant irrigation backflow maintenance looks like in your area, a licensed plumber can inspect it in under an hour.
— Sean
Workbenchguide keeps your irrigation schedule on track
Keeping up with seasonal irrigation tasks is easier when you have a system behind you. Workbenchguide gives homeowners step-by-step DIY guides, maintenance checklists, and seasonal reminders so nothing falls through the cracks. You can track spring startup, mid-season checks, and fall winterization all in one place, without relying on memory or sticky notes. The platform also connects you with contractors when a repair goes beyond what a screwdriver can fix. Visit Workbenchguide to set up your irrigation maintenance schedule and get reminders before each seasonal task comes due. A year-round maintenance checklist is a good place to start.
FAQ
How often should I inspect my irrigation system?
Residential irrigation systems need at least two full inspections per year, at spring startup and fall shutdown, with a mid-season check strongly recommended to catch heat stress and sediment issues.
What is the water meter test for irrigation leaks?
The water meter test involves shutting off all indoor water use and watching the flow indicator on your meter. Movement with all faucets closed confirms a hidden outdoor leak.
How much water does a broken sprinkler head waste?
A single broken sprinkler head can waste up to 25,000 gallons of water per year, making prompt replacement one of the highest-impact steps in lawn irrigation maintenance.
Can a smart controller save water on its own?
A certified weather-based smart controller can save about 9,000 gallons annually compared to a standard clock timer, but only if its weather data connection is validated regularly.
When should I winterize my irrigation system?
Winterize your system before the first hard freeze in your area. Blow out all water from the pipes using a compressor, close the main shutoff valve, and insulate any above-ground components.
Leave a Reply