
Homeowners across the country are hit with unexpected repair bills every year, not because disaster struck, but because small exterior problems went unnoticed for too long. A cracked window seal, a clogged gutter, or peeling caulk around a vent might seem minor on their own. Combined over one or two seasons, those small failures can mean water damage, structural rot, and five-figure repair costs. The good news is that a consistent, season-by-season exterior maintenance routine puts you back in control, saves real money, and keeps your home looking sharp year after year.
Table of Contents
- Season-by-season maintenance: What to do and when
- Essential tools and materials for exterior upkeep
- How to inspect and maintain gutters like a pro
- Caulking, sealing, and exterior repairs: Avoiding costly failures
- Verifying results: How to confirm your maintenance protects your home
- Why seasonal maintenance is more effective than fixing problems as you notice them
- Get expert help and smarter tools for home maintenance
- Frequently asked questions
Key Takeaways
| Point | Details |
|---|---|
| Seasonal upkeep is essential | Scheduling exterior maintenance each season prevents expensive surprises and keeps your home protected. |
| Right tools save time | Having the right tools and materials makes DIY exterior tasks more efficient and effective. |
| Gutters need extra care | Gutters should be inspected often, especially before freezes and after storms, to avoid leaks or ice dams. |
| Caulking prevents water damage | Regular inspection and timely repair of exterior caulking stops leaks and costly repairs. |
| Track results for peace of mind | Checking your work and keeping maintenance records helps you catch issues early and protect your investment. |
Season-by-season maintenance: What to do and when
Now that you understand the importance of routine exterior maintenance, let’s break down what needs to be done, season by season.
A season-by-season system assigns specific inspection, cleaning, and repair tasks to the time of year when they matter most. This prevents the “I’ll get to it later” trap that turns small problems into big ones. Think of it like oil changes for your car: the schedule keeps everything running smoothly, and skipping it always costs you more in the end.
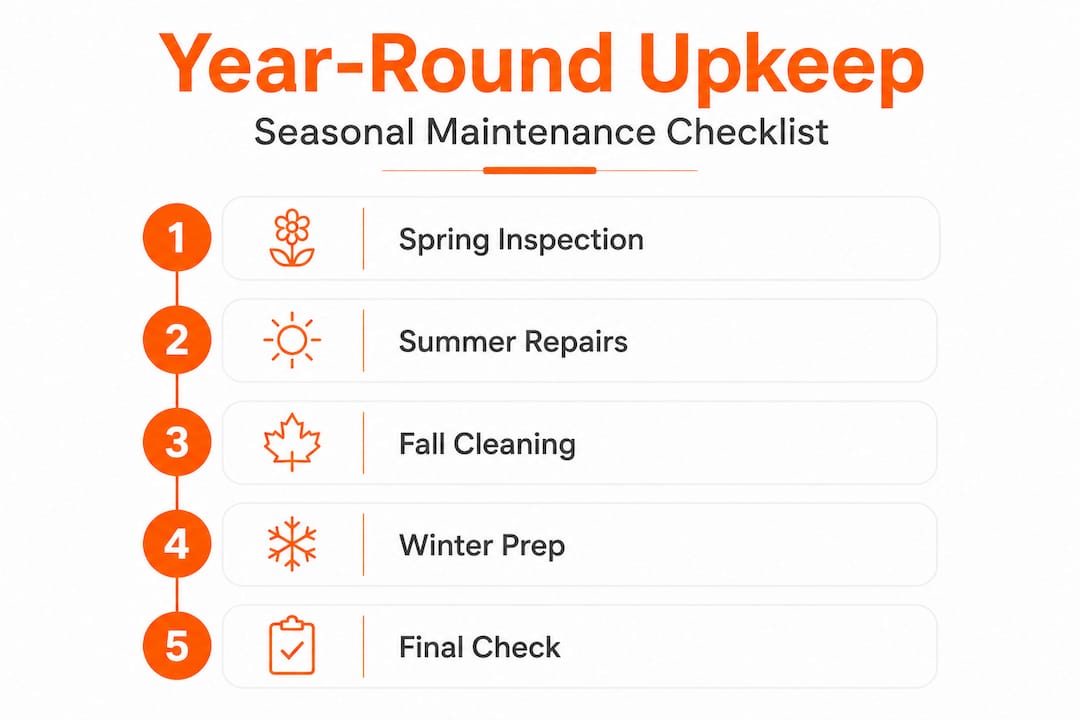
Here’s a quick look at what each season demands:
Spring
- Assess winter damage: check for cracked paint, lifted shingles, and shifting foundation trim
- Clear debris from window wells, walkways, and drainage areas
- Flush gutters and downspouts, and inspect for winter damage
- Check caulking around all windows, doors, and vents
Summer
- Paint or repaint surfaces before heat causes further peeling
- Stain and seal decks, fences, and wood trim
- Repair any cracked mortar, siding gaps, or rotted wood found in spring
- Inspect and clean window screens and exterior vents
Fall
- Protect pipes and hose bibs from freezing temperatures
- Clean gutters again after leaves have fully dropped
- Inspect weatherstripping and exterior door sweeps
- Check attic vents and roof flashings before cold weather sets in
Winter
- Monitor for ice buildup in gutters and on roof edges
- Check for condensation near windows and exterior wall penetrations
- Inspect after heavy storms for displaced shingles or debris damage
- Walk around the perimeter after wind events to spot emerging issues
Good seasonal home prep keeps each of these tasks from piling up. When you spread the work across the year, nothing feels overwhelming, and you catch problems when they’re still cheap to fix.
Here’s a simple comparison of reactive versus proactive maintenance:
| Approach | Average annual effort | Typical repair costs | Stress level |
|---|---|---|---|
| Reactive (fix when broken) | Low initially, high in crisis | $2,000–$10,000+ per incident | High |
| Proactive (seasonal schedule) | Consistent and manageable | $100–$500 per season | Low |
| No maintenance | None until disaster | $10,000+ major damage | Extreme |
Use a year-round maintenance checklist to map every task to its correct window, and refer to the maintenance checklist timing guide to prioritize by urgency. If you live in a colder region, the winter prep guide offers freeze-specific steps that go beyond the basics.
Essential tools and materials for exterior upkeep
With a clear schedule in place, make sure you’re equipped for each task. Here’s what you’ll need.
The right tools make a massive difference. Working with a dull caulk gun or the wrong type of sealant wastes time and leads to failures within a season. Your goal is to build a basic exterior maintenance toolkit that’s always ready to go, so when the right week arrives on the calendar, you’re not scrambling at the hardware store.
Here’s a breakdown of what belongs in your exterior maintenance kit:
| Tool or material | Primary use | Notes |
|---|---|---|
| Sturdy extension ladder | Roof, gutters, high trim | Fiberglass preferred for safety |
| Caulk gun and exterior caulk | Sealing windows, doors, vents | Choose flexible, paintable, mold-resistant formulas |
| Gutter scoop and bucket | Debris removal | Plastic scoops avoid scratching gutters |
| Deck brush and pump sprayer | Cleaning decks, siding, walkways | Use with appropriate cleaners |
| Paint and primer | Touch-ups and full repaints | Use exterior-grade, weather-resistant products |
| Deck stain and sealant | Wood protection | Oil-based for longevity, water-based for easy cleanup |
| Work gloves and safety glasses | Personal protection | Non-negotiable for debris and chemical handling |
When selecting materials, always choose weather-resistant products rated for your climate zone. In hot, sunny regions, UV-resistant paint matters most. In wet or humid areas, mold-and-mildew-resistant exterior caulk formulas are the better choice, specifically ones that are flexible, paintable, high-adhesion, and built to resist biological growth. Cheap caulk may cost $2 less at the register but fail in one winter, forcing a redo.
Pro Tip: Keep all your exterior maintenance tools in a single labeled storage bin in the garage. When a seasonal task rolls around, you grab the bin and you’re ready. No hunting for the caulk gun, no discovering the ladder has a broken rung the morning you planned to use it.
Use our maintenance checklists and step-by-step repair guides to pair the right tool with the right task every time.
How to inspect and maintain gutters like a pro
Prepared with tools in hand, let’s tackle one of the most critical and often neglected tasks: gutter maintenance.

Gutters are the unsung heroes of your home’s exterior. They redirect thousands of gallons of water away from your foundation every year. When they’re clogged or damaged, that water goes somewhere it shouldn’t, and the repair bills for foundation damage, basement flooding, or fascia rot are not small. A twice-yearly gutter inspection schedule is the standard recommendation, with extra checks after major storms or high-wind events.
Here’s the step-by-step process for a thorough DIY gutter clean and inspection:
- Set up your ladder safely. Place it on firm, level ground. Never lean a ladder against the gutter itself since it can bend or detach.
- Clear debris by hand or with a gutter scoop. Work from one end toward the downspout. Bag the debris as you go.
- Flush the gutter with a garden hose. Start at the far end and work toward the downspout. Watch for slow drainage or standing water, which signals a partial clog or improper pitch.
- Flush the downspout from the top. If water backs up, use a plumber’s snake or downspout attachment to clear the blockage.
- Inspect for rust, holes, and loose hangers. Small rust spots can be sealed with gutter patch compound. Loose hangers need refastening before the next rain.
- Check for leaks at seams. Apply gutter sealant to any joints showing daylight or past water stains on the fascia.
- Confirm pitch is correct. Gutters should slope about a quarter inch for every 10 feet toward the downspout. Use a level to verify.
Safety first: Never work on a ladder alone. Always have someone present who can stabilize the ladder and call for help if needed. Wear non-slip footwear and never lean past your body’s center of gravity.
In colder climates, backed-up gutters dramatically raise ice dam risk, where ice builds at the eave and water backs up under shingles. Inspecting gutters before the first freeze cycle and again after heavy snow events is the most effective way to prevent this.
After completing a gutter cleaning, always check the roof inspection checklist to confirm your roof surface is in good shape alongside the drainage system. The home safety inspection guide also covers ladder safety in more detail if you’re new to working at height. And if you’re heading into colder months, the winterizing home steps will extend what you’ve done here.
Pro Tip: After flushing the gutters, run a hose from ground level and watch where the downspout discharges. Water should move at least 4 to 6 feet away from your foundation. If it pools near the house, add a downspout extension.
Caulking, sealing, and exterior repairs: Avoiding costly failures
Well-maintained gutters are only half the battle. Next, learn how to prevent leaks and structural damage with effective caulking and sealing.
Caulk is cheap. Water damage is not. Inspecting and replacing failed caulk is one of the highest-return maintenance tasks you can do, because a $10 tube of caulk applied in the right spot can prevent $3,000 in drywall and framing damage.
The highest-risk junctions in any home exterior include windows and door frames, utility penetrations such as dryer vents and gas line entries, chimney flashings, and anywhere two dissimilar materials meet, like wood siding butting against a brick foundation. These are exactly the spots to inspect for caulking failures each spring and fall.
Common signs that caulk has failed:
- Cracking or powdering: The bead has dried out and can no longer flex with the building
- Shrinkage: The caulk has pulled away from one or both surfaces, leaving a gap
- Delamination: The caulk is peeling off the substrate rather than adhering
- Discoloration or mold growth: Water has been infiltrating behind or under the bead
Here’s how to replace failed exterior caulk correctly:
- Score and remove old caulk. Use a utility knife and caulk removal tool. Every trace of old material must come off for the new bead to adhere properly.
- Clean the surface. Wipe with a dry cloth and allow to dry completely. Caulk applied over moisture will fail quickly.
- Apply painter’s tape on both sides of the joint for a clean, professional bead line.
- Load your caulk gun and apply in one smooth pass. Keep consistent pressure and move at a steady pace.
- Tool the bead with a wet finger or caulk tool to press it into the joint and create a concave profile.
- Allow to cure according to the product label, typically 24 hours before painting.
Areas to check every single season:
- All window and door perimeters
- Chimney base and step flashings
- Dryer vents, pipe penetrations, and electrical conduit entries
- Corner boards on wood siding
- Transitions between different siding materials
The exterior repair guides at Workbench Guide walk through each of these scenarios with photos and material recommendations.
Verifying results: How to confirm your maintenance protects your home
Once your repairs are complete, it’s vital to ensure your home really is protected from costly surprises.
Finishing a maintenance session feels good, but skipping the verification step is a mistake many homeowners make. Doing the work is not enough if a downspout was refastened but still leaks at the seam, or if new caulk was applied over a surface that wasn’t fully dry. The confirmation walk-around closes the loop.
Use this verification checklist after each seasonal maintenance session:
- Walk the full perimeter of the home and visually confirm every repair area
- Look for any caulk that’s already separating or showing air gaps
- Check that all gutter hangers are secured and gutters have proper pitch
- Confirm downspouts discharge water well away from the foundation
- Look at painted or sealed surfaces in raking light (angled sunlight reveals bubbles, drips, or missed spots)
- Make sure all tools and debris have been properly stored or removed
After storms or extreme weather, do a quick follow-up check of the areas you’ve maintained. This is especially important in year-round results monitoring because weather events often reveal weak spots that weren’t visible during dry conditions.
Pro Tip: Start a simple home maintenance log, either a notebook or a notes app on your phone. After each session, write the date, what you did, and anything you noticed but didn’t fix yet. Patterns emerge over time. If a certain window joint keeps failing every season, that’s a signal of a deeper moisture or structural issue worth investigating before it becomes expensive.
Why seasonal maintenance is more effective than fixing problems as you notice them
Here’s a perspective that years of watching homeowners struggle with their properties has reinforced again and again: reactive maintenance is not actually maintenance. It’s damage control.
When you fix problems as you notice them, you’re always a step behind. The caulk was failing for six months before you saw the bubbled paint on the interior wall. The gutter pulled away from the fascia over three rainy seasons before water stained the siding all the way to the foundation. By the time the problem is obvious, the damage is already compounded.
Scheduled maintenance works differently because it treats your home’s exterior as a system, not a collection of isolated parts. When you check gutters in spring, you’re also naturally looking at the roof edge, the fascia board, and the downspout extensions. You catch three potential problems in one visit instead of discovering them as three separate emergencies over two years.
There’s also a psychological benefit that rarely gets mentioned. Homeowners who maintain a regular schedule report far less stress about their home. They know what’s been checked. They know what’s coming next. The home doesn’t feel like a source of lurking threats because they’ve already looked. That peace of mind has real value, and it builds on itself each season.
The uncomfortable truth is that most major exterior repairs are not bad luck. They’re the result of small problems that had time and moisture on their side. Take that time advantage away with a consistent schedule, and you dramatically change the odds in your favor.
Get expert help and smarter tools for home maintenance
Ready to move beyond reactive fixes? Here’s how our platform can be your partner for hassle-free exterior care.
Workbench Guide is built specifically for homeowners who want to stay ahead of problems without becoming professional contractors. Our platform gives you curated checklists that tell you exactly what to do and when, so you never forget a seasonal task. The prevent costly repairs checklist is a great starting point for building your full-year exterior routine. When you’re ready to tackle specific jobs, the step-by-step repair guides walk you through each task with clear instructions and material recommendations. You can also explore DIY project ideas that save money and add real value to your home. And when a job genuinely needs a pro, we help you find one confidently.
Frequently asked questions
How often should exterior maintenance be done on a house?
A season-by-season system is best, with specific inspection, cleaning, and repair tasks assigned to spring, summer, fall, and winter for complete year-round protection.
What is the most overlooked exterior maintenance task?
Gutter inspection and cleaning are consistently overlooked but critical. A proper DIY gutter routine includes clearing debris, flushing downspouts, and checking for leaks or rust, especially after storms.
What are signs that exterior caulking needs repair?
Look for cracking, powdering, shrinkage, and delamination. These are the main caulking failure signs that mean the bead needs to be removed and replaced before water gets behind the surface.
How can homeowners prevent ice dams and winter overflow?
Inspect gutters and downspouts before freeze cycles and after heavy snow. Backed-up gutters in cold climates allow ice to build at the roof edge, which forces water back under shingles and into the structure.
What’s an easy way to organize exterior maintenance tasks?
A structured seasonal checklist system assigns the right tasks to the right time of year, making it easy to stay consistent without having to remember everything from scratch each season.