
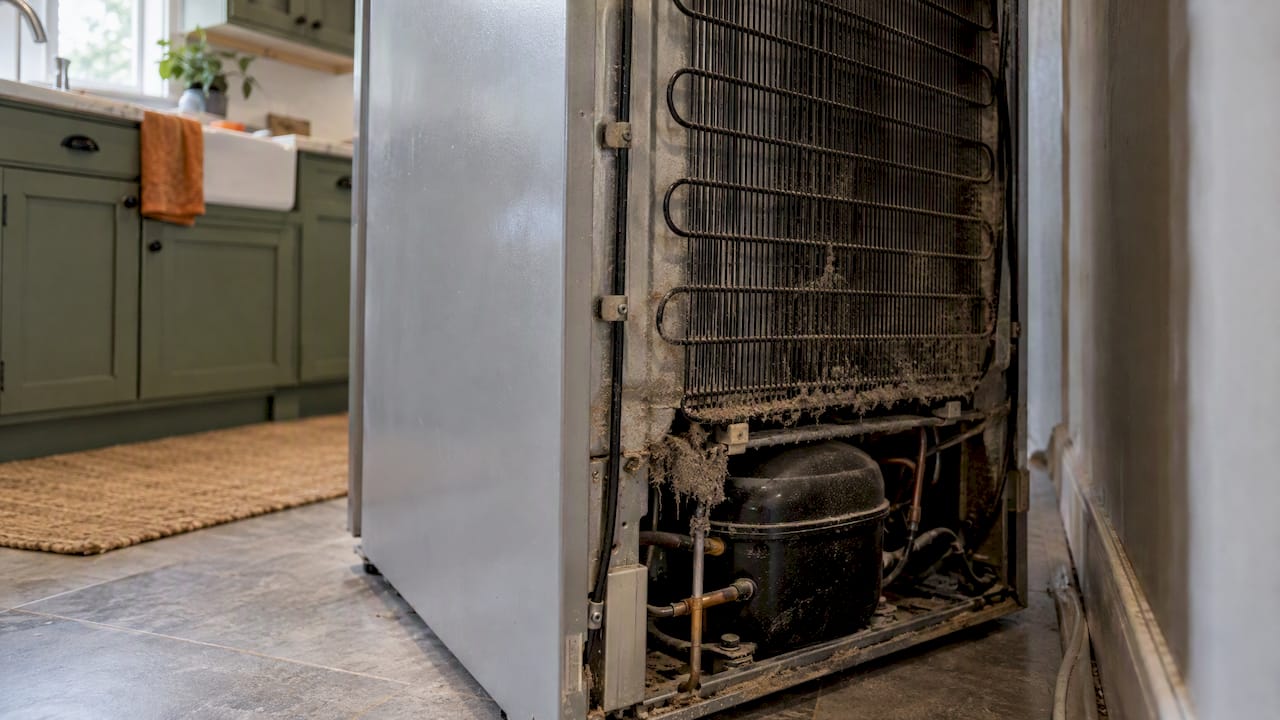
Cleaning your refrigerator coils takes about 20 minutes with a vacuum and a long, thin brush. You unplug the fridge, open the base grille or reach the back panel, remove the dust and pet hair, and restore power. But not every refrigerator needs it, and some can’t be cleaned by the owner at all. Check your model first, then decide how often to do it.
TL;DR
- Many modern refrigerators have coils that need no routine cleaning. Check your owner’s manual before you pull anything apart.
- If your coils are accessible, a vacuum with a brush attachment plus a coil brush does the job. Always unplug the fridge first.
- Plan on every 6 to 12 months for a typical home, and every 3 to 6 months with pets, dusty rooms or construction.
- Never bend the fins or tubing, and never disturb the water line to the dispenser or ice maker.
- Put it on a recurring reminder, because this is a job people only remember when the fridge is already struggling.
Table of Contents
- Do refrigerator coils really need cleaning?
- Find out which kind of coils you have
- How often to clean refrigerator coils
- What you need
- How to clean refrigerator coils step by step
- What to avoid
- What does professional coil cleaning cost?
- Our perspective: make it a habit, not a rescue
- Keep coil cleaning on a schedule
- Build a simple fridge-care routine
- FAQ
- Sources
Do refrigerator coils really need cleaning?
It depends on the refrigerator. The condenser coils release the heat the fridge pulls out of your food. When dust and pet hair coat them, the compressor works harder to shed that heat. Whirlpool’s U.S. product help says clean coils help a refrigerator cool efficiently, hold steady temperatures and reduce the chance of service issues.
The same page also says routine cleaning is not typically needed in a normal home. Some models don’t require it, and others can only be cleaned by a certified technician. GE Appliances says most of its models made since 2001 have a NeverClean condenser that doesn’t require cleaning, and that not all coils are owner-accessible.
The energy-savings story is also less tidy than many guides suggest. A secondary summary on Appropedia notes that cleaning doesn’t necessarily produce measurable savings in every refrigerator, though plugged bottom-mounted condensers may benefit in some cases.
So the honest answer is: clean them if you can reach them and they are dirty, and leave them alone if your manual says they are sealed or technician-only.
Find out which kind of coils you have
Coils sit in one of three places, according to GE Appliances: under the refrigerator behind the base grille, on the back, or on top. Newer models often hide them completely.
| Coil location | How you reach it | Extra caution |
|---|---|---|
| Bottom, behind the base grille | Unplug, pop off the grille at the front | Fins are thin; don’t bend them |
| Back of the cabinet | Unplug, carefully pull the fridge out | Don’t stress the power cord or tubing |
| Top | Disconnect power at the breaker | Sharp fin edges: wear long sleeves and gloves |
| Enclosed or sealed | Not owner-serviceable | Follow the manual or call a technician |
The Maryland Energy Administration points out that coil maintenance can be difficult on newer refrigerators with enclosed coils, and that professional service may be preferable when the covers are hard or impossible to remove. If you have to fight a cover, stop.
The quickest way to settle it is to look up your model number, usually on a label inside the fresh-food compartment, and read the care section of the manual. If you’re also wondering how long the fridge will last and what to check as it ages, this guide to refrigerator serviceability and maintenance checks is a good companion for deciding whether your model is worth maintaining.
How often to clean refrigerator coils
There’s no single number, and the official sources give slightly different ranges:
- The U.S. Department of Energy’s Building America Solution Center, hosted by PNNL, recommends cleaning accessible coils every 6 to 12 months.
- Whirlpool says households with pets, heavy kitchen traffic or construction dust should inspect and clean every 3 to 6 months.
- GE says cleaning is needed more often when pets shed or when the fridge sits somewhere dusty, such as a garage.
A practical rule: look at the coils twice a year, when the clocks change for example. If you see a visible mat of lint, do the cleaning. If they look nearly clean, close it up and check again in six months.
Signs the coils may be dirty
- The compressor seems to run almost constantly.
- The back or bottom of the fridge feels unusually warm.
- Food isn’t as cold as it used to be, or the temperature swings.
- You can see dust or pet hair when you shine a flashlight behind the grille.
- Your electric bill has crept up without another explanation.
These symptoms also have other causes, such as a failing door gasket or a weak fan. If a thorough cleaning doesn’t fix them, call a technician rather than guessing.
What you need
You probably own most of this already. Whirlpool lists a vacuum with a crevice or brush attachment, a soft-bristle coil brush, or a refrigerator coil brush. PNNL’s list adds a broom or dust brush, a rag, warm water, dishwashing liquid and a dust mask if you’re sensitive to dust.
Here is the kit we’d gather:
- Vacuum with a narrow crevice tool and a soft brush head
- Long, flexible coil brush (a hardware store item)
- Flashlight
- Safety glasses and gloves
- Dust mask
- Damp rag with warm water and a few drops of dish soap
- Old towel or cardboard to protect the floor if you move the fridge
How to clean refrigerator coils step by step
The sequence below follows the Whirlpool, GE and PNNL guidance. Read your manual for anything model-specific.
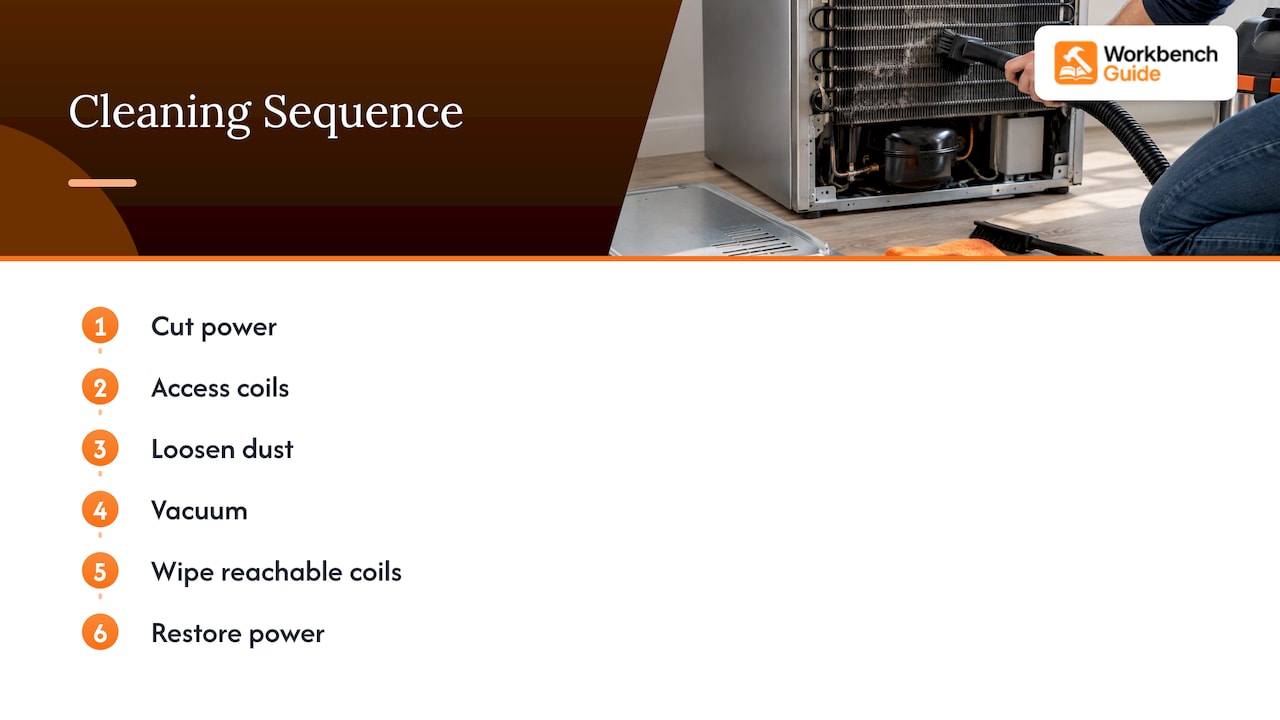
1. Cut the power
Unplug the refrigerator. Whirlpool’s procedure also allows switching off the circuit breaker. For top-mounted coils, GE recommends disconnecting power at the fuse box or breaker because the fins have sharp edges.
2. Get to the coils
For bottom coils, remove the base grille. Many just pull or unclip forward. For rear coils, pull the fridge out slowly and straight, so you don’t kink the water line or strain the cord. Put on safety glasses, long sleeves and gloves.
3. Loosen the dust
PNNL advises removing as much dust as you can, alternating between brushing and vacuuming where useful. Slide the coil brush gently along the length of the coils, working in the direction of the fins, to release the lint. Use the flashlight to check the far side and the area around the fan.
4. Vacuum everything
Use the crevice tool or a soft brush attachment to pull the loosened dust off the coils, the grille, the floor under the fridge and the drip pan area if it’s visible. This is the answer to the common question about vacuuming fridge coils: yes, you can, and a vacuum with a soft brush is the main tool. Keep the nozzle moving and don’t jam hard plastic into the fins.
5. Wipe if the coils are reachable
PNNL says reachable coils can be wiped after vacuuming with a rag dampened with warm water and a few drops of dish soap, then left to air dry. Wring the rag well. Skip this step if you can’t reach the coils easily.
6. Close up and restore power
Replace the grille or panel and make sure it’s secure before you plug the fridge back in. Push the fridge back carefully, leaving the clearance your manual recommends at the back and sides. It may take several hours to get back to its normal temperature, so don’t judge the result right away.
What to avoid
- Skipping the unplug step. Power off first, every time.
- Bending fins or tubing. Whirlpool specifically warns against it. Bent fins restrict airflow and refrigerant tubes can be damaged.
- Disturbing the water line. Dispenser and ice-maker lines run near the coils on many models. Pull the fridge out straight and slowly.
- Forcing sealed covers. If a panel doesn’t come off with the fasteners the manual describes, you’re probably looking at a technician-only design.
- Using sharp or hard tools. A coil brush and soft vacuum head are enough.
- Plugging back in with the grille off. Secure panels first, as Whirlpool says.
What does professional coil cleaning cost?
Prices vary by region, by how hard the fridge is to reach and by whether the technician is only cleaning or also diagnosing a cooling problem. We couldn’t find a reliable national figure from an official or appliance-maker source, so rather than quote a number we can’t back up, we suggest asking two local appliance repair companies for a quote that states the service-call fee and what it includes. If your manual says the coils are technician-only, ask the manufacturer’s service line or an authorized servicer.
The DIY version costs a coil brush and about 20 minutes, which is why it’s worth doing yourself whenever the coils are accessible.
Our perspective: make it a habit, not a rescue
We see the same pattern with every appliance chore: nothing is hard, but nothing is scheduled. People clean coils after the fridge starts struggling, or after a repair bill, when a 20-minute habit would have been enough. Worse, they do it blind, without knowing whether their model even needs it.
Our approach is to do three small things once, then let the calendar do the remembering. First, find out whether your coils are accessible and write that down with the model number. Second, pick a cadence that fits your household: twice a year for a quiet home, every three to four months with a shedding dog or a fridge in the garage. Third, record what you saw, with a quick photo of the coils before and after, so next time you know whether the schedule is too frequent or not frequent enough.
That last bit matters more than it sounds. A fridge, a water heater and an HVAC system all have their own manuals, filters and service intervals, and they live in different drawers. Keeping them in one place is the difference between a home that runs predictably and a home that surprises you. If you need a starting point, our guide to organizing home maintenance with a two-minute monthly habit is built around exactly that idea.
— Sean
Keep coil cleaning on a schedule
If you’d rather not rely on memory, Workbench Guide sends smart maintenance reminders, keeps step-by-step DIY guides next to your task list, and stores your appliance records, photos and notes in one place. The Homeowner plan is $7 per month or $70 per year, and Owner Plus is $12 per month or $120 per year. Landlords and property managers can look at the PM plans too. See the plans and pricing to pick the one that fits.
Build a simple fridge-care routine
Coils are one part of a short list. Here’s what a sensible routine looks like for most kitchens:
| Task | Typical timing |
|---|---|
| Check coils and clean if accessible | Every 6 to 12 months; every 3 to 6 with pets or dust |
| Vacuum the base grille and floor beneath | Whenever you check the coils |
| Check door seals for gaps | Twice a year |
| Confirm fridge and freezer temperatures | Twice a year |
| Replace the water filter if your model has one | Per the manual |
| Note the model number and service history | Once, then update after repairs |
Keep receipts for repairs and filters with the record. If you want a system for that, we cover it in how to organize home receipts. A photo of the nameplate and the coils goes a long way if a warranty or insurance question comes up later.
FAQ
Should refrigerator coils be cleaned?
Only if they are accessible and dirty. Whirlpool says routine cleaning isn’t typically needed in a normal home, and GE says most of its models since 2001 have a NeverClean condenser. Check your manual, and if you have pets or a dusty kitchen, inspect the coils more often.
Can you vacuum fridge coils?
Yes. Use a crevice tool or soft brush attachment, and combine it with a coil brush to loosen packed lint first. Unplug the refrigerator, keep the nozzle moving, and avoid bending the fins.
What can I use to clean refrigerator coils?
A vacuum with a brush or crevice attachment and a long coil brush are the core tools. PNNL also describes wiping reachable coils with a rag dampened in warm water and a few drops of dish soap, then letting them air dry. Don’t spray liquids into the fridge’s electrical parts.
How do I know if my refrigerator coils are dirty?
Look with a flashlight for visible dust, lint or pet hair on the coils and around the fan. A compressor that runs nearly all the time, a warm back or bottom panel and warmer food are other clues. If cleaning doesn’t help, have a technician check the fridge.
How much does it cost to have refrigerator coils cleaned?
It varies by region and by whether the visit includes diagnosis. Ask a few local appliance repair companies for a quote that lists the service-call fee. DIY costs a coil brush if you don’t already have one.
Sources
- How and When to Safely Clean the Condenser Coils, Whirlpool product help
- Refrigerator: Cleaning Condenser Coils, GE Appliances
- Clean Refrigerator Condenser Coils, Building America Solution Center
- Taming Your Power-Hungry Refrigerator, Maryland Energy Administration
- Should I clean my refrigerator coils, Appropedia
Leave a Reply