

The fastest path to a functional garage is a seven-step plan: Declutter → Zone → Measure → Install vertical storage → Label → Digitize inventory → Schedule maintenance logs. Start by pulling everything onto the driveway, sorting into four piles (keep regular use, keep rare use, donate/sell, trash and hazardous), and sketching a rough zone map before a single shelf goes up. Consistent service history can extend mechanical equipment lifespan by up to 40%, and a timestamped maintenance log serves as crucial evidence in property-damage or injury claims. For landlords managing multiple properties, centralizing records in one system prevents the maintenance and compliance gaps that quietly compound into expensive problems.
Table of Contents
- How long does garage organization take, and what does it cost?
- How to organize a garage step by step
- What storage systems actually maximize your garage space?
- How to digitize and catalog your garage inventory
- Why maintenance logs matter more than most homeowners realize
- What tools and templates should you use?
- When should you hire a contractor instead of doing it yourself?
- Key Takeaways
- The part most guides skip: why the digital layer is the real upgrade
- Workbenchguide keeps your garage records organized year-round
- Useful sources and further reading
How long does garage organization take, and what does it cost?
Most homeowners can complete the declutter and sort phase within a few days. Full installation of wall and ceiling systems typically takes multiple weekends, especially if you’re waiting on deliveries. Hiring a pro for overhead mounts or custom cabinetry can stretch the timeline to a few weeks.
| Task | Typical Time | Cost Range |
|---|---|---|
| Declutter, sort, and zone sketch | 1 weekend | — |
| Basic shelving + hooks | 1 weekend | $50–$200 |
| Wall-track, pegboard, mid-range shelving | 1–2 weekends | $200–$1,000 |
| Premium cabinets, slatwall, overhead racks | 2–3 weekends or pro install | $1,000+ |
Budget-track homeowners can accomplish a lot with a $50–$200 purge-and-shelve approach. The moderate range ($200–$1,000) covers solid wall-mounted shelving, a pegboard section, and a set of labeled bins. Premium setups with heavy-duty steel cabinets, full slatwall panels, and ceiling platforms run $1,000 and up, and that number climbs fast with professional labor.
One number worth keeping in mind: professionals who clear out before planning routinely find they need 20–30% less storage than they assumed. Buy after you purge, not before.
How to organize a garage step by step
Follow this sequence and you won’t waste money on storage you don’t need.
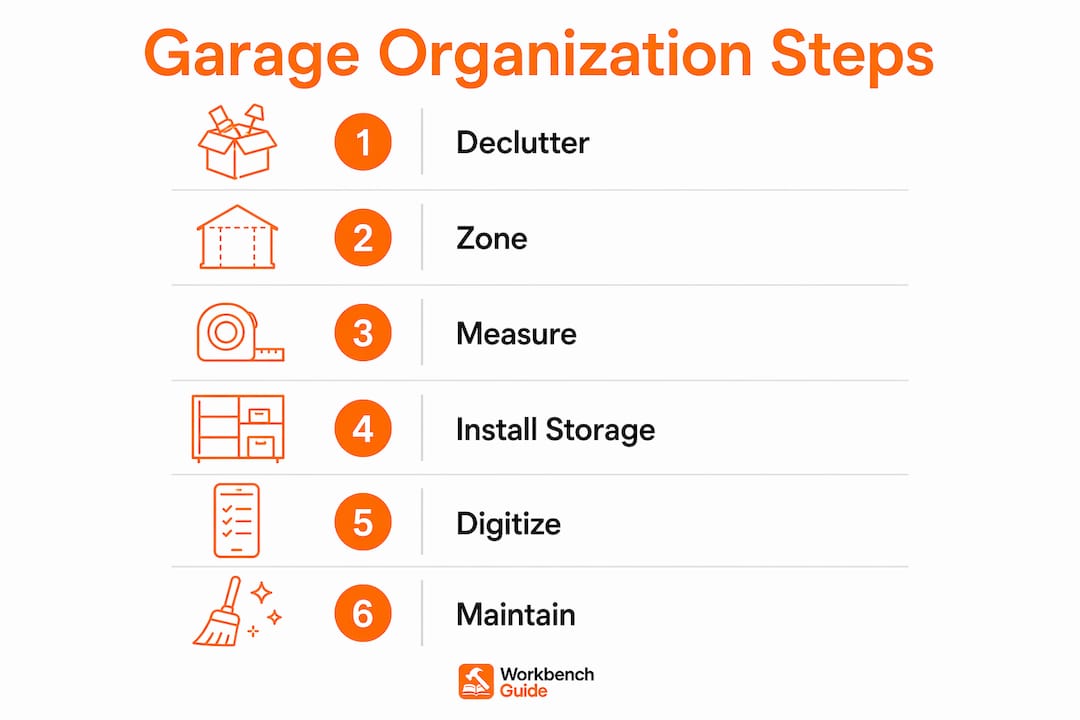
- Full clear-out. Move everything onto the driveway. No exceptions. You cannot accurately assess what you have until it’s all visible at once.
- Four-pile sort. Keep (regular use), keep (rare use), donate/sell, and trash/hazardous. Be ruthless. If you haven’t touched it in two years, it belongs in pile three or four.
- Zone map. Sketch a simple floor plan and assign zones: workbench/tools, vehicle care, sports/recreation, garden, seasonal, and a dedicated hazardous-materials corner.
- Measure. Before ordering anything, record nine measurements: wall lengths, stud locations, ceiling height, joist spacing, garage-door clearance, car-door swing, walking-path width, tote dimensions, and floor slope. Skipping this step is the single most common reason storage systems don’t fit.
- Install in order. Overhead racks first, then wall systems, then floor shelving. That sequence prevents blocked access and avoids uninstalling hardware you just mounted.
- Return items zone by zone and label everything. Bins, shelves, and zones all get labels. Without them, organizational systems drift within months.
- Set a seasonal reset. A 15–20 minute quarterly tidy catches drift before it becomes chaos.
Safety and hazardous materials: Bolt ceiling racks into joists only, never drywall. Confirm the distributed load rating before loading; a standard 4×8-foot platform holds roughly 250–600 lbs depending on model and mounting. For oil, paint, and propane, separate those items during the clear-out and check your municipality’s household hazardous waste (HHW) program for drop-off dates. Local disposal rules vary, so call your city or county solid-waste office before assuming curbside pickup is an option.
Pro Tip: Wear work gloves and closed-toe shoes during the clear-out. Moving heavy bins and tools across concrete is where most garage-project injuries happen.
What storage systems actually maximize your garage space?
The three-level rule is the organizing principle behind every good garage layout: floor for heavy or daily-access items, walls for tools and frequently used gear, ceiling for seasonal and infrequent items. Applying it consistently keeps your most-used things reachable and your rarest things out of the way.
Pro Tip: Install overhead racks before you buy more floor shelving. Most homeowners discover they have far more ceiling capacity than floor capacity once racks go up.
| Garage Size | Recommended Wall Shelving | Ceiling Solution | Hazardous Storage |
|---|---|---|---|
| Single-car | — | One 4×8 overhead platform | Locked cabinet, rear corner |
| Two-car (20×20 ft) | 30–40 linear feet | Two 4×8 platforms or adjustable rack system | Locked cabinet, side wall |
| Two-car with workshop | 40+ linear feet | Two platforms + wall-mounted bike hoists | Dedicated locked cabinet |
Freestanding vs. wall-mounted shelving: Freestanding units are cheaper and portable but eat floor space and tip if overloaded. Wall-mounted shelving anchored into studs holds more weight per square foot and keeps the floor clear.
Slatwall/track vs. pegboard: Slatwall accepts interchangeable hooks, bins, and baskets and handles heavier loads. Pegboard costs less and works well for lighter hand tools, but hooks pull out more easily under weight.
Cabinets: The main advantage is dust protection and security, especially for chemicals and power tools. They give the garage a finished look and keep hazardous materials locked away from children.
How to digitize and catalog your garage inventory
A physical garage organization is only half the job. The digital record is what protects you when a tool goes missing, a warranty needs filing, or an insurance claim requires documentation.
Capture these fields for every significant item:
- Item name and category
- Zone and shelf/bin location
- Purchase date and price
- Serial number (photograph it separately)
- Warranty expiry date
- Current condition
- Estimated replacement value
- Receipt or invoice scan (link to file)
- At least one clear photo of the item
Store original receipts in a fireproof box. Scan everything into cloud storage and keep a second local backup on an external drive. For high-value tools and equipment, one photo of the item and one of the serial number plate is the minimum.
Pro Tip: Print QR stickers that link directly to each item’s digital record and stick them on the bin or shelf. When you grab a tool, scan the sticker to pull up its warranty, purchase date, and last service note in seconds.
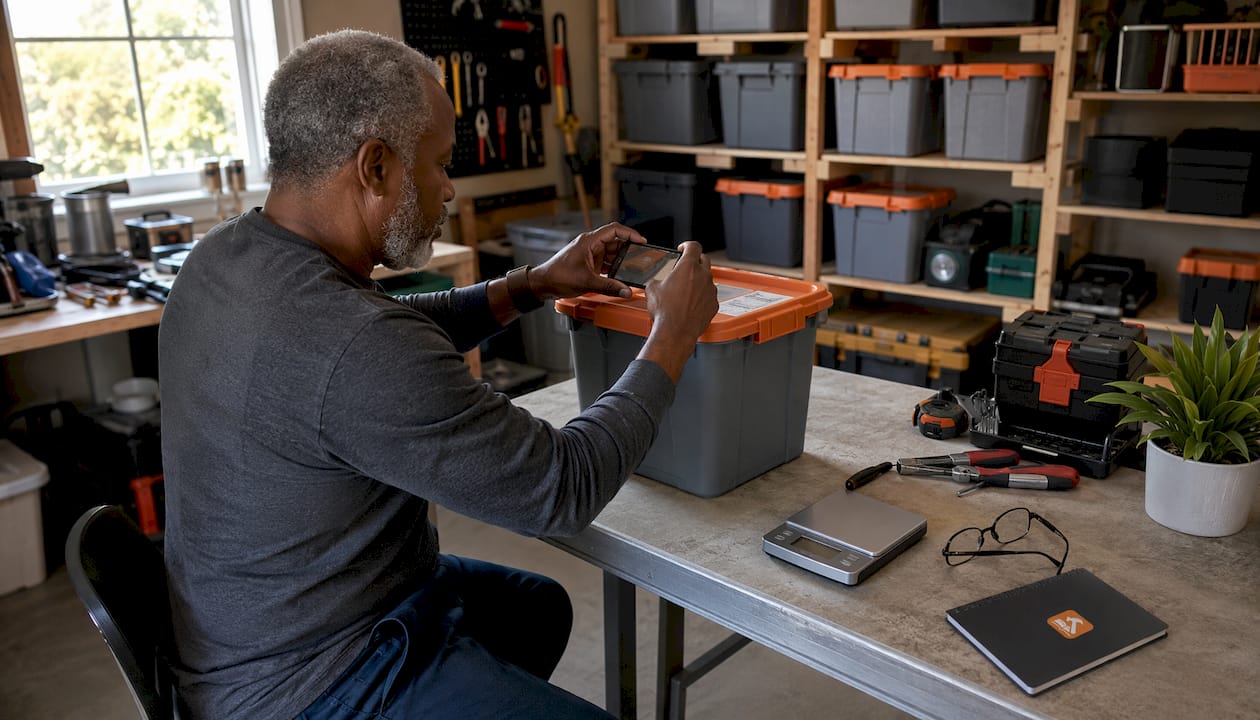
Add items to your digital system while returning them to their zones, not after. The workflow is: place item in zone → photograph → enter fields → print label → done. Doing it in one pass prevents a backlog that never gets finished.
Why maintenance logs matter more than most homeowners realize
A recurring schedule keeps a garage functional long after the initial organization project fades from memory.
Sample maintenance calendar:
- Monthly: Quick tidy, remove trash, check for moisture or pests
- Quarterly: Inspect tool condition, test battery-powered equipment, wipe shelves
- Semiannually: Reset overhead storage, check ceiling rack bolts and weight distribution
- Annually: Full purge and inspect, update digital inventory, review warranties
For every service or repair, log these fields: date, work performed, contractor name and license number, invoice number, cost, photos, next recommended action, and a link to the digital file. Digital timestamps matter. A detailed, timestamped log is far stronger evidence in a property-damage or injury claim than a handwritten note with no date.
The lifespan benefit is just as concrete. Consistent service documentation can extend mechanical equipment lifespan by up to 40%. For landlords, the ROI of a centralized system comes from eliminating the missed services and lost receipts that compound into larger repair bills. Check your exterior maintenance schedule alongside garage logs to catch issues before they escalate.
What tools and templates should you use?
Three approaches work, depending on how much tech you want involved.
- Spreadsheet-first: Build a CSV with columns matching the inventory fields above (name, category, location, purchase date, serial number, warranty expiry, condition, value, receipt link, photo link). Free, portable, and works offline. The limitation is no reminders and no mobile capture.
- Cloud photo + folder approach: Create a folder structure in Google Drive or iCloud mirroring your zones. Drop photos and scanned receipts into the right folder. Simple but hard to search at scale.
- Dedicated home maintenance app: Workbenchguide covers inventory records with photos, scheduled maintenance reminders, contractor documentation, and multi-property management in one place. The how it works page walks through the full feature set.
| Approach | Setup Time | Reminders | Multi-Property | Cost |
|---|---|---|---|---|
| Spreadsheet | 1–2 hours | Manual | Possible but clunky | Free |
| Cloud folders | 30 minutes | None | Separate folders | Free |
| Workbenchguide | Under 1 hour | Automated | Built-in | Subscription |
Onboarding workflow for any system: scan receipts → photograph items → enter serial numbers → label bins → verify QR links → set first reminder. Do this in one session while items are still on the driveway and the momentum is there.
When should you hire a contractor instead of doing it yourself?
DIY is fine for shelving, pegboard, labeling, and most wall-track systems. Hire a pro for overhead mounts that cross multiple joists, any electrical changes (adding outlets or lighting), and load-bearing reconfigurations.
When you hire, request these documents at job completion:
- Proof of general liability insurance and contractor license
- Itemized invoice showing parts and labor separately
- Before-and-after photos of completed work
- Written warranty or workmanship guarantee
- A service log entry you can upload to your central record
Upload digital copies of all invoices and photos immediately after the job. A paper invoice in a junk drawer is not a record. An uploaded, timestamped file in your property record is. For step-by-step guidance on what to tackle yourself vs. when to call a pro, Workbenchguide’s repair guides cover the most common garage projects.
Key Takeaways
A well-organized garage requires a physical workflow (clear, zone, measure, install) paired with a digital record system that protects equipment lifespan, documents warranties, and supports liability claims over time.
| Point | Details |
|---|---|
| Purge before you buy | Clearing out first routinely reduces required storage by 20–30%, saving real money. |
| Three-level storage rule | Floor for heavy/daily items, walls for tools, ceiling for seasonal and infrequent items. |
| Document every service | Consistent service history can extend mechanical equipment lifespan by up to 40%. |
| Timestamps protect you | A detailed, timestamped maintenance log is crucial evidence in property-damage or injury claims. |
| Workbenchguide centralizes it all | Inventory records, scheduled reminders, contractor docs, and multi-property management in one platform. |
The part most guides skip: why the digital layer is the real upgrade
The physical side of garage organization gets all the attention, and the advice is mostly sound: clear everything out, assign zones, go vertical. But the part that actually compounds in value over time is the record you build alongside it.
A garage full of labeled bins is satisfying for about six months. A garage paired with a digital inventory, timestamped service logs, and warranty records is an asset. When you sell the house, those records demonstrate care. When a contractor disputes a repair, you have documentation. When a tool fails under warranty two years later, you have the receipt and serial number in thirty seconds.
Landlords feel this even more acutely. One missed HVAC service at a rental property can cascade into a tenant complaint, a repair bill, and a compliance gap, all because no one had a reminder set. The administrative overhead of managing that manually across multiple properties is where most landlords eventually break down and start losing track.
The first-90-days checklist for new homeowners is the right time to set this up. Not after the first repair, not after the first missed warranty. Right at the start, while the motivation is there and the garage is already organized. Two sessions is usually enough to photograph, log, and label everything worth tracking.
Workbenchguide keeps your garage records organized year-round
Physical organization fades without a system behind it. Workbenchguide gives you the digital layer that makes it stick: photo-linked inventory records, automated maintenance reminders, contractor invoice storage, and multi-property management built for landlords who can’t afford gaps.
You can start by importing a spreadsheet or capturing items one by one as you return them to their zones. Either way, your first reminder is set before the weekend is over. No more lost receipts, missed service dates, or warranty claims you can’t prove.
Start with the home maintenance checklist to build your first recurring schedule, or go straight to Workbenchguide to see how the full platform maps to the workflow in this guide.
Useful sources and further reading
- Hazardous waste disposal (U.S.): Contact your city or county solid-waste office for local HHW drop-off dates. Rules vary by state; never assume curbside pickup for oil, paint, or propane.
- Ceiling rack safety: Bolt into joists only. Confirm distributed load capacity (typically 250–600 lbs for a 4×8 platform) and follow manufacturer weight limits.
- OSHA storage standards: 29 CFR 1926.250 covers general storage safety requirements, including aisle clearance and load limits.
- Measurement checklist: Nine-point checklist (wall length, studs, ceiling height, joist spacing, door clearances, walking path, tote dimensions, floor slope) from Garage Daily.
- Workbenchguide checklists: The home maintenance checklist and first-90-days homeowner workflow are good starting points for new property owners.
- Document storage best practice: Keep original receipts in a fireproof container and maintain two backups for critical documents: one cloud, one local drive.