
Winterizing your plumbing comes down to four immediate actions: keep indoor heat at or above 55°F, disconnect and drain every exterior hose and spigot, insulate exposed pipes in unheated spaces, and know exactly where your main shutoff valve is before temperatures drop. Do those four things and you’ve eliminated the most common causes of freeze damage.
Safety warnings before you start:
- Use only non-toxic RV/plumbing antifreeze in drains and traps. Automotive antifreeze is toxic and will contaminate your sewer or septic system.
- Never use an open flame to thaw a frozen pipe.
- Never pour boiling water into a frozen line.
Priority checklist — do these first:
- Occupied home: Set thermostat to at least 55°F. Locate your main shutoff. Disconnect garden hoses. Open exterior spigots to drain residual water. Install foam faucet covers on outdoor bibs.
- Vacant home: Shut off the main supply. Turn off and drain the water heater. Drain the system top-to-bottom. Pour non-toxic RV antifreeze into every trap and toilet bowl.
- Both: Insulate any pipe running through an unheated crawlspace, attic, or garage. Open cabinet doors under kitchen and bathroom sinks on exterior walls.
Pro Tip: Before the first hard freeze, walk your home’s perimeter and count every outdoor spigot. Most homes have two to four. Missing even one disconnected hose can split a sillcock overnight.
Key Takeaways
Protecting your plumbing from freezing requires acting before temperatures drop: set heat to at least 55°F, drain exterior lines, insulate vulnerable pipes, and know your main shutoff valve location.
| Point | Details |
|---|---|
| Temperature threshold | Pipes face significant freeze risk below 20°F; keep indoor heat at or above 55°F to protect wall cavities. |
| Exterior lines first | Disconnect hoses, shut isolation valves, drain spigots, and install foam faucet covers before the first hard freeze. |
| Vacant homes need full drain-down | Shut the main, drain top-to-bottom, and add RV/plumbing antifreeze to every trap and toilet bowl. |
| PEX handles freezes better than copper | PEX expands slightly under ice pressure; copper splits more readily, making insulation more critical for copper runs. |
| Know when to call a plumber | Burst pipes, inaccessible shutoffs, and complex systems (sprinklers, steam heat) require a licensed pro immediately. |
Table of Contents
- How to winterize plumbing: why it matters and when pipes actually freeze
- How do you protect exterior plumbing before winter?
- What should you do inside an occupied home to prevent frozen pipes?
- How to winterize a vacant house: full drain-down and antifreeze method
- What do you do if pipes freeze or burst?
- Which materials and pipe types should you buy for freeze protection?
- When should you call a licensed plumber?
- What’s the right seasonal schedule for winterizing your plumbing?
- The mistakes homeowners actually make when winterizing plumbing
- Sources
How to winterize plumbing: why it matters and when pipes actually freeze
Pipes freeze when water inside them drops to 32°F and stays there long enough for ice to form. But significant risk starts closer to 20°F, not at the technical freezing point. The difference is insulation, air movement, and how long the cold lasts. A pipe inside an insulated wall can survive a night at 25°F; the same pipe in an uninsulated crawlspace with wind blowing through a vent might freeze in a few hours.
The physics are unforgiving. Freezing water expands and can generate thousands of pounds per square inch of pressure, and pipes typically split across their diameter when ice has nowhere to go. That’s why draining or insulating is the only real fix. A burst pipe can release hundreds of gallons before anyone notices.
Rough freeze timeline by exposure:
| Outdoor Temp | Exposed, Uninsulated Pipe | Insulated Pipe (Crawlspace/Wall) |
|---|---|---|
| 32°F | Several hours to overnight | Low risk unless sustained multi-day |
| 20°F | 2–6 hours | 6–12 hours in drafty spaces |
| Below 10°F | Under 2 hours | 4–8 hours; high risk in all unheated areas |
Timeline guidance is approximate and varies with wind chill, pipe diameter, and water flow.
Most vulnerable locations in a typical home:
- Exterior walls, especially north-facing ones with little insulation
- Crawlspaces with open foundation vents
- Attics where supply lines run to upper-floor bathrooms
- Attached garages with water supply to laundry or utility sinks
- Sillcocks (outdoor hose bibs) and the short supply stub behind them
- Under-sink cabinets on exterior walls where cabinet doors stay closed
The 55°F thermostat rule exists for a reason. Wall and floor cavities can drop 10–15°F below the room temperature when outdoor temps are extreme. Keeping indoor heat at or above 55°F keeps those cavities above freezing even on a cold night, which is the margin that prevents most freeze events in occupied homes.
How do you protect exterior plumbing before winter?
Exterior lines are the first to freeze and the easiest to protect. The work takes an afternoon and the materials cost under $30 for most homes.
Step-by-step exterior winterization:
- Locate the interior isolation valve for each outdoor hose bib. These are usually in the basement, crawlspace, or utility room on the supply line feeding that spigot.
- Turn the isolation valve off completely.
- Go outside and open the spigot to drain any water remaining in the line. Leave it open for a few minutes.
- Disconnect and remove all garden hoses. A hose left attached traps water in the bib even on a frost-free model, which can still freeze and crack.
- Install an insulated foam faucet cover over each outdoor bib. These slip-on covers cost $3–$8 each and add meaningful protection against brief cold snaps.
- Clean gutters and flush downspouts so meltwater drains freely. Ice dams in gutters can back up against fascia and eventually reach exterior wall cavities where pipes run.
Frost-free sillcocks vs. standard bibs: A frost-free (freeze-proof) hose bib has a long stem that pushes the actual shutoff point 6–12 inches back inside the wall, where it stays above freezing. Replacing a standard bib with a frost-free sillcock is one of the most effective long-term fixes, especially for bibs on north-facing walls. If you already have frost-free bibs, you still need to disconnect hoses — a connected hose defeats the design entirely.
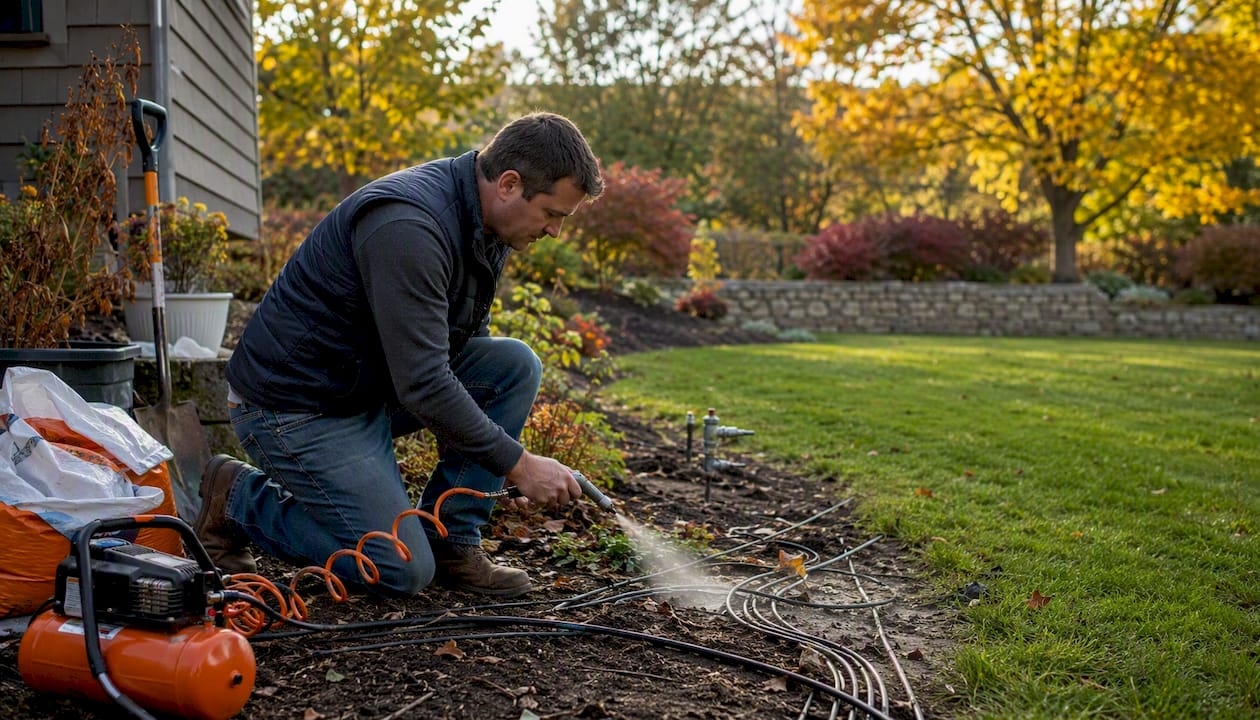
Irrigation systems need a full blowout with a compressor (typically 50 PSI for poly pipe, 50–80 PSI for PVC). Gravity alone won’t clear horizontal runs. If your system has more than a few zones, hire an irrigation tech — a $75–$150 blowout is far cheaper than replacing cracked heads and manifolds.
Pro Tip: Test your interior isolation valve by opening it and closing it slowly, then checking the outdoor spigot for flow-stop. Old ball valves sometimes fail to fully seat. If water keeps trickling, the valve needs replacement before winter — not after.
Safety note: never pour antifreeze into outdoor drains or storm sewers. It’s environmentally harmful and unnecessary if you’ve properly drained the lines.
What should you do inside an occupied home to prevent frozen pipes?
For a home you’re living in, the goal is keeping heat in the right places and giving vulnerable pipes a little extra protection. You don’t need to drain anything.
Locate and document your shutoffs
Before any cold snap, find your main shutoff valve and every secondary isolation valve. Write them down or photograph them. If a pipe bursts at 2 AM, you don’t want to be searching. Workbenchguide lets you log shutoff locations with photos so you (or a plumber) can find them instantly.
Insulate exposed pipes
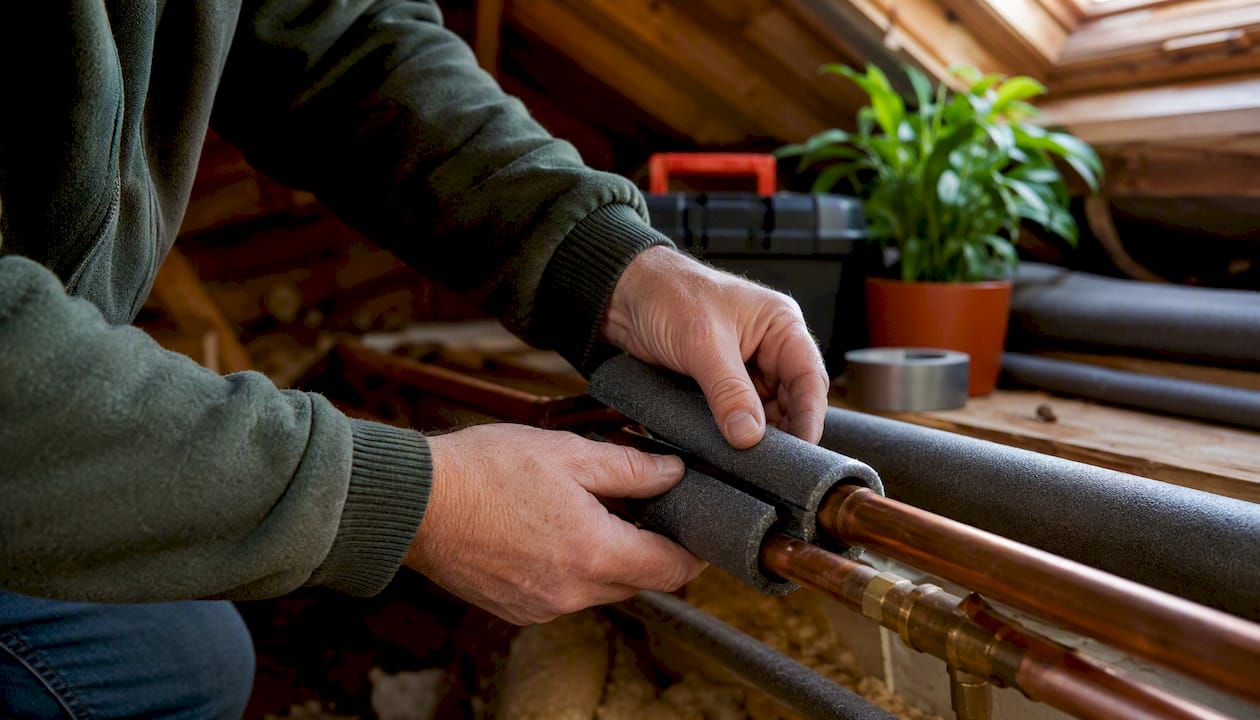
Foam pipe sleeves are the go-to for most DIYers. They’re pre-slit, slip over the pipe, and seal with tape. Match the sleeve’s inner diameter to your pipe diameter (most residential supply lines are 1/2" or 3/4"). For pipes in very cold spaces, use sleeves with at least 3/4" wall thickness. Fiberglass wrap works well for irregular shapes or larger-diameter pipes, but it requires more care to install without gaps.
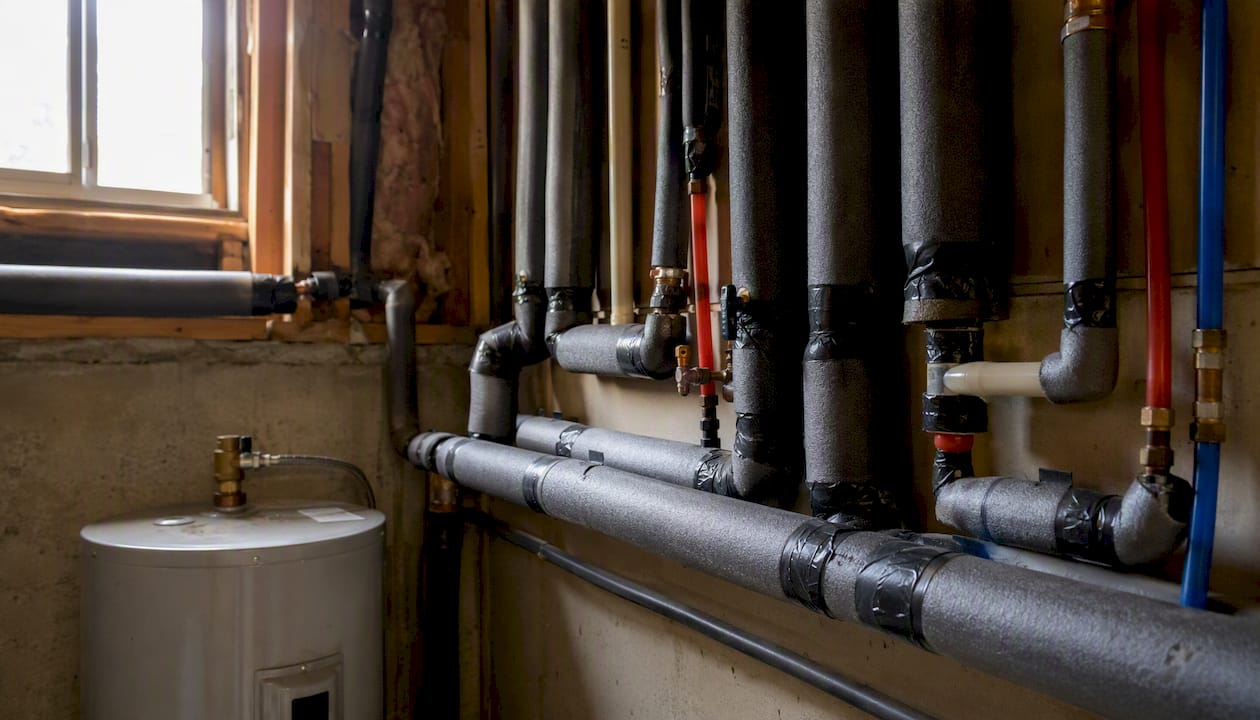
Portland’s municipal water utility recommends insulating pipes in unheated areas as a preventive seasonal task that pays off across multiple winters. One afternoon of insulation work can eliminate years of freeze risk.
Heat tape: when it makes sense
Self-regulating heat tape (also called heat cable) is the right tool when insulation alone isn’t enough — think an unheated crawlspace with persistent below-zero temps, or a pipe you can’t reroute or insulate adequately. Self-regulating models adjust their output based on ambient temperature, which prevents overheating and saves electricity. Always choose a UL-listed product with a built-in thermostat. Wrap it in a spiral along the pipe, then cover with foam insulation on top. Do not use heat tape on plastic PVC pipe without confirming the tape is rated for it.
Open cabinet doors and let faucets drip
On nights when temps drop below 20°F, open the cabinet doors under kitchen and bathroom sinks that sit against exterior walls. It sounds almost too simple, but it lets warm room air reach the pipes. A slow drip from the faucet farthest from the main keeps water moving, which delays freezing and relieves pressure buildup. That said, a drip is a temporary mitigation, not a guaranteed fix during prolonged deep freezes. If you’re heading into a multi-day cold snap below 10°F, insulation and heat tape matter more than a drip.
Do’s and don’ts:
- Do use thermostatic, self-regulating heat tape on plastic pipes (confirm compatibility first).
- Do seal gaps and drafts around pipe penetrations through exterior walls with expanding foam or caulk. Sealing those drafts reduces cold air intrusion that accelerates freezing.
- Don’t leave portable space heaters unattended in crawlspaces or utility rooms.
- Don’t assume a drip will protect a long, exposed run during a sustained cold event.
Pro Tip: Prioritize insulating in this order: (1) pipes in crawlspaces with open vents, (2) pipes on exterior walls near windows or doors, (3) attic supply lines, (4) garage utility lines. That sequence covers the highest-risk runs first.
How to winterize a vacant house: full drain-down and antifreeze method
An empty house with the heat off needs a different approach entirely. The goal is to remove all water from the system so there’s nothing left to freeze and expand.
The short version: shut off the main, depressurize, drain top-to-bottom, pour non-toxic RV antifreeze into every trap and toilet, and shut off power to the water heater before you drain it.
Step-by-step drain-down checklist
- Shut off the main supply valve at the meter or where it enters the house.
- Turn off the water heater at the breaker (electric) or at the gas valve (gas). Never drain a water heater that’s still energized.
- Open the highest faucets in the house (top floor, both hot and cold) to vent the system and break the vacuum. This is what allows water to drain downward.
- Connect a garden hose to the water heater’s drain valve and run it to a floor drain or outside. Open the valve and let it drain fully. Proper water heater draining also removes sediment that builds up over the season.
- Open all faucets, starting from the top floor and working down. Flush every toilet until the tank and bowl are empty.
- Open the lowest drain points — basement floor drains, laundry tub, lowest hose bib — to let gravity pull remaining water out. This top-to-bottom sequence is the standard approach because gravity does most of the work.
- Pour non-toxic RV/plumbing antifreeze into every trap: bathroom sinks, tubs, showers, floor drains, and the toilet bowl and tank. About 1–2 cups per trap is typical; pour until you see the antifreeze sitting in the trap.
- Check appliance supply lines: dishwasher, refrigerator ice maker, washing machine. Disconnect and drain them.
Only use antifreeze labeled for RV or plumbing use. Automotive antifreeze (ethylene glycol) is toxic to humans, pets, and septic systems. RV antifreeze (propylene glycol) is non-toxic and safe for drains.
When you need compressed air
Long horizontal runs and backwards-sloping lines won’t drain by gravity alone. If your home has a complex layout or an irrigation system, a compressor blowout clears residual water that would otherwise freeze in place. For irrigation systems, this is almost always necessary. Hire a licensed plumber or irrigation tech if you’re not experienced with compressed-air blowouts — over-pressurizing PVC can crack fittings.
Special systems: If your home has a fire sprinkler system or steam heating, do not shut off the water or drain without consulting a specialist. Draining a wet-pipe sprinkler system without proper procedures can render it inoperable.
Safety warnings:
- Shut off power to the well pump before draining a well system.
- Never use automotive antifreeze anywhere in a plumbing system.
- Verify drainage by checking the lowest fixture after the blowout — residual water in a low spot is the most common cause of freeze damage in “winterized” homes.
What do you do if pipes freeze or burst?
If you suspect a burst
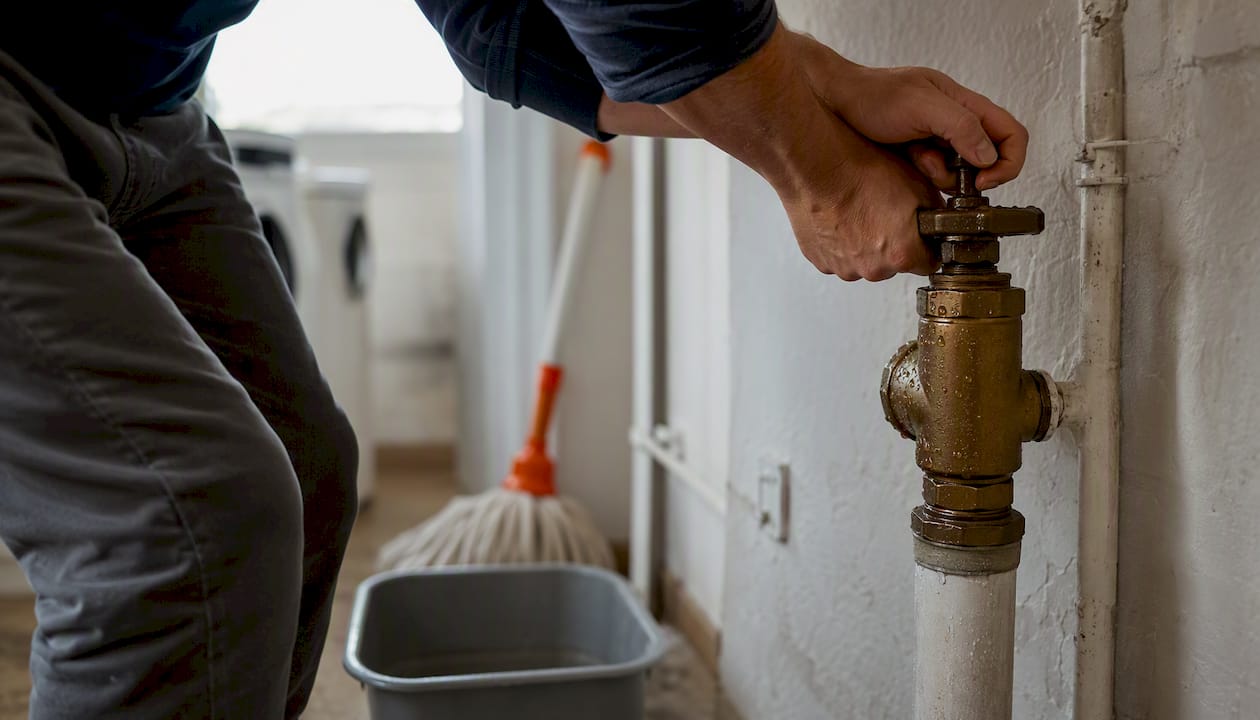
Shut off the main supply immediately. Don’t wait to confirm. Open a faucet to relieve pressure, then assess. If you see water actively flowing from a wall, ceiling, or floor, the pipe has already split. Protect your property (towels, buckets, move valuables), then call a licensed plumber.
Safe thawing for a frozen but intact pipe
If the pipe is frozen but you don’t see signs of a burst, you can attempt a controlled thaw. Keep the faucet open while you apply heat — the open faucet relieves pressure as ice melts and tells you when flow is restored. Work from the faucet end toward the frozen section, not from the middle outward.
Safe heat sources:
- Hair dryer on medium heat, moved continuously
- Electric heating pad wrapped around the pipe
- Portable electric space heater directed at the area (keep it away from water)
- Infrared heat lamp at a safe distance
Never use:
- Open flame (torch, lighter, candles) — fire risk and pipe damage
- Boiling water poured into or onto the pipe
- High-temperature heat guns on plastic pipe (PVC, PEX)
Electrical hazard note: If you’re thawing near wiring or in a damp area, use a GFCI-protected outlet or extension cord. If the area is wet, turn off the circuit breaker for that space before entering.
Emergency checklist:
- Shut main valve
- Open a faucet to relieve pressure
- Apply controlled heat starting at the faucet end
- Inspect the full pipe run for cracks or bulges once flow returns
- Call a licensed plumber if you find any crack, if the pipe won’t thaw, or if flow doesn’t return within 30 minutes of heating
For a step-by-step repair walkthrough once the emergency is under control, the plumbing repair guide for homeowners covers the most common fixes.
Which materials and pipe types should you buy for freeze protection?
Pipe insulation options
Foam pipe sleeves are the standard choice for most homeowners. They’re inexpensive ($0.50–$2 per linear foot), easy to cut and install, and effective for pipes in crawlspaces, basements, and attics. Look for sleeves with at least 3/4" wall thickness for pipes in very cold spaces. Install with the seam facing down (away from cold surfaces) and tape all joints.
Fiberglass pipe wrap handles irregular shapes and larger diameters better than foam sleeves. It’s more labor-intensive but provides higher R-value per inch. Use it for pipes near exterior walls where you need maximum insulation in a tight space.
Self-regulating heat tape is the right call when insulation alone won’t keep a pipe above freezing — exposed crawlspace mains, pipes near exterior doors, or any run you can’t adequately insulate. Always buy UL-listed tape with a built-in thermostat. Install it in a spiral wrap, then cover with foam insulation on top for maximum efficiency.
PEX vs. copper: freeze resistance
| Property | PEX Pipe | Copper Pipe |
|---|---|---|
| Freeze resistance | Higher — expands slightly before bursting | Lower — splits more readily under ice pressure |
| Burst risk | Lower; can survive a single freeze event in some cases | Higher; more likely to crack at the freeze point |
| Cost (materials) | Generally lower | Generally higher |
| Installation | Flexible, fewer fittings needed | Rigid, requires soldering or press fittings |
| Best use for winterization | Replacing vulnerable runs in crawlspaces or exterior walls | Existing systems; retrofit with insulation |
PEX’s flexibility gives it a meaningful advantage in freeze events because it can expand slightly as ice forms, which helps reduce the chance of a split. That said, PEX still bursts if frozen solid for long enough. The best prevention hierarchy is: move pipes inside the thermal envelope if possible, then insulate and air-seal, then add frost-free sillcocks, then use self-regulating heat cable as a last resort.
Buying tips:
- Match foam sleeve inner diameter exactly to your pipe’s outer diameter.
- For heat tape, confirm it’s rated for the pipe material (some tapes are not safe for PVC).
- Buy UL-listed heat tape only — unlisted products are a fire risk.
- Pick up a GFCI extension cord if you’re running heat tape in a crawlspace or damp area.
- Foam faucet covers: the hard-shell insulated type outperforms the soft foam bag style in sustained cold.
When should you call a licensed plumber?
Call immediately if:
- A pipe has burst and water is actively flowing
- You can’t locate or operate your main shutoff valve
- Thawing attempts haven’t restored flow after 30–45 minutes
- You find cracks, bulges, or wet drywall after thawing
- Your home has a fire sprinkler or steam heating system and you need to winterize
- You need a full compressed-air blowout for irrigation or a complex system
Typical cost ranges
Emergency plumbing calls (nights, weekends, holidays) typically run $150–$300 for the dispatch alone, plus labor. A burst pipe repair — cutting out the damaged section and replacing it — generally runs $200–$1,000 depending on pipe location, material, and access. Retrofitting insulation on accessible crawlspace pipes is often $300–$800 for a professional job. These are rough ranges; actual quotes vary by region and contractor.
For non-emergency work, plumbing tips and guidance from a licensed contractor can help you understand what’s a reasonable scope before you get a quote.
What to expect when a plumber arrives
They’ll verify the main shutoff is working, locate the damaged or frozen section, and give you an estimate before cutting into anything. Common repairs include cut-and-replace on the damaged segment, rerouting a vulnerable run, and recommending insulation or heat tape for the repaired area.
Practical tip: Before the plumber arrives, log your shutoff valve locations, photos of the pipe layout, and any notes about past freeze events in Workbenchguide. That documentation cuts diagnostic time and reduces billable hours. A yearly plumbing inspection also catches vulnerable runs before they become emergencies.
What’s the right seasonal schedule for winterizing your plumbing?
Pre-winter tasks (late October through November)
- Clean gutters and flush downspouts
- Disconnect and store garden hoses
- Shut off and drain irrigation systems (or schedule a blowout)
- Install foam faucet covers on all outdoor bibs
- Inspect crawlspace vents — close or insulate them before sustained cold
- Check pipe insulation in attic, crawlspace, and garage; replace any that’s cracked or missing
- Test main shutoff valve; confirm it fully closes
- Set thermostat minimum to 55°F
The fall maintenance checklist covers these tasks alongside HVAC and exterior prep so nothing gets missed.
Pre-freeze short-notice checklist (24–48 hours before a hard freeze)
- Open cabinet doors under exterior-wall sinks
- Set a slow drip on faucets farthest from the main on exposed runs
- Confirm thermostat is at 55°F or above
- Move any portable items (hoses, outdoor furniture) away from exterior spigots
- Locate and confirm access to the main shutoff
Mid-winter quick checks (monthly during freeze season)
- Walk the crawlspace or basement and check for frost on pipes
- Confirm heat tape indicator lights are on (if installed)
- Check under sinks for moisture or condensation
- Verify thermostat hasn’t been accidentally lowered
Pre-departure checklist (leaving for more than 3 days in winter)
- Shut off the main supply (or arrange a local check-in)
- Turn off and drain the water heater
- Drain the system top-to-bottom
- Add RV antifreeze to all traps and toilets
- Set thermostat to at least 55°F if you’re leaving heat on, or shut it off only after full drain-down
- Travelers Insurance recommends using monitored sensors or a local check-in service for extended absences — a $30 WiFi water sensor near the main shutoff can catch a problem before it becomes a flood
Set a reminder in Workbenchguide for the first week of November each year. Add a second trigger: any forecast showing multi-day temps below 20°F. Those two reminders cover the vast majority of freeze events.
The mistakes homeowners actually make when winterizing plumbing
Most freeze damage isn’t caused by ignorance of the basics. It’s caused by assuming a step was done when it wasn’t, or trusting a system that quietly failed.
The most common oversight: leaving a garden hose connected to a frost-free bib. Homeowners install a frost-free sillcock, feel confident, and skip the hose disconnect. The connected hose traps water in the bib’s stem, defeating the frost-free design entirely. Store hoses inside or in a heated garage every fall.
The second most common: turning the heat off entirely in a vacant home instead of doing a proper drain-down. A house at 40°F with water in the pipes will freeze during a cold snap. Either maintain heat at 55°F or drain the system completely. There’s no safe middle ground.
A few other mistakes worth correcting:
- Assuming the main shutoff fully closes. Old gate valves often don’t. Test it by opening a low fixture and watching for flow-stop. If water keeps trickling, replace the valve before winter.
- Forgetting appliance supply lines. The refrigerator ice maker, dishwasher, and washing machine all have supply lines. In a vacant home, disconnect and drain them.
- Ignoring crawlspace vents. Open foundation vents are designed for summer ventilation. In winter, they funnel cold air directly onto supply lines. Close or insulate them before the first hard freeze.
- Using the wrong antifreeze. Automotive antifreeze in a drain or toilet is a serious hazard. RV/plumbing antifreeze only, every time.
The home winterization guide covers the full scope of seasonal prep beyond plumbing if you want to tackle the whole house at once.
Sources
A short list of primary sources used for temperature thresholds, drain-down procedures, and vacant-home antifreeze guidance. All are U.S.-focused and include municipal guidance, contractor expertise, and building science resources.
- How to Winterize Your Plumbing and Prevent Frozen Pipes – Oatey
- Portland
- What temperature do pipes freeze? – The Spruce
- Frozen Pipe Prevention: What Actually Works | AlertPlumber
- Force of freezing water and ice – InspectApedia