

Most homeowners treat their house like a car they only take to the shop after the engine warning light comes on. You wait for the leak, the crack, or the sudden spike in your utility bill before you do anything about it. But the truth is, by the time you notice a problem, it has usually been growing for months or even years. A home audit flips that script entirely. It is a proactive look at your property before things go wrong, and it can save you thousands of dollars, protect your family’s comfort, and keep your home’s value strong.
Table of Contents
- What is a home audit?
- DIY vs. professional home audits: What’s the difference?
- What does a home audit check? Key systems and areas reviewed
- When and how often should you conduct a home audit?
- How to get started: Tools, checklists, and practical tips
- A homeowner’s perspective: Why home audits pay off—what most people miss
- Get organized: Take the next step with home audits and maintenance
- Frequently asked questions
Key Takeaways
| Point | Details |
|---|---|
| Early issue detection | Home audits reveal small problems before they become major repairs. |
| DIY or professional | You can conduct basic audits yourself or hire a certified pro for deeper analysis. |
| Regular audits save money | Annual or seasonal home audits cut long-term costs and protect property value. |
| Checklists are essential | Using structured checklists makes sure you don’t overlook hidden problems. |
What is a home audit?
A home audit is a structured assessment of your property’s overall condition. Instead of waiting for something to break, you go room by room and system by system to check everything while it still looks fine on the surface. Think of it as a physical for your house.
The core elements of a home audit include:
- Checking for water leaks at visible pipes, under sinks, and around appliances
- Inspecting insulation in the attic and around windows and doors
- Reviewing HVAC filters and ductwork for buildup or damage
- Looking for early signs of wear on the roof, siding, foundation, and flooring
- Testing smoke and carbon monoxide detectors for proper function
The difference between a home audit and your usual cleaning or weekend repairs is intent. Repairs are reactive. Cleaning is routine. A home audit is deliberate investigation. You are actively hunting for issues that have not caused a problem yet but will.
“DIY home audits use visual checks and checklists for leaks, insulation, and filters, while professional audits provide quantified data with specialized equipment.”
The financial case for doing this regularly is hard to ignore. A minor roof flashing issue caught during an audit might cost $200 to fix. Left alone for two years, the same problem can create water damage, mold, and structural rot that runs $8,000 or more. Using a solid home maintenance checklist alongside your audit keeps every check organized and nothing falls through the cracks.
| Benefit | DIY Audit | Professional Audit |
|---|---|---|
| Cost | Free to low cost | $300 to $600 average |
| Time required | 2 to 4 hours | 3 to 5 hours |
| Tools needed | Flashlight, checklist, camera | Blower door, infrared camera |
| Issues found | Visible problems | Visible and hidden problems |
| Report provided | Your own notes | Detailed written report |
Home audits are not just for older homes either. New construction can have insulation gaps, improper grading, and poorly sealed windows from day one. Every home benefits from a regular, honest look.
DIY vs. professional home audits: What’s the difference?
Now that you know what a home audit is, it is important to understand your options for doing one. Both approaches have real value, and many homeowners use a combination of both.
A DIY audit relies on your own eyes and simple, affordable tools. You walk through your home with a flashlight and a checklist, looking for anything that seems off. You check for drafts near windows, look for water stains on ceilings, feel for soft spots in flooring, and press your hand against exterior walls to feel for temperature inconsistencies. The DOE confirms that DIY visual checks on insulation and filters are effective starting points for identifying energy inefficiencies and maintenance needs.
A professional audit goes several layers deeper. Certified auditors use tools like blower door tests, which depressurize your home to find air leaks that are invisible to the naked eye. Infrared cameras detect heat loss through walls and attic floors. Combustion analyzers check your furnace and water heater for safety. Professionals certified through BPI or RESNET provide a full written report with priority rankings and estimated costs for each issue found.
When DIY is enough:
- Annual check on a newer home with no history of major issues
- Post-storm inspection for visible damage
- Seasonal checks before winter or summer
When you need a professional:
- Persistent high energy bills with no obvious cause
- Suspected hidden moisture or mold problems
- Before a home sale or major renovation
- Older homes with unknown insulation or ductwork history
You can explore structured guides and checklists to make your DIY audits more thorough, even if you still bring in a pro every few years for the deeper assessment.
Pro Tip: Even if you are confident in your DIY skills, schedule a professional energy audit at least every three to five years. The blower door test alone can reveal air leaks responsible for 20 to 30 percent of heating and cooling costs in the average home.
What does a home audit check? Key systems and areas reviewed
To know what you will actually examine, let’s break down each part of your home that a thorough audit reviews. A good audit does not skip any system, because issues in one area often affect others.
- Roof and attic. Look for missing or curled shingles, soft spots from the attic side, proper ventilation, and insulation depth. Dark stains on attic wood indicate moisture intrusion.
- Foundation and basement. Check for cracks wider than a quarter inch, water staining, efflorescence (white mineral deposits), and any signs of settling or shifting.
- Plumbing. Run every faucet and check for slow drains. Inspect under sinks for moisture, soft cabinet floors, or discoloration. Look at water heater condition and age.
- HVAC system. Check filter condition, inspect visible ductwork for tape failures, listen for unusual sounds, and check that all vents are open and unobstructed.
- Insulation. Feel for drafts near outlets on exterior walls. Check attic insulation depth. Look at weatherstripping on all exterior doors and windows.
- Windows and doors. Hold a lit candle or incense stick near frames on a windy day to detect drafts. Check glazing compound and caulk for cracks or shrinkage.
- Electrical. Look for tripping breakers, warm outlet covers, flickering lights, or any smell of burning plastic near panels. Do not open the electrical panel yourself unless you are qualified.
- Appliances. Check dryer vent for lint buildup. Confirm refrigerator door seals are tight. Inspect the range hood filter and dishwasher door gasket.
- Moisture and mold. Check bathrooms, laundry rooms, and basements. Look for dark spotting, musty odors, or peeling paint that indicates chronic moisture behind walls.
A professional auditor can use thermal imaging to spot exactly where your insulation and air sealing are failing, even inside walls you cannot see. That is the key difference. A DIY audit tells you what to see. A professional audit tells you what is there even when you cannot see it.
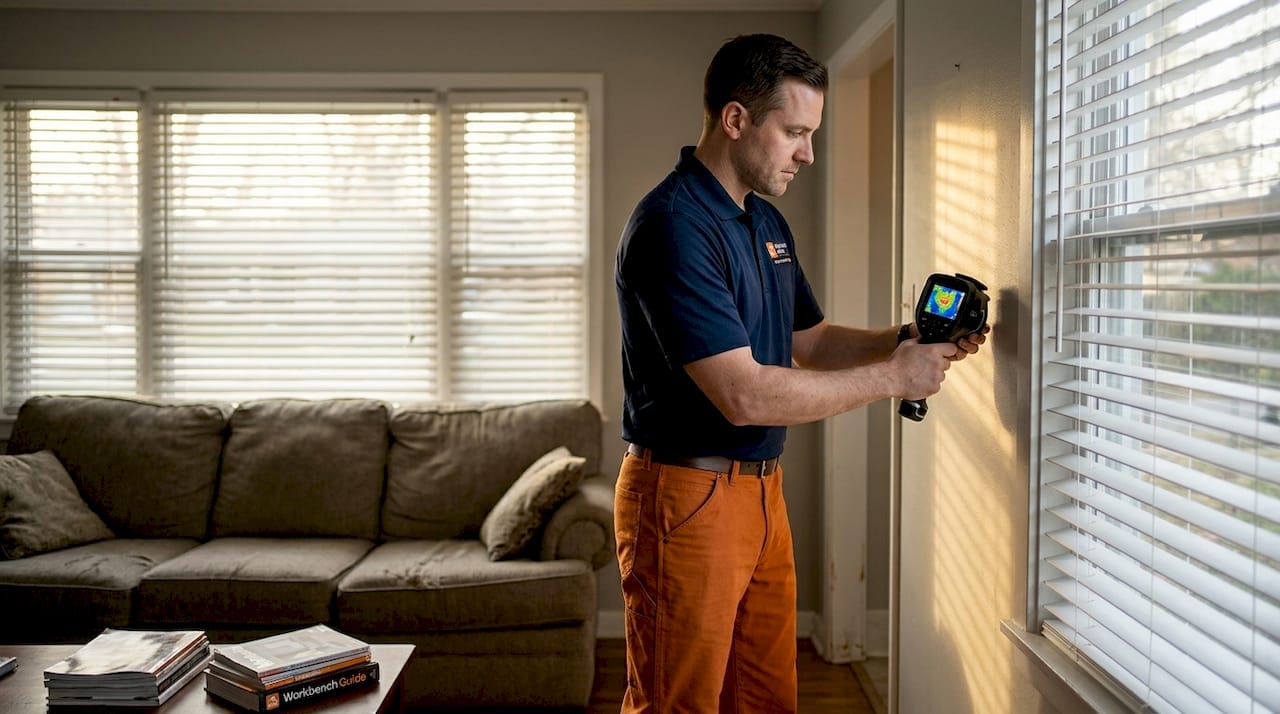
You can dig into specific problems with household repair guides for issues you find, and build a longer term approach using preventative maintenance tips that connect your audit findings to a real action plan.
Pro Tip: Photograph every issue you find during an audit, even small ones. Create a folder on your phone labeled with the date. When you do your next audit, you can compare photos side by side to see if a crack has grown or a stain has spread. This documentation also matters when selling your home or filing an insurance claim.
When and how often should you conduct a home audit?
Understanding what a home audit covers, the next step is knowing when to schedule these checks for the best results.
Most homes should have a full audit at least once per year. Older homes, homes in harsh climates, and properties with known issues deserve more frequent attention, such as a light check each season. The goal is not to find something wrong every time. The goal is to make sure nothing is wrong.
Best times to schedule a home audit:
- Before winter: Check your heating system, insulation, weatherstripping, and roof before cold weather stresses every one of those systems at once
- After major storms: Wind and hail can crack shingles, shift flashing, and force water into small gaps that did not exist before
- Before a home sale: A seller’s audit catches problems before a buyer’s inspector does, giving you time to fix items on your terms instead of under pressure
- After renovations: New construction work can disturb insulation, plumbing, and air sealing in adjacent areas that were not part of the project scope
- When bills spike unexpectedly: A sudden jump in your gas or electric bill without a clear cause is a strong signal that something in your envelope or mechanical systems has changed
Key stat: The average emergency home repair costs between $1,000 and $5,000, while most issues caught during regular home audits and inspections cost a fraction of that to address proactively.
Staying consistent is the hardest part. Most homeowners start with good intentions but skip audits when life gets busy. Setting a recurring calendar reminder for the same weekend every fall takes about 30 seconds and makes the habit stick. A yearly maintenance checklist paired with your audit ensures you never forget the smaller seasonal tasks that keep big repairs away.
How to get started: Tools, checklists, and practical tips
Once you know when to audit, it is time to get started with the right tools and a method that actually works.
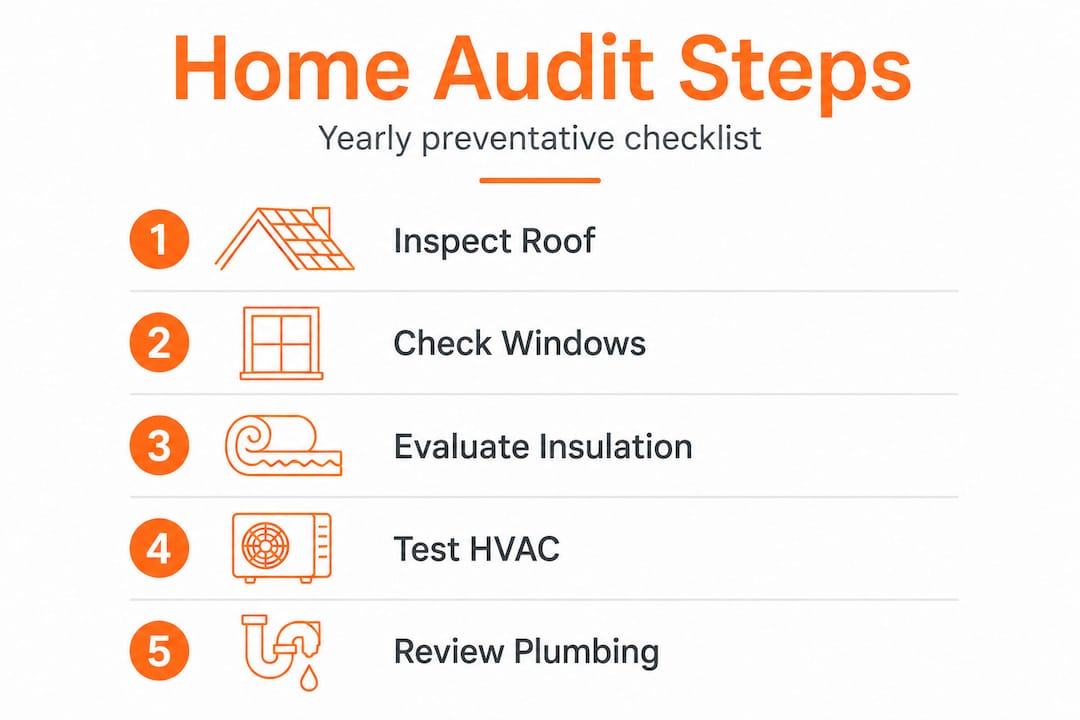
The most common mistake is trying to audit everything at once and getting overwhelmed. Instead, start with one system or one area of the house. Pick the roof and attic on one Saturday, then tackle plumbing the next. Breaking it down makes the process feel manageable and keeps your attention sharp.
Basic tools for a DIY audit:
- Flashlight or headlamp for attics, crawl spaces, and under sinks where visibility is poor
- Notepad and pen or a phone for recording findings and taking photos
- Screwdriver for checking loose outlet covers, hinges, or vent grilles
- Work gloves to protect your hands in dusty or rough spaces
- Moisture meter (optional but useful) for testing wood around windows and plumbing for hidden dampness
Step-by-step approach for your first audit:
- Download or print a structured checklist before you begin
- Walk the exterior first and work your way inside
- Check the attic and basement, because those two areas reveal the most
- Move room by room through the living areas
- Test all mechanical systems: HVAC, water heater, appliances
- Review your notes, prioritize findings, and schedule fixes
DIY audits rely on visual checks and structured checklists that guide you through every major system without missing anything. You can find ready-to-use free home audit checklists as well as deeper reference material on the home maintenance blog to support your work.
Pro Tip: Schedule your next audit the moment you finish your current one. Put a specific date in your phone calendar with a reminder two weeks out. Homeowners who lock in the date immediately are far more likely to actually complete the next audit than those who plan to do it “sometime next fall.”
One important note on safety: never attempt major electrical, structural, or gas repairs on your own unless you are trained. The purpose of a DIY audit is to identify and document, not to fix everything yourself. Know when a contractor is the right call, and make it.
A homeowner’s perspective: Why home audits pay off—what most people miss
Here is something most articles about home maintenance never say directly: the biggest threat to your home is not one catastrophic event. It is the slow, quiet accumulation of small things you were too busy to notice.
We have seen it over and over. A homeowner spends years maintaining their property and then faces a $12,000 repair because a small attic vent was blocked, moisture built up in the insulation, and rot worked its way into the rafters without a single obvious warning sign. The vent itself would have cost nothing to clear. The audit that would have caught it takes less time than a Saturday afternoon movie.
What strikes us most is how much homeowners learn about their own house once they start auditing regularly. You start to understand which rooms run cold, which pipes are oldest, and which corner of the basement always gets a little damp after heavy rain. That knowledge is genuinely valuable. It makes you a better homeowner, a smarter buyer if you ever upgrade, and a more informed seller when the time comes.
The other thing most people miss is the compounding effect of saving money with prevention. Fixing a $50 caulk failure prevents a $3,000 window replacement. Replacing a $15 HVAC filter on schedule keeps a $4,000 compressor running for years longer. These are not dramatic savings. They are consistent, reliable ones that add up to tens of thousands of dollars over the life of homeownership.
The habit of auditing also shifts your mindset. You stop feeling like things just happen to your home and start feeling like you are actually in charge of it. That confidence is not just psychological. It shows in how you maintain the property, how quickly you respond to small issues, and how well you are prepared when you do need a contractor.
Get organized: Take the next step with home audits and maintenance
If you are ready to make home audits part of your maintenance routine, here is an easy way to get started. Workbench Guide was built specifically to help homeowners stay ahead of their home instead of always chasing it.
Start with the complete home maintenance checklist to map out your yearly schedule and make sure every system gets attention at the right time. When your audit turns up something that needs fixing, the household repair guides walk you through common repairs step by step, so you know exactly what to do and when to call a professional. You can also grab downloadable guides and checklists to keep your audit organized and your records complete. Your home is one of your biggest investments. Workbench Guide helps you protect it.
Frequently asked questions
What is the main purpose of a home audit?
A home audit helps you spot small issues early before they grow into expensive problems, using visual checks and checklists across every key system in your home.
Is a professional home audit worth it if I do my own inspections?
Yes. Professional audits offer deeper insights with tools like infrared cameras and blower door tests that can find hidden issues missed in standard DIY checks.
How often should I do a home audit?
Most homes benefit from a yearly full audit, with more frequent checks recommended for older homes or after significant weather events.
What tools do I need for a DIY home audit?
You only need basic items like a flashlight, notepad, camera, and a good checklist to complete a thorough visual inspection of your home’s key systems.
Recommended
- Preventative maintenance: Save money and protect your home
- Blog – WorkbenchGuide
- WorkbenchGuide – Modern home maintenance platform with DIY guides, schedules, checklists, and task tracking to help owners and managers care for properties confidently.
- Emergency Home Repairs: A Step-by-Step Guide for Homeowners