
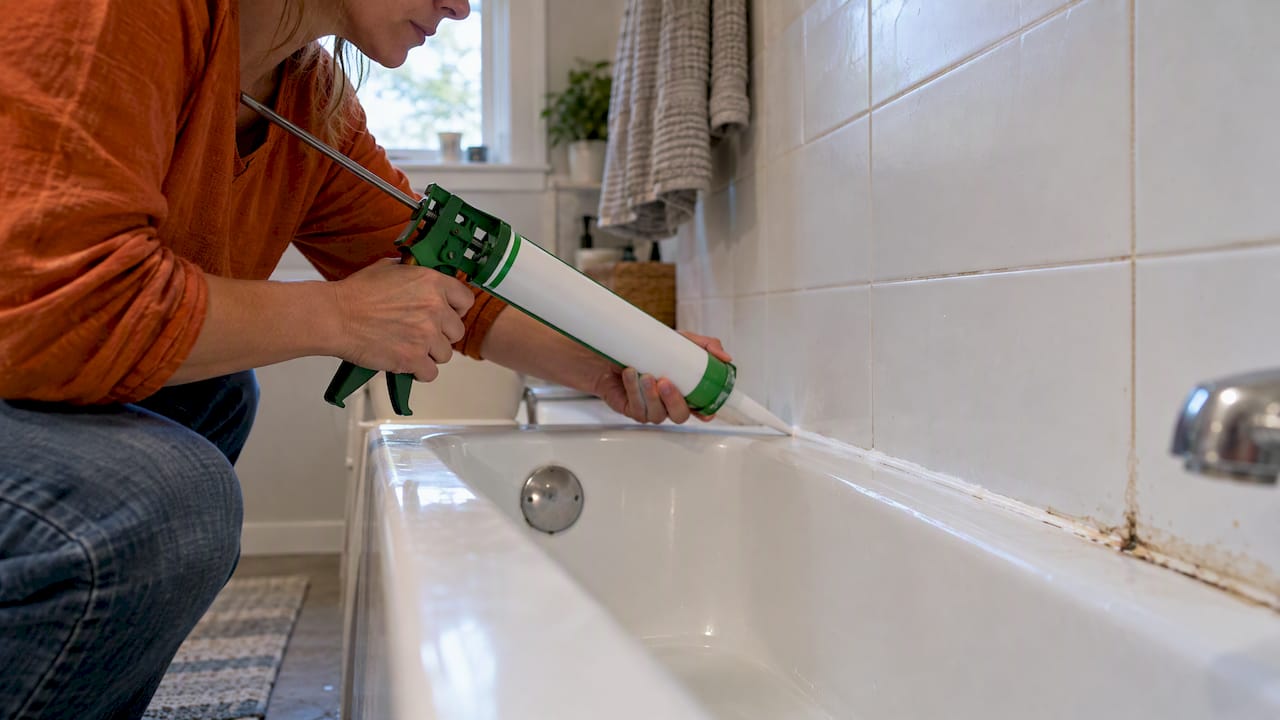
To caulk a bathtub, remove every bit of the old bead, clean and fully dry the seam, tape both sides, run one continuous bead of tub-rated caulk, smooth it within minutes, pull the tape, and keep water off it until it cures. Most of the work is prep. The caulking itself takes about 15 minutes. Skip the prep and even the best caulk will peel, trap mold, or let water behind the tub.
This guide covers which caulk to buy, how to get the old caulk out, how to lay a clean bead, how long to wait before the next shower, and how to tell when it is time to do it again.
TL;DR
- Use a caulk made for kitchens and baths. 100% silicone is the usual choice for the flexible seam where a tub meets the wall or tile.
- Remove all the old caulk, clean with denatured alcohol, treat mold, and let the joint dry completely before you apply anything.
- Tape both sides of the seam, cut the nozzle tip at 45 degrees, apply one steady bead, smooth it, and peel the tape before the caulk skins over.
- Cure times depend on the product: check the tube. Expect 24 hours to 48 hours before the tub gets wet, and do not guess.
- Replace caulk when it cracks, peels, or stays moldy after cleaning. Put it on a maintenance calendar so it does not get forgotten.
Table of Contents
- Why the caulk line around your tub matters
- Choosing the right caulk for a bathtub
- What you need before you start
- Step 1: Remove the old caulk
- Step 2: Clean and dry the joint
- Step 3: Fill the tub, then tape
- Step 4: Cut the nozzle and load the gun
- Step 5: Apply the bead
- Step 6: Tool the bead and pull the tape
- How long before you can use the tub
- Common mistakes that make caulk fail
- Caulking around shower fixtures and tub-shower combos
- When to re-caulk
- Our perspective: make caulk a calendar item, not a surprise
- Keep track of it with Workbench Guide
- FAQ
- Sources
Why the caulk line around your tub matters
A tub is a rigid object sitting against walls that move a little. The tub flexes when it fills and when someone stands in it. The wall shifts with temperature and humidity. The seam between them is the one place where that movement shows up, and caulk is what keeps the gap watertight.
GE Sealants says that bathtub seals fail because of constant moisture, movement, and mold pressure, which is why it favors 100% silicone for a durable waterproof seal. When the bead cracks or pulls away, water can get behind it and into the wall and tile. Sashco notes that a cracked or broken bead breaks the watertight seal and can let moisture build up behind the caulk and tile.
That hidden moisture is the expensive part. A $10 tube and an afternoon is cheap next to opening up a wall. If a failed seam has already let water behind the tub, a full tub and shower replacement may be the right call instead of a fresh bead.
Choosing the right caulk for a bathtub
There are three things to look for on the label: it is rated for kitchen and bath, it resists mold and mildew, and it stays flexible.
DAP advises a kitchen-and-bath sealant for joints that are often exposed to water, one that bonds to porous and nonporous surfaces and resists mold and mildew. LATICRETE recommends 100% silicone for tub and shower joints, especially where tile or stone is involved, and says flexible silicone suits corners and changes of plane.
Silicone versus siliconized acrylic
The two options you will see on the shelf behave differently.
| 100% silicone | Siliconized acrylic (“tub and tile” caulk) | |
|---|---|---|
| Flexibility | Stays flexible through movement | Less flexible over time |
| Water exposure | Built for constant wetness | Check the tube: some are not for constant water |
| Cleanup | Solvent or mineral spirits; harder to tool | Water cleanup in many products |
| Paintable | Generally not | Often yes |
| Best for | Tub-to-wall seam, tub-to-tile seam, corners | Light-duty joints, spots you want to paint |
The label always wins over a general rule. For example, Custom Building Products says its siliconized ceramic tile caulk can be used around tubs but is not meant for constant water exposure. That is a good reminder to read the technical details before you buy.
A quick buying checklist
- “Kitchen & bath” or “tub & shower” printed on the tube
- Mold and mildew resistance
- A color that matches your tub or tile (white and clear are the usual picks)
- A cure time you can live with: if this is your only bathroom, plan for it
- A caulk gun with a smooth trigger, unless you buy a squeeze tube
What you need before you start
Gather everything first. Once the caulk is out of the tube, you do not want to run to the store.
- Caulk and a caulk gun
- Caulk removal tool or plastic scraper, plus a utility knife
- Denatured alcohol and clean rags
- Bleach and water (for mold), gloves, and eye protection
- Shop vacuum or a brush and dustpan
- Painter’s tape
- A smoothing tool or a gloved finger
- Paper towels and a small cup of soapy water or a rag for cleanup
- A fan or open window
Loctite’s U.S. bathtub guide recommends a well-ventilated workspace and gloves, and that applies doubly when you are working with bleach and solvents. Never mix bleach with other cleaners. Alcohol fumes and bleach together are not something to experiment with in a small bathroom.
Step 1: Remove the old caulk
This is the slow part, and it is the step most people rush. New caulk does not stick well to old caulk, and it will not stick at all to soap scum.
- Score the bead. Run a utility knife gently along the top and bottom edges of the old caulk to free it from the wall and tub. Go easy on an acrylic or fiberglass tub, which scratches.
- Pull and scrape. Peel out long strips by hand when you can. Use a plastic scraper or caulk removal tool for the rest.
- Soften stubborn bits. A commercial caulk remover can loosen silicone residue. Follow the product directions and its wait time.
- Vacuum the debris. Loose crumbs left in the gap will be trapped under the new bead.
The goal is bare, clean surface on both sides of the seam. A thin film of old silicone left behind is the number one reason a new bead peels. If you can feel slickness when you run your fingernail along the joint, keep scraping.
Dealing with mold and mildew
Black spots under or in old caulk mean you need to clean before you seal. Loctite’s instructions call for a 1:4 bleach-and-water solution on mold or mildew, then letting the area dry completely. Wear gloves, keep the room ventilated, and do not skip the drying time. Sealing damp mold in under a fresh bead just gives it a new home.
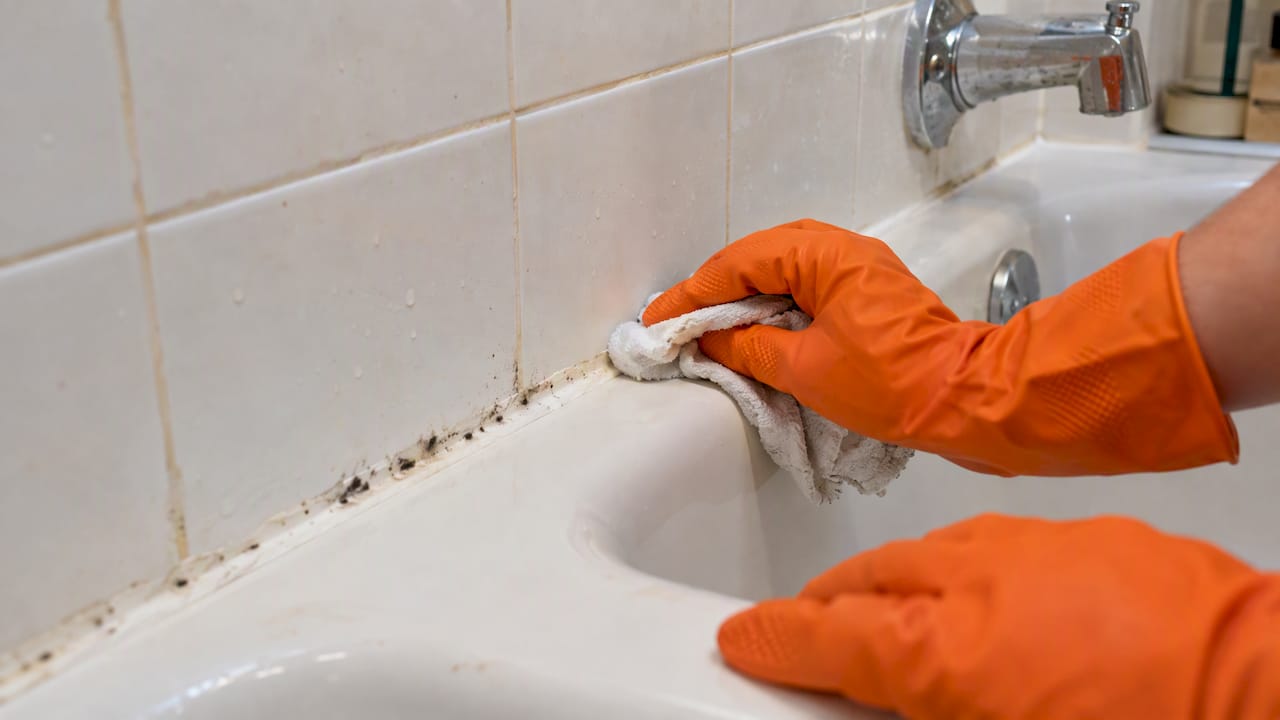
If the mold goes beyond the seam, into grout, drywall, or the wall surface, a full bathroom deep cleaning routine can help you get the whole space ready before you reseal. Soft, crumbling drywall behind the tub is a different problem. That means moisture has been getting in for a while, and a contractor should look at it.
Step 2: Clean and dry the joint
Once the old caulk is gone, wipe the seam with denatured alcohol on a clean rag. Loctite says denatured alcohol cleans the joint after the old caulk is removed. It cuts through soap film and body oils that water alone leaves behind, and it evaporates quickly.
Then let it dry. Some people wait overnight, especially after treating mold. Feel the corners and the bottom of the gap. If anything feels cool or damp, give it more time. A hair dryer on low can speed things up, but time works better.
A useful test: tape a small square of plastic wrap over a section of the seam for an hour. If fog or droplets form underneath, it is not dry.
Step 3: Fill the tub, then tape
Fill the tub first (the tip most guides skip)
On a fiberglass or acrylic tub especially, the tub drops slightly under the weight of water and a bather. GE says that for fiberglass tubs, filling the tub before sealing accounts for that flex under load. If you caulk an empty tub, the gap can open wider once it is full, and the bead stretches or tears.
Fill the tub with water, leave it full while you work, and drain it after the caulk has cured. Check the tub’s care instructions about water weight if you are unsure. Also note that GE’s guidance applies to fiberglass tubs, so cast iron or steel tubs that do not flex need less of this.
Apply painter’s tape
Tape is what gives you a sharp, even line. GE recommends painter’s tape about 1/8 inch from each side of the joint and pressing it down firmly so sealant does not seep under it.
- Run one strip on the tub side and one on the wall or tile side.
- Keep the gap between strips even. That gap is the width of your finished bead.
- Press the edges down with a fingernail or a putty knife.
- Make clean corners and overlap where strips meet.
Step 4: Cut the nozzle and load the gun
The tube tip controls the bead. Cut it small: you can always make it bigger, and you cannot make it smaller. Loctite says to cut the nozzle at a 45-degree angle, and to size the opening to the gap you are filling.
- Cut the tip, starting with an opening about as wide as the gap.
- Poke the inner foil seal with a nail or the rod on your gun, if the tube has one.
- Load the tube and squeeze the trigger until caulk just appears.
- Practice on cardboard for a few inches to find your pace.
GE notes that its silicone is water-ready quickly only with a bead up to 3/16 inch, so a smaller bead also means a faster cure. If your gap is wider than that, you may need a foam backer rod or a different approach. Check the product label.
Step 5: Apply the bead
Work in one pass. Starting and stopping makes lumps and weak points.
- Start in a back corner, in the tub’s least visible spot.
- Hold the gun at a steady angle, about 45 degrees to the seam.
- Squeeze with consistent pressure and move at a steady speed. Push the bead into the gap, not just on top of it.
- Go slightly past each corner and release pressure before you lift off.
- Wipe the nozzle tip as needed.
Keep the length of each pass manageable. A standard 60-inch tub has about 15 feet of seam when you count both long sides and the ends, so work in sections if you need to, but never let a bead skin over before you tool it.
Step 6: Tool the bead and pull the tape
Tooling presses caulk into the gap and shapes a concave, waterproof surface that sheds water. Loctite describes tooling the bead to roughly a 45-degree finish. LATICRETE says to smooth it with a gloved finger or tool within 5 to 7 minutes, then remove the tape immediately after smoothing.
For a clean finish:
- Dip your finger or tool in soapy water, if the caulk is one that cleans up with water. For silicone, a dry gloved finger or a dedicated tool is often better; follow the tube.
- Make one smooth pass along the bead. Do not go back and forth.
- Wipe excess onto a paper towel, not back onto the bead.
- Pull the tape slowly, at an angle away from the bead, while the caulk is still wet.
If the line looks rough in one spot, leave it and fix it after curing. Overworking wet caulk smears it and makes it worse.
How long before you can use the tub
This varies by product, and the tube is your authority. A few real examples from manufacturers:
| Product | What the maker says |
|---|---|
| Loctite Polyseamseal | At least 48 hours before bathtub use |
| Bostik Tub & Tile Caulk | Protect from water for 24 hours; cold, humidity, and larger beads can extend drying |
| Custom Building Products ceramic tile caulk | At least 24 hours before water contact |
| GE silicone | Water-ready in 30 minutes but 24 hours recommended for full cure |
GE’s fast 30-minute window has conditions: a bead up to 3/16 inch, a temperature of at least 65°F, and humidity of at least 50%. Otherwise wait 8 hours, with full cure at 24 hours. A cold bathroom in January or a thick bead can stretch the schedule.
The safe habit: wait the longer number. Tell everyone in the house the tub is off limits, and put a note on the faucet.
Common mistakes that make caulk fail
- Caulking over old caulk. It will not bond, and the bead peels in weeks.
- Sealing a damp joint. Moisture under the bead means mold and poor adhesion.
- Using the wrong product. A paintable acrylic with no water rating in a constant-wet spot will not last.
- A bead that is too fat. Thick beads cure slowly and crack. Narrower is better.
- Skipping the tub fill on a flexing tub. The seam opens when the tub is loaded.
- Rushing the cure. One quick shower can ruin a fresh bead.
- Covering a bigger problem. A soft wall, a loose tile, or a leaking drain needs repair, not caulk.
Caulking around shower fixtures and tub-shower combos
The same method works around a tub spout, shower valve trim, and the seam where a tub surround meets the tub. Remove the old bead, clean with alcohol, dry, tape, and seal. For fixtures, use a smaller bead and tool it with a fingertip. Do not caulk the weep holes or drain openings that are designed to let water escape; check your fixture instructions if you are not sure.
When to re-caulk
You do not need a fixed schedule so much as a regular look. Check the seam every few months and re-caulk when you see:
- Cracks or splits in the bead
- Edges that curl or pull away from the tub or wall
- Gaps you can fit a fingernail into
- Black or pink growth that returns right after cleaning
- Soft or discolored spots along the seam
Sashco says cracking or breaking is the sign that caulk needs replacing, because the seal is no longer watertight. Surface mold you can wipe away may just need cleaning. Mold that has grown through the bead means the bead is done.
Our perspective: make caulk a calendar item, not a surprise
Most homeowners we hear from do not neglect caulk because they do not know how. They neglect it because nothing reminds them. The bead looks fine in March, a little tired in August, and cracked by the time a stain shows up on the ceiling below the bathroom.
We think small seals deserve the same attention as big systems. A quick seam check twice a year, a note with the product you used and when, and a photo of the finished bead give you three things: a clear date to re-check, the exact product to buy again, and a record you can show an inspector or a future buyer. Tell yourself the tub is a system, not a fixture. Do the cheap job early, and you rarely end up doing the expensive one.
If you try just one habit, make it this: when you finish, write the cure time on a piece of tape on the faucet, then put the next inspection in your calendar. That is the difference between a project and a maintained home.
— Sean
Keep track of it with Workbench Guide
Caulk is one of dozens of small jobs that keep a house dry: gutters, grout, water heater flushes, window seals. Workbench Guide gives you smart maintenance reminders, step-by-step guides, checklists, and a place to store notes and photos for every repair, so a re-caulk date does not depend on your memory. The Homeowner plan is $7 per month or $70 per year, and Owner Plus is $12 per month or $120 per year. See the plans and pricing to find the right fit. Taking before-and-after pictures of your work also pays off later; our guide to home project photos shows how to shoot them, and our monthly maintenance habit shows how to keep the whole house on schedule in minutes.

FAQ
What kind of caulk is best for a bathtub?
A 100% silicone caulk labeled for kitchen and bath is the most common recommendation for the seam where a tub meets the wall or tile, because it stays flexible and handles constant water. A siliconized acrylic can work for lighter-duty joints or when you want to paint, but read its label for water exposure limits first.
Can I put new caulk over old caulk?
No. New caulk does not bond reliably to old caulk or to soap film, so it will peel or trap mold underneath. Remove all the old bead, clean the joint with denatured alcohol, and let it dry before you apply anything new.
How long should I wait before showering after caulking?
Follow the tube. Some products say 24 hours, and Loctite’s guide says at least 48 hours for its product. GE’s silicone is water-ready in 30 minutes under specific conditions, with full cure at 24 hours. When in doubt, wait a full day or two.
Should the tub be full when I caulk it?
On a fiberglass tub, filling it first is a good idea, because the tub flexes under the weight of water and a bather. Caulking at that position means the bead will not be stretched when the tub is in use. Check your tub’s manufacturer instructions if you are unsure.
How do I get a clean, straight caulk line?
Tape both sides of the seam about 1/8 inch away from it, apply one continuous bead, smooth it within a few minutes, and pull the tape while the caulk is still wet. A small nozzle opening and a steady pace do most of the rest.
Sources
- Caulking a bathtub: Simple steps for a successful seal (Loctite)
- How to Seal a Bathtub the Right Way (GE Sealants)
- How to recaulk your bathtub (GE Sealants)
- Choosing the Right Caulk for Showers and Bathtubs (LATICRETE)
- How to Choose the Right Caulk or Sealant (DAP)
- Tub & Tile Caulk technical data sheet (Bostik)
- Ceramic Tile Caulk technical data sheet (Custom Building Products)
- Best Bathtub Caulk (Sashco)
Leave a Reply