

Household repairs have a way of piling up fast, and the costs can catch you off guard. Lower-income homeowners spend $3,100 on repairs annually, and a big chunk of that goes toward issues that could have been caught and fixed early. The good news? Most common repairs are well within reach for any homeowner willing to learn. This guide walks you through how to prioritize repairs, fix leaky faucets, patch drywall, replace electrical outlets, and compare your options side by side so you always know what to tackle next.
Table of Contents
- How to prioritize household repairs and avoid emergency expenses
- Leaky faucets and running toilets: Quick fixes to save water and money
- Patching drywall holes and repairing cracked walls
- Electrical basics: Restoring light switches and outlets safely
- Side-by-side comparison: Most common household repairs
- A smarter approach to DIY: Why home repair confidence matters most
- Level up your home maintenance with the right tools and guides
- Frequently asked questions
Key Takeaways
| Point | Details |
|---|---|
| Prioritize urgent issues | Safety and water damage repairs should always come before cosmetic fixes. |
| DIY can save money | Most common household repairs are manageable and can save you thousands each year. |
| Use checklists | Tracking maintenance tasks helps prevent expensive surprises and keeps your home in good condition. |
| Build repair confidence | Learning step-by-step and starting with small repairs steadily builds DIY skills. |
How to prioritize household repairs and avoid emergency expenses
Not every repair is created equal. Some issues are cosmetic annoyances. Others can turn into expensive disasters if you ignore them for even a few weeks. Knowing how to sort one from the other is the foundation of smart home maintenance.
Start with a simple urgency framework:
- Safety hazards first. Gas smells, exposed wiring, or structural instability need immediate attention. These are non-negotiable.
- Water intrusion second. Leaks, roof damage, and moisture buildup cause mold and rot quickly. Address these before they spread.
- Functional systems third. HVAC issues, broken appliances, and plumbing slowdowns affect daily life and can worsen fast.
- Cosmetic repairs last. Scuffed paint, minor cracks, and worn fixtures matter, but they can wait while you handle the bigger stuff.
The difference between proactive maintenance (scheduled upkeep like caulking windows each fall) and reactive fixes (emergency calls after a pipe bursts) is mostly timing. Proactive maintenance costs far less. Research shows 75% of repair spending by lower-income households goes toward essential maintenance or emergency fixes, which means most of that money is spent under pressure rather than on a planned schedule.
One of the best things you can do is keep a running list of what needs attention and when. A solid home maintenance checklist helps you stay ahead of seasonal tasks and avoid the “out of sight, out of mind” trap that leads to expensive surprises.
“An ounce of prevention is worth a pound of cure” is never more true than in home maintenance. Catching a small roof leak before winter can save you thousands in interior water damage.
Pro Tip: Set aside 1% to 3% of your home’s value each year as a repair and maintenance fund. If your home is worth $300,000, that’s $3,000 to $9,000 annually. It sounds like a lot until you need a new water heater and a roof patch in the same month. Strategies for avoiding costly home repairs start with having a budget before something breaks.
Leaky faucets and running toilets: Quick fixes to save water and money
With priorities in mind, let’s start with one of the most persistent and fixable sources of home maintenance headaches: plumbing leaks. They’re annoying, they waste water, and they’re almost always fixable without calling a plumber.
Simple water leaks waste up to 10,000 gallons per home annually. That’s not just an environmental issue. It shows up directly on your water bill every month.
Common causes of leaks:
- Worn washers or O-rings in faucets
- A faulty flapper valve in the toilet tank
- Loose supply line connections
- Corroded valve seats
Tools and materials you’ll need:
- Adjustable wrench
- Flathead and Phillips screwdrivers
- Replacement washers, O-rings, or a toilet flapper kit
- Plumber’s tape
- Towels and a small bucket
How to fix a dripping faucet:
- Turn off the water supply valve under the sink.
- Remove the faucet handle by unscrewing the decorative cap and the screw underneath.
- Pull out the cartridge or stem and inspect the washer at the bottom.
- Replace the worn washer or O-ring with a matching part from a hardware store.
- Reassemble the handle, turn the water back on, and test for drips.
How to fix a running toilet:
- Remove the toilet tank lid and observe what’s happening inside.
- If water runs into the bowl constantly, the flapper is likely worn. Turn off the water supply, flush to empty the tank, and unhook the old flapper.
- Snap the new flapper onto the overflow tube and reconnect the chain.
- Turn the water back on and test by flushing twice.
Pro Tip: Drop a few drops of food coloring into the toilet tank. If color appears in the bowl without flushing, your flapper is leaking. This quick test saves you from guessing. For more hands-on DIY repair guides, you can find step-by-step walkthroughs organized by skill level.
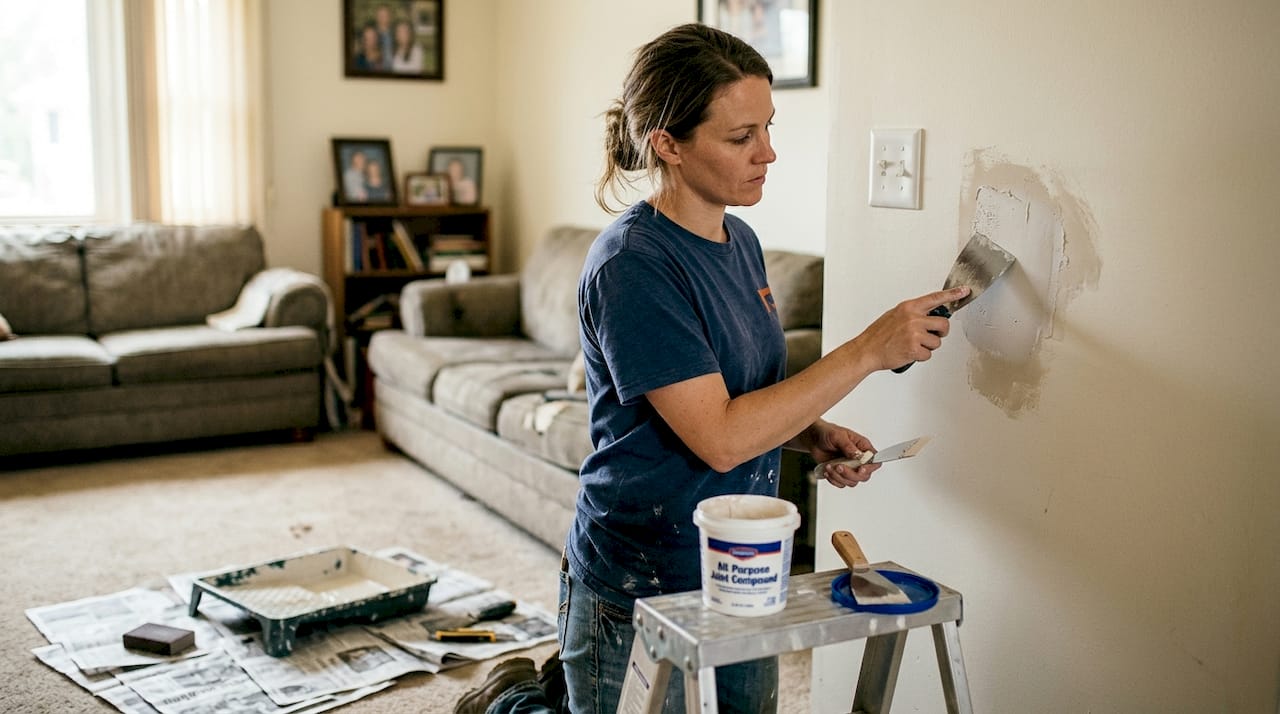
Patching drywall holes and repairing cracked walls
Beyond plumbing, wall repairs rank high on every homeowner’s to-do list, both for aesthetics and long-term maintenance. The good news is that most wall fixes are DIY-friendly, even if they look intimidating at first.
The approach depends on the size of the damage:
- Small holes (nail holes, small dents): Use lightweight spackle, apply with a putty knife, let dry, and sand smooth.
- Medium holes (up to 6 inches): Use a drywall patch kit with a self-adhesive mesh backing. Apply joint compound over the mesh in thin layers.
- Large holes: Cut the damaged section into a clean square, install backing boards, cut a matching drywall piece, screw it in, tape the seams, and apply joint compound.
- Hairline cracks: Apply flexible paintable caulk, smooth with a damp finger, and paint over once dry.
Materials checklist:
- Spackle or joint compound
- Drywall patch kit (for medium holes)
- Drywall screws and backing boards (for large holes)
- Drywall tape
- Putty knife and sanding block
- Primer and matching paint
Step-by-step for a medium hole:
- Clean up any loose drywall around the hole.
- Press the self-adhesive mesh patch over the hole.
- Apply joint compound over the patch using a wide putty knife, feathering the edges.
- Let dry completely (usually 24 hours), then sand lightly.
- Apply a second thin coat if needed, sand again, and prime before painting.
For a seamless finish, always prime before painting. Skipping primer is the number one reason patches look obvious after painting. You can browse additional home repair tutorials for finishing tips and paint-matching techniques that make repairs invisible.
Match your paint sheen to the existing wall. Flat paint on a semi-gloss wall will always stand out, no matter how well you patch.
Electrical basics: Restoring light switches and outlets safely
Many issues can be tackled without professional help, but safety is critical when dealing with electricity. The key word here is respect. You don’t need to be an electrician to replace a switch or outlet, but you do need to follow the steps carefully.
Signs a switch or outlet needs replacing:
- Switch feels warm or makes a crackling sound
- Outlet has visible scorch marks or doesn’t hold plugs firmly
- Lights flicker when the switch is toggled
- GFCI outlet won’t reset
Many routine electrical repairs can be safely completed with minimal tools, which cuts down on service call costs significantly.
Step-by-step for replacing a light switch:
- Turn off the breaker that controls the switch. Use a voltage tester to confirm power is off.
- Remove the switch plate and unscrew the switch from the electrical box.
- Take a photo of the existing wiring before disconnecting anything.
- Disconnect the wires and connect them to the new switch in the same configuration.
- Screw the switch back in, replace the cover plate, and restore power to test.
| Repair | DIY safe? | Tools needed | Avg. time |
|---|---|---|---|
| Replace light switch | Yes | Screwdriver, voltage tester | 20 min |
| Replace outlet | Yes | Screwdriver, voltage tester | 25 min |
| Add new circuit | No | Requires licensed electrician | N/A |
| Fix breaker panel | No | Requires licensed electrician | N/A |
| Replace GFCI outlet | Yes | Screwdriver, voltage tester | 30 min |
Pro Tip: Never assume the power is off just because you flipped a breaker. Always use a non-contact voltage tester before touching any wires. They cost about $15 and are worth every cent. If you’re new to home ownership, first-time homeowner tips can help you build confidence with these basic tasks.
Side-by-side comparison: Most common household repairs
Now that you have step-by-step instructions for key repairs, let’s compare them in one handy chart. Average annual repair spending reaches $3,100 per household, but DIY work can cut that number dramatically for the repairs you handle yourself.
| Repair task | Avg. DIY cost | Avg. pro cost | Difficulty | Time needed |
|---|---|---|---|---|
| Fix dripping faucet | $5 to $20 | $100 to $200 | Beginner | 30 to 60 min |
| Fix running toilet | $5 to $15 | $75 to $150 | Beginner | 20 to 45 min |
| Patch small drywall hole | $5 to $10 | $75 to $150 | Beginner | 1 to 2 hrs |
| Patch large drywall hole | $20 to $50 | $150 to $400 | Intermediate | 2 to 4 hrs |
| Replace light switch | $5 to $15 | $75 to $125 | Beginner | 20 to 30 min |
| Replace electrical outlet | $5 to $20 | $75 to $150 | Beginner | 25 to 40 min |
A few things stand out in this comparison. First, the materials cost for most beginner repairs is minimal. You’re paying mostly for labor when you hire a pro. Second, some repairs can be bundled together. If you’re already patching one drywall hole, check the whole room and fix everything at once. You’ll have the tools out and the paint mixed anyway.
For tasks in the intermediate column, consider watching a video walkthrough before you start. The technique matters more than the tools. Explore detailed repair checklists to bundle similar tasks and make the most of each repair session.
A smarter approach to DIY: Why home repair confidence matters most
Here’s something most repair guides won’t tell you: the biggest barrier to DIY home repairs isn’t technical skill. It’s the fear of making things worse. That fear is understandable, but it’s also the reason many homeowners spend money on repairs they could easily handle themselves.
The truth is, every experienced DIYer has a story about a repair that didn’t go perfectly the first time. The difference is they tried anyway, learned from it, and got better. Confidence in home repair isn’t something you’re born with. It’s built one small win at a time.
Start with the easiest repairs on this list. Fix a running toilet. Patch a nail hole. Replace a light switch. Each one builds your skills and your trust in yourself. Before long, you’ll approach a leaky faucet the same way you approach changing a light bulb: no big deal.
The habit of doing regular home checks also changes your relationship with your home. You stop seeing it as a source of stress and start seeing it as something you understand and can manage. That shift in mindset is worth more than any single repair.
Level up your home maintenance with the right tools and guides
Tackling repairs one at a time is a great start, but staying on top of your home long-term takes a system.

At WorkbenchGuide, we built the WorkbenchGuide home platform specifically for homeowners who want to stay organized, catch problems early, and feel confident about every repair. You’ll find step-by-step DIY guides for repairs just like the ones in this article, along with a maintenance checklist that tells you exactly what to do and when. Whether you’re fixing your first faucet or planning a full seasonal walkthrough, we’ve got the resources to keep you moving forward without the guesswork.
Frequently asked questions
What are the most common household repairs I should expect as a homeowner?
You should expect to handle leaks, drywall repairs, light switches, outlets, and minor plumbing fixes. Research shows 75% of repair budgets go toward these basic maintenance and emergency issues.
How much can I save by doing household repairs myself?
DIY repairs can save hundreds or even thousands per year. The average household spends $3,100 annually on repairs, and most beginner-level tasks cost under $20 in materials when done yourself.
How do I know when to call a professional for a repair?
If a repair involves structural concerns, electrical work beyond switch or outlet replacement, or a leak that keeps returning, call a professional. Safety hazards always require a licensed expert, no exceptions.
What basic tools should every homeowner have for common repairs?
A toolkit with a screwdriver set, pliers, adjustable wrench, utility knife, voltage tester, and cordless drill covers the vast majority of simple household repairs.
Where can I find detailed guides for specific home repairs?
WorkbenchGuide offers easy-to-follow, step-by-step instructions organized by repair type and skill level, making it simple to find exactly what you need for your next project.
Recommended
- Blog – WorkbenchGuide
- Preventing Costly Home Repairs: The Small Checks That Save Thousands – WorkbenchGuide
- How It Works – WorkbenchGuide
- First-Time Homeowner Tips: A Simple System for the First 90 Days – WorkbenchGuide
- Step-by-step home repairs: Essential DIY guide for Kansas City
- Step by Step Roof Repair Guide for Homeowners
Leave a Reply